Decluttering Kitchen Counters: A Step-by-Step Guide
- demoore5506
- Sep 15, 2025
- 11 min read
Kitchen counters are some of the hardest spaces to keep clear and organized. The average person spends over 37 minutes a day looking for lost or misplaced household items and countertops are usually the main culprit. Most people think the problem is just not having enough storage but that is rarely the real issue. The secret is that a clutter-free kitchen starts with one unexpected step most people skip—and it might just change the way you see your kitchen forever.
Table of Contents
Quick Summary
Key Point | Explanation |
1. Assess your current clutter situation | Evaluate and document your counter status to understand the clutter causes before starting the decluttering process. |
2. Gather essential decluttering supplies | Collect trash bags, donation boxes, and cleaning materials to ensure an organized and effective decluttering experience. |
3. Clear and clean each counter completely | Empty and deep clean all surfaces to create a blank canvas for your decluttering strategy, ensuring no dirt or grime remains. |
4. Sort items into categories | Establish distinct zones for keeping, donating, or discarding items to streamline the decluttering process and make informed decisions. |
5. Create functional zones on counters | Organize remaining items into specific purpose zones to enhance kitchen usability and maintain an efficient workspace. |
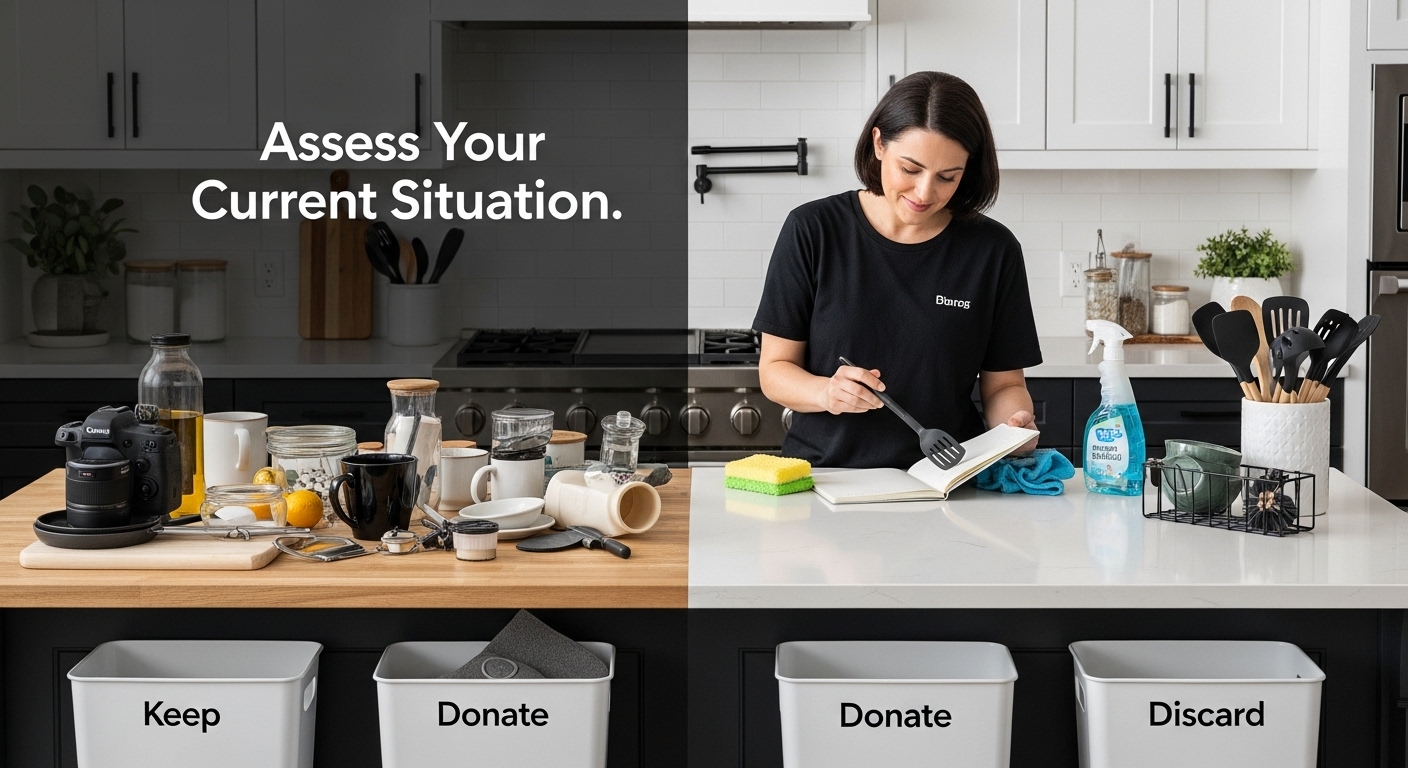
Step 1: Assess Your Current Situation
Decluttering kitchen counters begins with a comprehensive evaluation of your current space. This critical first step sets the foundation for transforming your kitchen from a chaotic catchall into an organized, functional area. Before diving into sorting and removing items, you need to understand the current state of your kitchen counters and identify the root causes of clutter.
Start by taking a deliberate, honest look at your countertops. Grab a notebook and stand in your kitchen, observing every surface without touching anything. Document what you see: Are small appliances permanently stationed on the counter? Do random papers, mail, and miscellaneous items accumulate throughout the week? Notice the patterns of how items arrive and remain on these surfaces.
According to Statistics Canada’s Households and the Environment Survey, understanding household organization patterns is crucial for effective space management. This means recognizing not just the physical items, but the behaviors that contribute to counter clutter.
Consider photographing your current counter setup. This visual record serves two purposes: it provides an objective baseline for your decluttering journey and allows you to track progress. When examining these images, ask yourself critical questions: Which items truly need to be on the counter? What gets used daily versus weekly? Are there items that could be stored more efficiently elsewhere?
Identify your specific clutter categories:
Cooking and food preparation tools
Electronic devices and charging stations
Mail and paper documents
Decorative items
Miscellaneous household items
Recognize that decluttering kitchen counters isn’t about creating a sterile space, but designing a purposeful environment that supports your daily cooking and lifestyle needs. Each item should earn its place through frequency of use and practical utility.
As you complete this assessment, you’ll develop a clear mental map of your current kitchen counter situation. This foundational step prepares you for the next phase of strategic decluttering, where you’ll make intentional decisions about what stays, what goes, and how to optimize your kitchen’s most valuable horizontal real estate.
Step 2: Gather Decluttering Supplies
Preparation is key to successful kitchen counter decluttering, and gathering the right supplies will make your process smooth and efficient. Think of this step as assembling your decluttering toolkit, equipping yourself with everything needed to transform your kitchen space strategically and systematically.
According to the University of Georgia’s Field Report on Home Organization, having the proper supplies ready before starting can significantly improve your decluttering effectiveness. You will want to collect several essential items that will serve multiple purposes throughout your kitchen organization journey.
Primary Sorting Containers:
Large trash bags for discarding items
Donation boxes for items in good condition
Clear plastic storage bins for temporary sorting
Sturdy cardboard boxes for items to relocate
Beyond sorting containers, you will need cleaning and organizational supplies. Gather microfiber cloths, all-purpose cleaner, disinfectant wipes, paper towels, and a step stool to reach higher areas. A marker and labels will help you clearly mark containers and categorize items quickly. Having a vacuum or handheld vacuum nearby will help you clean surfaces as you clear them.
Prepare a workspace staging area near your kitchen where you can sort items without creating additional mess. This might be a nearby table or a cleared section of countertop. Having a dedicated space prevents the decluttering process from becoming overwhelming and helps you maintain focus.
Here is a table summarizing the essential kitchen counter decluttering supplies, their purpose, and helpful notes for effective use.
Supply Item | Purpose | Notes |
Large trash bags | Discard unwanted items | Choose sturdy bags for heavy or sharp trash |
Donation boxes | Collect usable items to donate | Use clearly labeled containers |
Clear plastic bins | Temporary item sorting | Helpful for seeing contents at a glance |
Cardboard boxes | Relocate items | Ideal for moving items to other rooms |
Microfiber cloths | Clean surfaces | Prevents scratches on delicate counters |
All-purpose cleaner | Remove dirt/grime | Match the cleaner to your counter material |
Marker and labels | Mark containers and categories | Keeps your organization system clear |
Consider wearing comfortable clothing and having a water bottle nearby, as decluttering can be physically demanding. Comfortable shoes with good support will help you stay energized during the process. If possible, choose a time when you will not be interrupted, allowing you to work methodically and efficiently.
By meticulously gathering these supplies before beginning, you set yourself up for a successful decluttering experience. Your preparation transforms what could be a chaotic task into a structured, manageable project. Remember, the right tools can make all the difference in turning your kitchen counters from cluttered to clean and functional.
Step 3: Clear and Clean Each Counter
Clearing and cleaning your kitchen counters is more than just a surface-level task. This critical step transforms your space from cluttered to pristine, creating a blank canvas for your organizational strategy. Start by completely emptying each counter section, placing items into the sorting containers you prepared earlier.
According to the Public Health Agency of Canada’s cleaning guidelines, thorough surface cleaning involves more than just moving items around. Remove every single object, including small appliances, decorative items, and random papers. Place each item into its designated sorting container: keep, donate, or discard.
Once the counter is completely bare, begin the deep cleaning process. Mix a solution of warm water and mild dish soap, or use an all-purpose cleaner appropriate for your counter material. Granite, marble, laminate, and quartz counters require different cleaning approaches, so be sure to use a cleaner specifically designed for your surface type. Learn more about preparing surfaces for transformation with our cabinet painting guide.
Cleaning techniques:
Use microfiber cloths to avoid scratching surfaces
Wipe in circular motions to lift dirt effectively
Rinse with clean water to remove soap residue
Dry thoroughly with a clean, lint-free towel
Pay special attention to corners, edges, and areas around the sink where grime tends to accumulate. Use a soft-bristled brush or old toothbrush to gently scrub hard-to-reach spots. For stubborn stains, create a paste using baking soda and water, applying it gently and letting it sit for a few minutes before wiping clean.
After cleaning, inspect the counter carefully. Run your hand across the surface to ensure it feels smooth and completely clean. Look for any remaining water spots or missed areas. A clean, dry counter signals you’re ready for the next stage of decluttering. This methodical approach ensures you’re not just moving items around, but creating a truly refreshed kitchen workspace.
Step 4: Sort Items into Keep, Donate, and Discard
Sorting items is the heart of decluttering kitchen counters, transforming your space from chaotic to intentional. This step requires honest self-assessment and strategic decision-making about each item’s value and necessity. According to Mississippi State University Extension’s decluttering guidelines, creating clear sorting categories helps streamline the process and reduce emotional attachment to unnecessary items.
Establish three distinct sorting zones: Keep, Donate, and Discard. Each zone represents a critical decision point in your decluttering journey. The Keep zone is reserved for items you use frequently and genuinely need on your kitchen counters. These are the tools and objects that support your daily cooking and food preparation routines.
As you evaluate each item, ask yourself critical questions:
Have I used this item in the last 90 days?
Does this item serve a specific, regular purpose?
Can this item be stored more efficiently elsewhere?
Would I buy this item again today?
For the Donate zone, consider items that are in good condition but no longer serve your current kitchen needs. These might include duplicate utensils, appliances you rarely use, or decorative items that no longer match your aesthetic. Pro tip: Local shelters, community centers, and thrift stores often welcome kitchen item donations.
The Discard zone is for items that are broken, expired, or too worn to donate. Be ruthless but practical. Chipped mugs, warped cutting boards, and old takeout menus belong here. Check local recycling guidelines to responsibly dispose of items that can be recycled.
Remember that decluttering is not about creating a sterile space, but designing a functional kitchen that supports your lifestyle. Take your time with each item, making deliberate choices. If you find yourself hesitating about an object, set it aside and revisit it later with fresh eyes.
Once you complete sorting, immediately remove donation and discard bags from your kitchen. This prevents second-guessing and signals a clear commitment to your organizational goals. Your newly sorted items are now ready for the next phase of creating a streamlined, efficient kitchen counter space.

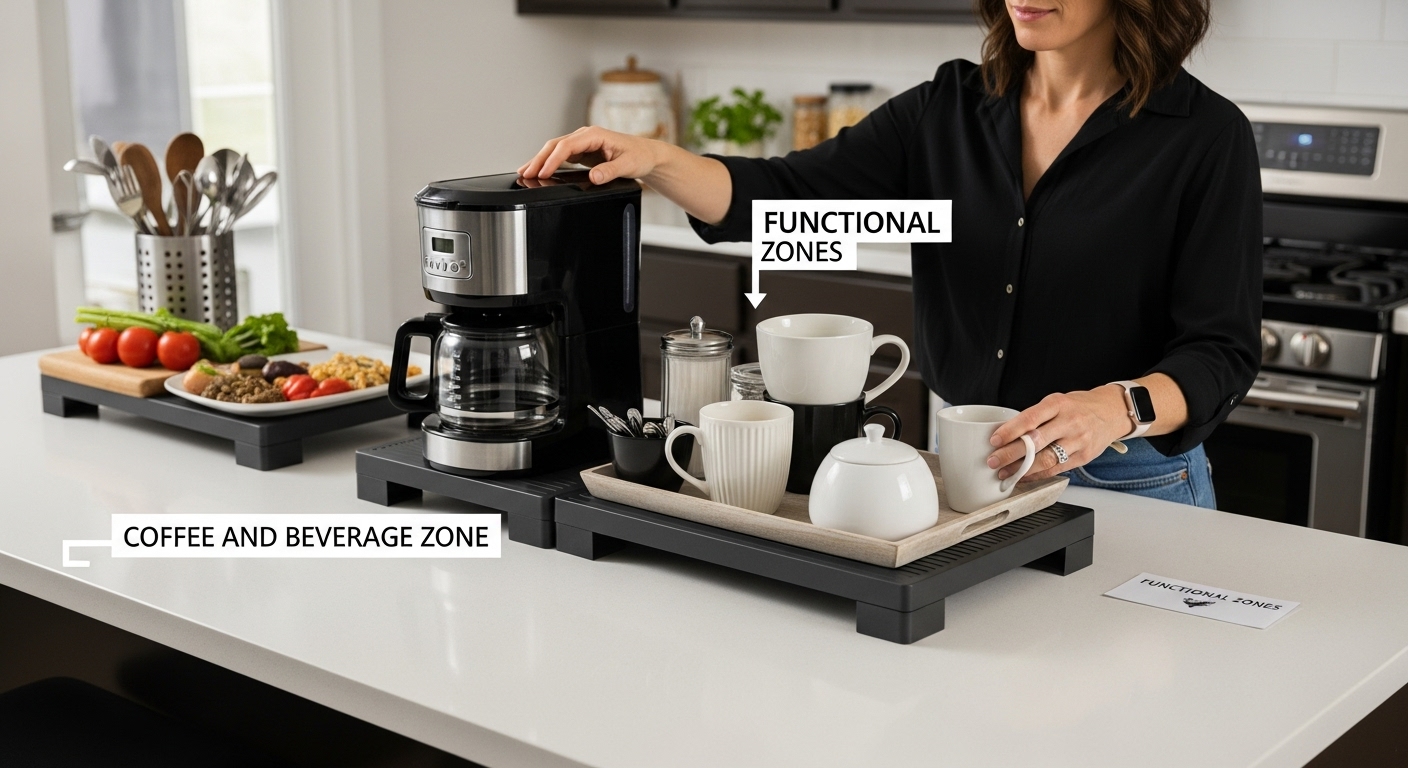
Step 5: Organize Remaining Items into Functional Zones
Organizing your kitchen counters into functional zones transforms your space from cluttered to strategic, creating an efficient cooking and preparation environment. According to Canada Mortgage and Housing Corporation’s kitchen design guidelines, thoughtful zoning can dramatically improve kitchen usability and workflow.
Primary functional zones should reflect your actual cooking and daily kitchen activities. Consider creating distinct areas for specific purposes: a coffee and beverage station, a meal preparation zone, and a daily essentials area. This approach ensures that every inch of counter space serves a deliberate purpose.
Your coffee and beverage zone might include your coffee maker, mugs, sweeteners, and related accessories. Position this area near water sources and electrical outlets for maximum convenience. Use a small tray or dedicated corner to contain these items, preventing them from spreading across the counter.
Key organizational principles:
Group similar items together
Store frequently used items within easy reach
Use vertical space with risers or shelf organizers
Minimize visual clutter
Create designated spaces for each item category
The meal preparation zone should house cutting boards, knives, mixing bowls, and frequently used cooking utensils. Select a section of counter near your stove with ample workspace. Consider installing a magnetic knife strip or using a countertop utensil holder to keep essential tools accessible yet organized.
Daily essentials might include a charging station for electronic devices, a small mail sorter, or a spot for keys and wallets. This zone helps prevent random items from accumulating randomly across your counters. Use a compact organizer or tray to contain these items neatly.
Remember that negative space is valuable. Not every inch of counter needs to be filled. Leaving some open space creates a sense of calm and makes your kitchen feel larger and more inviting. Periodically reassess your zones, adjusting as your cooking habits and lifestyle evolve.
After establishing your functional zones, step back and evaluate. Does the layout feel intuitive? Can you move easily between areas? Your goal is a kitchen counter that looks intentional, feels effortless, and supports your daily rhythms.
Step 6: Maintain Your Clutter-Free Kitchen
Maintaining a clutter-free kitchen is an ongoing process that requires consistent effort and mindful habits. After investing time in decluttering and organizing your kitchen counters, developing a sustainable system becomes crucial to prevent regression into chaos. According to Canadian Food Focus’s kitchen organization recommendations, successful maintenance is about creating practical daily routines.
Daily maintenance starts with a simple five-minute reset at the end of each day. Before going to bed, return every item to its designated zone. This small ritual prevents items from accumulating and becoming overwhelming. Place cooking utensils back in their holders, wipe down counters, and clear any random items that have wandered into your carefully created functional zones.
Implement a one-in-one-out rule to prevent future clutter buildup:
When you purchase a new kitchen tool, remove a similar item
Regularly assess appliances and utensils for actual usefulness
Donate or discard items that no longer serve your cooking needs
Avoid impulse purchases of kitchen gadgets
Schedule monthly review and refresh sessions where you critically examine your kitchen organization. This is an opportunity to reassess your functional zones, determine if they still work for your lifestyle, and make necessary adjustments. During these sessions, check for expired items, clean hard-to-reach areas, and ensure your organizational system remains efficient.
Develop mindful habits around counter usage. Before placing an item on the counter, ask yourself: Does this belong here? Can it be stored elsewhere? This small mental checkpoint prevents unnecessary clutter from creeping back into your space. Create a habit of immediate cleanup after cooking, putting ingredients away and wiping surfaces immediately.
Consider using small organizational tools like trays, risers, and drawer dividers to maintain your newly established zones. These tools help define spaces and make it easier to keep items in their designated areas. A tray for your coffee station or a small organizer for mail can make a significant difference in maintaining order.
Remember that maintaining a clutter-free kitchen is a skill that improves with practice. Be patient with yourself, celebrate small victories, and understand that perfection is not the goal. The objective is creating a functional, peaceful kitchen environment that supports your daily life and brings you joy.
Ready to Take Your Decluttered Kitchen Even Further?
You have just learned how to clear, clean, and organize your kitchen counters for maximum efficiency and calm. But even with clutter gone, dull or outdated cabinets can still make your kitchen feel less inviting and unfinished. After all, a functional space deserves to look as beautiful as it feels. Imagine walking into your kitchen each day and seeing modern, high-end cabinets that reflect a fresh, organized space.
If you want your hard work to shine, trust the experts at Ottawa Cabinet Painting to elevate your newly organized kitchen with stunning cabinet refinishing. Our meticulous prep, premium paints, and attention to detail help you achieve a silky smooth finish without the disruption of a full renovation. Visit Ottawa Cabinet Painting to see how we transform kitchens like yours and request your personalized quote today. Take the next step toward a kitchen that truly feels like the heart of your home.
Frequently Asked Questions
How do I assess the current situation of my kitchen counters?
To assess your kitchen counters, stand back and observe the surfaces without touching anything. Document what items are present, notice clutter patterns, and consider photographing the setup for a visual record. Identify clutter categories like cooking tools, mail, and appliances to understand what contributes to the clutter.
What supplies do I need to declutter my kitchen counters effectively?
Gather large trash bags for disposal, donation boxes for usable items, clear plastic bins for sorting, cleaning supplies like microfiber cloths and all-purpose cleaner, and a staging area for organizing items. Having these materials ready helps streamline the decluttering process.
What steps should I follow to clean my kitchen counters after decluttering?
Clear each counter completely, placing items into designated sorting containers. Clean the surface using appropriate cleaners for the material, like mild soap for granite or quartz. Use microfiber cloths to avoid scratches, and ensure all areas, including corners, are thoroughly cleaned and dried.
How can I maintain a clutter-free kitchen after the initial decluttering?
Implement daily maintenance by returning items to their designated zones and wiping down surfaces regularly. Follow a one-in-one-out rule to control new items and schedule monthly reviews to reassess your organization. Creating mindful habits around counter usage will help keep your kitchen tidy.
Recommended
Comments