Paint Kitchen Cabinets Professionally: 7-Day 60% Savings
- demoore5506
- Mar 3
- 9 min read
Updating your kitchen cabinets shouldn’t drain your savings or turn your home into a construction zone. You want a fresh, modern look without the chaos of full renovations. Professional cabinet painting delivers exactly that: a high-end finish in about a week, costing 60-75% less than full replacement. This guide walks you through the process that professionals use to achieve durable, silky-smooth results.
Table of Contents
Key Takeaways
Point | Details |
Timeline and Durability | Professional cabinet painting takes 7-10 days and delivers a finish lasting 5-7 years with proper care. |
Cost Efficiency | Painting costs 60-75% less than replacement while minimizing household disruption. |
Critical Preparation | Thorough cleaning, sanding progression (120 to 220 grit), and quality primer are essential for adhesion. |
Application Technique | Use cabinet-grade enamel paints with multiple thin coats and 4-6 hours drying between layers. |
Common Pitfalls | Skipping primer, rushing drying times, and painting in high humidity cause over 30% of DIY failures. |
Prerequisites: Tools, Materials, and Conditions You Need
Before starting your cabinet transformation, gather the right equipment and prepare your workspace. Success depends on having everything ready from day one.
You’ll need sanding blocks in three grits: 120 for initial surface prep, 150 for smoothing, and 220 for final finishing between paint coats. A high-quality bonding primer designed for cabinets creates the foundation. Cabinet-grade enamel paint, either water-based or oil-based, delivers the durability kitchens demand. Don’t forget tack cloths for dust removal, painter’s tape for clean edges, and foam rollers or spray equipment for smooth application.
Pro Tip: Choose low-VOC paints to keep indoor air quality safe while working in enclosed kitchen spaces.
Ventilation matters more than most homeowners realize. Open windows, run fans, and ensure air circulation throughout the painting process. Temperature should stay between 50-85°F with humidity below 50% for optimal paint curing.
Plan for 7-10 days of availability. Rushing any step compromises the final result. If you’re researching cabinet refinishing cost in Ottawa, factor in time as well as materials.
Tool/Material | Purpose | Pro Tip |
Sanding Blocks (120, 150, 220 grit) | Surface prep and smoothing between coats | Progress from coarse to fine for best adhesion |
Bonding Primer | Seals surface and improves paint adhesion | Choose one rated for kitchen cabinets |
Cabinet-Grade Enamel Paint | Durable, smooth finish | Water-based dries faster; oil-based levels better |
Tack Cloths | Remove all sanding dust | Use before every paint coat |
Painter’s Tape | Protect edges and hardware areas | Remove while paint is slightly tacky |
Foam Rollers or Sprayer | Smooth, professional application | Sprayers eliminate brush marks entirely |
Step 1: Thorough Surface Preparation
Surface prep determines whether your paint job lasts five years or five months. This stage demands patience and attention to detail.
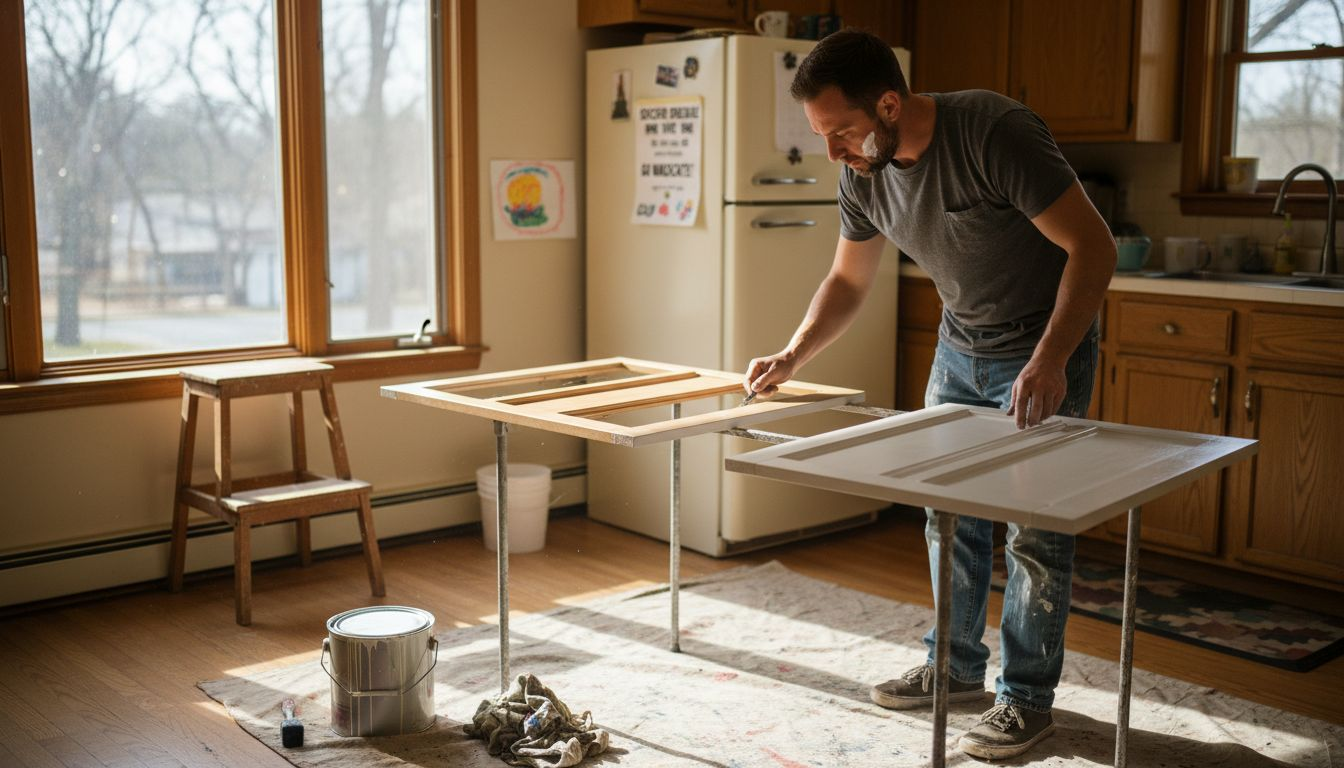
Start by removing all cabinet doors, drawers, and hardware. Label everything so reassembly goes smoothly later. Clean every surface thoroughly with a degreasing solution. Years of cooking leave invisible grease films that prevent paint adhesion. Cleaning all surfaces to remove grease and dust ensures primer and paint bond properly without contamination.
Next comes sanding. This isn’t about stripping the finish completely. You’re creating a slightly rough surface that paint can grip.
Begin with 120-grit sandpaper to remove the glossy finish and any flaking old paint.
Switch to 150-grit to smooth out scratches from the coarser paper.
Finish with 220-grit for a surface that’s rough enough for adhesion but smooth to the touch.
Wipe everything down with tack cloths after each sanding stage.
After final sanding, apply a high-quality bonding primer. This step seals the wood and creates a uniform base. Primer also prevents wood tannins from bleeding through your topcoat. One coat usually suffices, but severely stained or dark cabinets may need two.
Pro Tip: Never skip sanding or primer, even if the existing finish looks smooth. These steps account for 80% of your final durability.
Professional results come from this foundation work. When searching for affordable cabinet painting services in Ottawa, ask about their prep process. Shortcuts here always show up later.
Step 2: Applying Paint Properly
Once your surfaces are prepped and primed, paint application requires technique and patience. The difference between amateur and professional results shows up in this phase.
Choose your paint type carefully. Water-based acrylic enamels dry faster and emit fewer fumes. Oil-based enamels self-level better, hiding brush strokes more effectively. Both work beautifully when applied correctly.
The secret lies in multiple thin coats rather than one or two thick ones. Thick coats sag, drip, and take forever to cure properly.
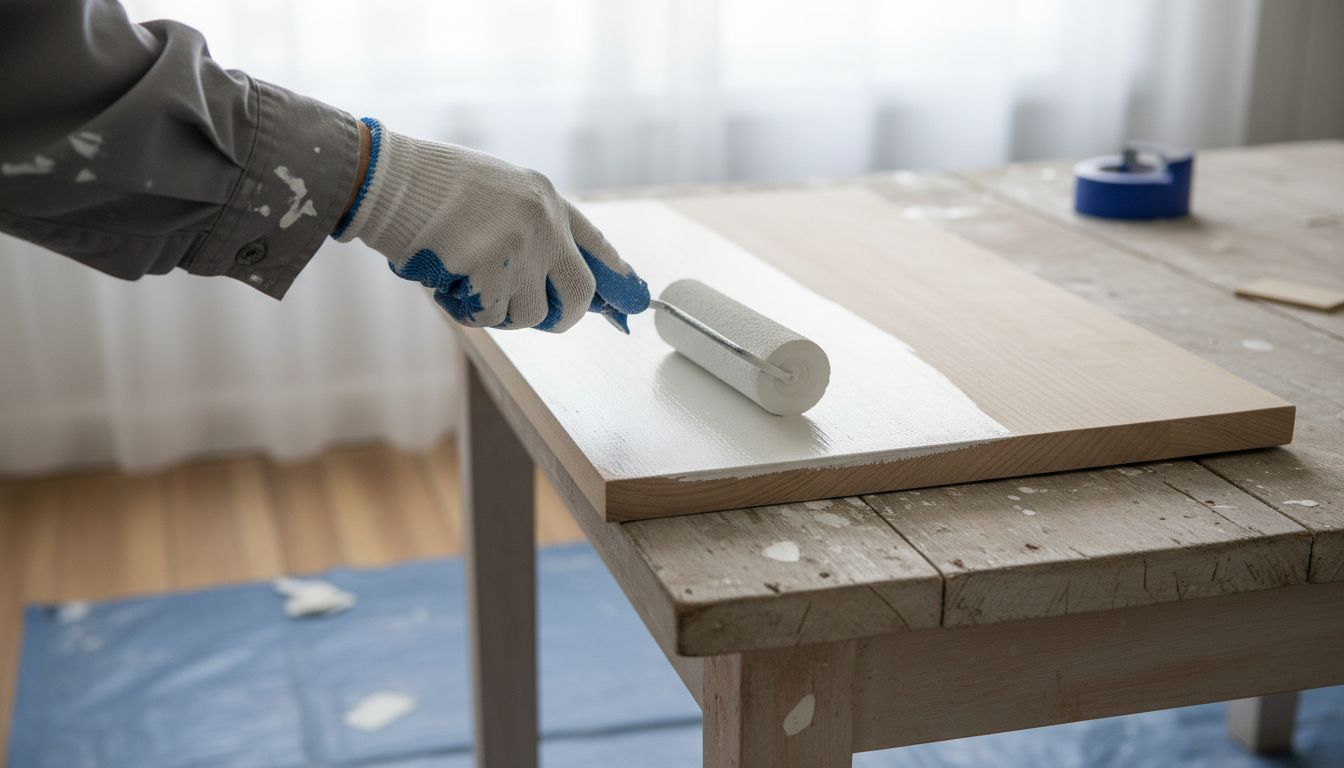
Load your brush or roller lightly with paint.
Apply the first coat in smooth, even strokes following the wood grain.
Apply three thin coats with 4-6 hours drying time between to reduce drips and enhance finish durability.
Lightly sand with 220-grit paper between each coat once dry.
Remove all dust with a tack cloth before applying the next layer.
“The key to professional cabinet painting isn’t expensive equipment or secret products. It’s patience. Let each coat dry completely, sand lightly, and repeat. That’s what separates finishes that last from those that chip within months.” — Professional Cabinet Refinisher
Pay special attention to edges and corners where paint tends to pool. Smooth these areas immediately with a nearly dry brush. If you’re wondering whether cabinet painting is worth it, the answer depends entirely on proper technique. Done right, you get a factory finish. Rushed, you get visible flaws and early failure.
Work in good lighting so you can spot drips or thin spots immediately. Natural daylight reveals imperfections artificial light hides. Most projects need three coats for full coverage and optimal durability.
Step 3: Allowing Proper Drying and Curing
Drying and curing are not the same thing. Understanding this difference prevents countless ruined paint jobs.
Drying means the paint feels dry to touch, usually within 4-6 hours for water-based products. Curing means the paint has chemically hardened to its maximum durability, which takes 24-48 hours or longer. You can apply the next coat after drying. You cannot use the cabinets normally until curing completes.
Allowing 24-48 hours curing time after the final coat and maintaining low humidity improves finish hardness and durability significantly. Rush this step and you’ll see fingerprints, scratches, and adhesion failures within weeks.
Temperature and humidity control curing speed. Ideal conditions are 70-75°F with 40-50% humidity. Cold slows curing dramatically. High humidity causes paint to stay tacky and can lead to blistering.
Here’s how to optimize curing conditions:
Keep the workspace temperature steady throughout the drying period.
Use a dehumidifier if humidity climbs above 60%.
Avoid running the kitchen during final curing (no cooking steam or grease).
Wait a full week before putting items back on shelves or closing doors repeatedly.
Handle doors and drawers by edges only during the first few days after reinstallation.
Patience during this phase multiplies your finish lifespan. Many homeowners ask about the kitchen cabinet painting timeline expecting quicker results. Quality takes time. The extra days you invest now give you years of durability.
Common Mistakes to Avoid and Troubleshoot
Even with careful planning, certain mistakes trip up DIY painters repeatedly. Knowing what to watch for helps you avoid expensive do-overs.
Skipping primer or painting under high humidity are leading causes of cabinet paint failures in over 30% of DIY jobs. Here are the most common errors:
Skipping primer: Paint peels or chips within months without proper primer bonding.
Poor ventilation: Slow drying and solvent buildup create health risks and finish problems.
Thick coats: Sags, drips, and extended drying times ruin the smooth finish you want.
No sanding between coats: Without light sanding, subsequent layers don’t bond properly.
Rushing curing time: Early use creates permanent marks and reduces finish lifespan.
Pro Tip: Check humidity levels with an inexpensive hygrometer before painting each day. If humidity exceeds 60%, delay painting until conditions improve.
Troubleshooting common issues:
If you notice bubbling or blistering, humidity or contamination caused it. Sand the affected area smooth, clean thoroughly, and repaint. For visible brush marks, you applied paint too thickly or didn’t allow proper leveling time. Sand smooth with 220-grit paper and apply a thinner coat.
When paint feels sticky days after application, temperature or humidity prevented proper curing. Improve ventilation and give it more time. Professional affordable cabinet painting services avoid these pitfalls through experience and climate control.
Expected Outcomes: Durability, Cost, and Timeline Benchmarks
Understanding realistic expectations helps you plan and evaluate results. Here’s what professional cabinet painting delivers compared to full replacement.
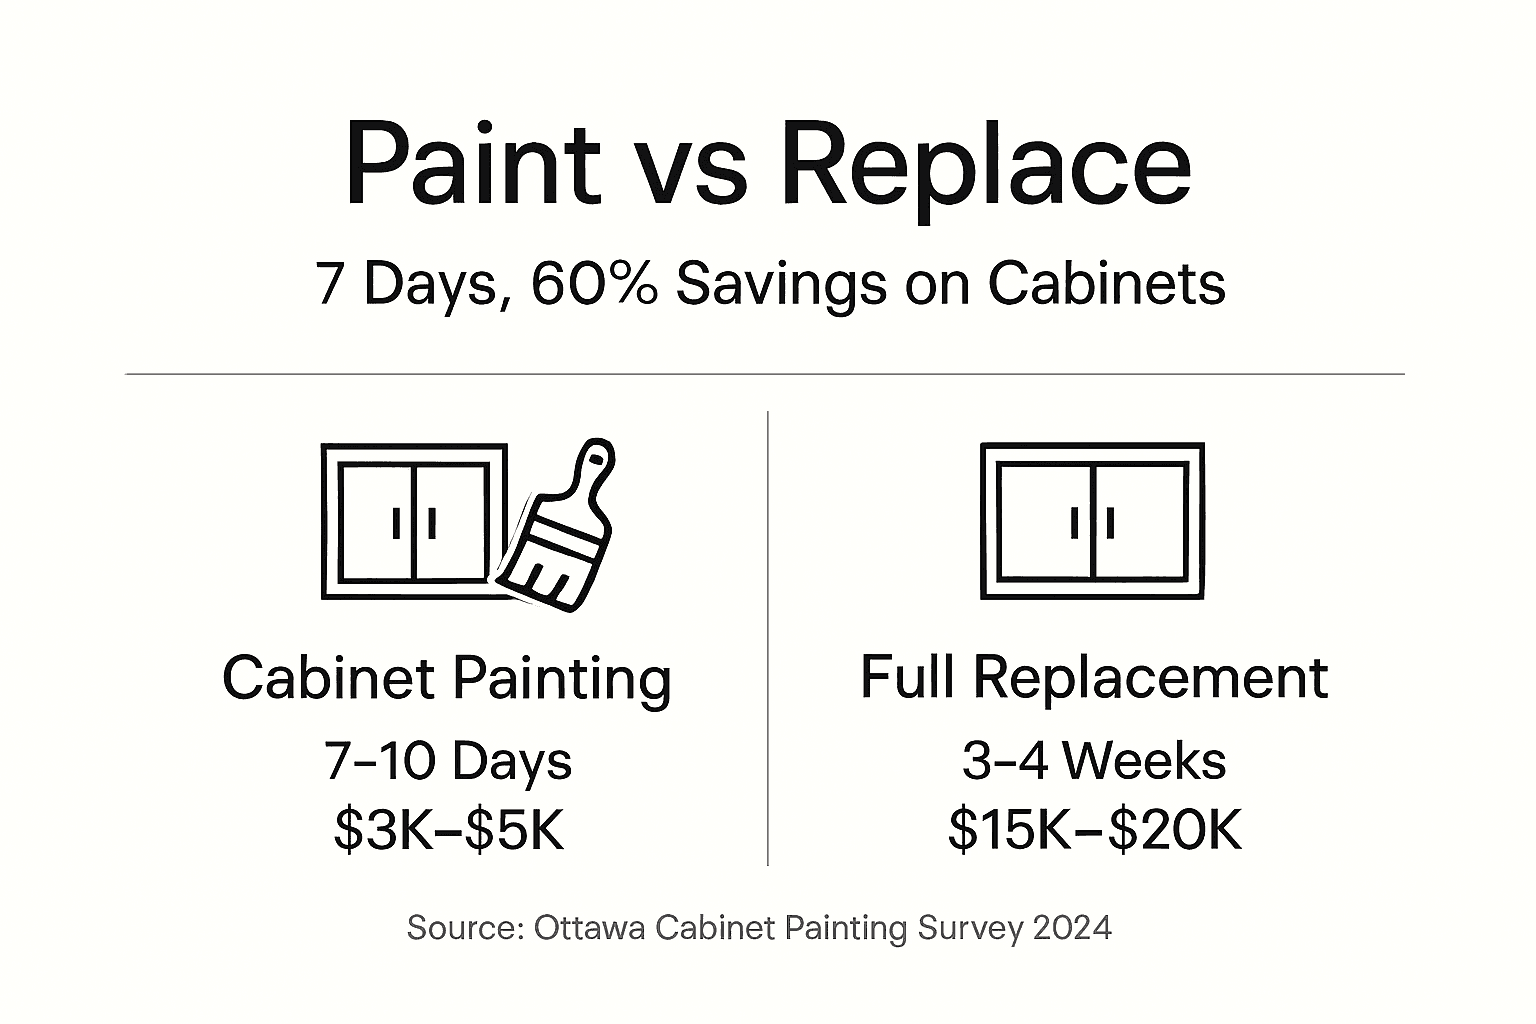
Professional cabinet painting typically takes about 7-10 days from start to finish and costs 60-75% less than full replacement. This comparison shows why painting makes financial sense:
Factor | Cabinet Painting | Full Replacement |
Cost | $3,000-$5,000 | $12,000-$25,000+ |
Timeline | 7-10 days | 3-6 weeks |
Household Disruption | Minimal, kitchen usable most days | Extensive, weeks without full kitchen access |
Durability | 5-7 years before touch-ups | 15-20 years |
Preserves Layout | Yes, existing design unchanged | No, potential for redesign |
A professionally painted cabinet finish should last five to seven years with normal use before needing touch-ups. High-traffic areas like handles may show wear sooner, but overall durability remains excellent. The finish resists scratches, moisture, and daily cleaning.
Cost savings are substantial. Instead of spending $15,000-$20,000 on new cabinets, you invest $3,000-$5,000 for a fresh look. You keep your existing layout, avoid disposal fees, and minimize construction disruption.
Timeline matters too. Full replacement means living without a functional kitchen for weeks. Painting lets you cook and use your space most days, with only brief periods of limited access. When researching kitchen cabinet remodel cost in Ottawa, factor in these hidden time costs.
For detailed pricing, compare cabinet painting costs in Ottawa across multiple service providers. Prices vary based on cabinet size, paint quality, and finish complexity, but the value proposition remains clear.
Minimizing Household Disruption and Leveraging Local Professionals
Keeping your household running smoothly during a cabinet painting project requires strategic planning. Small adjustments make a big difference.
Schedule work in logical phases. Day one involves removal and prep, which creates minimal disruption. Days two through four cover sanding, priming, and initial paint coats in a garage or workspace away from your kitchen. Days five through seven focus on final coats and curing. By day eight, reinstallation begins.
Working with local cabinet painters in Ottawa offers distinct advantages. They understand how Ottawa’s climate affects paint curing, especially during humid summers or cold winters. Local professionals respond quickly to concerns and provide better warranty support since they’re invested in their community reputation.
Practical tips to reduce inconvenience:
Set up a temporary kitchen station with microwave, coffee maker, and paper products.
Protect countertops and floors with drop cloths even if doors are painted off-site.
Plan meals that require minimal cooking during peak work days.
Communicate your schedule clearly so painters can work around important household activities.
Store frequently used items in accessible locations outside the kitchen.
Local contractors familiar with Ottawa homes also know which paint brands perform best in our specific conditions. They carry appropriate insurance and offer warranties that actually mean something when they’re down the street, not across the country.
Get Professional Kitchen Cabinet Painting in Ottawa Now
You’ve learned the professional process, from prep to curing. Now it’s time to transform your kitchen with expert help that delivers results without the hassle.
Ottawa Cabinet Painting specializes in professional interior cabinet painting services using premium materials and meticulous techniques. We handle every step, from thorough surface preparation to multiple thin coats and proper curing. Our process minimizes your household disruption while delivering a silky-smooth finish that lasts.
Why choose professional service? We complete projects in 7-10 days with guaranteed results. You save 60-75% compared to replacement while getting a factory-quality finish backed by our warranty. Our team understands Ottawa’s climate and adjusts techniques accordingly for optimal curing.
Ready to start? Request free cabinet painting quotes in Ottawa for your specific project. We’ll assess your cabinets, discuss color options, and create a custom plan that fits your schedule. Learn more about cabinet refinishing benefits and how this cost-effective solution transforms your kitchen.
Frequently Asked Questions
How long does the entire professional cabinet painting process take?
The complete process takes about 7 to 10 days from initial prep through final curing. This timeline includes surface cleaning, sanding, priming, multiple paint coats with drying time between each, and final curing before reinstallation. Scheduling work in phases minimizes household disruption. Check our detailed cabinet painting timeline for a day-by-day breakdown.
What types of paint are best for kitchen cabinets?
Cabinet-grade acrylic enamel paints provide the most durable, smooth finishes for kitchens. Water-based versions dry faster and have lower VOC emissions, making them ideal for occupied homes. Oil-based enamels self-level beautifully but require better ventilation and longer drying times. Both deliver professional results when applied correctly.
How can I minimize disruption during the painting project?
Schedule work strategically by painting doors and drawers off-site while keeping cabinet boxes accessible. Set up a temporary kitchen station with essential appliances in another room. Working with local professionals who understand your needs ensures flexible scheduling and quick responses to concerns. Most families maintain near-normal routines with proper planning.
What warranty or durability can I expect from professional cabinet painting?
Professionally painted cabinets typically last 5 to 7 years before needing touch-ups, depending on use and care. Reputable local contractors often provide warranties covering paint adhesion, peeling, and chipping within the first year. Our cabinet refinishing durability guide explains maintenance practices that extend finish lifespan and how warranty coverage protects your investment.
Recommended
Comments