Refinishing damaged cabinets: affordable DIY & pro tips
- Axcell Painting

- 13 hours ago
- 9 min read
Your kitchen cabinets take a beating every single day. Grease, moisture, scratches, and years of use can make even a well-designed kitchen look tired and dated. The good news? You don’t need a full renovation to fix that. Refinishing can cost up to 75% less than full cabinet replacement in Ottawa, making it one of the smartest upgrades a homeowner can make. Whether you’re a confident DIYer or considering professional help, this guide walks you through every step: tools, technique, troubleshooting, and long-term care, all tailored for Ottawa homes.
Table of Contents
Key Takeaways
Point | Details |
Major cost savings | Refinishing saves Ottawa homeowners up to 75 percent compared to replacing cabinets. |
Step-by-step process | A multi-stage approach ensures professional-looking, durable results that last years. |
DIY or call a pro | Handy homeowners can refinish, but pros offer speed, warranties, and best outcomes for complex jobs. |
Longevity with care | Refinished cabinets last 6 to 12 years with simple, regular maintenance. |
Why refinish damaged cabinets instead of replacing?
The financial case for refinishing is hard to argue with. Professional refinishing in Ottawa costs CAD $3,000–$6,000 for a typical kitchen, compared to $20,000 or more for brand-new cabinets. That’s a massive difference, and it doesn’t account for the added cost of demolition, disposal, and the weeks of kitchen downtime that come with a full replacement.
Beyond the upfront savings, refinishing delivers strong returns. Refinishing ROI reaches 75–96%, which outpaces most full kitchen remodels. If you’re planning to sell your home or simply want to protect your investment, refinishing is one of the most cost-effective kitchen upgrades you can make.
Who benefits most from refinishing? Homeowners whose cabinet boxes are structurally sound, those working within a budget, and anyone who wants to preserve their current kitchen layout without the chaos of a full remodel. The refinishing benefits in Ottawa are especially relevant in older neighborhoods where cabinet bones are solid but surfaces have aged.
Factor | Refinishing | Full replacement |
Average cost (Ottawa) | CAD $3,000–$6,000 | CAD $20,000+ |
Project timeline | 7–10 days | 4–8 weeks |
Kitchen disruption | Minimal | Significant |
ROI | 75–96% | 60–80% |
Layout preserved | Yes | Not always |
Refinishing does have limits. If your cabinet boxes are warped, rotting, or structurally compromised, or if you need a completely different kitchen layout, replacement may be the right call. But for the vast majority of Ottawa kitchens, refinishing is the smarter, faster, and far more affordable path. You can review a full cabinet refinishing cost breakdown to understand exactly what drives pricing in your area.
Key reasons Ottawa homeowners choose refinishing:
Saves thousands compared to new cabinets
Preserves the existing kitchen footprint and layout
Completed in days, not weeks
Dramatically improves appearance with a fresh, modern finish
Strong return on investment for resale value
With refinishing as a smart alternative, let’s lay out exactly what you need to get started.
What you need: Tools, materials, and workspace setup
A successful refinishing job starts long before you open a can of paint. Having the right tools and a well-organized workspace is what separates a factory-smooth finish from a streaky, peeling disappointment. The refinishing process requires removing hardware, cleaning with TSP, repairing with wood filler, sanding, priming, and painting, so preparation is everything.
Category | Items needed |
Removal tools | Screwdrivers, drill, labeled bags for hardware |
Cleaning supplies | TSP (trisodium phosphate) cleaner, rags, gloves |
Repair materials | Wood filler, putty knife, sandpaper (80, 120, 220 grit) |
Priming and painting | Shellac-based primer, quality brush or foam roller, paint or stain |
Sealing | Polyurethane or water-based topcoat |
Safety gear | Respirator mask, safety glasses, nitrile gloves |
Workspace supplies | Drop cloths, painter’s tape, plastic sheeting |
In Ottawa, you can source most of these supplies at Home Depot, Rona, or local paint specialty shops. For Ottawa refinishing supply sources, local stores often carry climate-appropriate products that perform better through our freeze-thaw cycles.
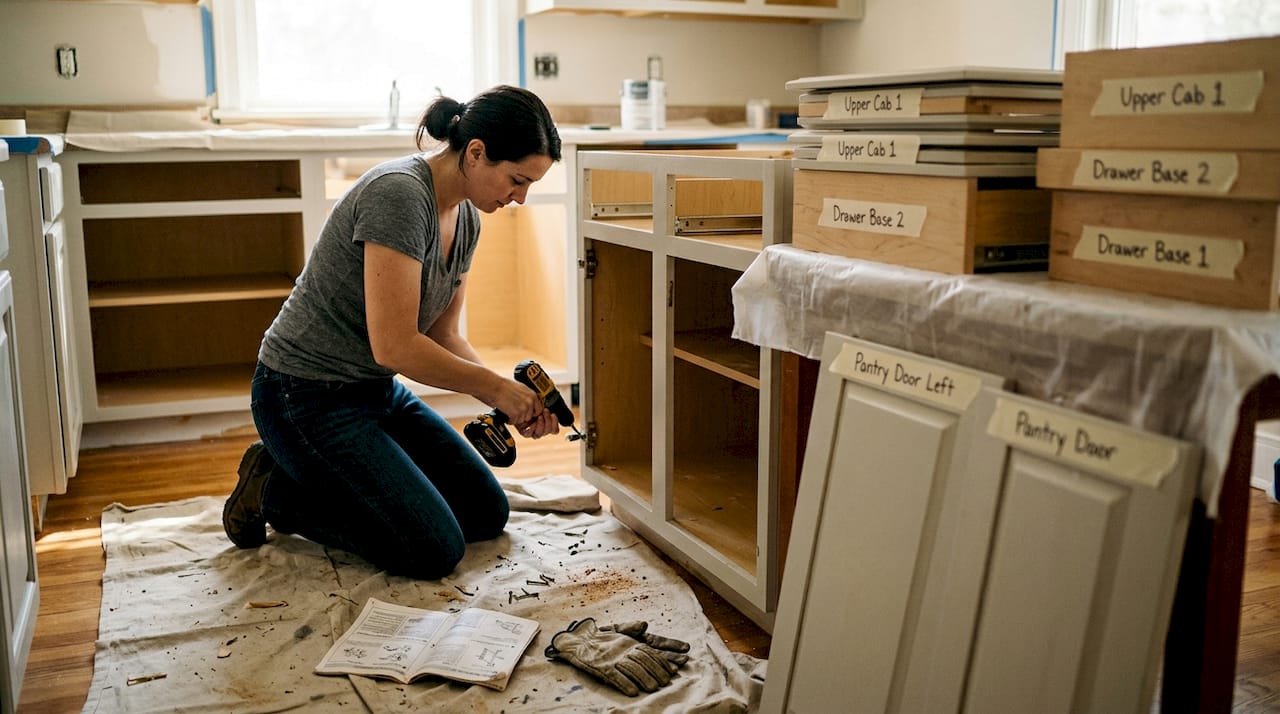
Workspace setup matters just as much as your supply list. Remove all cabinet doors and drawers and label each one so reassembly is straightforward. Lay drop cloths across countertops and floors. Use plastic sheeting to seal off the kitchen from the rest of the house to contain dust and fumes.
Pro Tip: Ventilation is non-negotiable. Open windows, run a box fan to exhaust fumes outward, and wear a respirator rated for organic vapors. TSP and oil-based primers release fumes that can build up quickly in a closed kitchen. Don’t skip this step.
For homeowners who want to learn pro refinishing shortcuts before starting, reviewing how professionals organize their workflow can save you hours and help you avoid common prep mistakes.
Now that you know why refinishing is so compelling, gather everything you’ll need before tackling the process.
Step-by-step guide to refinishing damaged cabinets
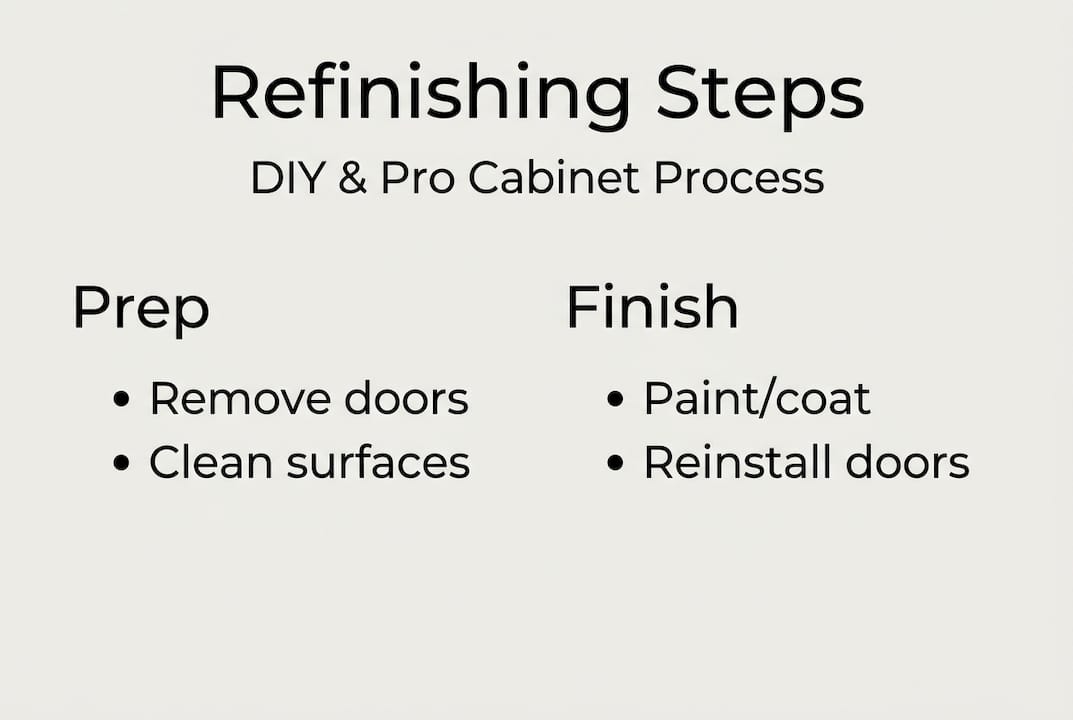
With your space and materials set, here’s exactly how to refinish your cabinets like a pro. The full process includes removal, cleaning, degreasing, repair, sanding, priming, painting or staining, sealing, and reassembly. Rushing any stage is a recipe for disaster.
Remove doors, drawers, and hardware. Label everything with painter’s tape and a marker. Store hardware in labeled bags.
Clean with TSP. Mix TSP cleaner with water and scrub every surface thoroughly. Grease and grime will prevent paint from bonding, so this step is critical.
Repair damaged areas. Fill dents, gouges, and cracks with wood filler. Let it cure fully before moving on. Don’t rush this.
Sand using the SVT method. Sand, vacuum, then tack cloth. Start with 80-grit for rough surfaces, move to 120-grit for smoothing, and finish with 220-grit for a silky surface ready for primer. Always sand with the wood grain.
Apply shellac-based primer. Shellac-based primer seals stains, prevents bleed-through, and bonds to almost any surface. Apply one thin, even coat and let it dry completely.
Paint or stain in thin coats. Apply your chosen finish in two to three thin coats, allowing full drying time between each. Thin coats prevent drips and build a more durable finish than one thick coat ever could.
Seal with a topcoat. A water-based polyurethane topcoat protects your finish from daily wear, moisture, and grease. Apply two coats for maximum durability.
Reassemble carefully. Rehang doors and reinstall drawers once everything is fully cured, not just dry to the touch.
“Patience is the most important tool in your kit. Thin coats and proper drying time between stages are what separate a showroom finish from a peeling mess six months later.”
Pro Tip: Always check each stage before moving to the next. Run your hand over the primed surface before painting. If it feels rough or gritty, sand lightly and tack again. Skipping this check is one of the most common cost-effective refinishing tips that professionals use to ensure a seamless result.
With your space and materials set, here’s exactly how to refinish your cabinets like a pro.
Troubleshooting: Common mistakes and how to avoid them
Even with a solid process, refinishing mistakes can undermine your efforts. Here’s how to avoid them.
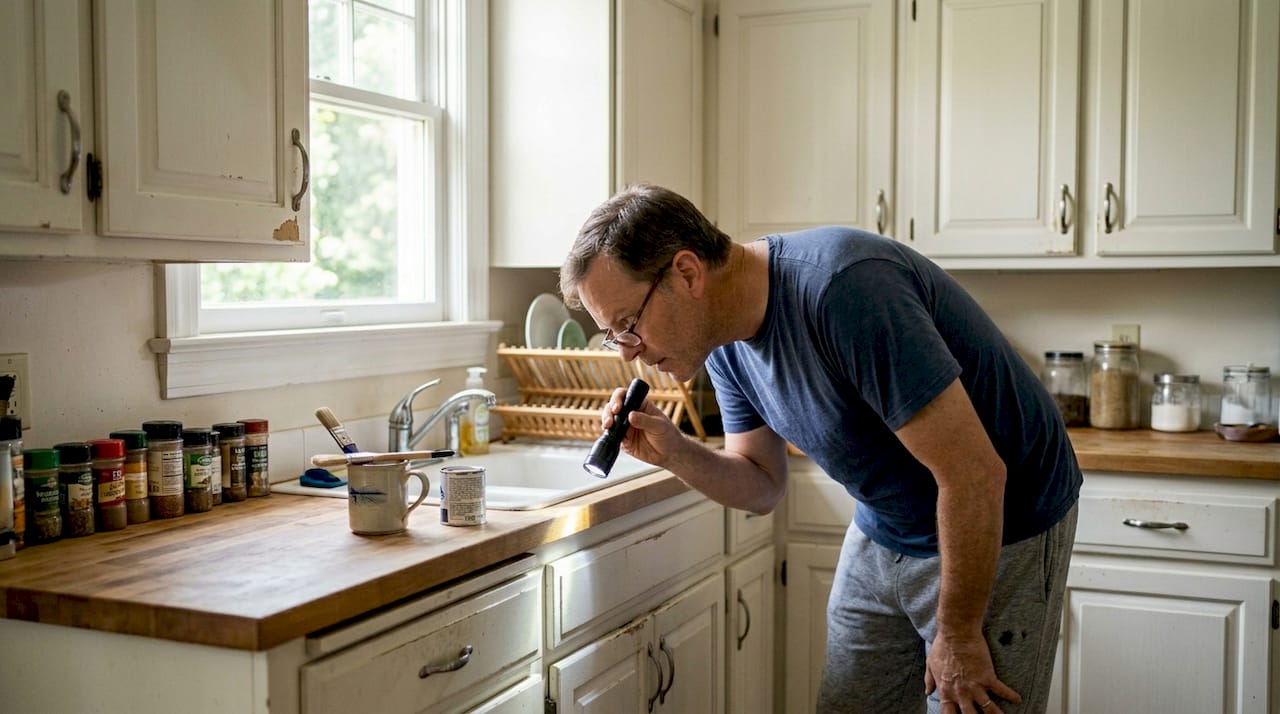
The most common DIY errors fall into a predictable pattern: skipping prep, rushing drying times, and underestimating how Ottawa’s climate affects the process. Before you even open a can of primer, inspect for structural integrity to make sure refinishing is actually the right solution. Spending a weekend on cabinets that are beyond saving wastes both time and money.
Common mistakes and how to fix them:
Improper sanding: Skipping grits or sanding across the grain leaves visible scratches under paint. Always follow the SVT sequence.
Paint drips: These happen when coats are too thick. Sand drips smooth after drying and recoat with a thinner layer.
Poor repairs: Rushing wood filler before it’s fully cured causes cracking later. Read the manufacturer’s drying time and add extra time in Ottawa’s cold or humid seasons.
Adhesion failure: Skipping TSP cleaning means paint won’t bond. There’s no shortcut here.
Finish cloudiness: Applying a water-based topcoat over an oil-based paint before it’s fully cured causes milky discoloration. Always confirm compatibility.
Ottawa’s climate adds a layer of complexity. Cold winters slow drying times significantly, and humid summers can cause paint to bubble or peel if applied in high humidity. Aim to refinish in temperatures between 15°C and 25°C with humidity below 70%. If you’re working in a garage in February, use a space heater to bring the temperature up before you start.
“If your cabinet doors are delaminating, swelling, or showing soft spots, that’s a red flag. Refinishing won’t fix structural problems, and painting over them only hides the issue temporarily.”
Pro Tip: For long-term durability, add a second topcoat six months after your initial refinish. This is especially useful in high-traffic kitchens. Comparing refinishing vs. refacing pros and cons can also help you decide whether a more involved approach is worth it for your specific situation.
How to maintain your refinished cabinets for years
Finish strong by setting your kitchen up for years of hard-wearing, beautiful results. Refinished cabinets last 6–12 years with simple, consistent care. That lifespan depends almost entirely on how well you maintain the finish after the work is done.
Daily and weekly habits that protect your finish:
Wipe spills immediately with a damp cloth. Don’t let liquids sit on the surface.
Use a mild dish soap solution for regular cleaning. Avoid abrasive scrubbers.
Never use bleach-based cleaners or ammonia products on painted cabinets.
Keep cabinet surfaces dry, especially around the sink and dishwasher.
Ottawa’s seasonal humidity swings are hard on painted surfaces. In winter, dry indoor air can cause minor cracking around joints. In summer, high humidity can soften finishes near steam sources like the stove or dishwasher. A kitchen exhaust fan used consistently during cooking makes a real difference.
Maintenance task | Frequency |
Wipe down surfaces | Daily or as needed |
Deep clean with mild soap | Monthly |
Inspect caulking and joints | Every 6 months |
Touch up chips or scratches | As needed |
Reapply topcoat sealant | Every 3–5 years |
Professional inspection | Every 5 years |
When you notice chips or scratches, address them quickly. A small touch-up with leftover paint and a fine brush takes minutes and prevents the damage from spreading. For joints and edges, recaulk as needed to keep moisture out. If you want expert maintenance support down the road, local Ottawa professionals can assess your finish and recommend targeted touch-ups without a full redo.
Why Ottawa homeowners shouldn’t underestimate professional refinishing
We’ve walked you through the full DIY process, and it’s genuinely doable for a handy homeowner. But here’s our honest take: even skilled DIYers often underestimate how much the details matter in cabinet refinishing. One missed sanding step, one coat applied in the wrong humidity, or one incompatible primer can mean peeling paint within a year.
Professional services deliver affordable, low-disruption results and handle complex repairs that are genuinely difficult without experience. We’ve seen homeowners spend $800 on materials and two weekends of labor, only to end up with a finish that doesn’t hold. A professional job, done right the first time, often costs less in the long run when you factor in wasted materials and do-overs.
Professionals also bring local knowledge that matters. Ottawa’s climate, the specific cabinet materials common in local homes, and the right products for our seasons all factor into a finish that lasts. A warranty-backed result from local refinishing experts gives you peace of mind that a weekend project simply can’t match. That’s not a knock on DIY. It’s just an honest look at where the value truly lies.
Get Ottawa’s best cabinet refinishing results—DIY guidance or pro help
Whether you’re ready to roll up your sleeves or you’d rather leave it to the professionals, Ottawa Cabinet Painting is here to help. We offer free spray painting quotes for homeowners across Ottawa who want a seamless, factory-finished result without the cost of full cabinet replacement. Browse our interior refinishing options to see the full range of services available, and check out our refinishing before and after gallery to see exactly what a professional finish looks like in real Ottawa kitchens. No matter where you’re starting from, we’re ready to help you get there.
Frequently asked questions
How long does cabinet refinishing last in Ottawa homes?
With proper maintenance, refinished cabinets last 6–12 years in Ottawa. Consistent cleaning and timely touch-ups are the biggest factors in reaching the upper end of that range.
Is refinishing suitable for cabinets with severe water damage?
Cabinets with serious structural or water damage are usually better replaced. Refinishing works best on sound cabinets where the box is solid and the damage is primarily cosmetic.
Can I refinish laminate cabinets, or does this only work on wood?
Laminate cabinets can sometimes be refinished if the surface is stable and well-bonded, but results depend heavily on material type and surface condition. Real wood consistently delivers the best outcome.
How much disruption should I expect during the refinishing process?
Expect minimal disruption. Most Ottawa professional projects wrap up in 7–10 days, and you’ll retain access to your kitchen for essentials throughout. DIY projects may take longer depending on your pace and drying conditions.
What’s the average cost to refinish a standard Ottawa kitchen?
Professional refinishing costs CAD $3,000–$6,000 for a typical Ottawa kitchen, which is roughly 75% less than the cost of new cabinets. The exact price depends on cabinet count, condition, and finish type.
Recommended


Comments