Refinish Your Kitchen Cabinets: Ottawa DIY Guide

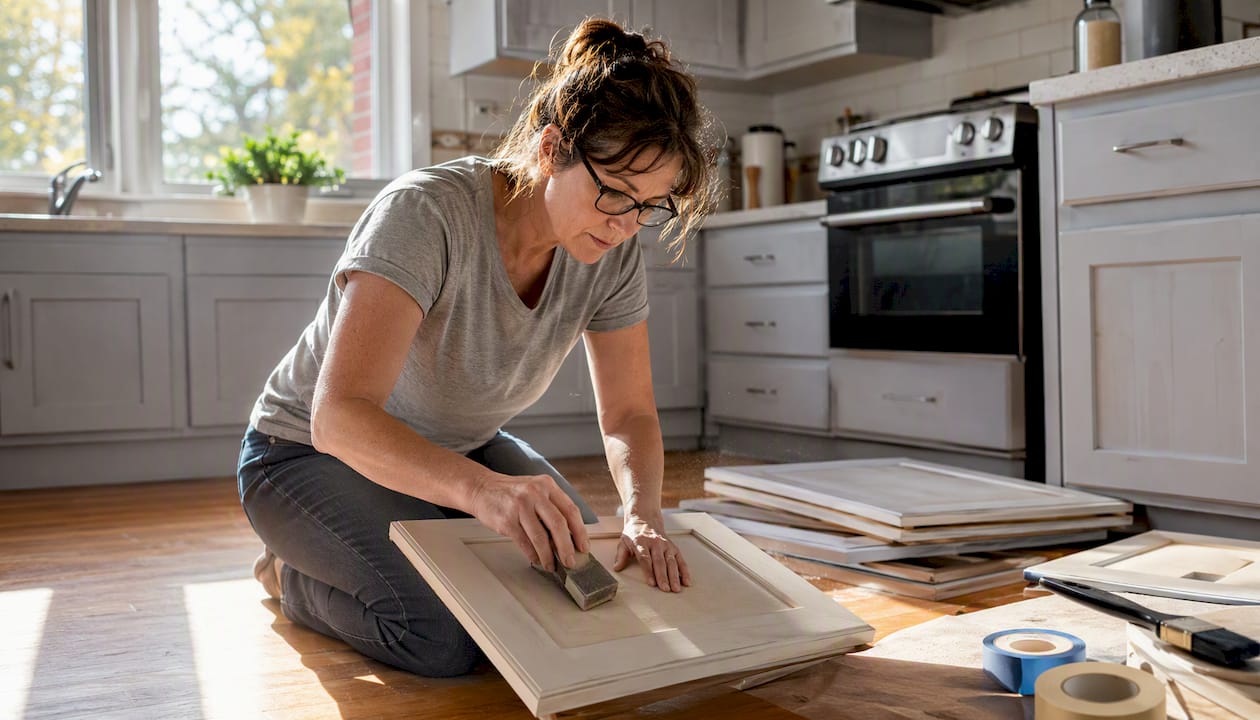
TL;DR:
Refinishing Ottawa kitchen cabinets offers a cost-effective alternative to replacement if the cabinet boxes are in good shape. Proper prep, quality primers, and thin coats of cabinet-grade enamel are essential for a durable, professional-looking finish. Replacement becomes necessary only when structural damage or layout changes are involved.
A motivated DIY homeowner in Ottawa can refinish kitchen cabinets for a fraction of replacement cost by following the right prep, product, and application steps. The core sequence is straightforward: remove hardware and doors, clean and degrease thoroughly, sand or degloss, repair any damage, prime, apply two to three thin coats of cabinet enamel, then reassemble after a proper cure. For a typical Ottawa kitchen, expect to spend time on prep and painting, with materials costing a moderate amount depending on product quality. The only scenario where replacement beats refinishing is severe structural damage — rotted frames, badly warped doors, or a layout that no longer works.
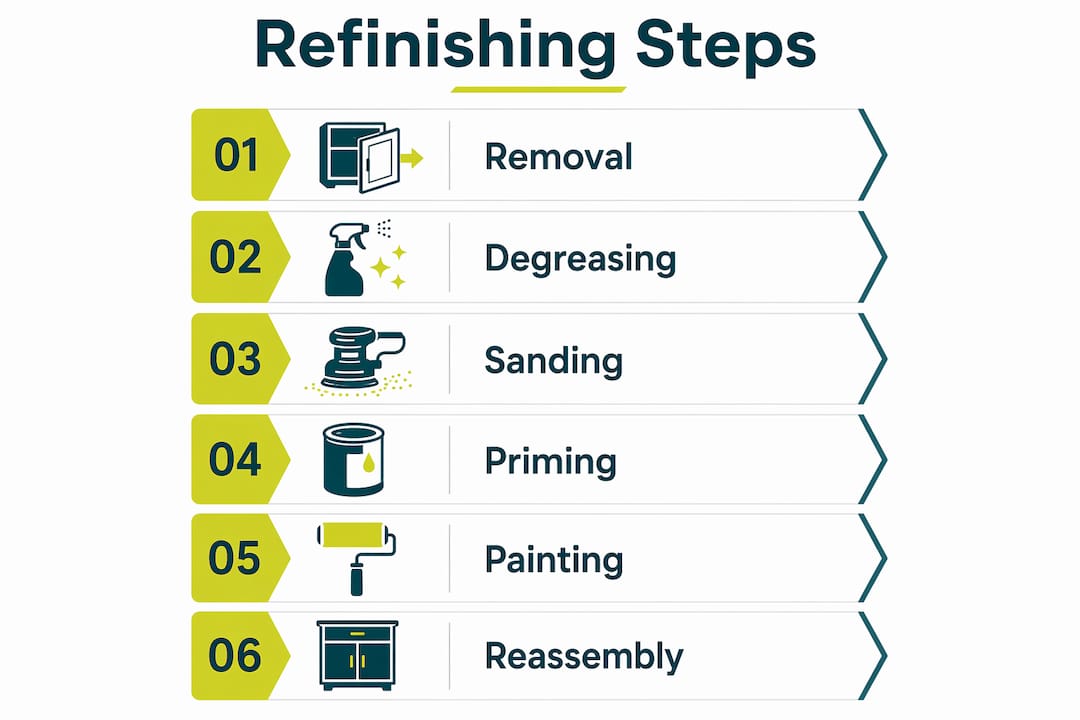
Quick step sequence:
Remove all doors, drawers, and hardware
Clean and degrease every surface with TSP or a TSP substitute
Sand (80–220 grit progression) or chemically degloss
Fill dents, gouges, and gaps; address any veneer lifts
Apply a quality bonding or shellac-based primer
Paint with a cabinet-grade enamel in two to three thin coats, sanding lightly between each
Reassemble only after the paint has fully cured (3–7 days minimum, product-dependent)
Table of Contents
Should you refinish your Ottawa kitchen cabinets or replace them?
What tools and materials do you need for Ottawa cabinet refinishing?
How to prepare your Ottawa kitchen and remove doors without making a mess
When should you strip vs. sand, and how do you repair cabinet damage?
Step-by-step painting technique for a factory-smooth Ottawa cabinet finish
How to reassemble Ottawa kitchen cabinets without damaging fresh paint
What does a DIY cabinet refinish cost and how long does it take in Ottawa?
Common DIY mistakes and how to fix them before they ruin your finish
How to dispose of old paint and stripping chemicals responsibly in Ottawa
Why refinishing is often the smartest kitchen upgrade Ottawa homeowners can make
Ready for a professional Ottawa cabinet finish? Get a free quote.
Should you refinish your Ottawa kitchen cabinets or replace them?
The answer usually comes down to the condition of your cabinet boxes, not the doors. Doors can be replaced individually or repainted easily. The frames and boxes are what determine whether refinishing is a smart investment.
Refinishing makes sense when:
Cabinet boxes are structurally sound with no rot or water damage
Doors open and close squarely with no significant warping
You have solid wood or plywood construction (not particle board that has swollen)
The layout works for your household and you want to preserve it
You want to save significantly on costs compared to a full replacement
Replacement is the smarter call when:
Frames show rot, mold, or water damage that has compromised the wood
Drawer boxes are falling apart or slides are beyond repair
The layout genuinely needs to change (moving a peninsula, adding an island)
Doors are so severely warped that new hinges cannot correct the gap
Ottawa’s resale market rewards updated kitchens, but buyers can tell the difference between a quality refinish and a rushed paint job. A well-executed cabinet restoration with proper prep and premium enamel can look indistinguishable from new cabinetry. A sloppy one peels within a year and hurts your home’s value. If your boxes are solid, refinishing is almost always the cost-effective path forward.
What tools and materials do you need for Ottawa cabinet refinishing?
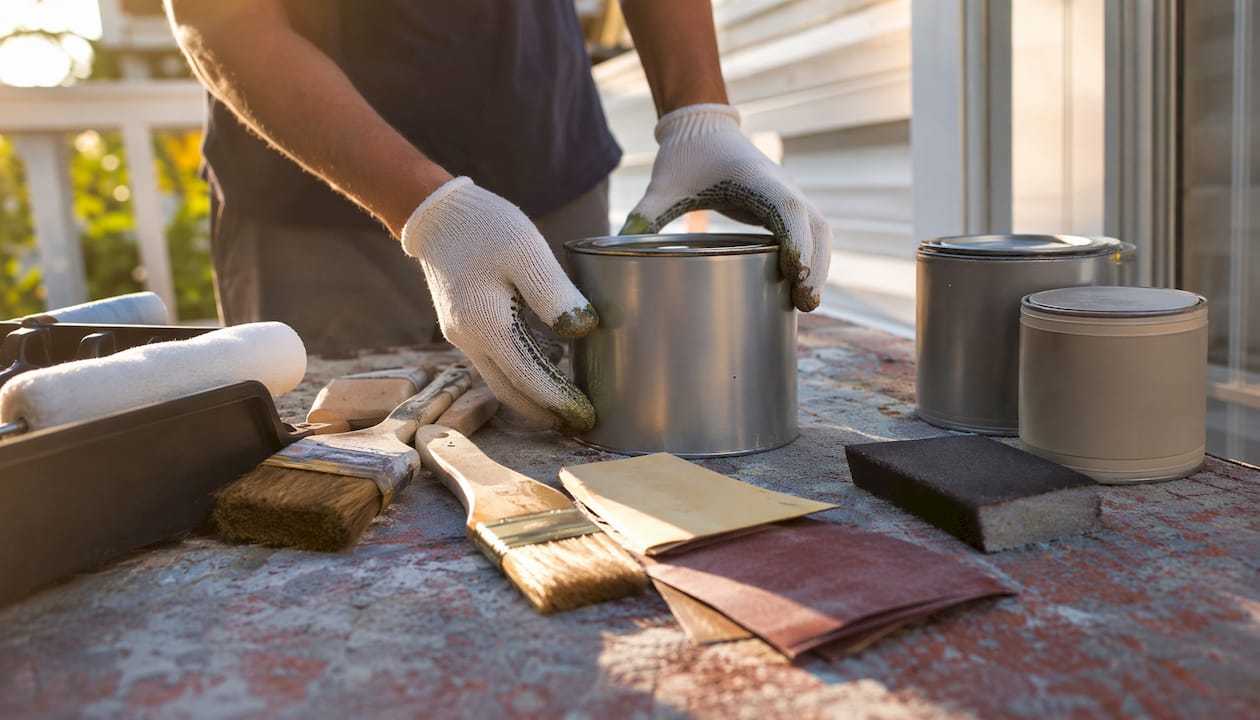
Buy the right supplies before you start. Running to the hardware store mid-project is how corners get cut.
Tools:
Random-orbit sander (rent one from Home Depot Canada or a local Ottawa tool rental shop for about $40–$60/day)
Sanding pads: 80, 120, 150, and 220 grit
Sanding block for flat door panels
Scrapers for old finish removal
Cordless drill and screwdrivers
Foam or microfiber mini rollers (4-inch)
2-inch angled nylon/polyester brush
Tack cloths
Shop vacuum
Drop cloths and plastic sheeting
Supplies:
TSP or TSP substitute (available at Canadian Tire, Home Depot Canada, or Rona)
Shellac-based primer (Zinsser BIN) or a high-quality bonding primer (Benjamin Moore Fresh Start)
Cabinet-grade enamel: Benjamin Moore Advance or Sherwin-Williams Emerald Urethane Trim Enamel
Wood filler or lightweight spackling compound
Paintable caulk
Painter’s tape (Frog Tape or 3M ScotchBlue)
Numbered labels or masking tape for door identification
Resealable plastic bags for hardware
Both Benjamin Moore Advance and Sherwin-Williams Emerald Urethane Trim Enamel are widely available in Canada and are the two products professionals reach for most often. They are waterborne alkyd-hybrid or urethane formulas that cure to a hard, grease-resistant finish — something standard latex wall paint simply cannot match.
Pro Tip: Rent a quality random-orbit sander rather than buying a cheap one. The difference in surface quality is significant, and a good sander cuts your prep time in half. Invest in a quality angled brush and a microfiber roller — these two tools do more for your final finish than any other purchase.
How to prepare your Ottawa kitchen and remove doors without making a mess
Prep is where most DIY cabinet jobs succeed or fail. Rushing through this stage is a recipe for adhesion failure, no matter how good your paint is.
Photograph everything first. Take photos of each cabinet section before removing anything. These are your reference for reassembly.
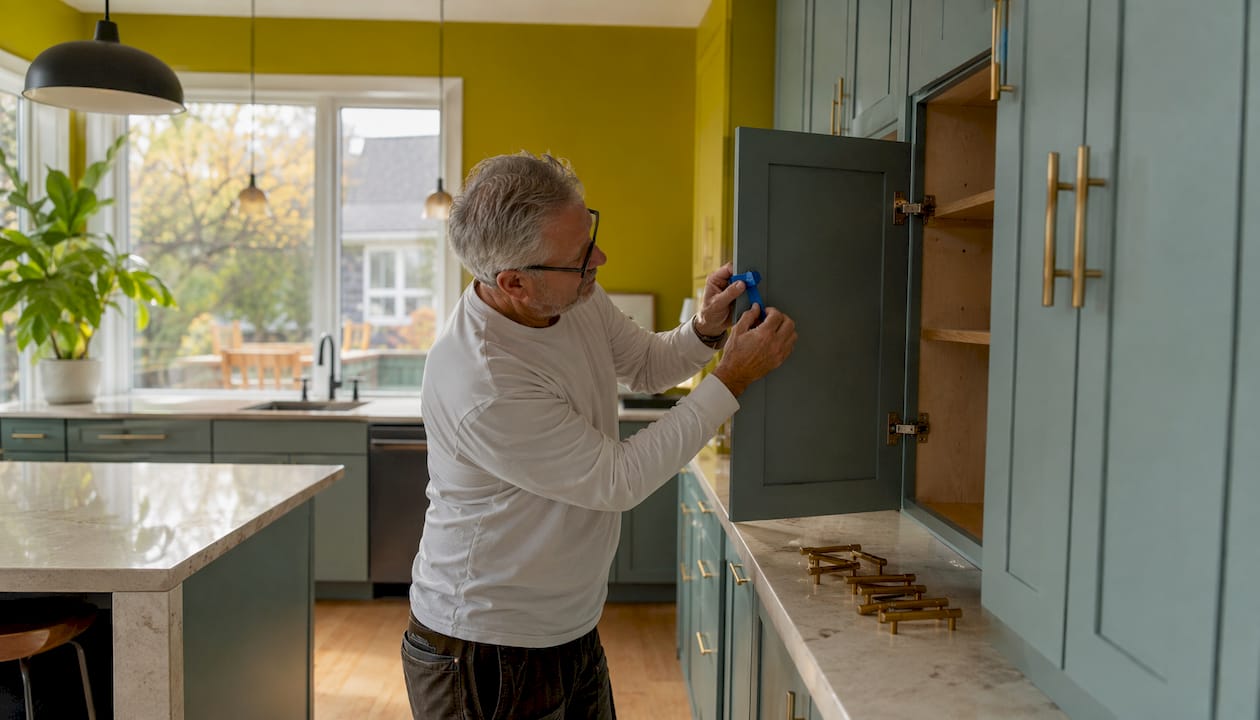
Label every door and drawer. Place a piece of painter’s tape inside each cabinet opening and write a number. Put the matching number on the back of the corresponding door. Doors that look identical often differ by as much as 1/4 inch — you will not notice until you try to rehang them.
Bag all hardware. Remove hinges, pulls, and knobs. Drop each set into a labeled resealable bag. Keep screws with their hardware.
Protect the kitchen. Lay drop cloths over countertops and flooring. Use plastic sheeting and painter’s tape to cover appliances, the backsplash, and the interior of cabinet boxes you are not painting.
Degrease every surface. Mix TSP substitute according to package directions and scrub every door, drawer front, and cabinet frame. Kitchen grease is invisible in many spots but will prevent primer from bonding. Wipe down with a clean damp cloth and allow surfaces to dry completely — at least two hours, longer in humid Ottawa summers.
Safety matters here. Work with windows open and a fan running. Wear an N95 mask when sanding (fine wood dust is a respiratory hazard), safety glasses, and nitrile gloves when handling TSP or chemical strippers. If your cabinets were painted before 1990, test for lead paint before sanding.
When should you strip vs. sand, and how do you repair cabinet damage?
The answer depends on what is currently on your cabinets.
Chemical stripping vs. mechanical sanding:
Chemical stripping is worth the extra effort when you have multiple failed paint layers, old oil-based varnish, or thick lacquer that would clog sandpaper quickly. A gel stripper (Citristrip is widely available in Canada and has lower fumes than solvent-based options) softens the old finish so you can scrape it off cleanly. For cabinets with a single factory finish or one previous paint layer in decent condition, mechanical sanding is faster and produces excellent results.
Sanding grit progression:
Stage | Grit | Purpose |
Strip/flatten | 80–120 | Remove old finish, level surface |
Smooth scratches | 150 | Remove coarse sanding marks |
Final prep | 220 | Create fine tooth for primer adhesion |
Following this grit progression and cleaning thoroughly with a shop vacuum and tack cloth between each stage is what separates a lasting finish from one that fails within a year. Skipping grits leaves deep scratches that telegraph through primer and paint.
Repairing common damage:
Gouges and dents: Fill with a lightweight wood filler (Minwax Wood Filler or DAP Plastic Wood). Let cure fully, then sand flush with 150 grit before priming.
Veneer lifts: Apply wood glue under the lifted section, clamp or weight it flat, and allow 24 hours before sanding.
Water stains: Seal with shellac-based primer (Zinsser BIN) before topcoating. Water stains will bleed through latex primer and show as yellow rings in your finish.
Warped doors: Minor warps can sometimes be corrected by painting both sides equally (uneven moisture absorption causes warping). Severe warps require door replacement.
After final sanding, vacuum every surface and wipe with a tack cloth. Any dust left on the surface will show as grit in your finish.
Which primers work best for Ottawa cabinet refinishing?
Primer is not optional. Skipping it or using the wrong one is the single most common cause of peeling cabinet paint.
Shellac-based primer (Zinsser BIN):
Best choice when cabinets have tannin-rich wood (oak, cherry), water stains, or grease contamination
Blocks stains aggressively and bonds to almost any surface
Dries in 45 minutes, which speeds up your project timeline
Requires denatured alcohol for cleanup and has strong fumes — open windows and wear a respirator
Waterborne bonding primer (Benjamin Moore Fresh Start, STIX Waterborne Bonding Primer):
Excellent adhesion to previously painted surfaces and factory finishes
Lower fumes, water cleanup, and easier to apply evenly
Needs at least one hour of dry time before sanding or topcoating
The right choice when stain blocking is not a concern
A high-quality primer does two jobs: it blocks stains and creates a mechanical bond for the topcoat. Apply one thin, even coat. Avoid building up primer in corners — it creates ridges that show through paint. Once dry, scuff lightly with 220-grit sandpaper, vacuum, and tack cloth before painting.
For solvent-based primers, ventilate aggressively. Run a fan exhausting air out of the workspace and wear a half-face respirator with organic vapor cartridges, not just a dust mask.
Step-by-step painting technique for a factory-smooth Ottawa cabinet finish
Paint choice and application technique together determine whether your cabinets look professional or homemade.
Recommended topcoats for Canadian homeowners:
Cabinet-grade enamels like Sherwin-Williams Emerald Urethane Trim Enamel and Benjamin Moore Advance are the industry standard for a reason. They level out brush marks as they dry and cure to a hardness that standard latex cannot reach. Regular wall paint stays slightly soft, which means it scuffs, collects fingerprints, and wears along door edges within months of heavy use.
Sheen selection:
Semi-gloss (35–70% sheen) is the industry standard for kitchen cabinets because it resists moisture and grease and wipes clean easily. Satin (25–35% sheen) is a softer alternative that looks elegant but rewards thorough prep — it hides surface imperfections less effectively than semi-gloss. Matte and eggshell are not recommended for cabinets.
Application steps:
Paint doors flat on sawhorses or a workbench whenever possible. Gravity works against you when painting vertical surfaces — runs are far more likely.
Use the wet-edge technique: brush profiles and edges first, then immediately roll the flat panels with a microfiber roller while the paint is still wet. This levels out brush strokes before they dry.
Apply thin coats. Two to three thin coats build a stronger, more uniform finish than one thick coat, which sags, drips, and takes far longer to cure.
Sand lightly with 220-grit between coats, then tack cloth before the next application.
Allow each coat to dry fully before recoating — check the product’s technical data sheet for recoat windows (Benjamin Moore Advance can take up to 16 hours between coats).
Pro Tip: Thin coats are not just a preference — they are the professional standard. A thick coat traps solvents, dries unevenly, and often stays tacky for days. Two thin coats applied correctly will outlast one heavy coat by years.
For a truly factory-smooth finish, consider renting an HVLP (high-volume, low-pressure) sprayer from a local Ottawa tool rental shop. Hold the tip at least 8 inches from the surface and use a controlled back-and-forth motion. Spraying requires more masking prep but produces results that brush-and-roll simply cannot match on detailed door profiles.
How to reassemble Ottawa kitchen cabinets without damaging fresh paint
The finish is on. Now patience is the only tool you need.
Cure time vs. dry time:
Paint that feels dry to the touch is not ready for hardware. Cabinet enamels need 3–5 days to reach working hardness, and some products require 7–14 days for full cure. Reattaching hardware too soon dents the finish and causes peeling at screw points.
Reassembly checklist:
Wait at least 24 hours before handling doors at all; 48–72 hours before reinstalling them
Install hinges by hand-tightening screws — do not use a power drill at full torque on fresh paint
Hang doors using your numbered labels to match each door to its original opening
Adjust hinge alignment before fully tightening screws; most European-style hinges have three-axis adjustment
Replace or upgrade hardware now, while everything is accessible
Add self-adhesive felt bumpers to the bottom corners of each door to protect the paint finish from the cabinet frame over time
Touch up any nicks from transport with a small detail brush — use the same paint, thinned slightly if needed
New hardware is one of the highest-impact, lowest-cost upgrades you can make during a refinish. Brushed brass, matte black, or satin nickel pulls can shift the entire look of the kitchen without adding significant cost.
What does a DIY cabinet refinish cost and how long does it take in Ottawa?
For a kitchen with 10–12 doors, here is a realistic breakdown.
Step | Time Estimate | Estimated Cost (CAD) |
Removal and labeling | 2–3 hours | — |
Degreasing and prep | 3–4 hours | $40 (TSP, cloths, tape) |
Sanding and repairs | 4–6 hours | $40–$60 (sandpaper, filler, rental) |
Priming (1 coat) | 2–3 hours + dry time | $40–$70 (primer) |
Painting (2–3 coats) | 6–10 hours over 2–3 days | $80–$100 (cabinet enamel) |
Cure and reassembly | 3–7 days wait, 2–3 hours work | – |
Total | 2 full weekends | $190 materials |
Optional rental costs (HVLP sprayer, orbital sander) add $60–$120 CAD to the total. Premium products like Sherwin-Williams Emerald Urethane or Benjamin Moore Advance cost more per litre than budget options, but their longer lifespan makes them the better value over a 5–10 year horizon. For a deeper look at how product quality affects cabinet refinishing durability, the difference between a $45/litre enamel and a $25/litre one shows up clearly within two to three years of daily use.
Common DIY mistakes and how to fix them before they ruin your finish
Most cabinet refinishing failures trace back to one of four problems.
Problem → fix pairs:
Paint peeling within weeks: Almost always an adhesion failure from insufficient degreasing or skipping primer. Fix: strip back to bare wood or sound paint, degrease again, apply bonding primer, repaint.
Sticky finish that never hardens: Usually caused by applying paint too thick or recoating before the previous coat dried. Fix: allow maximum cure time in a warm, well-ventilated space. If still tacky after two weeks, the coat needs to be sanded back and reapplied in thinner layers.
Visible brush marks: Caused by using the wrong brush, painting too slowly, or not using the wet-edge technique. Fix: sand lightly with 220-grit once fully dry and apply another thin coat using the brush-then-roll method.
Runs and drips: Too much paint applied at once, or painting on a vertical surface without thinning. Fix: let the run dry completely, sand it flat with 220-grit, and recoat thinly.
Grit in the finish: Dust contamination from inadequate tack-cloth wipe-down. Fix: sand lightly with 220-grit and apply a final thin coat in a cleaner environment.
To diagnose whether you have an adhesion problem or a surface contamination problem, try this: press a piece of painter’s tape firmly onto a cured section and pull it off sharply. If paint comes with it, you have an adhesion issue (primer or degreasing failure). If the surface just looks rough or gritty, it is contamination — easier to fix with a light sand and recoat.
Pro Tip: Many common refinishing myths — like “any paint works on cabinets” or “you can skip primer on already-painted surfaces” — lead directly to these problems. Cabinet-grade enamel and proper primer are not upsells; they are what makes the finish last.
What to expect when you hire Ottawa Cabinet Painting
Sometimes the right call is to hand the project to a professional. Here is what that looks like with Ottawacabinetpainting.
The professional workflow starts with a thorough assessment of your cabinet condition, followed by complete disassembly and detailed surface preparation — the same degreasing, sanding, and repair steps described above, but executed with commercial-grade equipment and controlled conditions. Ottawacabinetpainting uses spray application methods that produce a factory-smooth finish that brush-and-roll cannot fully replicate, particularly on detailed door profiles.
What the professional process includes:
Full disassembly, labeling, and protection of your kitchen
Commercial degreasing and surface preparation
Shellac or bonding primer application with proper dry time
Spray-applied cabinet enamel in multiple thin coats
Quality inspection and touch-up before reassembly
Hardware reinstallation and hinge adjustment
The typical professional timeline runs about one to two weeks from start to finish, which minimizes disruption compared to a DIY project. Ottawacabinetpainting offers a warranty that provides greater assurance than a DIY project.
When to call a pro instead of doing it yourself:
Structural damage that requires repairs beyond cosmetic filling
No suitable workspace to lay doors flat and allow proper drying
You want a guaranteed spray finish with zero brush marks
Time is a constraint and you cannot afford two disrupted weekends
For Ottawa homeowners weighing the options, the local professional process is worth understanding before committing to DIY. Knowing what a pro does differently helps you hold your own work to the same standard.
How to dispose of old paint and stripping chemicals responsibly in Ottawa
This part of the project gets overlooked, but improper disposal of paint and chemical strippers is both an environmental issue and a legal one in Ontario.
Old paint: The City of Ottawa accepts latex and oil-based paint at its Household Hazardous Waste (HHW) drop-off depots at no charge. Do not pour paint down the drain or into the garbage. Partially full cans of latex paint can also be dropped off at Canadian Tire locations participating in the PaintCare program, which operates across Ontario.
Chemical strippers: Solvent-based strippers (methylene chloride formulas, though largely phased out in Canada) and gel strippers like Citristrip are classified as hazardous waste. Seal them in their original containers and bring them to the Ottawa HHW depot. Never pour stripper residue into the sewer system.
Rags and applicators: Rags soaked in oil-based products or solvent-based primers can self-ignite. Lay them flat outside to dry completely before placing them in a sealed metal container for disposal. This is a genuine fire hazard, not a theoretical one.
Sandpaper and dust: Sanding dust from old painted surfaces (especially pre-1990 cabinets that may contain lead) should be vacuumed with a HEPA-filter shop vacuum and the bag disposed of in a sealed plastic bag in the regular garbage. If you suspect lead paint, contact Ottawa Public Health for guidance before sanding.
The EPA’s residential renovation guidelines provide additional context on lead-safe work practices that apply to older Canadian homes as well.
Key Takeaways
A properly prepped and painted cabinet refinish in Ottawa can last a decade or more when you use cabinet-grade enamel, follow the correct grit progression, and respect cure times before reassembly.
Point | Details |
Prep determines everything | Degrease with TSP substitute and sand through 80–220 grit before any primer touches the surface. |
Use cabinet-grade enamel | Benjamin Moore Advance and Sherwin-Williams Emerald Urethane Trim Enamel outperform wall paint for hardness and grease resistance. |
Thin coats, always | Two to three thin coats with 220-grit sanding between each produces a stronger, smoother finish than one thick coat. |
Cure time is not dry time | Allow 3–7 days before reattaching hardware; full cure can take up to 14 days depending on the product. |
Dispose responsibly | Drop off old paint and stripping chemicals at Ottawa’s Household Hazardous Waste depots — never pour them down the drain. |
Ottawacabinetpainting for guaranteed results | For a spray-applied factory finish with a 6-year warranty, Ottawacabinetpainting handles the full process from prep to reassembly. |
Why refinishing is often the smartest kitchen upgrade Ottawa homeowners can make
Here is an opinion worth considering: most Ottawa homeowners who replace their cabinets do so because they assume refinishing will look like a DIY paint job. That assumption is wrong — and it costs them tens of thousands of dollars unnecessarily.
The gap between a poor refinish and a great one is almost entirely prep and product choice, not skill level. A homeowner who degrease properly, follows the grit progression, uses a bonding primer, and applies Benjamin Moore Advance or Sherwin-Williams Emerald Urethane in thin coats will get a result that genuinely rivals new cabinetry. The process is methodical, not mysterious.
What we see consistently is that homeowners underestimate cure time and overestimate how much paint to apply per coat. Those two mistakes account for the majority of failed DIY refinishes. Fix those two habits and the rest follows naturally.
Refinishing also makes environmental sense. Keeping functional cabinet boxes out of landfill, avoiding the manufacturing footprint of new cabinetry, and using low-VOC waterborne enamels is a genuinely better outcome for the city. Ottawa homeowners who choose refinishing over replacement are making a decision that holds up financially, aesthetically, and environmentally.
The one honest caveat: refinishing is not a structural fix. If your boxes are rotted or your layout needs to change, no amount of good paint solves that. Be clear-eyed about what you are working with before you start.
Ready for a professional Ottawa cabinet finish? Get a free quote.
If you have read through this guide and decided the project is bigger than your current bandwidth, Ottawacabinetpainting offers a done-for-you alternative with a result you cannot get from a weekend DIY project. The spray-applied finish, controlled cure environment, and 6-year warranty mean you get a factory-quality outcome without the prep work, the rental equipment, or the two disrupted weekends.
To get an accurate quote quickly, have your kitchen’s door count, approximate square footage, and your preferred sheen ready when you reach out. Visit the cabinet painting service page to request a free quote, or browse the before and after gallery to see finished Ottawa projects before you decide.
Useful sources for Ottawa cabinet refinishing
Benjamin Moore: How to Paint Kitchen Cabinets — Step-by-step guide from Benjamin Moore Canada, including Advance product specs and application temperatures
This Old House: Tips for Refinishing Kitchen Cabinets — Primer selection, stain blocking, and professional technique overview
Cabinets Refinishing CA: How to Sand Kitchen Cabinets — Detailed grit progression guide and dust-control instructions
Ottawa Cabinet Painting: Satin vs. Semi-Gloss — Local guide comparing sheen options for Ottawa kitchens
Kitchen Makeovers CA: Best Paint Finish for Kitchen Cabinets — Canadian perspective on satin vs. semi-gloss trade-offs
Pavlo Construction Canada: Top 5 Durable Paint Brands — Overview of cabinet paint brands available in Canada
EPA Residential Renovation Guidelines — Lead-safe work practices relevant to pre-1990 Canadian homes
Blessing Pro Painters: How Long Painted Cabinets Take to Cure — Dry time vs. cure time explained with product-specific guidance
Ottawa Cabinet Painting: Kitchen Paint Finish Choices — Further reading on finish options and how sheen affects durability and cleanability
One Day Doors and Closets: Best Color to Paint Interior Doors — Useful reference when coordinating cabinet color with adjacent interior doors
For product technical data sheets and safety data sheets (SDS), visit the Benjamin Moore Canada and Sherwin-Williams Canada websites directly and search by product name. SDS documents list VOC levels, application temperatures, recoat windows, and disposal instructions specific to each formula.
Recommended
Comments