Refinishing Cabinets with Children at Home: A Safe Guide
- Axcell Painting

- 15 hours ago
- 9 min read
TL;DR:
Refinishing cabinets with children at home involves using low-toxicity materials, careful scheduling, and dust containment for safety. It typically costs $150 to $400 in materials and requires a detailed, multi-day process, with full curing taking 7 to 14 days. Proper lead paint testing and safe application methods are essential to avoid health risks in older homes, and professional help can ensure a stress-free, durable finish.
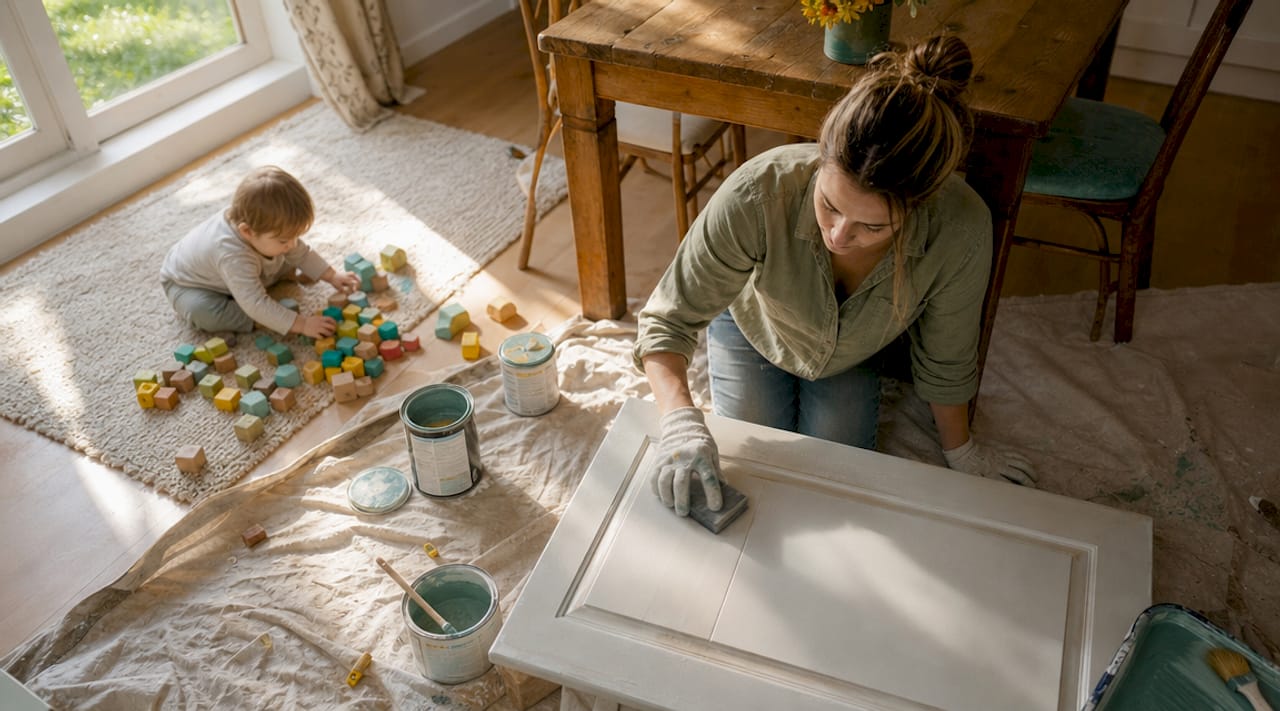
Refinishing cabinets with children at home is defined as updating your kitchen cabinet surfaces using low-toxicity materials, controlled scheduling, and dust containment methods that keep your family safe throughout the process. Unlike full cabinet replacement, which costs $5,000 or more, DIY cabinet refinishing runs between $150 and $400 in materials. That savings is real, but the process requires more than a brush and a weekend. When young children share the space, the stakes around fumes, dust, and lead paint exposure demand a deliberate plan. The right approach makes this a manageable, family-safe project rather than a chaotic one.
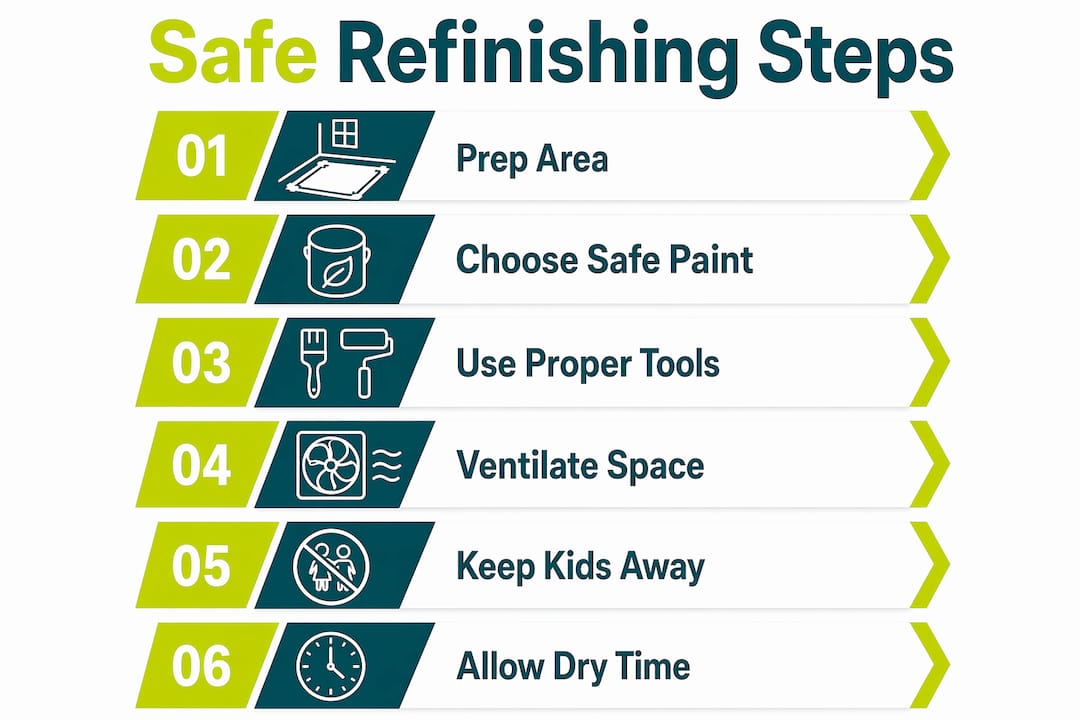
What tools and materials are safest for refinishing cabinets with children at home?
The safest materials for refinishing kitchen cabinets with kids in the home are water-based, low-VOC primers and paints. Benjamin Moore Advance is one of the most recommended products in this category. It is a waterborne alkyd enamel that self-levels beautifully with a brush or roller, produces minimal fumes, and cures to a hard, durable finish. That combination matters enormously when children are sleeping, eating, or playing nearby.
Primers, paints, and finishes worth using
For primer, choose a water-based bonding primer or a shellac-based option in a well-ventilated space. Zinsser BIN shellac-based primer bonds aggressively to slick surfaces but carries stronger fumes, so apply it only when children are out of the house for several hours. For topcoats, stick with low-VOC waterborne products from brands like Benjamin Moore, Sherwin-Williams Emerald Urethane, or General Finishes Milk Paint. These products dry faster, clean up with water, and release far fewer airborne chemicals than oil-based alternatives.
Application tools that reduce exposure
Brush and roller application is safer and more manageable around kids than spray painting. Spraying creates fine aerosol particles that travel far beyond the work area, requiring full-room containment and respirators. A quality synthetic bristle brush paired with a small foam roller gives you a smooth finish without the overspray risk. Use painter’s tape, drop cloths, and plastic sheeting to protect countertops and floors.
For prep, you need:
A TSP substitute degreaser (non-toxic alternatives like Krud Kutter work well on kitchen grease)
120-grit and 220-grit sanding blocks for scuff-sanding between coats
Painter’s tape and plastic sheeting for containment
Zip-lock bags and a marker for labeling hardware and screws
A HEPA vacuum for dust cleanup after sanding
Pro Tip: Self-leveling alkyd enamels like Benjamin Moore Advance give you the durability of oil-based paint with the low-fume profile of a waterborne product. Apply two coats with a foam roller, then tip off lightly with a brush for a near-factory finish.
How to plan and schedule your Ottawa cabinet project around your kids
A realistic safe cabinet refinishing timeline in Ottawa runs five to seven days of active work, with a full cure period of seven to fourteen days before normal use. Waiting at least 72 hours before reinstalling doors and hardware prevents damage to the fresh finish. Rushing this step is one of the most common mistakes parents make, and it leads to sticking, fingerprinting, and rework that extends the disruption far longer than the original plan.
Here is a practical day-by-day schedule built around a family household:
Day 1: Removal and labeling. Remove all cabinet doors and drawer fronts. Label each door with painter’s tape and a marker before it comes off the hinge. Bag all hardware separately. Do this step while kids are awake since no chemicals are involved.
Day 2: Degreasing and sanding. Clean all surfaces with a TSP substitute, then scuff-sand with 120-grit. Schedule this during naptime or after the kids are in bed. Vacuum all dust with a HEPA vacuum before children re-enter the kitchen.
Day 3: Priming. Apply primer to cabinet boxes first, then doors laid flat on sawhorses in the garage or a well-ventilated room. Keep children out of the primed area until the primer is fully dry to the touch, typically two to four hours for water-based products.
Day 4: First topcoat. Apply the first coat of your chosen low-VOC paint. Allow full overnight drying before children use the kitchen normally.
Day 5: Light sanding and second topcoat. Scuff-sand lightly with 220-grit, wipe clean, and apply the second coat. Again, schedule during a school day, outing, or naptime.
Days 6 and 7: Reinstall boxes, wait on doors. Reattach cabinet boxes but leave doors off for at least 72 hours. Hang doors only after that window has passed.
Days 8 through 21: Cure period. Full cure takes 7 to 14 days for most waterborne alkyds. During this window, wipe surfaces gently and avoid slamming doors.
Pro Tip: Paint upper cabinets before lower ones. Any drips or brush marks that fall from upper boxes land on unpainted lower surfaces, saving you from repainting finished work.
Ottawa’s climate adds one more variable. High humidity in summer slows drying times noticeably, and cold garage temperatures in spring or fall can prevent proper film formation. Keep your workspace between 60°F and 85°F and monitor humidity levels with a basic hygrometer.
How to handle lead paint risks when refinishing in older Ottawa homes
Lead-based paint is present in the majority of Ottawa homes built before 1978, and disturbing it without proper containment puts children at serious risk. Lead exposure has no safe level for children, and the EPA’s Renovation, Repair, and Painting (RRP) rule requires certified contractors to follow strict containment protocols when disturbing more than six square feet of painted interior surface in homes where children live. If your home predates 1978, treat this step as non-negotiable.
Before you sand a single cabinet, test for lead. Home test kits from 3M or LEAD Check are available at most hardware stores and give results in minutes. If the test is positive, your approach changes completely.
Safe practices when lead paint is a concern:
Avoid dry sanding entirely. Dry sanding generates fine lead dust that spreads through the entire home. Use wet sanding with HEPA containment instead, or apply a bonding primer directly over the existing surface without sanding.
Seal off the work area. Use heavy plastic sheeting taped to doorways and over vents. Keep children and pregnant adults out of the home during active work.
Use a HEPA vacuum exclusively. Standard vacuums exhaust fine particles back into the air. A HEPA-rated vacuum captures lead dust at the filter level.
Wipe-test after cleanup. Use a lead dust wipe test kit to verify the area is clear before children re-enter.
Dispose of materials properly. Bag all sanding debris, used plastic sheeting, and wipes in heavy-duty garbage bags and check your local Ottawa waste disposal guidelines for hazardous materials.
If lead paint disturbance is unavoidable and the affected area exceeds six square feet, hire a certified lead-safe renovator. The cost is far lower than the health consequences of improper exposure.
What mistakes do parents make when doing a DIY cabinet makeover with children?
The most damaging mistakes in a DIY cabinet makeover with children at home are the ones that create extra rounds of work, because each additional step means more fumes, more dust, and more disruption. Skipping degreasing is the single most common cause of paint failure in family kitchens. Kitchen cabinets accumulate grease and cooking residue that prevents paint from bonding properly. A coat of paint applied over a greasy surface peels within months.
Here are the mistakes worth avoiding before you start:
Painting doors while they are still on the hinges. Gravity causes drips on vertical surfaces, and you cannot reach all edges cleanly. Remove doors and paint them flat.
Not waiting for full cure. Reopening doors too soon causes the paint film to stick to the frame and peel. Dry to the touch is not the same as cured.
Overtightening hinges after reinstallation. Driving screws too hard cracks the paint film around the screw head. Tighten until snug, then stop.
Ignoring ventilation. Even low-VOC products release some fumes during application and drying. Open windows, run a box fan exhausting outward, and keep children in a different part of the home.
Rushing the sanding step. Scuff-sanding between coats removes surface imperfections and gives the next coat something to grip. Skipping it produces a finish that chips easily.
Pro Tip: Before removing any doors, photograph the entire cabinet layout with your phone. This takes two minutes and saves significant confusion during reinstallation, especially if you have a large kitchen with many similar-looking doors.
Key takeaways
Safe, durable cabinet refinishing with children at home requires low-VOC materials, strict lead paint protocols, and a curing period of at least seven to fourteen days before normal family use.
Point | Details |
Use low-VOC waterborne products | Benjamin Moore Advance and similar waterborne alkyds minimize fumes in occupied family homes. |
Schedule around children’s routines | Apply coats during naptimes or school hours and keep kids out until surfaces are dry to the touch. |
Test for lead before sanding | Homes built before 1978 require a lead test; positive results demand wet sanding and HEPA containment. |
Wait for full cure | Allow 7 to 14 days after the final coat before resuming normal cabinet use to prevent sticking and peeling. |
Photograph before removal | A quick photo of your cabinet layout prevents reinstallation confusion and saves time. |
What we have learned from doing this work in Ottawa kitchens
We have worked in Ottawa homes long enough to know that the parents who get the best results are not the ones with the most tools. They are the ones who plan honestly. A cabinet refinishing project in a home with a toddler and a newborn is a different job than the same project in an empty house. That is not a reason to avoid it. It is a reason to plan it differently.
The products matter more than most people expect. We have seen homeowners use bargain-bin latex paint on kitchen cabinets and wonder why the finish looks worn within a year. Waterborne alkyd enamels cost more per can, but they cure harder and hold up to the kind of daily contact that family kitchens produce. That durability is worth the extra $20 per can.
Ottawa’s humidity also catches people off guard. A coat that feels dry in July humidity may take twice as long in a damp spring. We always recommend checking the weather before scheduling your painting days and keeping a dehumidifier running in the workspace if conditions are marginal. This is not overthinking. It is the difference between a finish that lasts a decade and one that starts peeling in two years.
The other thing we tell parents consistently: do not let the project drag. A kitchen without cabinet doors for three weeks is genuinely disruptive to family life. Plan the full timeline before you remove the first door, gather every material in advance, and commit to the schedule. The professional refinishing process we follow at Ottawacabinetpainting is built around exactly this discipline, and it is why our results hold up for years.
— Ottawa
Let Ottawacabinetpainting handle the hard parts for you
If the timeline, lead paint testing, and product selection feel like a lot to manage alongside a busy family, Ottawacabinetpainting offers a professional alternative built specifically for Ottawa homeowners. Our interior cabinet refinishing service uses low-fume, family-safe finishes applied with professional spray equipment for a factory-smooth result. We handle containment, prep, and cleanup so your kitchen is back to normal faster and with zero guesswork. For parents who want the upgraded kitchen without the disruption, we offer free quotes with no pressure. See what cabinet painting in Ottawa costs for your specific kitchen and decide from there.
FAQ
How long should children stay out of the kitchen after cabinet painting?
Keep children out of the painted area until surfaces are dry to the touch, typically two to four hours for low-VOC waterborne products. For full safety, avoid normal cabinet use for at least seven to fourteen days while the finish cures completely.
Is brush and roller painting safe enough for a home with kids?
Yes. Brush and roller application is the preferred method for occupied homes because it eliminates the fine aerosol overspray that spray painting produces, reducing airborne chemical exposure significantly.
What should I do if my Ottawa home was built before 1978?
Test for lead paint before sanding any cabinet surface. If the test is positive, avoid dry sanding, use wet sanding with HEPA containment, and consider hiring a certified lead-safe renovator if the affected area exceeds six square feet.
How do I keep cabinet doors from sticking after painting?
Wait the full cure period of seven to fourteen days before closing doors regularly. Reinstalling doors while the paint is still soft causes the film to bond to the frame and peel when opened.
What is the most affordable way to refinish kitchen cabinets with kids at home?
DIY cabinet refinishing with water-based low-VOC products runs between $150 and $400 in materials, compared to full cabinet replacement starting at $5,000 or more. Choosing the right products upfront prevents costly rework and keeps the project within budget.
Recommended
Comments