How to Get Quality Kitchen Refinishing Near Me Results
- demoore5506
- Feb 1
- 7 min read
Managing a busy household in Ottawa often means your kitchen is the center of daily life, and worn cabinets can make even the brightest space feel outdated. Upgrading your cabinets with affordable refinishing is a smart way to rejuvenate your kitchen without the cost or hassle of major renovations. By starting with a thorough cabinet assessment, you set the foundation for a transformation that enhances both function and style in your home. Cabinet condition evaluation helps you avoid expensive mistakes and ensures results that fit your needs and budget.
Table of Contents
Quick Summary
Key Point | Explanation |
1. Assess Cabinet Condition First | Evaluate the structural integrity and surface condition of your cabinets to decide on refinishing or replacement. |
2. Prepare Your Space Carefully | Clear surfaces and protect your kitchen to prevent damage and ensure a smooth refinishing process. |
3. Choose High-Quality Materials | Invest in premium paints and finishes for durability and an attractive final look for your cabinets. |
4. Apply Professional Techniques | Use lead-safe practices and professional tools for the best finish, ensuring attention to detail. |
5. Conduct a Thorough Final Inspection | Check for color consistency and surface smoothness to ensure a high-quality result that meets your standards. |
Step 1: Assess Existing Kitchen Cabinets and Needs
Successfully transforming your kitchen starts with a thorough assessment of your current cabinets. This crucial first step helps determine whether refinishing is the right solution for your Ottawa home’s kitchen upgrade.
Begin by conducting a comprehensive visual and functional cabinet condition evaluation. Look closely at your cabinets’ structural integrity, surface condition, and overall functionality. Critical aspects to examine include:
Wood or material type
Current paint or finish quality
Signs of wear like chips, scratches, or water damage
Hinge and hardware functionality
Cabinet frame and door alignment
Check for structural soundness before considering refinishing. Cabinets with significant structural damage might require replacement instead of painting. Minor imperfections like surface scratches or outdated finishes are perfect candidates for professional refinishing.
Here’s a summary of common cabinet issues and recommended solutions for kitchen upgrades:
Issue Identified | Severity | Recommended Action |
Surface scratches | Minor cosmetic | Professional refinishing advised |
Water damage | Moderate to severe | Assess for possible replacement |
Misaligned doors | Functional | Hardware adjustment needed |
Faded finish | Cosmetic | Upgrade paint or stain |
Structural weakness | Major | Full cabinet replacement |
A meticulous initial assessment prevents costly mistakes and ensures your kitchen transformation meets your expectations.
Consider your kitchen’s overall aesthetic and how new cabinet refinishing will impact the space. Think about color schemes, potential hardware updates, and how the refinished cabinets will complement your existing kitchen design.
Pro tip: Take clear, well-lit photographs of your cabinets from multiple angles to help professional refinishers accurately assess your project’s scope and provide precise recommendations.
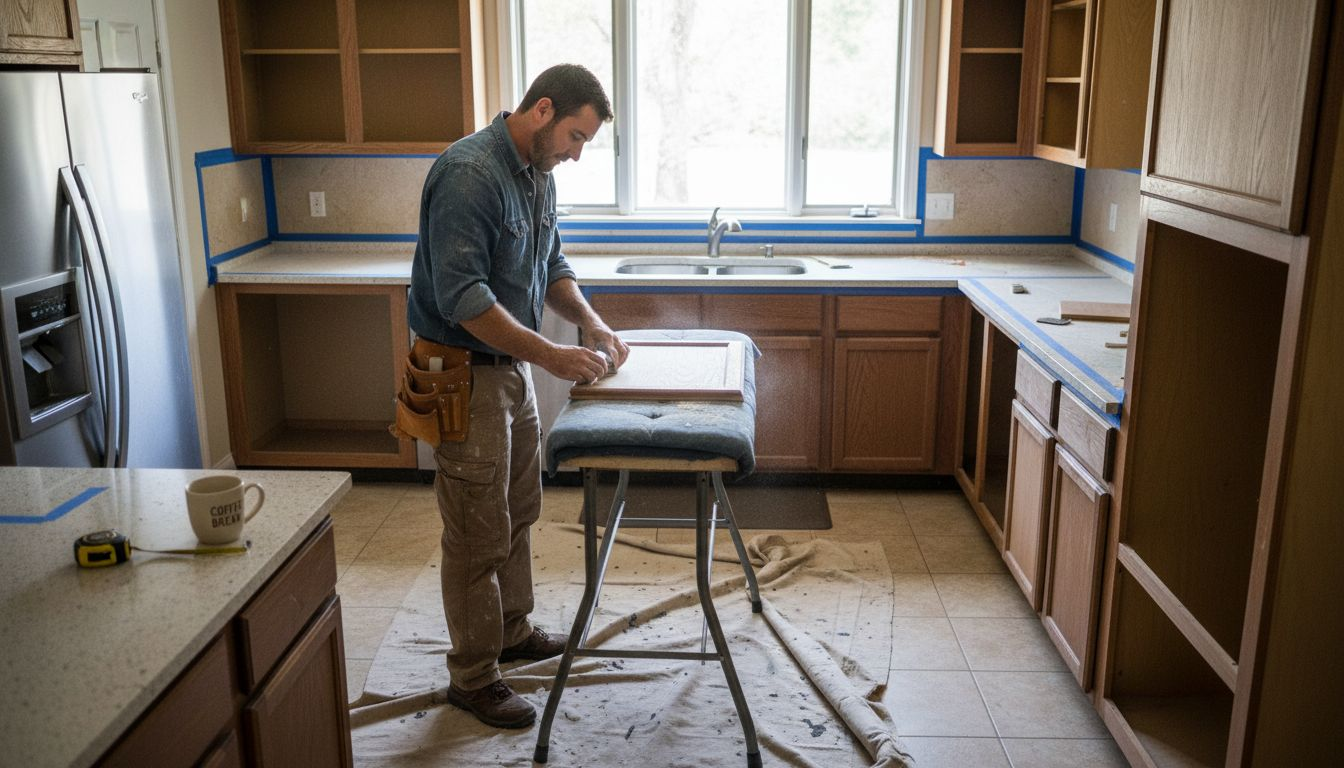
Step 2: Prepare Space and Protect Surfaces
Preparing your kitchen for cabinet refinishing is a critical step that ensures a smooth, professional result and protects your home from potential damage. This phase involves creating a controlled work environment that safeguards your kitchen and surrounding areas.
Begin by systematically clearing and protecting surfaces. Remove all items from cabinet interiors and countertops, creating a clean workspace for the refinishing team. Carefully wrap and protect:
Countertops with heavy-duty plastic sheeting
Appliances with drop cloths or protective coverings
Flooring with rosin paper or canvas drop cloths
Adjacent walls with painter’s tape and plastic sheeting
Remaining kitchen items in sealed boxes or another room
Establish a dedicated work zone that minimizes dust and paint overspray. This means sealing off the kitchen area from the rest of your home using plastic barriers and ensuring proper ventilation. Professional painters typically create a contained environment that prevents paint particles from spreading to other living spaces.
Thorough preparation prevents costly mistakes and ensures a clean, efficient refinishing process.
Remove cabinet hardware like knobs and handles before the refinishing begins. Label each piece and store them safely to ensure easy reinstallation after the project is complete. If you plan to upgrade hardware, this is an ideal time to select new pieces that will complement your refreshed cabinets.
Pro tip: Take smartphone photos of your cabinet hardware arrangement before removal to serve as a precise reference for reinstallation and maintain your original kitchen layout.
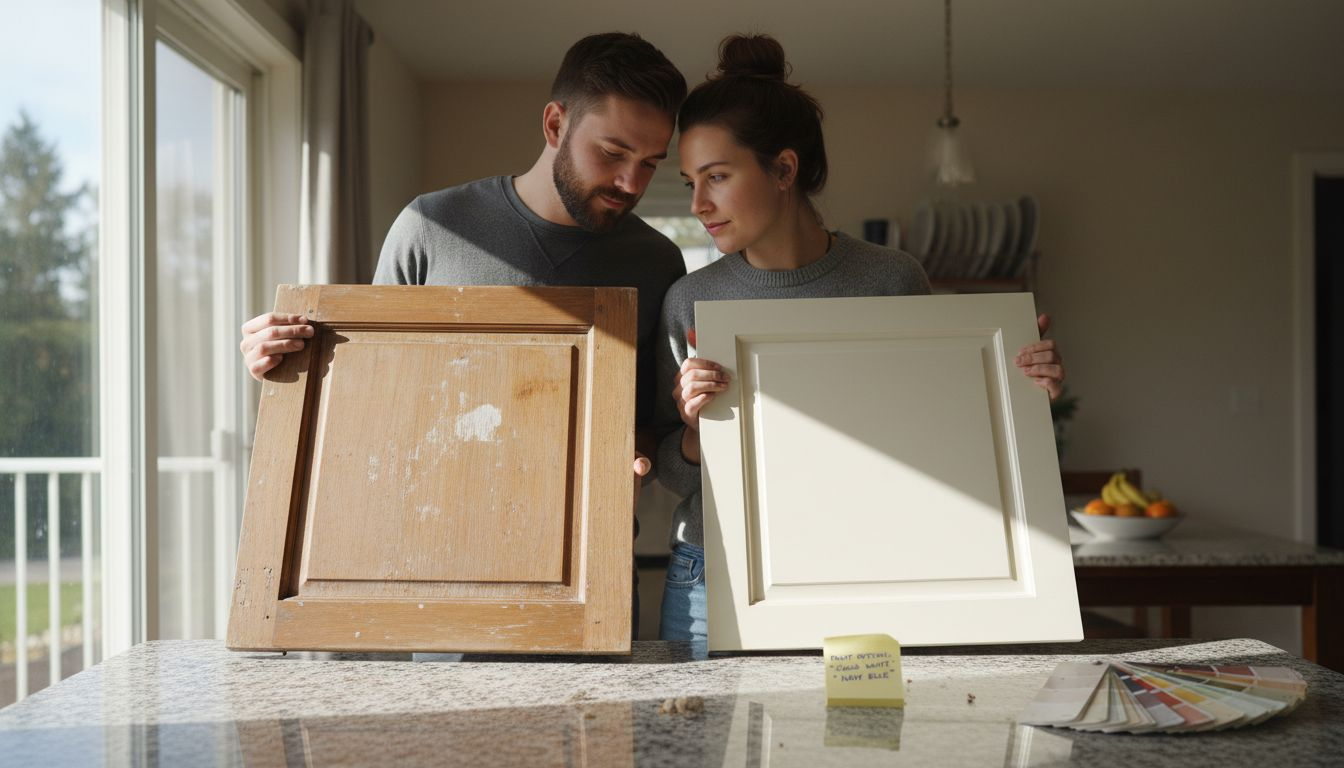
Step 3: Select Premium Paints and Materials
Choosing the right paints and materials is crucial for achieving a stunning, long-lasting kitchen cabinet refinishing result. Your selection will directly impact the durability, appearance, and overall performance of your newly transformed cabinets.
Understand the importance of high-quality paint composition that provides superior coverage and protection. Professional-grade materials make a significant difference in your kitchen’s final look and longevity. Consider these key factors when selecting paints:
Primer compatibility with existing cabinet surfaces
Durability rating for high-traffic kitchen environments
Moisture and stain resistance
Color retention and fade resistance
Recommended application methods
Professional refinishers typically recommend oil-based or hybrid paints that offer exceptional adhesion and a smooth finish. These specialized formulations provide better coverage and create a more resilient surface compared to standard wall paints.
Premium materials are an investment in your home’s beauty and functionality.
Pay close attention to the finish type. Semi-gloss and satin finishes work best for kitchen cabinets, offering easy cleaning and moderate light reflection. Consult with your refinishing professional to match the paint type precisely to your cabinet material and desired aesthetic.
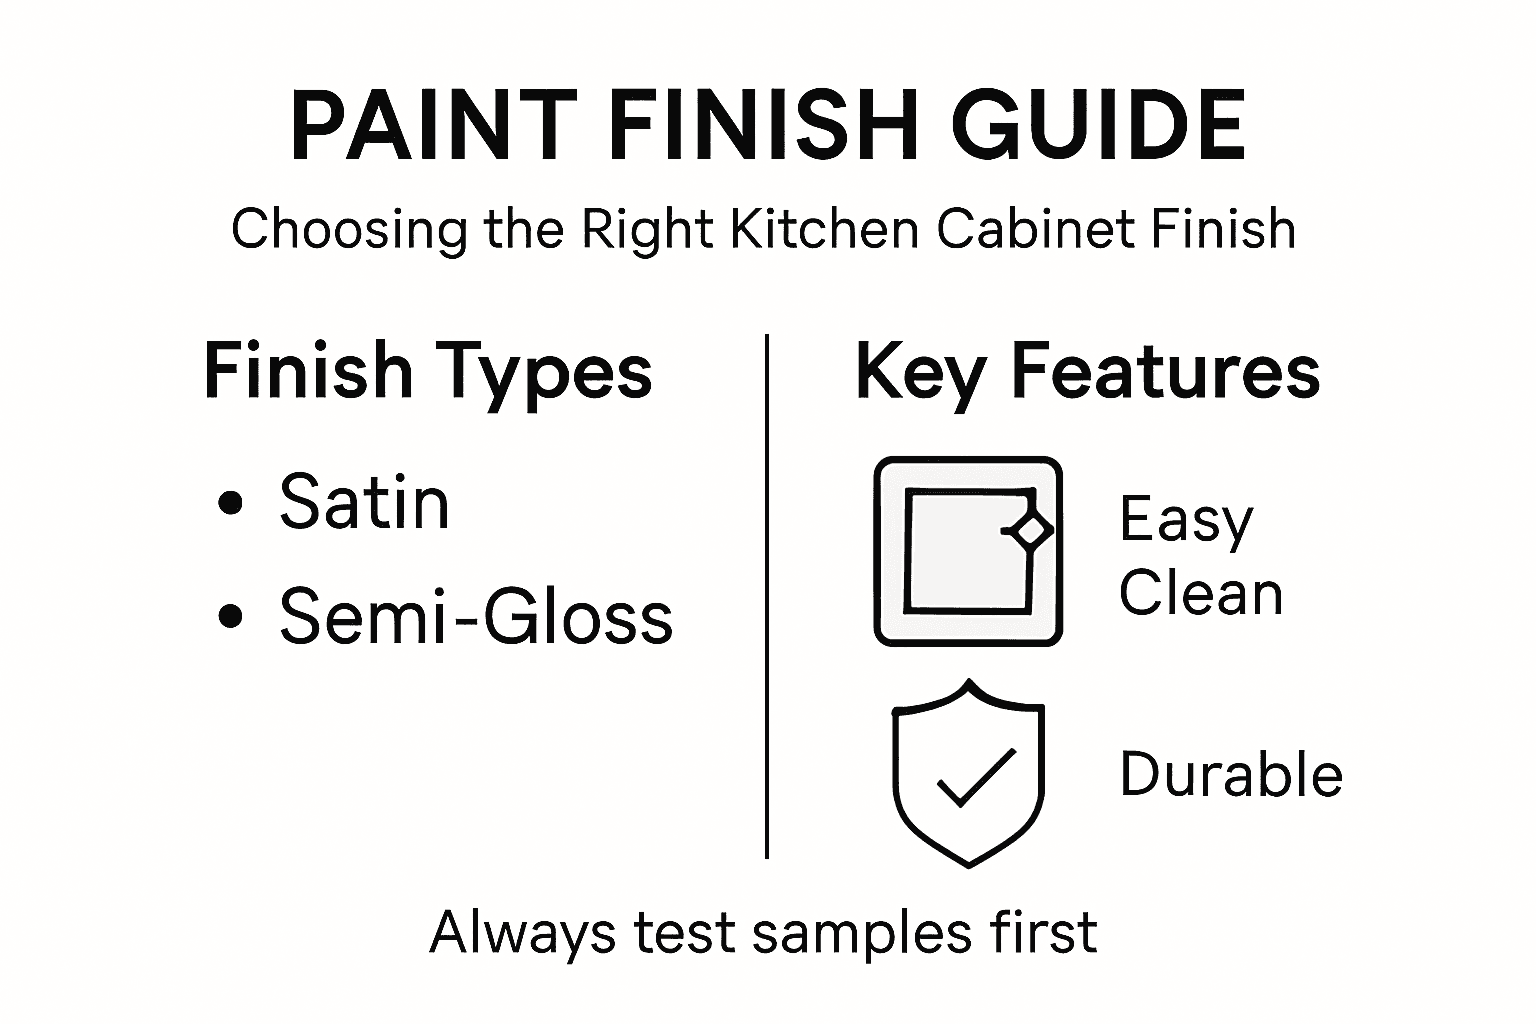
Here’s a comparison of popular paint finishes for kitchen cabinets:
Finish Type | Appearance | Cleaning Ease | Suitability for Kitchens |
Semi-gloss | Shiny, modern | Wipes clean easily | Highly recommended |
Satin | Soft, muted sheen | Moderately easy | Especially good for warmth |
Matte | No sheen | Harder to clean | Not ideal for cabinets |
Pro tip: Always request material samples and test color swatches in your kitchen’s lighting to ensure the final result meets your expectations.
Step 4: Apply Professional Refinishing Techniques
Applying professional refinishing techniques transforms your kitchen cabinets from worn to spectacular, ensuring a flawless finish that looks factory-fresh. This critical phase requires precision, patience, and meticulous attention to every detail.
Begin by implementing lead-safe renovation practices that protect your home and health during the refinishing process. Professional painters follow a systematic approach that includes:
Thorough surface cleaning and degreasing
Comprehensive sanding to create smooth surface texture
Precise primer application for optimal paint adhesion
Multiple thin, even paint coats
Strategic drying time between coats
Spray application techniques typically produce a smoother, more uniform finish compared to traditional brush or roller methods. Professionals use specialized equipment that creates an ultra-smooth, factory-like surface with minimal visible brush strokes or imperfections.
Professional refinishing is about creating a seamless, durable finish that transforms your kitchen’s entire aesthetic.
Each cabinet surface requires careful preparation and individualized treatment. Pay close attention to corners, edges, and detailed areas that demand extra care. The goal is a consistent, high-quality finish that looks professionally executed from every angle.
Pro tip: Invest in quality painter’s tape and use it meticulously to achieve crisp, clean lines and prevent unwanted paint bleeding.
Step 5: Inspect Work and Ensure Lasting Finish
The final inspection is your critical opportunity to ensure your kitchen cabinet refinishing project meets professional standards and your personal expectations. A thorough evaluation guarantees your investment delivers the showroom-quality transformation you desire.
Apply comprehensive kitchen surface inspection techniques to assess every aspect of the refinishing work. Your detailed examination should cover:
Color consistency across all cabinet surfaces
Smooth paint application without drips or brush marks
Proper coverage of edges and detailed areas
Uniform sheen and finish
No visible imperfections or uneven spots
Professional refinishers typically recommend a systematic visual and tactile inspection under different lighting conditions. Natural daylight and artificial lighting will help you detect subtle variations or potential touch-up areas that might be missed during initial application.
A meticulous final inspection separates professional-grade refinishing from amateur attempts.
Surface durability is paramount for kitchen cabinets that endure constant use. Gently test the finish by lightly running your hand across surfaces, checking for smoothness and adhesion. Any rough patches or easily disturbed paint indicate potential issues that require immediate professional attention.
Pro tip: Create a well-lit inspection checklist with natural and artificial lighting to capture every detail and ensure your cabinets meet your highest standards.
Elevate Your Kitchen Cabinets with Trusted Local Refinishing Experts
If you are facing challenges like worn surfaces, faded finishes, or want a cost-effective way to refresh your kitchen without the mess of a full remodel you are not alone. The article highlights how thorough assessment, premium paint selection, and professional refinishing techniques are essential for achieving lasting results. At Ottawa Cabinet Painting we understand the importance of a smooth durable finish that transforms your existing cabinets while preserving your kitchen layout and minimizing disruption to your home.
Discover how our meticulous 10-day process combines expert preparation and high-quality materials to deliver a silky smooth finish backed by a 6-year warranty. We specialize in handling the details from surface prep to final inspection so you can enjoy a warm functional kitchen that feels brand new without replacing your cabinets. Ready to see how professional refinishing can elevate your space and save you money? Visit our website at Ottawa Cabinet Painting and learn more about our premium cabinet painting solutions. Take the first step to your dream kitchen today by requesting a personalized quote and experience hassle-free quality like no other.
Frequently Asked Questions
How can I assess my kitchen cabinets for refinishing?
Start by evaluating the structural integrity, surface condition, and functionality of your cabinets. Look for signs of wear, such as chips or water damage, which can help determine if refinishing is a viable option.
What materials should I choose for high-quality kitchen cabinet refinishing?
Select premium paints and primers designed for kitchen use, focusing on durability, moisture resistance, and color retention. Opt for oil-based or hybrid paints that ensure long-lasting results and superior coverage.
What steps should I take to prepare my kitchen for cabinet refinishing?
Begin by removing all items from the cabinets and countertops, then protect your surfaces with plastic sheeting and drop cloths. Creating a clean workspace minimizes dust and damage during the refinishing process.
What professional techniques ensure a smooth finish for my cabinets?
Use spray application techniques for the highest quality result, as they produce a smooth, uniform finish with fewer imperfections. Ensure thorough sanding and priming are done before applying multiple thin layers of paint for optimal adhesion.
How do I inspect the quality of the cabinet refinishing work?
Conduct a detailed inspection of your cabinets, checking for color consistency, smoothness, and overall finish under different lighting conditions. Run your hand over the surfaces to feel for any rough patches or imperfections that may need touch-ups.
Recommended

Comments