How to Repaint Cabinets: Ottawa DIY Guide

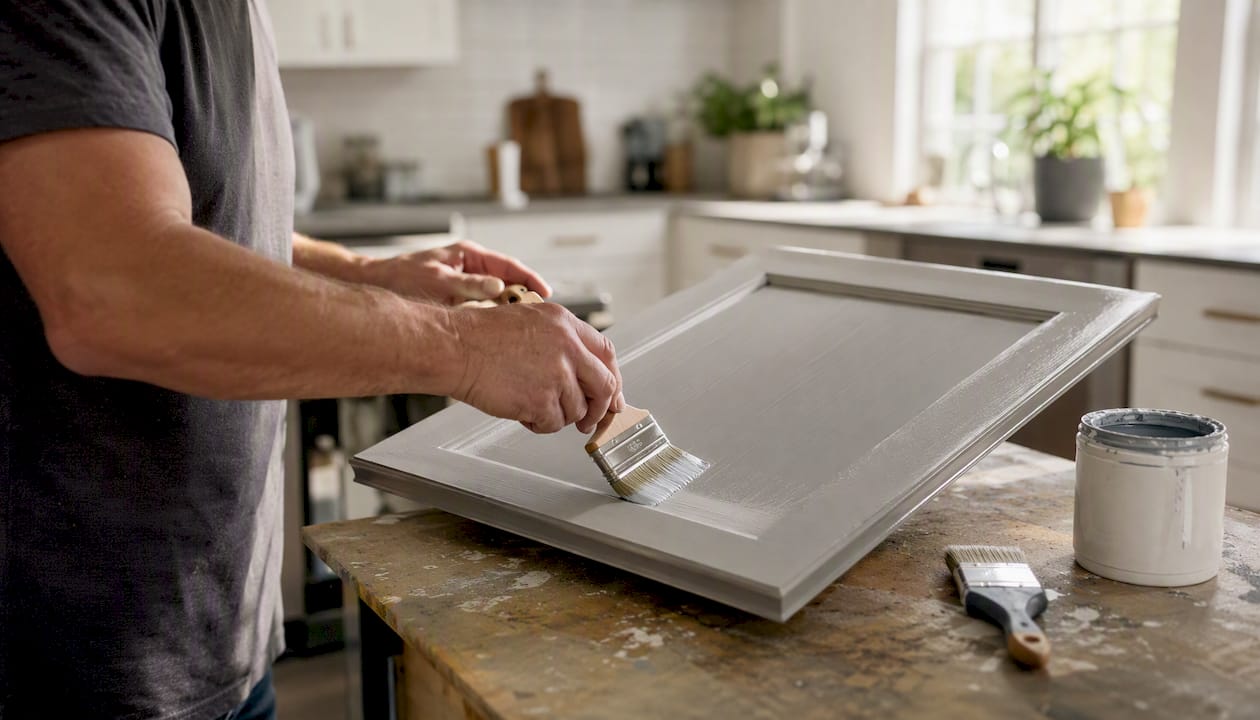
Yes, you can repaint your kitchen cabinets yourself and get a durable, near-factory finish. The key is following a disciplined prep → prime → paint → cure workflow, and not skipping steps because they feel tedious. Here is the high-level roadmap: gather your supplies, remove and label every door and drawer front, degrease all surfaces thoroughly, fill any dings, scuff-sand or degloss, apply a quality primer like Benjamin Moore Fresh Start®, then paint with a cabinet-grade product like Benjamin Moore Advance®, sand lightly between coats, and allow full cure before reinstalling. Doors typically come off for 3–7 days on a focused DIY project, but full cure can take 14–21 days depending on the product and Ottawa’s seasonal humidity. Materials-only cost for a typical Ottawa kitchen runs roughly $300–$700 CAD, making it one of the most cost-effective kitchen upgrades available. If the boxes are structurally sound, repainting is almost always worth doing before considering full replacement.
Key Takeaways
A thorough prep workflow, the right primer for your substrate, and patience during the cure period are what determine whether a cabinet repaint lasts two years or ten.
Point | Details |
Prep is non-negotiable | Degrease with TSP substitute and scuff-sand before priming; skipping either step causes adhesion failure. |
Match primer to substrate | Use shellac-based primer for tannin bleed or oil-based surfaces; bonding primer for laminate and thermofoil. |
Thin coats, not thick | Two thin coats of Benjamin Moore Advance® outperform one thick coat for leveling, adhesion, and durability. |
Cure before reinstalling | Doors may feel dry in 24–72 hours, but full abrasion resistance takes 14–21 days for waterborne alkyds. |
Ottawacabinetpainting | Offers professional spray application, meticulous prep, and a 6-year warranty for Ottawa homeowners who want a factory-grade result. |
Table of Contents
How to remove, label, and store cabinet doors in Ottawa kitchens
How to apply cabinet paint in Ottawa for a smooth, durable finish
Drying vs. curing: when can you reinstall Ottawa cabinet doors?
Which colors and sheens work best for Ottawa kitchen cabinets?
What does a professional Ottawa cabinet painter do differently?
Ottawacabinetpainting: professional cabinet painting in Ottawa without the renovation chaos
What tools and materials do you need to repaint cabinets?
Getting the right kit together before you start saves a trip to the hardware store mid-project. Here is what you need:
Tools:
Cordless drill or screwdriver (for removing hinges and hardware)
Angled synthetic-bristle brush (2–2.5 inches for rails, stiles, and edges)
4-inch foam or microfiber roller with a smooth nap (for flat door faces)
Sanding block and a random-orbit sander for larger flat surfaces
Tack cloths (at least a dozen)
Drop cloths and plastic sheeting
Painter’s tape (3M ScotchBlue or equivalent)
HVLP spray gun if you choose the spray method (rental or purchase)
Respirator rated for paint fumes (N95 minimum; P100 half-mask for spraying)
Safety glasses
Consumables:
Sandpaper: 100-grit and 150-grit for initial scuffing, 220-grit for between coats, 320-grit for ultra-smooth finishing
TSP substitute or a commercial degreaser (Krud Kutter works well in Canadian kitchens)
Wood filler or spackling compound for dings and gaps
Shellac-based or bonding primer (see the priming section below)
Cabinet-grade paint (Benjamin Moore Advance® or similar waterborne alkyd)
Masking paper or plastic for protecting countertops and appliances
Zip-lock bags and a marker for labeling hardware
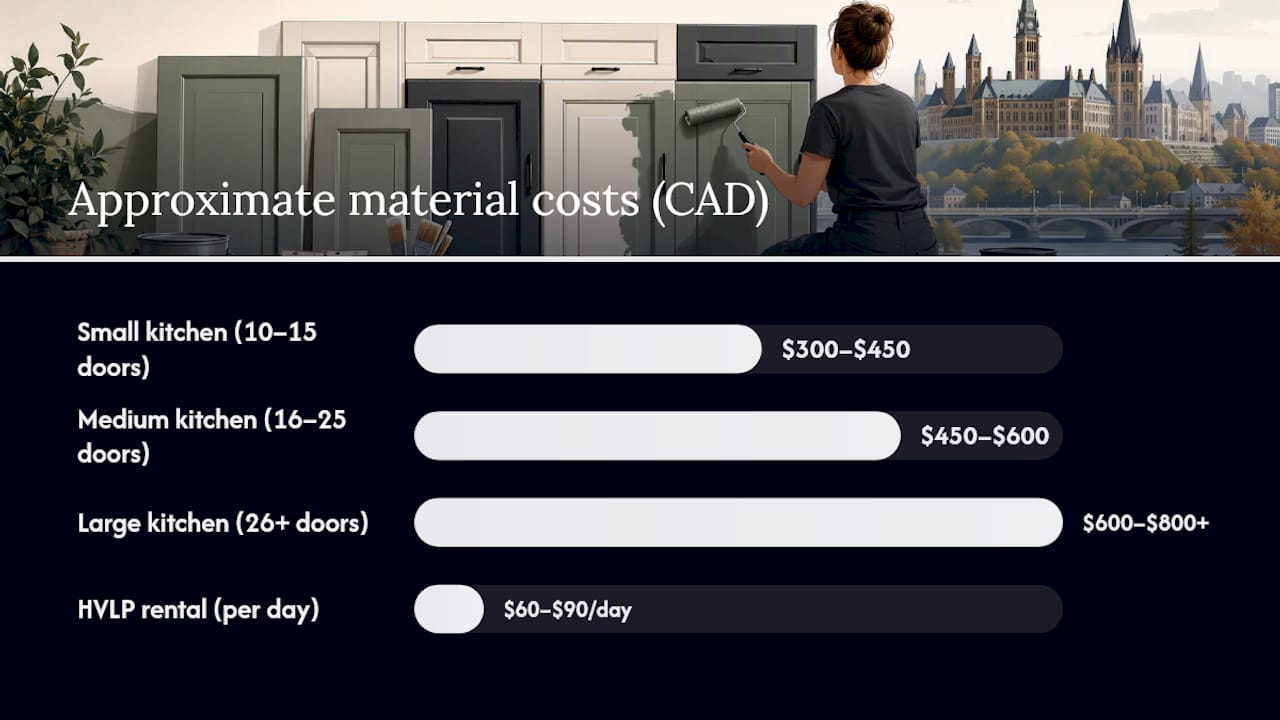
Approximate DIY cost ranges (materials only, CAD):
Small kitchen (10–15 doors): $300–$450
Medium kitchen (16–25 doors): $450–$600
Large kitchen (26+ doors): $600–$800+
Renting an HVLP sprayer from a Canadian Tire or Home Depot tool-rental counter typically costs $60–$90 per day, which makes sense for a single project. If you plan to brush and roll, invest in quality tools instead. A $25 Purdy or Wooster synthetic brush and a quality foam roller will outlast cheap alternatives and leave far fewer marks. You can find a solid overview of must-have painting tools that covers renting vs. buying in more detail.
Pro Tip: Buy one extra quart of primer and paint beyond your estimate. Running out mid-coat and buying a new batch risks a slight color or sheen mismatch, especially with tinted products.
How to remove, label, and store cabinet doors in Ottawa kitchens
Skipping a labeling system is one of the most common DIY mistakes. Doors that look identical often have slight size differences, and reinstalling them in the wrong spot causes alignment headaches.
Clear the countertops and lay a drop cloth on the floor below each cabinet run.
Use a drill to remove hinges from the cabinet box first, then lift the door free. Keep the hinges attached to the door itself so they stay paired.
As you remove each door, immediately write its position on a piece of painter’s tape stuck to the inside face: “Upper Left 1,” “Lower Right 3,” and so on. Photograph the full kitchen before removing anything.
Remove drawer fronts by unscrewing from the inside of the drawer box. Label them the same way.
Drop all hardware (knobs, pulls, screws) into labeled zip-lock bags. One bag per door or drawer front.
Store doors flat on a pair of 2x4s raised off the floor, with a soft pad (an old towel works) between the wood and the lumber to prevent scratching. Never lean doors against a wall for extended periods; they can warp.
In small Ottawa homes where floor space is tight, a simple leaning rack made from two 2x4s and a few dowels keeps doors organized and off the floor without taking up much room.
Take a second set of photos once everything is off. You will thank yourself during reinstallation.
Why degreasing and repair matter before you paint cupboards
Paint does not stick to grease. That sentence sounds obvious, but it is the single most common reason a cabinet repaint fails within a year. Kitchen cabinets accumulate cooking oils, cleaning product residue, and silicone from spray polishes. None of it is visible to the naked eye, and all of it will cause adhesion failure.
Cleaning steps:
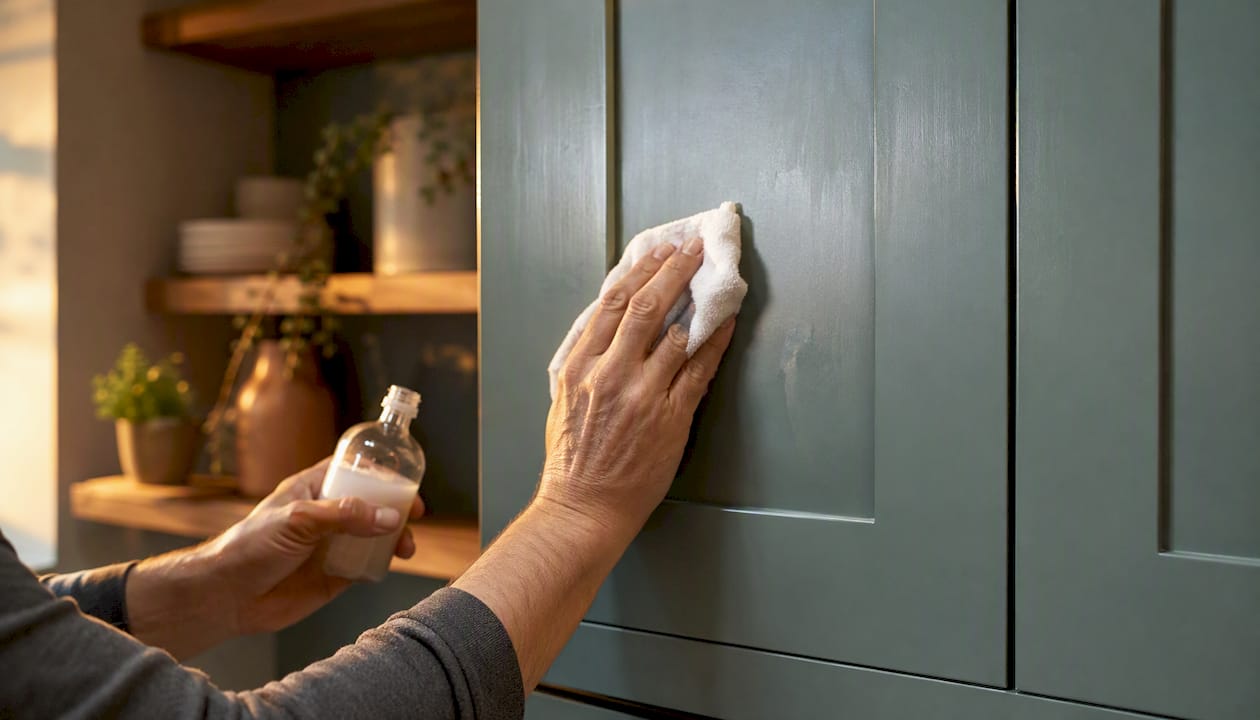
Mix TSP substitute according to package directions (typically 30 mL per 4 liters of warm water) and wipe every surface, front and back, with a sponge.
Follow with a clean water rinse and allow surfaces to dry completely, at least 2–4 hours.
For stubborn grease near the stove, apply a commercial degreaser like Krud Kutter full-strength, let it dwell for 2–3 minutes, then wipe clean.
Silicone residue from furniture polish requires a silicone remover or a wipe-down with mineral spirits before any water-based cleaner.
Repairs to make before priming:
Fill dings, nail holes, and small gouges with a lightweight wood filler. Let it dry fully, then sand flush with 150-grit.
Tighten any loose hinges by filling stripped screw holes with a wooden toothpick and a drop of wood glue, let cure overnight, then re-drive the screw.
Re-glue any delaminating veneer edges with wood glue and a clamp. Do not paint over lifted veneer; it will bubble.
Skipping the degreasing step is a recipe for disaster. Even surfaces that look clean carry invisible grease films that prevent primer and paint from bonding properly. A thorough TSP-substitute wash is non-negotiable, not optional.
The Home Depot how-to guide reinforces this sequence: clean, repair, then prime. Getting the order right is what separates a finish that lasts from one that peels by spring.
Do you really need to sand before repainting cabinets?
The short answer: usually yes, but not always heavily. The goal of sanding is not to strip the old finish. It is to create a mechanical profile the primer can grip.
Recommended grit progression:
100–150-grit for the initial scuff on previously painted or varnished surfaces
220-grit between primer coats and between paint coats
320-grit or finer for an ultra-smooth final surface before the last coat
Sand with the grain on wood and flat surfaces. On profiled doors with routed edges, a sanding sponge conforms better than a rigid block. Always wipe with a tack cloth after sanding before applying any product.
When a liquid deglosser works instead: Factory lacquers, thermofoil, and lightly glossy finishes sometimes respond well to a liquid deglosser (Wilbond or a similar product available at Canadian Tire). Apply it with a cloth, let it dull the sheen, and follow immediately with a bonding primer. Bless’er House documents that this approach can work, but cautions that you must test adhesion on a small area first and that degreasing is still required regardless.
Can you repaint without sanding at all? On a previously painted surface in good condition, a deglosser plus bonding primer can sometimes replace sanding. On bare wood, varnish, or oil-based paint, skipping sanding almost always leads to adhesion failure. When in doubt, scuff-sand.
Pro Tip: On veneer-faced doors, sand lightly and stop early. Veneer is thin, often less than 1 mm, and aggressive sanding at edges can cut through to the substrate underneath. Use 150-grit and a light touch near any routed profiles.
For a broader look at prepping surfaces before painting, the principles that apply to walls and trim carry over directly to cabinet work.
Which primer should you use for Ottawa cabinet repaints?
Primer choice depends on what you are painting over. Getting this wrong is the second most common cause of adhesion failure, right after skipping degreasing.
Primer selection by substrate:
Raw or previously painted wood: Benjamin Moore Fresh Start® High-Hiding All-Purpose Primer is a reliable choice. It blocks minor stains, levels well, and sands easily between coats.
Surfaces with tannin bleed (oak, cherry, knotty pine): Use a shellac-based primer like Zinsser BIN. Shellac seals tannins that would bleed through water-based products and cause yellowing.
Laminate or thermofoil: A specialty bonding primer (Zinsser Bulls Eye 1-2-3 or similar) is required. These surfaces have almost no mechanical tooth, so a standard primer will not hold.
Previously oil-based painted surfaces: Shellac or a bonding primer again. Water-based primer over oil-based paint without proper prep is a common adhesion failure point.
Benjamin Moore recommends Fresh Start® for many cabinet scenarios, noting it pairs well with Advance® paint and provides a stable base for a durable topcoat. Apply primer at a temperature between 50°F and 90°F (10°C–32°C). In Ottawa, that means avoiding unheated garages in winter if you are painting doors off-site.
Application tips:
Apply primer with a brush on edges and profiles, then roll flat faces with a 4-inch foam roller.
One coat of primer is usually sufficient on previously painted wood; two coats on bare wood or problem substrates.
Allow primer to dry fully (typically 1–2 hours for water-based, longer for shellac) before light-sanding with 220-grit.
Wipe with a tack cloth before painting.
Most DIYers need one quart of primer for a small kitchen and one gallon for a medium to large kitchen.
How to apply cabinet paint in Ottawa for a smooth, durable finish
Paint choice matters as much as technique. Standard wall paint is too soft for cabinet surfaces that get daily contact, cleaning, and moisture. Benjamin Moore Advance® is a waterborne alkyd that levels exceptionally well, dries to a hard film, and is widely available at Benjamin Moore dealers across Ottawa. Waterborne alkyds generally outperform straight acrylics for cabinetry because they self-level better and cure harder.
Recommended sheen: Satin or semi-gloss for most kitchen cabinets. Both are wipeable and durable. High-gloss is an option for a bold, modern look but shows surface imperfections more readily.
Brush-and-roll method (step by step):
Start with the cabinet boxes (the frames still on the wall). Cut in all edges and profiles with an angled brush.
Roll flat surfaces immediately after brushing, using a 4-inch foam roller. The roller knocks down brush marks while the paint is still wet.
Work in sections: one upper cabinet at a time, then lower cabinets.
For doors, lay them flat on a raised surface. Brush profiles and edges first, then roll the flat center panel.
Apply thin coats. Two thin coats always beat one thick coat for adhesion, leveling, and durability, as Architectural Digest’s step-by-step guide confirms.
Allow each coat to dry per the manufacturer’s recommendation before applying the next.
Spray method: An HVLP sprayer produces the smoothest possible finish and is worth renting for a medium or large kitchen. Mask everything aggressively: countertops, appliances, floors, and any adjacent walls. Spray in thin, overlapping passes, keeping the gun 8–10 inches from the surface. Follow EPA guidance on ventilation and respirator use when spraying indoors; open windows, run a fan exhausting air outward, and wear a P100 half-mask respirator.
Pro Tip: Maintain a wet edge at all times. If you stop mid-panel and let the edge dry before continuing, you will see a lap mark in the final finish. Work quickly and systematically.
How to sand between coats and fix imperfections
Light sanding between coats is what separates a good finish from a great one. After the first coat of paint dries fully, you will likely see minor dust nibs, small brush marks, or slight texture from the roller. These are normal.
Between-coat sanding:
Use 220-grit for standard smoothing between coats. Sand lightly with a sanding block, just enough to knock down texture without cutting through the paint.
Use 320-grit or finer before the final coat if you want an ultra-smooth, near-factory surface.
Always wipe with a tack cloth after sanding. Any dust left on the surface will show in the next coat.
Fixing common problems:
Runs or drips: Let the run dry completely. Sand it flat with 220-grit, feathering the edges. Wipe clean, spot-prime if you sanded through to bare substrate, then recoat.
Fisheyes (small craters in the paint): These are caused by silicone or oil contamination. Sand the area, clean with mineral spirits, let dry, and recoat. If fisheyes recur, the surface was not degreased thoroughly enough.
Visible brush marks: Usually caused by paint drying too fast or applying too thick a coat. Sand smooth with 220-grit and apply a thinner coat, or switch to rolling the flat surfaces.
Uneven spray coverage: Add another thin pass rather than trying to build up a thick corrective coat. Thick corrective coats sag.
Drying vs. curing: when can you reinstall Ottawa cabinet doors?
Surface dry and full cure are not the same thing, and confusing them is how you end up with doors that stick, scratch, or peel within weeks of reinstallation.
Surface dry means the paint is no longer tacky to the touch. That typically happens within 1–4 hours for waterborne products. Full cure means the paint film has reached its maximum hardness and abrasion resistance. That takes considerably longer.
Stage | Waterborne Alkyd (e.g., Advance®) | Acrylic Latex |
Touch dry | 1–2 hours | 1–2 hours |
Recoat window | 4–6 hours | 2–4 hours |
Handle / reinstall doors | 24–72 hours | 24–48 hours |
Light use (open/close) | 3–5 days | 2–3 days |
Full cure (abrasion resistant) | 14–21 days | 7–14 days |
Per Benjamin Moore’s guidance, doors may be safe to handle after 24–72 hours depending on the product, but full hardness that resists abrasion often takes 7–21 days. Plan reinstallation at the right moment to prevent premature marks.
Ottawa seasonality note: Ottawa winters bring low indoor humidity, which can slow water evaporation and extend dry times. Ottawa summers bring high humidity, which slows cure even further. Aim to paint in a space held between 65°F and 75°F (18°C–24°C) with moderate humidity. A small dehumidifier in the workspace during humid Ottawa summers makes a real difference.
Which colors and sheens work best for Ottawa kitchen cabinets?
Color and sheen choices affect both how the kitchen looks and how long the finish holds up to daily use.
Sheen recommendations:
Satin: The most popular choice for Ottawa kitchens. Durable, easy to wipe clean, and forgiving of minor surface imperfections. Works on both traditional and modern styles.
Semi-gloss: Slightly more reflective and even easier to clean. A strong choice for high-traffic kitchens or homes with young children.
High-gloss: Striking on flat-panel modern doors but unforgiving. Every brush mark, ding, and surface flaw reads clearly under Ottawa’s bright kitchen lighting.
Color guidance:
Timeless neutrals: White (Benjamin Moore Chantilly Lace OC-17 or Simply White OC-17), warm greige, and soft navy are consistently popular in Ottawa kitchens and hold their resale value well.
Two-tone kitchens: Painting upper cabinets a lighter color and lower cabinets a darker shade (charcoal, forest green, navy) adds depth without overwhelming a smaller kitchen.
Small kitchens: Lighter colors reflect more light and make the space feel larger. If your Ottawa kitchen gets limited natural light, a warm white or soft cream will serve you better than a deep color.
Hardware and material pairing:
Brushed brass or matte black hardware pairs well with navy, forest green, and warm white cabinets.
Polished nickel or chrome suits cooler whites and grays.
When pairing with a subway tile backsplash, choose a cabinet color that picks up a tone already present in the grout or tile rather than competing with it.
Quartz countertops with warm undertones (cream, beige) pair best with warm cabinet colors; cool-toned quartz suits gray or white cabinets. For additional color pairing ideas that translate well from doors to cabinetry, this guide to interior door colors offers useful reference points.
How to diagnose and fix peeling, runs, and sticky doors
Problems after painting almost always trace back to prep. Here is a quick diagnostic checklist.
Peeling or adhesion failure:
Cause: Insufficient degreasing, wrong primer for the substrate, or painting over a glossy surface without scuffing.
Fix: Strip the affected area back to a stable layer, degrease again, apply the correct bonding or shellac primer, and repaint. Spot repairs are possible if the failure is localized.
Sticky doors (doors that stick to the frame after closing):
Cause: Paint not fully cured before reinstallation, or doors closing against a freshly painted frame.
Fix: Wait for full cure (14–21 days for waterborne alkyds). Apply a thin strip of self-adhesive felt or rubber bumper pads to the cabinet frame where the door contacts it. This prevents sticking and protects the finish long-term.
Runs and drips:
Cause: Too much paint applied at once, or holding a spray gun too close to the surface.
Fix: Let the run cure fully, sand flat with 220-grit, wipe clean, and recoat with a thinner pass.
Brush marks in the dried finish:
Cause: Paint dried too fast, brush dragged over a partially dry surface, or using a low-quality brush.
Fix: Sand smooth with 220-grit, apply a thin coat with a quality synthetic brush, and tip off lightly in one direction.
When to call a professional:
Adhesion failure keeps recurring after two repair attempts.
The cabinet substrate (MDF core, thermofoil, or laminate) is delaminating or structurally compromised.
You need to spray a large kitchen and lack the ventilation or equipment to do it safely.
The existing finish is oil-based lacquer and you are not comfortable with the prep requirements. For guidance on repainting cabinets multiple times and substrate wear, that resource covers when the substrate itself becomes the limiting factor.
What does a professional Ottawa cabinet painter do differently?
The gap between a solid DIY result and a pro-grade factory finish comes down to a few specific steps that are difficult to replicate without professional equipment and a controlled environment.
Pro-only steps:
Full deglossing of every surface in a controlled sequence, often with both chemical and mechanical methods.
Spray application in a dedicated spray area or portable spray enclosure, which eliminates airborne dust contamination that settles into a brush-applied finish.
Multi-stage curing between coats in a temperature-controlled space, not a drafty garage or a kitchen with fluctuating humidity.
Door adjustment and soft-close tuning after reinstallation, so every door hangs level and closes quietly.
Detailed masking of countertops, appliances, and flooring that takes longer to apply than most DIYers budget for.
Ottawa example timeline: A professional cabinet painting service in Ottawa typically completes a medium kitchen in 5–10 working days from start to finish. Doors come off on day one, prep and priming happen over days one and two, painting and between-coat sanding fill days three through five, curing and reinstallation follow in the final days. Household disruption is real but manageable: the kitchen is accessible throughout, though cabinet contents need to be cleared.
Warranty expectations: A reasonable professional warranty covers finish adhesion and blistering for a defined period. Kitchen Makeovers notes that professionally spray-applied waterborne enamel with bonding primer can last 5–10 years with proper prep. Warranties typically exclude damage from impact, improper cleaning products, or modifications made after the job. Ottawacabinetpainting backs its work with a 6-year warranty, which reflects confidence in the prep and application process rather than just the paint product itself.
What an Ottawa pro actually sees that most DIYers miss
Most DIY cabinet repaints look good for the first six months. The ones that hold up for five or more years share one thing: the prep was done without shortcuts. We have seen kitchens where homeowners used quality paint and good brushes but skipped the TSP wash or applied primer over a glossy surface without scuffing. The finish looked fine at first. By the following winter, the paint was lifting at the edges of every door.
The other thing worth saying plainly: spray application is not just about aesthetics. A sprayed finish bonds differently than a brushed one because the atomized droplets flow into surface texture more uniformly. For complex profiles, routed edges, and MDF doors, spraying is genuinely the better method, not just a preference. If you are working with flat-panel doors and a steady hand, brush-and-roll can get you very close. But if your doors have detailed profiles or you are painting over thermofoil, the risk of brush marks and uneven coverage is real enough that renting a sprayer or hiring a pro is worth the cost.
One more thing DIYers consistently underestimate: cure time. Reinstalling doors after 48 hours because they feel dry is one of the most reliable ways to end up with paint transfer on the frame and sticky hinges. Wait the full 14–21 days for a waterborne alkyd, or at minimum, install soft bumper pads on every contact point before the paint is fully hard.
Ottawacabinetpainting: professional cabinet painting in Ottawa without the renovation chaos
Repainting your own cabinets is genuinely achievable, and this guide gives you the full process. But if your kitchen has complex profiles, thermofoil doors, or you simply want a factory-smooth finish without managing the prep, spray setup, and cure schedule yourself, Ottawacabinetpainting is the local alternative.
What sets the service apart is the prep. Meticulous degreasing, substrate-matched priming, and spray application in a controlled environment produce a finish that holds up to Ottawa’s seasonal humidity swings and daily kitchen use. The process runs approximately 5–10 working days, the kitchen stays accessible throughout, and the work is backed by a 6-year warranty on finish adhesion.
For homeowners weighing the time and effort of a DIY project against a guaranteed result, get a free cabinet painting quote and see what a professional repaint costs for your specific kitchen. You can also browse before-and-after project photos to see the finish quality firsthand.
Sources
Recommended
Comments