Kitchen Cabinet Ideas for Small Kitchens in Ottawa

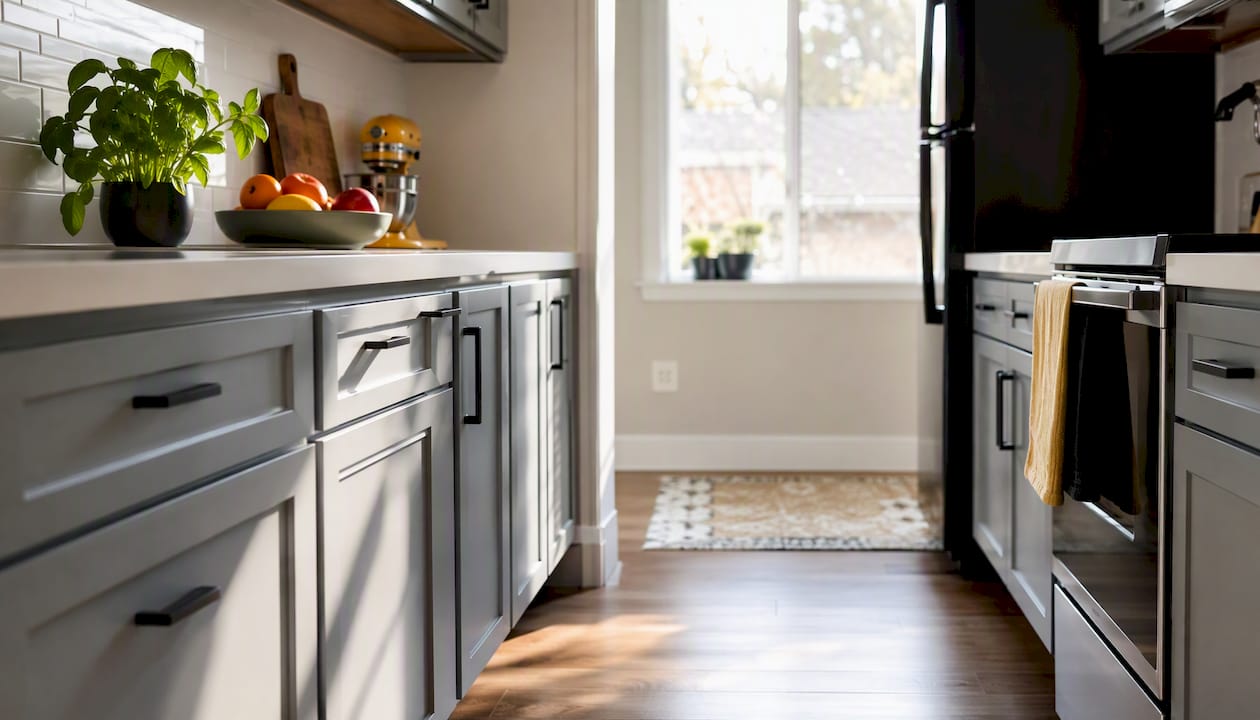
The fastest way to make a small kitchen feel and work bigger is to choose the right layout, convert lower cabinets to deep drawers and pull-outs, and use light, reflective finishes while going vertical for storage. Those four moves alone address the most common complaints Ottawa homeowners bring to us: not enough room to move, not enough places to put things, and a kitchen that feels cramped before you’ve even started cooking.
Here are the six highest-impact changes to prioritize:
Replace base cabinet shelves with deep, full-extension drawers
Add a pull-out pantry column in any 9–12-inch gap beside the fridge or stove
Choose light, semi-gloss or high-gloss cabinet finishes to reflect light
Extend upper cabinets to the ceiling for vertical storage
Install purpose-built corner pull-outs instead of a basic lazy Susan
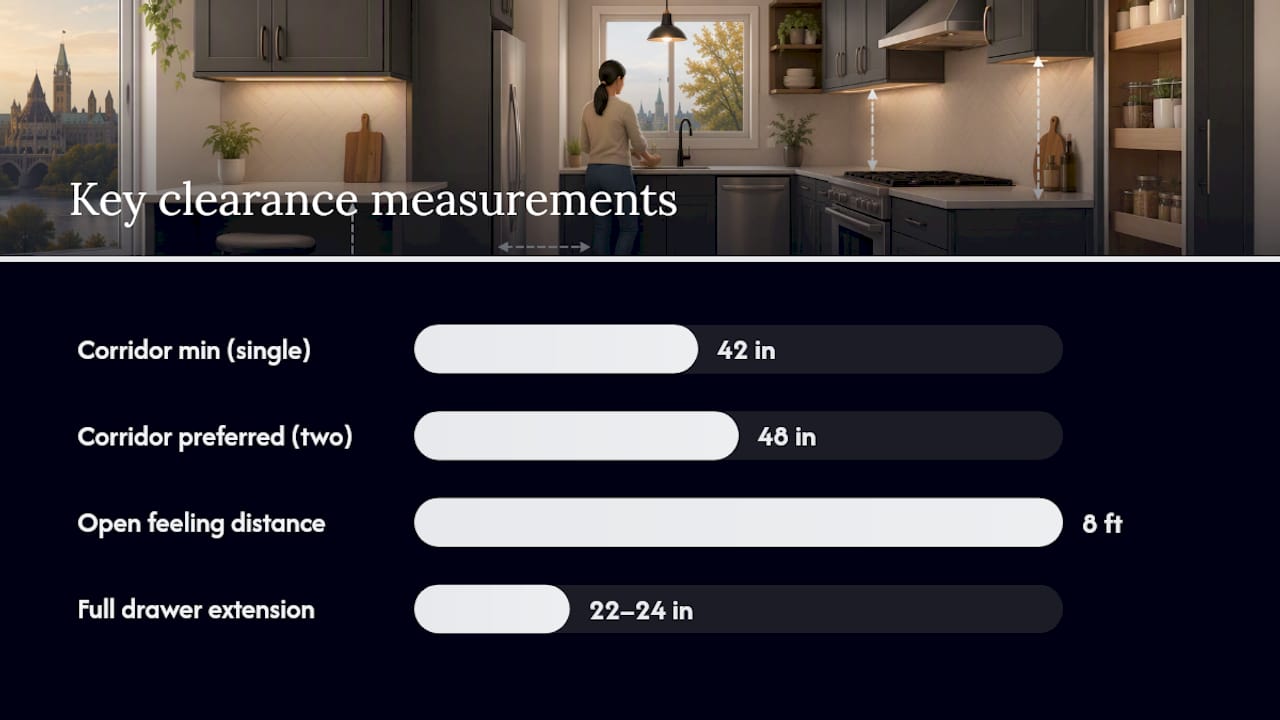
Keep corridor clearances at 42–48 inches so drawers and doors open freely
The NKBA recommends at least 42 inches of aisle width for single-cook kitchens and 48 inches when two people cook regularly. Getting that number right before you plan any cabinet changes is the single most important measurement you can take.
Key Takeaways
The most effective approach to small-kitchen cabinet design combines the right layout clearances (42–48 inches), drawer-first base cabinets, vertical upper storage, and a professional refinish when the boxes are sound.
Point | Details |
Measure clearances first | Record corridor width and aim for 42 in (single cook) or 48 in (two cooks) before planning any changes. |
Drawers beat shelves | Converting base cabinet shelves to full-extension drawers is the highest-impact functional upgrade in most small kitchens. |
Go vertical | Extending uppers to the ceiling with 42-inch cabinets adds storage and visually raises the room. |
Light finishes expand the room | Semi-gloss or high-gloss paint in white, soft gray, or warm cream reflects light and makes a small kitchen read as larger. |
Refinish before replacing | If cabinet boxes are sound, a professional refinish takes around ten days, costs far less than replacement, and carries a 6-year warranty. |
Table of Contents
Which Ottawa kitchen layouts work best in a small space?
Layout choice determines everything downstream: where tall pantries can go, whether a peninsula is realistic, and whether your drawer fronts will actually clear the opposite counter. For small kitchens, three layouts consistently outperform the rest.
Galley is the most efficient footprint for tight spaces. Two parallel runs keep the work triangle compact and every inch of wall usable. The trade-off is that a galley can feel tunnel-like if the corridor is too narrow. According to the Kitchen Design and Layout Guide for GTA Homes, you need at least 42 inches between facing runs for a single cook and 48 inches for two, with roughly eight feet between facing runs to avoid that closed-in feeling.
Single-wall with a peninsula works well in open-plan condos and older Ottawa row houses where one wall is all you have. The peninsula adds counter space and a second run of base cabinets without closing off the room. Tall pantry columns fit naturally at either end of the single wall.
Compact L-shape suits corner kitchens and gives you a natural spot for a corner storage cabinet. The inside corner is often wasted with a standard cabinet, which is exactly why corner hardware matters so much (more on that in the storage section).
Before you plan any cabinet changes, measure these four numbers:
Corridor width at the narrowest point (aim for 42 in minimum, 48 in preferred)
Distance from the fridge face to the opposite cabinet or island
Full drawer extension depth on your base cabinets (typically 22–24 in)
Ceiling height above your current upper cabinets
Those measurements tell you immediately whether you can add a peninsula, whether a full-depth drawer will clear the fridge, and how much vertical storage you’re leaving on the table. For more Ottawa-specific layout ideas, the kitchen cabinet designs for small spaces post walks through local configurations we see most often.
Cabinet styles and finishes that make an Ottawa kitchen feel larger
Color and finish are the cheapest tools you have for changing how a small kitchen reads. Light colors reflect more light and push walls back visually. White, soft gray, and warm cream remain the most reliable choices, and Good Housekeeping’s small-kitchen roundup consistently points to white cabinetry layered with wood accents as the combination that keeps compact kitchens feeling open and styled.
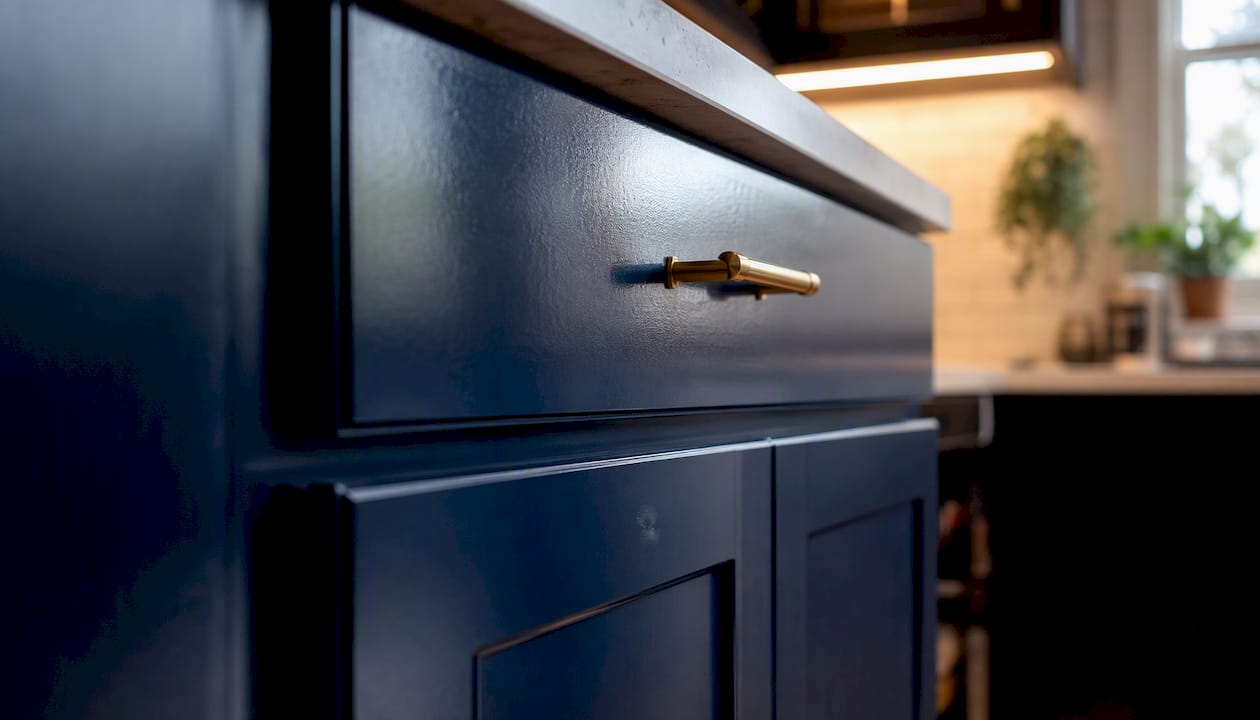
Finish sheen matters as much as color. Semi-gloss and high-gloss paints reflect overhead and under-cabinet light, which adds perceived depth. Flat or eggshell finishes absorb light and make a small kitchen feel smaller. The practical upside of a higher sheen: it wipes clean far more easily, which matters in a kitchen.
Door style affects visual clutter directly. Flat-panel and handleless fronts read as quieter and more open than raised-panel or heavily detailed shaker doors. Inset doors sit flush with the cabinet frame and give a clean, furniture-like look, though they cost more to build and paint precisely. If you want the shaker look without the visual weight, a simple one-step shaker profile in a light color is a reasonable middle ground.
Open shelving can help or hurt depending on how disciplined you are. A single run of open shelves above a coffee station or beside a window adds airiness. Two full walls of open shelves in a small kitchen usually creates visual noise unless everything on them is curated and consistent.
Pro Tip: Keep the upper and lower cabinet finish identical. Add depth by painting one lower cabinet or a small island in a contrasting color, one shade darker. That single accent reads as intentional and breaks the monotony without shrinking the room.
For current finish trends specific to Ottawa kitchens, the top cabinet trends for small kitchens post shows before-and-after examples of finish upgrades we’ve completed locally.
Storage solutions that actually multiply your cabinet space in Ottawa
The biggest storage mistake in a small kitchen is keeping base cabinets as shelves. A lower cabinet with two fixed shelves forces you to stack and dig. A deep, full-extension drawer lets you see and reach everything in one motion. Martha Stewart’s small-kitchen editorial and multiple high-authority design publishers converge on the same recommendation: convert base cabinet shelves to drawers first, then add pull-outs.
The small kitchen solutions guide identifies pull-outs, toe-kick drawers, and vertical storage as the most effective strategies for kitchens under 100 sq ft. Here’s where each type delivers the most value:
Deep drawers (18–24 in wide): Replace the two lower shelves in base cabinets beside the stove. Pots, pans, and lids become instantly accessible.
Pull-out pantry columns: A 9–12-inch-wide pull-out column beside the fridge holds spices, canned goods, and condiments on both sides of the unit. It uses a gap that would otherwise be dead space.
Toe-kick drawers: The 4-inch-high space beneath your base cabinets is almost always wasted. Shallow toe-kick drawers hold baking sheets, cutting boards, and placemats without touching any existing cabinet footprint.
Blind-corner pull-outs: A standard corner cabinet wastes roughly 50% of its interior. A purpose-built pull-out system brings everything to the front. IKEA Canada’s SEKTION corner base cabinet with pull-out fitting is a practical example of how a purpose-built corner unit improves access and visibility compared with a basic lazy Susan.
Vertical tray dividers: A 6-inch-wide vertical divider section in an upper cabinet stores cutting boards, sheet pans, and serving trays upright instead of stacked.
Tall pantry columns: Standard wall cabinets come in 30-, 36-, and 42-inch heights. Extending uppers to the ceiling with 42-inch cabinets, or stacking two units, adds meaningful storage and visually raises the room. Standard base cabinets sit at 34.5 inches high and 24 inches deep, so a full-height pantry column beside the fridge is often the single largest storage gain available in a small kitchen.
Pro Tip: Before buying new drawer inserts, check whether your existing cabinet boxes are deep enough for full-extension hardware. A drawer that can’t fully extend because the fridge or island blocks it is worse than no drawer at all. Measure the clear run from the cabinet face to the nearest obstruction before ordering.
Appliance choices that protect your cabinet space in Ottawa
Appliances set the physical boundaries for every cabinet decision. A standard 30-inch fridge that sticks 6 inches past the counter edge doesn’t just look awkward; it cuts into corridor clearance and may block a drawer from opening fully. Counter-depth fridges align with the cabinet face and typically recover 4–6 inches of usable aisle width.
The same logic applies to ranges. A 24-inch range instead of a 30-inch model frees up 6 inches of counter run on one side, which is enough for a narrow pull-out pantry column. Compact 24-inch dishwashers are widely available in Canada and work well in galley kitchens where the standard 24-inch depth is already tight.
Microwave drawers are worth considering if you’re planning a cabinet refresh. A drawer microwave installs below the counter, frees the upper cabinet above the range, and removes the visual bulk of an over-the-range unit. That upper cabinet space can then hold a proper range hood insert and a cabinet above it, which is a net gain in both ventilation and storage.
A few appliance sizing callouts to keep in mind:
Counter-depth fridge: typically 24–25 in deep vs. 30–32 in for standard models
24-in range: saves 6 in of counter run compared with a 30-in model
Drawer microwave: typically 24 in wide, 15 in high, fits in a standard base cabinet opening
Home Depot Canada’s small-kitchen design guide recommends pairing appliance sizing decisions with accessory choices like slide-out pot organizers and clip-on storage to get the most from the space those smaller appliances open up.
Inside-the-cabinet accessories that work right now in Ottawa
You don’t need to replace a single cabinet box to dramatically improve how your kitchen functions. The right accessories added to existing cabinets can double usable storage in an afternoon.
High-impact options for Ottawa homeowners and renters:
Inside-door racks: Mount on the inside of a lower cabinet door to hold cleaning supplies, foil, and wrap. Check that the rack depth doesn’t prevent the door from closing against the shelf inside.
Peg/divider systems for deep drawers: A peg board system (like those from IKEA’s VARIERA line or similar) lets you reconfigure drawer compartments as your storage needs change. Far more useful than fixed dividers.
Magnetic knife strips: Mount under an upper cabinet or on a side panel to free a full drawer.
Rail systems with hanging baskets: A wall-mounted rail between the counter and upper cabinets holds small baskets, utensil hooks, and spice jars without touching cabinet space at all.
Under-shelf pull-out baskets: Clip onto an existing shelf inside an upper cabinet to create a second storage layer for lighter items like snack bags or paper goods.
Renters should focus on clip-on and tension-mounted options that leave no permanent marks. Homeowners can go further with permanently mounted door racks, pull-out drawer inserts, and rail systems screwed into studs. For a full list of organizing strategies tailored to small Ottawa kitchens, the 7 essential tips for organizing small kitchens post covers placement and sizing in detail.
Pro Tip: Put your most-used items at waist height and within arm’s reach of the stove. Seasonal items and rarely used appliances go in the highest and lowest cabinets. That single rule of accessibility shapes every accessory and organizer decision you make.
When refinishing beats replacing Ottawa kitchen cabinets
If your cabinet boxes are structurally sound but the finish looks dated, refinishing is almost always the smarter call. You keep your existing layout, avoid the demolition and disposal costs of a full replacement, and get a result that looks factory-finished when done properly.
Refinishing makes the most sense when:
The cabinet boxes and hinges are solid, with no water damage or warped frames
You want to change the color or sheen without changing the layout
Your timeline is short (a professional refinish typically takes around ten days)
Your budget doesn’t support a full cabinet replacement, which runs significantly higher
The Ottawa Cabinet Painting service page outlines the full process, timeline, and warranty details. For visual proof of what a professional refinish delivers, the before-and-after gallery shows completed Ottawa projects.
Refreshing cabinet doors without touching the boxes is another option worth knowing about. One Day Doors & Closets explains how to refresh your space without a full renovation, which is useful context if you’re weighing door replacement against a full refinish.
Pro Tip: If two or more cabinet doors are warped or the box joints are soft, refinishing won’t fix the underlying problem. In that case, targeted replacement of the damaged units combined with refinishing the rest is the most cost-effective path.
How to prioritize your Ottawa cabinet upgrades
Not every change needs to happen at once. Here’s a practical sequence based on budget and disruption level:
Measure first. Record corridor width, ceiling height above uppers, and the clear run in front of each base cabinet. These numbers determine what’s possible before you spend anything.
Quick wins (low cost, no contractor needed). Add inside-door racks, peg dividers, under-shelf baskets, and a magnetic knife strip. Budget: under $150 for most kitchens.
Mid-level upgrades (some DIY skill or a handyperson). Install a pull-out pantry column in a gap beside the fridge, add toe-kick drawers, and mount a rail system between the counter and uppers. Budget: $300–$800 depending on materials.
Drawer conversion. Replace two or three base cabinet shelf units with deep drawer banks. This is the single highest-impact functional upgrade in most small kitchens. A cabinet shop or skilled DIYer can handle this in a weekend.
Professional refinish. Once the layout and hardware are optimized, a professional refinish by Ottawacabinetpainting transforms the look without touching the footprint. This is the right step after hardware upgrades, not before.
Full replacement (last resort). Only warranted when boxes are damaged, the layout genuinely doesn’t work, or you’re doing a full renovation. For budget-conscious remodeling ideas, the layout ideas post covers how to sequence changes without overspending.
Renters: focus on steps 2 and 3 with clip-on and removable accessories. Steps 4 and 5 require landlord approval but are worth asking about, especially in longer-term leases.
Our perspective on small-kitchen cabinet decisions in Ottawa
Working on Ottawa kitchens across condos, row houses, and older semi-detached homes has taught us one consistent lesson: the constraint is almost never the cabinet count. It’s the layout of what’s inside them.
We regularly work in buildings where the elevator is the narrowest point in the whole project. Getting a tall pantry column into a 14th-floor condo unit in Centretown requires planning the delivery before planning the cabinet. That’s a detail most online guides skip entirely. Ottawa’s older housing stock, particularly the 1960s and 1970s bungalows in Barrhaven and Nepean, tends to have 7-foot ceilings in the kitchen, which means ceiling-height uppers are often the only vertical storage gain available without structural work.
What we see most often: homeowners who have already bought organizers and pull-outs but installed them in cabinets that were never going to work because the door swing or drawer clearance was wrong. The measurement step is not optional. Get the corridor width and the clear drawer run before you buy anything.
The other pattern worth naming: a lot of Ottawa homeowners assume refinishing is a temporary fix. It isn’t, when it’s done properly. A professionally refinished cabinet with the right primer, topcoat, and cure time will outlast a budget replacement by years. The finish we apply at Ottawacabinetpainting is the same process used on high-end custom cabinetry, just applied to your existing boxes. That’s not a compromise. For most kitchens with sound boxes, it’s the better outcome.
Sources
Recommended
The discussion of using lighter cabinet colours to make a small kitchen feel more open caught my attention, especially because it shows how much visual perception can change the character of a limited space. I also found the idea of making use of vertical storage interesting, since a small kitchen isn’t necessarily short on usable space so much as it is short on easily accessible space at eye level. There’s something fascinating about how relatively modest changes to cabinets, handles, or layout can alter the way a room feels without changing its actual dimensions. It made me wonder which matters more in practice for creating that sense of openness: the cabinet colour itself or the way the storage is arranged…