How to pick cabinet paint for a durable finish
- Axcell Painting

- 1 hour ago
- 10 min read

TL;DR:
High-quality cabinet paint must bond strongly, resist moisture and grease, and withstand repeated cleaning for long-lasting results. Proper surface prep, choosing the right finish sheen, and applying thin coats using brushes and rollers or sprayers are crucial for a durable, professional-looking finish. Patience with drying and curing times significantly extends the lifespan of your paint job, making thorough preparation and proper timing essential for success.
Your kitchen cabinets take more abuse than almost any other surface in your home. Grease, steam, daily scrubbing, and constant opening and closing mean that ordinary wall paint simply won’t hold up. If you’re an Ottawa homeowner looking to refresh your kitchen without the cost and chaos of a full renovation, choosing the right cabinet paint is the single most important decision you’ll make. This guide walks you through exactly what to look for, which tools you need, and how to apply your paint so the results last for years, not just a season.
Table of Contents
Key Takeaways
Point | Details |
Choose enamel paints | Enamel-based paints give cabinets a hard, smooth, and durable finish that stands up to daily use. |
DIY with brushes or rollers | Foam rollers and angled brushes can achieve pro-level results for homeowners who follow proper steps and drying times. |
Follow drying schedules | Observe manufacturer timing for recoating and final curing to guarantee long-lasting beauty and resilience. |
Prep is critical | Careful cleaning, sanding, and priming ensure your cabinet paint adheres evenly and lasts years. |
Thin coats win | Applying multiple thin coats and sanding lightly between each helps achieve a smooth, factory-like finish. |
What makes a cabinet paint high quality?
Not all paint is created equal, and the gap between a mediocre result and a showroom look often comes down to the product itself. For kitchen cabinets, you need a paint that bonds hard, resists moisture and grease, and holds up to repeated cleaning without dulling or peeling.
Durability and hardness are the first benchmarks. Cabinet paint needs to cure (harden fully after drying) into a surface that can take a hit. Acrylic latex and alkyd enamel formulas are the two most reliable categories for this job. Acrylic latex paints are water-based, low odor, and easy to clean up, making them popular with Ottawa homeowners who want minimal disruption during the project. Alkyd enamels are oil-based and tend to cure even harder, though they require mineral spirits for cleanup and produce stronger fumes during application.
Enamel paints are particularly well suited for cabinets because enamel paints level well, meaning brush strokes and roller texture naturally smooth out as the paint dries. This is a huge advantage if you’re working without professional spray equipment.
Here’s a quick comparison of the most common cabinet paint types:
Paint type | Finish quality | Cleanup | Durability | Best use case |
Acrylic latex enamel | Very good | Water | High | DIY, low odor, fast recoat |
Alkyd enamel (oil-based) | Excellent | Mineral spirits | Very high | Maximum hardness, pro use |
Hybrid alkyd/latex | Excellent | Water | Very high | Best of both worlds |
Standard latex wall paint | Poor | Water | Low | Not recommended for cabinets |
Sheen level also matters. A semi-gloss or satin finish is ideal for cabinets because it resists grease and wipes clean easily. Flat or matte finishes absorb stains and are nearly impossible to clean properly in a kitchen environment. Always choose at minimum a satin sheen for cabinet work.
Low-VOC or zero-VOC formulas are worth considering for families who need to stay in the home during the project. VOCs (volatile organic compounds) are the chemicals that cause paint fumes. Modern hybrid alkyd paints like Benjamin Moore Advance deliver oil-like hardness with water-based convenience and significantly reduced VOC levels, making them a go-to choice for quality best cabinet paint finishes in residential kitchens.
Key qualities to look for on the label:
Listed as “cabinet and trim” or “enamel” paint
Semi-gloss or satin sheen
Full cure time listed (indicates a hard, durable finish)
Low or zero VOC for indoor use
Recommends light sanding between coats (a sign of a serious product)
Essential tools and materials for painting cabinets
Knowing what paint qualities to look for is key, but having the right tools on hand is what makes a flawless application possible. Walking into this project without the proper materials is a recipe for frustration and a finish that chips within months.
Sprayer vs. brush and roller is the first decision every Ottawa DIYer faces. A paint sprayer delivers the smoothest result, but it comes with real requirements: extensive masking of surrounding surfaces, a well-ventilated workspace, and significant practice to avoid runs and uneven coverage. For most homeowners, that’s a steep learning curve. The good news is that spraying yields a smooth finish closest to factory results, but a foam roller combined with an angled brush is a completely viable DIY approach when you use thin coats and sand lightly between them.
Method | Finish quality | Equipment cost | Skill level required | Masking needed |
Spray (HVLP) | Excellent/factory | High ($150+) | Advanced | Extensive |
Foam roller + brush | Very good | Low ($30-$50) | Beginner/intermediate | Moderate |
Standard bristle brush | Fair | Very low | Beginner | Minimal |
Your essential supply list:
High-density foam roller (4-inch for cabinet doors, 6-inch for face frames)
Angled synthetic brush (2.5-inch) for corners and detail areas
120-grit and 220-grit sandpaper or sanding sponges
Tack cloths to remove dust after sanding
Degreaser or TSP substitute for cleaning
High-adhesion primer or shellac-based primer for slick surfaces
Painter’s tape (blue or green, not masking tape)
Drop cloths
Screwdrivers for removing hardware and doors
Pro Tip: Use a 4-inch high-density foam roller for cabinet doors. It lays paint on smoothly and leaves almost no texture, especially when using a leveling enamel. Roll in one direction, then lightly tip off with your angled brush before the paint starts to set.
Before you pick up a single tool, make sure your cabinets are properly cleaned and prepped. A thorough cabinet prep guide covers the exact steps for degreasing and sanding so your paint bonds correctly from the start. Good prep also means thinking ahead about where you’ll store items during the project. A little organizing your kitchen before you start saves a lot of scrambling mid-project when your cabinets are off their hinges.
Step-by-step: How to pick the right cabinet paint
With your tools assembled, you’re ready to pick the perfect paint that will look great and last. This is where Ottawa homeowners often overthink things. Let’s simplify the decision into clear, logical steps.
Step 1: Assess your cabinet material and condition. Wood cabinets accept paint readily with proper sanding and a good primer. MDF (medium-density fiberboard) cabinets are very common in Ottawa kitchens and also paint beautifully but are sensitive to moisture, so a water-resistant primer coat matters. Thermofoil (a plastic-wrapped surface) is trickier and requires a specialty adhesion primer.
Step 2: Determine how much prep the surface needs. Cabinets in good shape with no peeling or major damage need light sanding and a quality primer. Cabinets with old paint that’s chipping or stained heavily with grease need more aggressive cleaning, a possible shellac-based primer to block stains, and multiple prep steps. Check out the full breakdown of the importance of cabinet prep to understand why skipping this step is the number one reason DIY paint jobs fail.
Step 3: Choose your sheen. For kitchens, semi-gloss or satin. Full stop. Eggshell is borderline acceptable for low-traffic upper cabinets, but the lower cabinets that see daily splashes and greasy hands need semi-gloss.
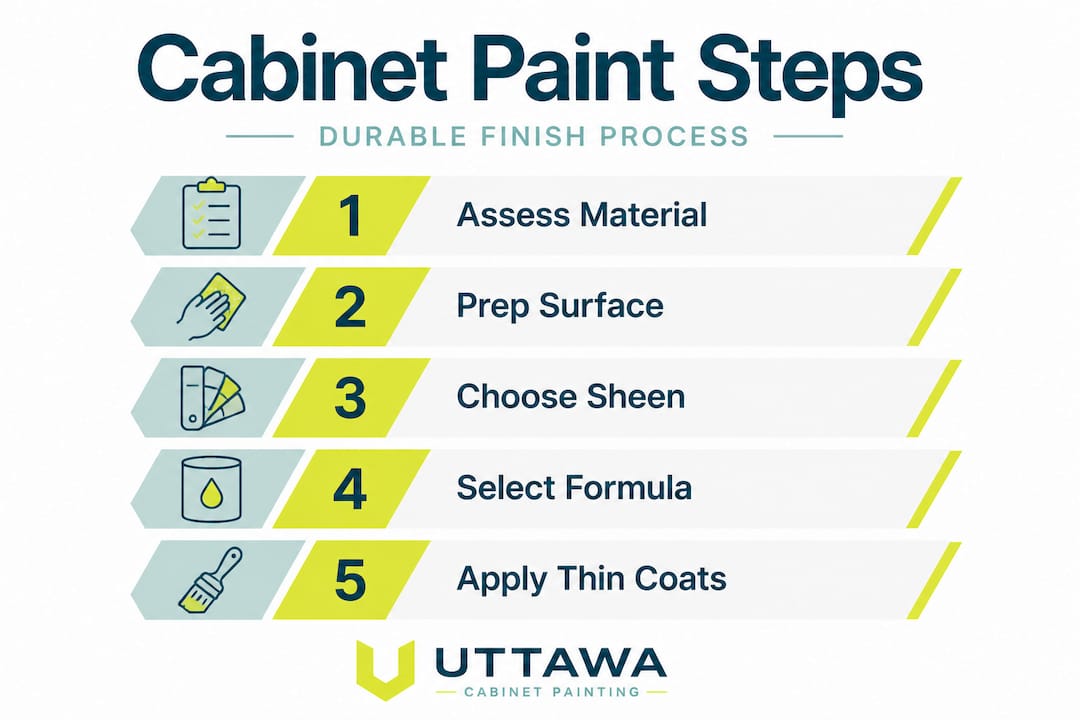
Step 4: Decide on application method. Are you comfortable with a sprayer and have the space to mask properly? Go for it. If not, the brush and roller method still gets you to a beautiful result with durable, chaos-free results as long as you use proper technique and don’t rush.
Step 5: Read the label carefully. Recoat times, full cure times, and recommended primer are all listed. If a paint doesn’t list a cure time separately from dry time, that’s worth noting. Many easy kitchen updates fail simply because homeowners treat dry time as cure time.
“The single biggest mistake Ottawa homeowners make is putting their cabinets back into service before the paint has fully cured. Dry to the touch is not the same as hard enough for daily use.”
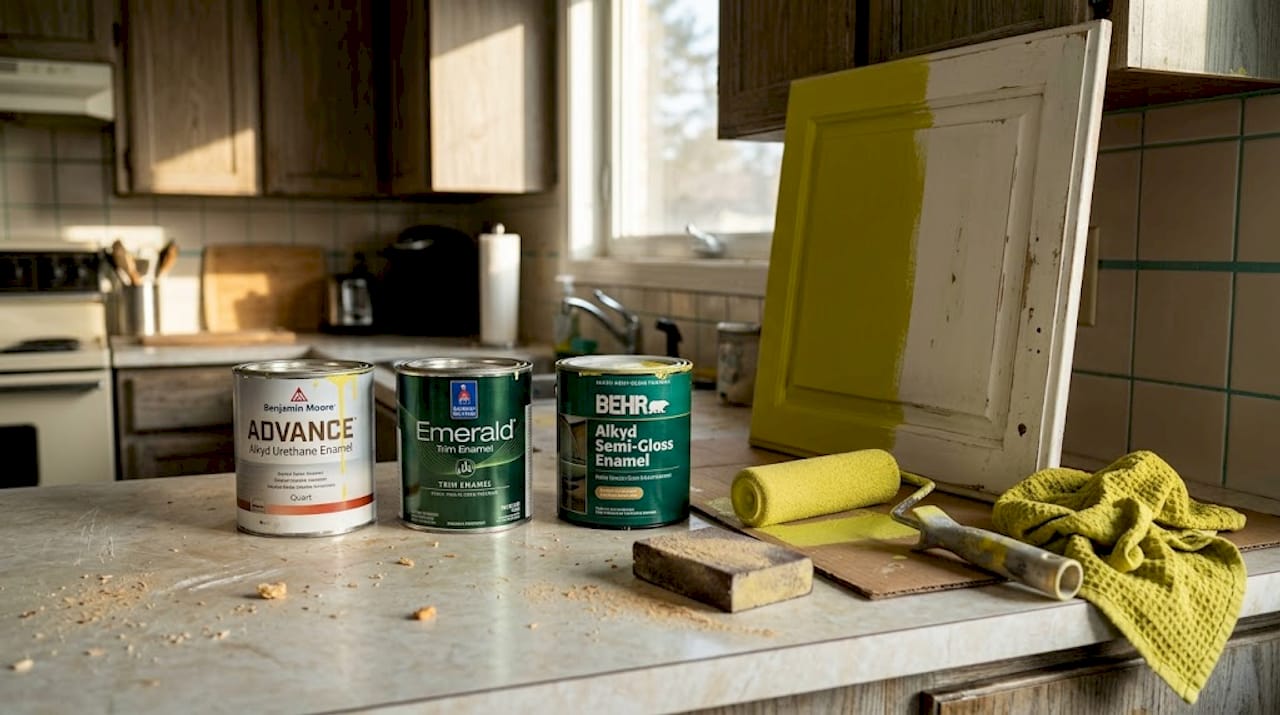
Step 6: Choose a reputable brand. Benjamin Moore Advance, Sherwin-Williams Emerald Urethane Trim Enamel, and Behr Alkyd Satin are consistently top-rated for cabinet work. They’re available at local Ottawa paint suppliers and come with reliable technical data sheets so you know exactly what you’re working with.
Timing, recoating, and curing: How to get pro-level durability
Selecting your paint is just the start. Making it last depends entirely on proper drying and curing between coats and before the cabinets go back into full use.
Here’s the timing reality most homeowners miss: paint dries and paint cures are two completely different things. Dry means the surface isn’t tacky. Cure means the paint has hardened to its full strength. Cabinet paint is only fully hardened after 7 to 30 days depending on the formula, temperature, and humidity in your space.
For a product like Benjamin Moore Advance, the practical schedule looks like this:
Recoat window: 16 to 24 hours between coats
Hardware reinstallation: Wait at least 48 hours after your final coat
Light use: Safe after 5 to 7 days
Full hardness: 7 to 30 days depending on conditions
Why does this matter so much? If you reinstall your cabinet doors and start slamming them shut after 24 hours, you risk denting the soft, not-yet-cured paint film right at the hinge areas. Those marks are nearly impossible to fix cleanly after the fact.
Critical timing guidelines to follow:
Never recoat before the minimum recoat time. Going too soon traps solvents and creates bubbling or peeling later.
Keep your kitchen above 50°F (10°C) during drying. Cold Ottawa winters slow curing dramatically.
Avoid running steamy dishwashers or stovetop cooking near freshly painted surfaces for at least a week.
Do not wash painted surfaces with any cleaner for at least 30 days post-painting.
Pro Tip: If you painted during Ottawa’s humid summer months, expect curing to take toward the longer end of the range. Humidity slows solvent evaporation, which slows hardening. Give it the full 30 days before doing a hard scrub test.
Good prep work also directly impacts how long your finish lasts. A cabinet prep for long-lasting finish explains how the right primer and surface preparation affect cure time and adhesion over the long run.
Common mistakes and expert tips for flawless cabinet paint
Even with the right product and timing, your technique makes all the difference. Here’s how to avoid the mistakes we see most often.
Rushed prep work is the biggest culprit behind cabinet paint failures. Skipping degreasing means the paint has nothing solid to grab onto. Skipping sanding on slick surfaces means the paint peels within weeks. There are no shortcuts here. The DIY cabinet painting risks are real, and most of them trace back to preparation.
Applying thick coats to try to finish faster is a recipe for runs, drips, and uneven texture. A foam roller and angled brush approach works best with thin, even coats, sanding lightly between each one with 220-grit paper. Two or three thin coats always beat one thick coat.
Common mistakes to avoid:
Painting over dirty or greasy cabinets without degreasing first
Using wall paint instead of cabinet-grade enamel
Skipping primer, especially on raw wood or MDF edges
Applying the second coat before the first is fully dry
Not removing cabinet doors and painting them flat (painting doors vertically creates drips)
Reinstalling hardware too soon and denting the soft paint film
“Apply thin coats consistently, sand between them, and be patient. Those three habits separate a finish that looks good for a season from one that looks great for years.”
Pro Tip: Always paint cabinet doors laid flat on sawhorses or a workbench. Gravity is your enemy when painting doors vertically. A flat surface gives the leveling enamel the best possible chance to flow out and self-smooth before it sets.
For a deeper look at how professional results compare to DIY attempts, the breakdown of DIY vs pro cabinet painting is an honest assessment of where the two approaches diverge.
The Ottawa homeowner’s shortcut: Why perfection is overrated
After working through everything this project involves, here’s a perspective worth considering before you obsess over achieving a flawless factory finish.
The spray-only, mirror-perfect cabinet finish is real. It’s also something that takes professional equipment, substantial skill, and a lot of masking and setup. For most Ottawa kitchens, chasing that standard as a DIYer creates more stress than it resolves. And here’s what the paint industry doesn’t loudly advertise: modern leveling enamels are so good at self-smoothing that minor brush or roller marks become virtually invisible once the paint fully cures. We’ve seen brush-applied cabinet jobs that look nearly indistinguishable from sprayed finishes after 30 days of curing. The paint does a lot of the work for you.
The smarter approach for most homeowners is to focus energy on prep, timing, and thin coats rather than obsessing over the application method. A beautifully prepped, correctly primed, and carefully applied brush and roller job with a quality enamel will outperform a rushed spray job on poorly prepared surfaces every single time. Durability lives in the prep and the product, not just the method. The Ottawa pro painting process reflects this philosophy exactly, with a timeline built around doing each step right rather than doing it fast. The takeaway for Ottawa homeowners: balance your results against your budget and skill level, and know that a thoughtful DIY approach with the right paint can genuinely deliver a kitchen you’ll love for years.
Upgrade your Ottawa kitchen with expert cabinet painting
If you’d rather guarantee a flawless finish or save time, here’s how you can make your Ottawa kitchen upgrade completely hassle-free. At Ottawa Cabinet Painting, we bring the same meticulous prep, premium product selection, and careful timing to every kitchen we work on. Our process is built around minimizing disruption in your home while delivering a finish backed by a 6-year warranty. Whether you want to see what’s possible or you’re ready to move forward, explore our kitchen before and after gallery to see real Ottawa results, or check our full range of interior painting options for everything beyond cabinets. When you’re ready to take the next step, get your free cabinet painting quotes and find out exactly what a professional transformation costs for your kitchen.
Frequently asked questions
How long should I wait before using cabinets after painting?
Wait at least 48 hours after the final coat before reinstalling hardware, and avoid heavy use for 5 to 7 days as the finish cures fully.
Do I need a sprayer for high-quality cabinet paint results?
Spraying offers a near-factory finish, but a foam roller and angled brush can still yield durable, attractive results if you use thin coats and good technique.
What type of paint is best for kitchen cabinets in Ottawa?
Enamel paints or specific cabinet and trim paints are best because enamel paints level well and resist stains, water, and daily wear.
How many coats of paint should I apply for cabinets?
Two to three thin coats are ideal for even coverage and maximum durability, with light sanding between each coat.
Is sanding between coats really necessary?
Yes, light sanding between coats ensures a smooth, professional finish and better adhesion for each subsequent layer.
Recommended
Comments