DIY cabinet painting: costs, tools, and steps for Ottawa homes
- Axcell Painting

- 15 hours ago
- 11 min read
TL;DR:
Deciding between DIY cabinet painting and hiring a professional hinges on budget, time, and desired quality, with DIY saving over $1,500 initially but requiring 40-60 hours of work. Proper preparation, technique, and understanding Ottawa’s climate challenges are crucial for a durable finish in DIY projects, while professionals offer longer-lasting results and warranties. Ultimately, homeowners should weigh their skills, patience, and long-term plans before choosing the best approach for their kitchen renovation.
Choosing between painting your kitchen cabinets yourself and calling in a professional is rarely a simple decision. On one hand, DIY saves $1,500 or more upfront for handy homeowners. On the other hand, getting a truly seamless, durable finish takes serious time, the right tools, and a real understanding of what the process demands. In Ottawa’s climate, where humidity swings and cold winters complicate curing, the stakes are even higher. This guide walks you through everything: what it actually costs, exactly what supplies you need, a step-by-step process, common mistakes to avoid, and a clear-eyed look at what you can realistically expect from a DIY finish.
Table of Contents
Key Takeaways
Point | Details |
Substantial upfront savings | DIY painting can save over $1500 compared to hiring professionals. |
Time investment required | Most homeowners spend 40-60 hours on a full cabinet painting project. |
Preparation is crucial | Careful labeling, cleaning, and workspace management are essential for quality results. |
Finish quality varies | DIY can deliver modern results, but pro finishes last longer and often look smoother. |
Climate considerations matter | Ottawa’s temperature and humidity affect drying, curing, and the ultimate durability of your painted cabinets. |
What does it cost to DIY paint cabinets?
The first thing most Ottawa homeowners want to know is the number. What will this actually cost me? The short answer is that a full DIY cabinet painting project typically runs around $500 for paint, supplies, and pulls when you factor in hardware updates and lighting. That is a significant difference compared to professional services, which routinely run $2,000 to $3,500 or more for a full kitchen.
Here is a breakdown of where that money typically goes:
Item | Estimated cost |
Primer (water-based, quality brand) | $40 to $70 |
Cabinet paint (1 to 2 gallons) | $80 to $140 |
Sandpaper (assorted grits) | $20 to $35 |
TSP (trisodium phosphate) degreaser | $15 to $25 |
Foam rollers and brushes | $20 to $40 |
Painter’s tape and drop cloths | $20 to $30 |
New hardware (handles, hinges) | $80 to $200 |
Total estimated range | $275 to $540 |
Beyond the dollars, there is a time cost that many homeowners underestimate. Most DIY cabinet projects take 40 to 60 hours total, spread across multiple days or weekends. That includes disassembly, cleaning, sanding, priming, painting multiple coats, and curing time.
If you are weighing this decision carefully, our breakdown of DIY vs professional painting outlines the tradeoffs in more detail. You can also look at how homeowners in other markets approach the same calculation in this comparison of DIY vs pro repairs.
Now that you understand the primary cost advantage, let us look at what you will need before you start.
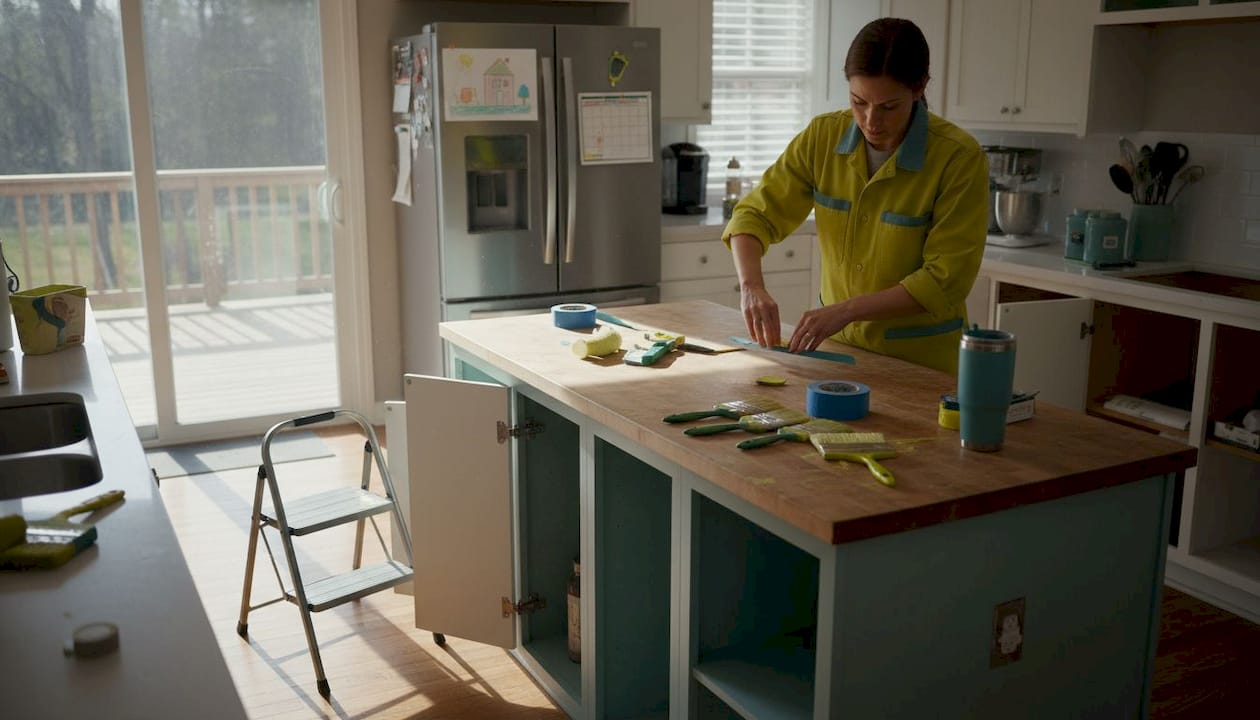
Tools, supplies, and workspace checklist
Getting your materials together before you start is not just about convenience. Walking away mid-project to grab sandpaper is a recipe for uneven results, especially when working with open-time sensitive products. Here is what you need before Day 1.
Essential tools and supplies:
TSP (trisodium phosphate) cleaner for degreasing surfaces
120-grit and 220-grit sandpaper or sanding sponges
Shellac-based or water-based bonding primer
Cabinet-specific paint (alkyd or water-based enamel)
Foam rollers (4-inch is ideal for flat surfaces)
Angled brush for edges and detailed areas
Painter’s tape and plastic sheeting
Screwdrivers for hardware removal
Zip-lock bags and a marker for labeling screws and hardware
Clean rags and tack cloths for dust removal
Optional but highly recommended:
HVLP (high-volume, low-pressure) spray gun for a factory-style finish
Portable work table or sawhorses to paint doors flat
Respirator mask, especially for shellac-based primers
Workspace setup matters. Your kitchen needs to stay functional during the project, which means staging your workspace carefully. Remove doors and drawers and work on them in a garage or basement. Ottawa winters mean the garage can get too cold for paint to cure properly. Aim to work in a space that stays between 15 and 25 degrees Celsius with good airflow.
The complete cabinet painting guide on our site covers workspace setup in depth. For more on getting the surface right before you ever open a paint can, our cabinet refinishing tips article is a solid reference. You can also review a general DIY renovation checklist for organizing your project from start to finish.
The full process follows a reliable sequence: remove and label all doors, drawers, and hardware, then degrease with TSP, scuff-sand, prime, paint, and allow full cure time. Each stage is critical. Skipping or rushing any one of them leads to visible problems down the road.
Pro Tip: Use a permanent marker and tape to label each door and its corresponding hinge location before you remove anything. When it is time to reassemble after painting and curing, you will thank yourself for the extra two minutes of organization.
With your shopping and setup list ready, here is exactly how to paint your cabinets step by step.
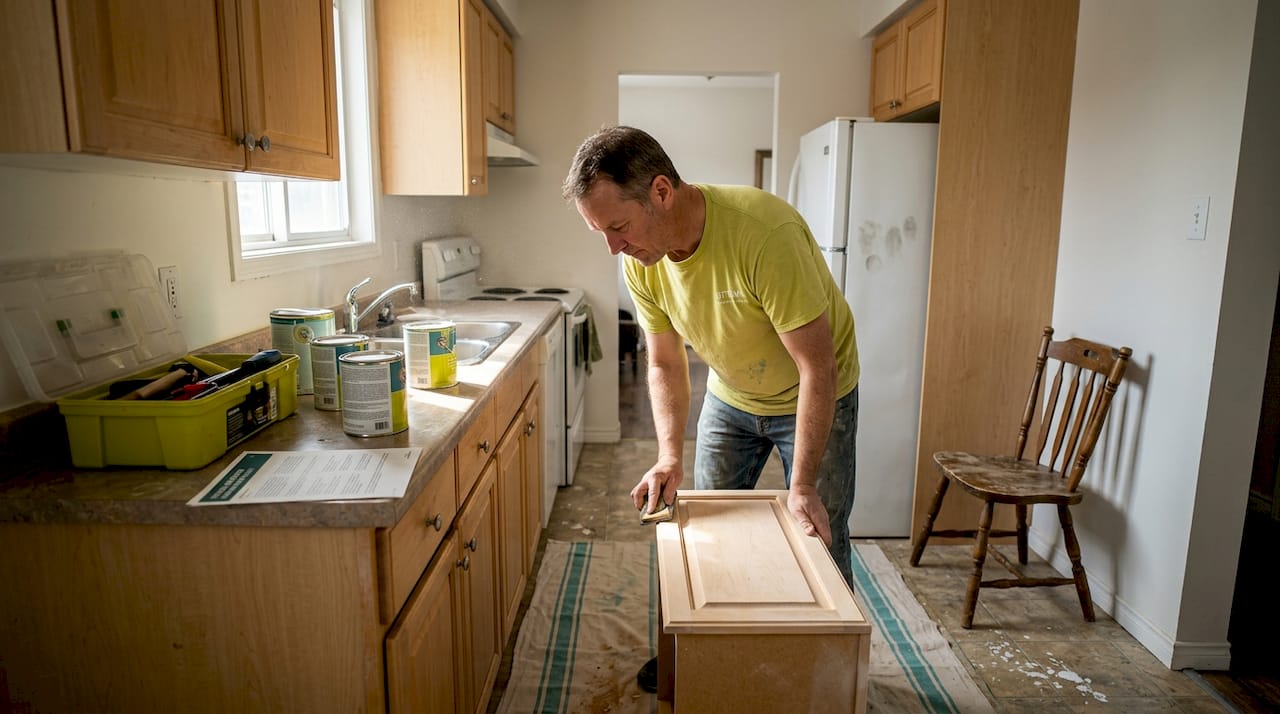
Step-by-step guide to painting your cabinets
Following a structured process is what separates a smooth, lasting finish from a patchy, peeling disappointment. Here is how to approach the project from disassembly to the final reinstall.
Remove all doors, drawers, and hardware. Label every piece as you go. Take photos of the layout before you start so reinstallation is straightforward.
Clean all surfaces with TSP. TSP (trisodium phosphate) is a heavy-duty degreaser that cuts through cooking oils and grime. Kitchen cabinets collect years of residue that will cause paint to peel if not removed first. Mix it according to the package directions and wipe down every surface thoroughly.
Scuff-sand all surfaces. Use 120-grit sandpaper to lightly sand all cabinet faces, doors, and drawer fronts. This creates microscopic scratches that give the primer something to grip. Finish with 220-grit for a smoother surface before priming. Wipe off all dust with a tack cloth.
Apply primer. A water-based bonding primer works well for most cabinet materials. If you are working with previously painted or very smooth surfaces, a shellac-based primer provides superior adhesion. Apply one even coat, let it dry completely (at least 2 to 4 hours), then lightly sand again with 220-grit and wipe clean.
Apply the first coat of cabinet paint. Use a foam roller on flat surfaces and an angled brush for edges and inset details. Work in long, even passes. Avoid going back over an area once it starts to tack up.
Let the first coat dry fully. Do not rush this. Depending on temperature and humidity, this can take 4 to 8 hours. Ottawa’s climate calls for conditions between 15 and 25 degrees Celsius, low humidity, and good ventilation for proper drying. A warm, dry Ottawa summer day in your basement workshop is ideal. A cold, damp October garage is not.
Lightly sand between coats. A quick pass with 220-grit between every coat removes any dust nibs or brush marks and gives each layer a smooth base to build on.
Apply a second coat. Two coats is the minimum for solid coverage and durability. Many pros apply three thin coats for the best results.
Allow full cure time. This is the step most DIYers skip. Paint may feel dry to the touch in hours, but full hardness takes much longer. Proper curing takes 5 to 7 days before the surface can handle regular use without denting or marking. Reinstall cabinets after they feel completely dry, but treat them gently for at least a week.
Reinstall hardware and doors. Refer to your labels and photos. Install new hardware if you chose to upgrade.
Pro Tip: Paint all door fronts face-up on a flat surface whenever possible. Gravity works in your favor, pulling the paint level as it settles rather than letting it drip or sag.
For ideas on achieving a modern updated look, see our guide on diy modern cabinet finish options. If your cabinets are made from oak, the details in our article on painting oak cabinets are especially relevant since oak grain requires specific filling techniques for a smooth result.
Even with careful prep and execution, mistakes can happen. Here is how to troubleshoot and avoid common DIY pitfalls.
Troubleshooting: Common pitfalls and how to avoid them
Most DIY cabinet painting problems trace back to one of three causes: rushing the prep work, skipping sanding between coats, or painting in poor conditions. Here is what to watch for and how to handle it.
Common problems and solutions:
Brush marks: Use a foam roller instead of a bristle brush on flat surfaces. Brush marks are nearly impossible to sand out once the paint cures. Thin coats applied with a foam roller produce a smooth result, and if you want a truly factory-level finish, renting a paint sprayer for $50 to $100 per day is worth considering. Check wet edge rolling tips for technique guidance.
Drips and runs: These happen when too much paint is applied at once. Always work in thin, even coats. If you catch a drip while the paint is still wet, you can brush it out. If it dries, let it cure fully, then sand it flat before repainting.
Peeling or poor adhesion: Almost always caused by inadequate degreasing or skipping primer. TSP cleaning followed by a proper primer is non-negotiable for a lasting finish.
Uneven color or sheen: Usually means one area got more coats than another. Keep track of where you have applied each coat and work methodically.
Slow curing in Ottawa’s climate: Humidity above 70 percent significantly slows drying and curing. If you are painting in fall or late spring when Ottawa sees high humidity, use a dehumidifier in your workspace.
Understanding the risks before you start is important. Our article on DIY painting risks covers additional situations where things can go wrong and how to protect yourself. For a more general look at refreshing your kitchen on a budget, easy cabinet updates is worth a read.
Pro Tip: Never paint when the temperature in your workspace is below 10 degrees Celsius or above 30 degrees Celsius. Paint applied outside that range will not cure correctly no matter how long you wait.
After tackling the tough parts, let us look at what successful DIYers achieve and how their results compare to professional services.
What results can you expect? DIY vs professional outcomes
Here is the honest comparison most guides avoid giving you.
Factor | DIY result | Professional result |
Finish quality | Good with care; can show brush marks | Smooth, factory-level spray finish |
Typical lifespan | 2 to 3 years | 10 to 15 years |
Warranty | None | Up to 6 years (Ottawa Cabinet Painting) |
Time investment | 40 to 60 hours of your time | Minimal disruption, ~10 days |
Upfront cost | $275 to $540 | $2,000 to $3,500+ |
Long-term value | Lower; repaints needed sooner | Higher; one job lasts much longer |
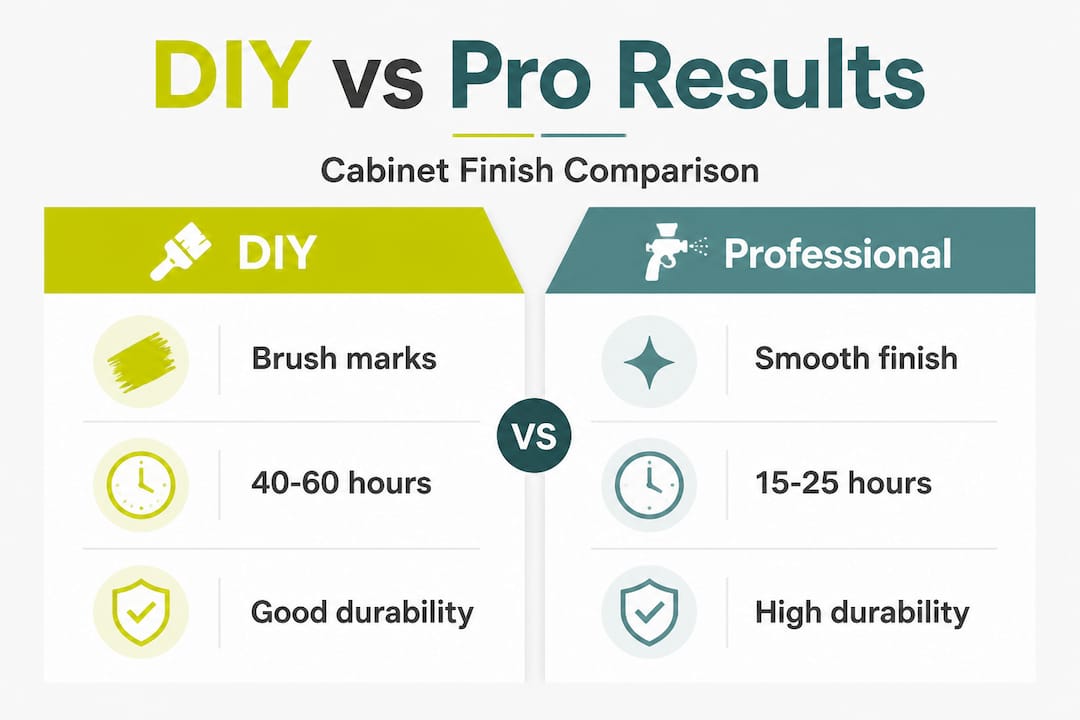
The math is important here. Professional cabinet painting offers better long-term value when you consider a 6-year warranty and a finish that lasts 10 to 15 years, compared to a DIY job that may need repainting in 2 to 3 years. That said, DIY still saves $1,500 or more upfront, which is a real advantage for handy homeowners working within a strict budget.
DIY makes sense if:
You are confident in your ability to follow a detailed process precisely
You have a suitable workspace and the time to invest properly
Your budget is tight and a repeat repaint in a few years is acceptable
You enjoy the satisfaction of a hands-on project
Professional service makes sense if:
You want a showroom-quality finish the first time
You plan to stay in your home long-term and want lasting results
You want a warranty backing the work
Your time is limited and kitchen disruption needs to be minimized
Our cabinet refinishing guide walks through the professional process in detail, and our modern cabinet repainting guide shows what a pro-level finish looks like in real Ottawa kitchens.
Pro Tip: If you are unsure whether your cabinets are worth the effort of a full repaint, run your hand across the surface. If the wood feels solid and the doors close cleanly, the cabinets themselves are almost certainly worth refinishing rather than replacing.
Our take: Why DIY isn’t always the cheapest or smartest option
We hear it often: “I just want to save money.” That is completely valid. But here is what we have seen over years of working in Ottawa kitchens. The homeowners who go the DIY route and then call us six months later are not upset about the cost of professional service. They are upset about the time they lost, the cabinets they have to live with, and the fact that they now have to spend money anyway to fix the result.
Ottawa’s climate is genuinely harder on painted finishes than many homeowners expect. Temperature swings between seasons cause wood to expand and contract. High humidity in summer slows curing. Dry winter air can cause fresh paint to crack if conditions are not controlled carefully. These are not reasons to avoid DIY entirely. They are reasons to take the process seriously and go in with realistic expectations.
The other thing we want to say plainly: the upfront cost difference is real, but so is the lifespan difference. A family planning to stay in their home for 10 or more years will likely repaint their cabinets two or three times over if they go the DIY route. Add up those repaints in time and money, and the professional option often comes out ahead. Our expert comparison goes deeper into this calculation if you want to work through the numbers for your specific situation.
What we always recommend is this: if you choose to DIY, do not cut corners. Give it the full 40 to 60 hours it deserves, use quality materials, and respect the curing process. A well-executed DIY job is genuinely impressive. A rushed one is a source of daily frustration.
Ready for a kitchen transformation? Professional help and resources in Ottawa
Whether you decide to take on this project yourself or explore professional options, you deserve a clear picture of what is available to you right here in Ottawa. At Ottawa Cabinet Painting, we specialize in spray-applied, factory-quality finishes backed by a 6-year warranty, and we work hard to minimize disruption to your household throughout the entire process. Browse our interior cabinet painting services for a full overview of what we offer. If you want to see the quality difference before committing, our before and after gallery shows real Ottawa kitchens we have transformed. When you are ready to take the next step, get your free spray painting quote and find out exactly what a professional finish would cost for your kitchen.
Frequently asked questions
How long does it take to DIY paint kitchen cabinets?
Most DIYers spend 40 to 60 hours total, spread across multiple days, including prep, painting, and the full curing period before reinstallation.
What kind of paint and primer work best for Ottawa’s climate?
Choose water-based bonding primers and kitchen-grade enamel paints, and make sure your workspace stays between 15 and 25 degrees Celsius with low humidity and good ventilation throughout the project.
Is it worth renting a paint sprayer for a DIY cabinet job?
Yes, if you want to avoid brush marks. Renting a sprayer at $50 to $100 per day delivers noticeably smoother results on flat cabinet doors compared to even the best foam roller technique.
How much money can I save by painting cabinets myself?
A typical DIY project saves at least $1,500 upfront compared to hiring a professional, though this does not account for the time investment or potential cost of repainting sooner.
How long will my painted cabinets last?
DIY finishes typically last 2 to 3 years before showing wear, while a professionally applied finish with a 6-year warranty can last 10 to 15 years in normal kitchen conditions.
Recommended
Comments