How cabinet paint adhesion works for lasting results
- Axcell Painting

- 5 hours ago
- 9 min read
TL;DR:
Proper cabinet paint adhesion depends on professional prep, including thorough cleaning, sanding, and suitable priming.
Skimping on these steps causes peeling, bubbling, and early failure, regardless of paint quality.
Ensuring adhesion through correct surface preparation guarantees a long-lasting, flawless finish in Ottawa kitchens.
Many Ottawa homeowners assume that a fresh coat of paint is all it takes to transform tired kitchen cabinets. Buy a quality paint, roll it on, and you’re done. But that thinking is exactly why so many cabinet paint jobs start peeling, chipping, or bubbling within a year or two. The real foundation of a lasting, beautiful cabinet finish is adhesion, and getting it right requires more than just good paint. In this guide, we’ll walk you through what adhesion actually means, why it matters for Ottawa kitchens specifically, and what professional prep and priming looks like when it’s done correctly.
Table of Contents
Key Takeaways
Point | Details |
Adhesion determines durability | Lasting cabinet paint jobs rely on deep, stable adhesion between layers, not just paint quality. |
Primer is essential | Specialty primers create the critical bond for cabinets, preventing common failures like peeling or bubbling. |
Prep work matters most | Proper cleaning, sanding, and surface testing are the main differences between lasting professional results and DIY frustration. |
Easy adhesion checks | Simple DIY tests and early warning signs help you verify paint jobs and avoid costly mistakes. |
Expert help pays off | Professional cabinet painters in Ottawa have the tools and knowledge to ensure long-lasting, flawless finishes. |
Why cabinet paint adhesion is critical for Ottawa homes
Ottawa kitchens take a beating. Think about the daily cycle of cooking steam rising from the stove, condensation building near the sink, and the constant opening and closing of cabinet doors. Now layer in Ottawa’s seasonal climate swings, from humid summers to dry, heated winters, and you have conditions that constantly stress every painted surface in your kitchen.
Without proper adhesion, paint has no real grip on the cabinet surface. It sits on top rather than bonding to the material underneath. The result? Paint that cracks, chips, or peels, sometimes within months. Here are the most common visible signs that adhesion was insufficient:
Peeling along the edges of cabinet doors, especially near hinges
Bubbling or blistering on flat door panels, often caused by trapped moisture
Chipping at corners where doors and drawers experience the most contact
Yellowing or staining bleeding through the topcoat from the cabinet material beneath
“Primer is the key adhesion interface for cabinets, preventing problems like peeling and bubbling.”
True durability doesn’t come from expensive paint alone. It comes from a well-adhered paint system where each layer, from the cleaned surface to the primer to the topcoat, bonds tightly to the one beneath it. That’s why cabinet painting prep is never a step we skip or rush. It is the foundation everything else rests on.
Having set the stage for why adhesion matters, we can now explore what actually makes paint stick well to cabinets.
The science of cabinet paint adhesion explained
Adhesion works on two levels at once: mechanical and chemical. Understanding both helps you see why shortcuts never pay off.
Mechanical adhesion happens when paint physically grips the tiny peaks and valleys of a surface. A smooth, glossy cabinet door gives paint almost nothing to hold onto. When you lightly sand that surface, you create microscopic texture, and paint fills those small grooves and locks in. Think of it like Velcro: both sides need texture for the connection to hold.
Chemical adhesion is what happens when primer bonds to the cabinet material at a molecular level. Different materials, such as raw wood, MDF, thermofoil, or previously painted surfaces, each have different chemical properties. A primer creates a chemically and mechanically compatible base that bridges those differences and gives the topcoat a consistent surface to bond to.
Adhesion type | How it works | Why it matters for cabinets |
Mechanical | Paint grips micro-texture from sanding | Essential on glossy or slick surfaces |
Chemical | Primer bonds to cabinet material | Critical on laminate, thermofoil, MDF |
Combined | Sanding + primer working together | The gold standard for lasting results |
Pro Tip: Skipping sanding on glossy cabinets and relying on primer alone is a recipe for disaster. Even the best bonding primer performs significantly better on a lightly scuffed surface. Sanding takes time, but it’s the step that makes the chemistry work.
Improper or missing primer nearly guarantees early paint failure. The topcoat has no compatible layer to bond to, so it cures on top rather than into the surface. Over time, the stress of daily use pulls it free. That’s why we always invest in smooth cabinet spray finishes that start with a proper primer system rather than taking shortcuts to save time.
Now that you understand the significance of adhesion, let’s break down the primers and products that actually make paint stick for years.
Primers: The secret to flawless cabinet finishes
Not all primers are created equal, and choosing the wrong one is one of the most common reasons cabinet paint jobs fail. The primer you need depends entirely on what your cabinets are made of and what condition they’re in.
Here’s a breakdown of the main primer types and where they perform best:
Primer type | Best for | Key benefit |
Shellac-based primer | Stain-heavy wood, knots, smoke damage | Exceptional stain blocking and adhesion |
Water-based bonding primer | Previously painted surfaces, MDF | Fast drying, low odor, strong bond |
Oil-based primer | Raw wood, high-humidity areas | Deep penetration, excellent durability |
Adhesion-specific primer | Laminate, thermofoil, glossy surfaces | Grips slick surfaces without sanding |
Wrong primer selection or insufficient priming can reduce adhesion longevity dramatically, even when the topcoat paint itself is high quality. A premium paint applied over an incompatible or thin primer coat will still fail.
Here’s what a good primer actually does for your cabinets:
Seals the surface so the topcoat applies evenly without absorbing unevenly into porous wood
Bonds to the material beneath, whether that’s bare wood, laminate, or a previous paint layer
Blocks stains and tannins from wood grains that would bleed through and discolor a light topcoat
Provides a consistent base so the final color looks uniform and true across all cabinet faces
Thorough cabinet prep for paint always includes selecting the right primer for the specific surface. This isn’t a one-size-fits-all decision. A thermofoil cabinet door needs a different primer than a raw oak cabinet, and applying the wrong one is exactly the kind of mistake that leads to a failing paint job within a year.
Understanding the science is valuable, but now let’s see how true professionals ensure the right adhesion in practice.
Professional prep steps that guarantee strong paint adhesion
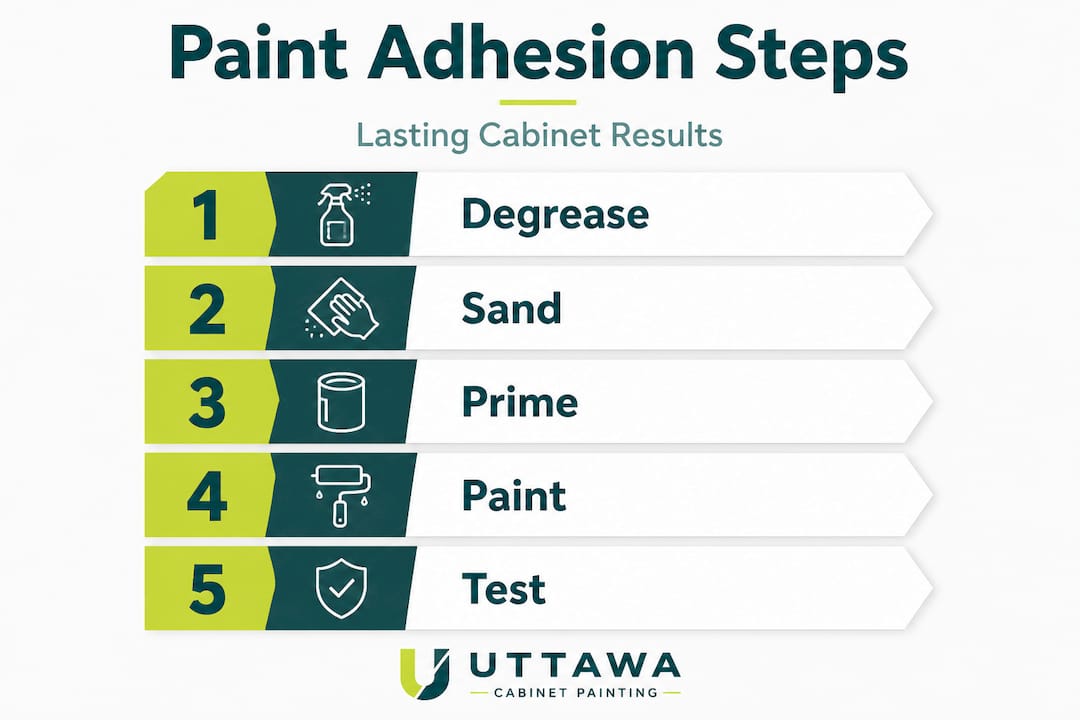
The difference between a DIY cabinet paint job that lasts two years and a professional finish that lasts a decade often comes down to the prep steps, not the paint. Here’s how professionals approach surface preparation for maximum adhesion:
Degrease thoroughly. Kitchen cabinets accumulate grease, cooking oil residue, and fingerprint oils over years of use. Even a thin layer of grease acts as a release agent between the cabinet surface and the primer. We use a dedicated degreaser, not just soap and water, to strip every trace of contamination.
Sand strategically. Light sanding with the right grit scuffs the surface just enough to create mechanical adhesion without damaging the cabinet material. For glossy finishes, this step is essential. Skipping it means the primer sits on top of the gloss rather than bonding to the cabinet.
Fill and caulk gaps. Any small cracks, dents, or gaps between cabinet components are filled and caulked before priming. Failing to do this leaves weak spots where paint edges can lift or peel later.
Apply the correct primer. Using the right primer for the specific cabinet material is critical, as we covered above. The primer coat is applied evenly and allowed to dry fully before any topcoat goes on.
Conduct adhesion and moisture tests. This is the step most DIYers skip entirely. Professionals use adhesion tests such as tape testing and moisture checks to confirm the surface is truly ready before the topcoat is applied.
Statistic callout: According to professional surface preparation standards, inadequate prep is responsible for the majority of paint adhesion failures. Getting the prep right is far more impactful than upgrading to premium paint.
Pro Tip: Ask any cabinet painter you’re considering hiring exactly how they test for adhesion before they prime. If they look confused or tell you they don’t bother, that’s a clear signal to keep looking. Testing is how professionals catch problems before they become expensive failures.
These steps are what separate a refinishing wooden cabinets project done right from one that starts showing wear in months. And they are why we invest the time we do in every kitchen we work on. If you want to understand what the full painting kitchen cabinets process looks like from start to finish, you can see our detailed process breakdown as well.
Now that you know what pros do, let’s explore ways to check and maximize adhesion if you’re doing your own evaluation.
How to test and spot true paint adhesion at home
Whether you’re checking the work of a previous painter or thinking about a refresh, there are simple ways to evaluate how well your cabinet paint has actually adhered. Catching a problem early saves you from a full repaint later.
Here are the key checks to run:
The tape test. Press a strip of standard painter’s tape firmly onto a painted cabinet surface, then pull it back quickly at a 90-degree angle. If paint comes off with the tape, adhesion was poor. Professionals run adhesion tests and moisture evaluations as a standard step before coating, and you can use this same basic principle to check existing paint.
Look for early bubbling. Small bubbles forming under the paint surface are a sign of trapped moisture or contamination that was present when the paint was applied. Bubbling almost always worsens over time.
Check corners and edges first. Adhesion failure typically shows up at the edges of doors and drawer fronts before it appears on flat surfaces. If you see lifting or chipping at corners, that’s an early warning sign.
Feel for stickiness. If a painted cabinet surface feels slightly tacky even weeks after painting, it may not have cured properly. This can happen when paint is applied over a contaminated or incompatible surface.
Pro Tip: Run the tape test on an inconspicuous area, like the inside edge of a cabinet door, before you commit to a full paint project. If the existing paint lifts easily, you know the surface needs proper prep and priming before any new coat goes on.
Spotting these warning signs early allows you to address the root cause, which is almost always an adhesion issue, before the problem spreads. If you’re already dealing with peeling or bubbling cabinets in your Ottawa home, check out our cabinet refinishing near me guide to understand your options.
The truth most homeowners miss about paint adhesion
Here’s something we’ve observed consistently over years of working on Ottawa kitchen cabinets: the homeowners who are disappointed with their cabinet paint job almost never chose bad paint. They chose a painter, or attempted a DIY project, where the prep and priming steps were undervalued.
The most common failure we see isn’t a bad topcoat. It’s skipping the degreasing step, using a cheap all-purpose primer instead of a bonding primer suited to the cabinet material, or rushing the sanding because it’s time-consuming and unglamorous. The prep work is invisible in the final result, which makes it easy to cut corners and hard to justify spending time on it.
But here’s the uncomfortable truth: expensive spray equipment and premium paint brands cannot compensate for a poorly prepped surface. We’ve seen top-of-the-line paint fail on cabinets that weren’t properly degreased. And we’ve seen standard-grade paint last years on cabinets that were prepped meticulously.
The real upgrade in cabinet painting is invisible. It’s the cabinet prep insights and adhesion work that happens before a drop of paint is applied. When we tell homeowners that our process takes around ten days, it’s because we’re not rushing the steps that determine whether a finish lasts two years or ten. The beautiful color you see at the end is a reward for all the careful work done underneath it.
Ready for flawless cabinet painting in Ottawa?
If this guide has shown you anything, it’s that a lasting cabinet finish is built from the ground up through proper adhesion, correct primer selection, and meticulous prep work. That’s exactly how we approach every project at Ottawa Cabinet Painting. Our process is designed to deliver a factory-finished, showroom look that stands up to years of Ottawa kitchen life. You can browse our before and after cabinet results to see what a properly adhered, professionally painted cabinet finish actually looks like in real Ottawa homes. And if you’re ready to move from reading to results, our interior cabinet painting service covers everything from prep and priming to the final smooth topcoat, backed by our 6-year warranty. Reach out for a free quote today.
Frequently asked questions
What causes kitchen cabinet paint to peel or bubble?
Poor adhesion from inadequate primer, surface contamination, or moisture is the most common cause, since primer is the key adhesion interface that prevents peeling and bubbling when properly applied.
How do I know if primer is compatible with my cabinets?
Check that the primer is rated for your specific cabinet material, and ask your painter whether they conduct adhesion tests and moisture evaluations for compatibility before coating.
Can professional cabinet painting really outlast a DIY job?
Yes, because professionals follow rigorous prep and adhesion steps, and use adhesion tests such as tape testing and moisture checks that most DIY projects skip entirely.
Do all types of paint require primer for cabinets?
Yes, primer is essential for every cabinet painting project because it provides a mechanically and chemically compatible base for the topcoat, regardless of the paint type used.
Recommended
Comments