DIY Cabinet Painting and Door Spraying in Ottawa A Beginner Guide to Pro Results

A full kitchen renovation can feel out of reach, but tired cabinets do not always need to be replaced. If the boxes are solid and the layout works, paint can give the room a fresh, clean look for far less disruption.
The tricky part is the doors.
Cabinet doors and drawer fronts show every brush mark, speck of dust, worn corner, and uneven sheen. That is why a hybrid approach makes so much sense for Ottawa homeowners on a budget: remove and deliver the doors to a finishing shop for professional spraying, then paint the cabinet boxes yourself at home.
You avoid the hardest part, still keep costs lower than a full-service job, and get a finish that looks much closer to factory quality than a weekend brush-and-roller rush job.

Why the hybrid DIY and shop-sprayed approach works
Painting cabinet boxes is usually manageable for a careful beginner. The frames stay in place, they have fewer large flat surfaces, and small brush or roller marks are less noticeable once the doors go back on.
Doors are different. They need more space, cleaner conditions, careful handling, and smooth spray application. A shop setup can control dust, drying, orientation, and coating thickness better than most garages or basements.
For price-sensitive homeowners, this split method can be the sweet spot:
You handle removal, cleaning, light prep, and painting the fixed cabinet boxes.
The shop handles degreasing, sanding, priming, spraying, drying, and curing the doors.
You reinstall everything once the finish has hardened enough for careful handling.
This is especially helpful in Ottawa, where cold weather and humidity swings can make DIY spraying in a garage unreliable for much of the year. A controlled shop space removes that guesswork.
The most visible part of a cabinet painting project is not the cabinet box. It is the door face you see every time you walk into the room.
Start with a realistic cabinet check
Before buying paint, inspect the cabinets. Paint improves the surface, but it will not fix failing materials.
Good candidates include:
Solid wood doors
MDF doors in good condition
Maple, oak, birch, or painted cabinetry with sound structure
Cabinet boxes that are firmly attached
Doors that open and close properly
Be cautious with:
Peeling thermofoil
Water-swollen MDF
Flaking veneer
Greasy cabinets that have not been cleaned in years
Doors with deep cracks near hinges
Cabinets with major structural damage
If a few doors are damaged, ask whether they can be repaired or replaced before finishing. A beautiful spray finish over a failing surface is still a problem waiting to show.
Tools and materials you will need
You do not need a professional spray booth to do your part well. You do need the right prep tools and enough patience to use them.
Basic tools for removing and organizing doors
Keep the removal stage neat. It saves hours later.
Painter’s tape
Permanent marker
Small bags or containers for screws and hinges
Drill or screwdriver
Phone camera for reference photos
Drop cloths or moving blankets
Cardboard or padding for transport
Label each door and opening with a system you understand. For example, use `U1` for upper door one and `B1` for base door one. Put hardware from each door in its own bag, then label the bag to match.
Take photos before removing anything. Get wide shots of the kitchen and close-ups of hinge positions, drawer slides, bumpers, and odd details.
Prep and painting supplies for cabinet boxes
For the cabinet frames, gather:
Degreasing cleaner
Clean cloths or shop towels
Fine sanding sponges
Vacuum with brush attachment
Tack cloth or damp microfibre cloth
Painter’s tape
Masking paper or plastic
High-quality angled brush
Small foam or microfibre rollers
Paint tray and liners
Bonding primer
Cabinet-grade paint
Disposable gloves
Respirator or suitable mask for sanding and painting
Good lighting
Do not skimp on the brush, roller, primer, or paint. Cabinet projects fail most often because of poor cleaning, weak adhesion, or soft paint that cannot handle daily use.

A beginner step-by-step guide to painting cabinets
This guide assumes you are sending the doors and drawer fronts out for spraying and painting the fixed cabinet boxes yourself.
1. Empty the cabinets near your work area
Remove food, dishes, small appliances, and cleaning products from the cabinets you will paint around. You do not need to empty every cabinet in the kitchen, but clear enough space to work cleanly.
Protect counters, floors, appliances, and backsplashes. Paint prep creates dust, and primer can find its way onto surfaces you thought were safe.
2. Remove doors, drawer fronts, and hardware
Work one section at a time. Remove the doors, hinges, knobs, pulls, and drawer fronts if they detach from the drawer boxes.
Label everything as you go. Do not rely on memory. Cabinet doors can look identical, but tiny differences in hinge placement can make reinstalling frustrating.
If you are delivering the doors to a shop, wrap or stack them carefully. Avoid sliding painted or wood surfaces against each other. Use blankets, cardboard, or foam sheets between pieces.
3. Clean every surface thoroughly
Kitchen cabinets collect cooking oils, hand residue, dust, and airborne grease. Paint will not bond well to grime.
Clean cabinet boxes, face frames, end panels, and trim with a degreasing cleaner. Pay close attention to areas near the stove, sink, garbage pullout, and handles.
After degreasing, wipe again with clean water if the cleaner requires rinsing. Let everything dry fully before sanding.
4. Scuff sand for adhesion
You are not trying to remove the old finish. You are dulling the surface so primer can grip.
Use a fine sanding sponge and sand evenly. Get into edges, corners, and glossy areas. If the cabinets have an existing clear coat, make sure the shine is reduced.
Vacuum the dust, then wipe with a tack cloth or lightly damp microfibre cloth. Dust left on the surface can create rough patches in the primer.
5. Tape and mask carefully
Mask walls, inside cabinet openings, countertops, floors, and appliances. Use painter’s tape along clean lines and masking paper where you need wider protection.
Do not rush this step. A crisp paint line can make the difference between “DIY but decent” and “that looks professionally done.”
6. Prime the cabinet boxes
Use a bonding primer suited to the cabinet material and the existing finish. This matters most on glossy factory finishes, stained wood, laminate surfaces, and old oil-based coatings.
Apply primer in thin, even coats. Use a brush for corners and profiles, then a small roller for flat areas. Watch for drips under rails and along inside edges.
Let the primer dry according to the product directions. Dry to the touch does not always mean ready to sand or recoat.
7. Sand the primer lightly
Once the primer is dry, lightly sand rough spots, dust nibs, and raised grain. Vacuum and wipe again.
This step feels small, but it is one of the best ways to get a smooth final result. Paint exaggerates bumps and ridges. It rarely hides them.
8. Paint the cabinet boxes
Use cabinet-grade paint designed for trim, doors, or furniture. These paints dry harder than regular wall paint and handle cleaning better.
Apply two thin coats rather than one heavy coat. Brush into corners, then roll flat surfaces lightly. Keep a wet edge where possible, and avoid overworking paint as it starts to set.
Give each coat proper drying time. Ottawa homes can be dry in winter and humid in summer, so drying conditions may vary. Follow the label, and add time when the space feels cool or damp.
9. Let the finish cure before hard use
Paint can feel dry long before it has cured. Treat the cabinet boxes gently for the first while. Avoid scrubbing, slamming drawers, or pressing objects against fresh paint.
When the sprayed doors return, handle them with clean hands or gloves. Reinstall slowly, adjust hinges, and add new bumpers if the old ones are worn.

How to get a professional-looking finish
Good cabinet painting is mostly preparation. The finish coat matters, but it cannot save a rushed surface.
Choose the right paint
Look for hard-wearing enamel, urethane acrylic, or cabinet and trim paint from a reputable brand. The label should mention cabinets, doors, trim, furniture, or high-traffic surfaces.
Avoid basic wall paint. It may look fine for a week, but it is more likely to stay soft, mark easily, or fail around handles.
For sheen, satin and semi-gloss are common choices. Satin hides small flaws better. Semi-gloss reflects more light and can be easier to wipe, but it also shows surface defects more clearly.
Pick colours with your lighting in mind
Ottawa kitchens deal with very different light through the year. A white that looks warm in a paint store can look grey in a north-facing kitchen in February. A dark colour can look rich in daylight and heavy at night.
Test large samples near the backsplash, flooring, and countertop. Check them in the morning, afternoon, and evening.
Popular cabinet colour families include:
Soft white
Warm greige
Muted green
Navy
Charcoal
Light mushroom
Classic black for islands or lowers
If your shop is spraying the doors, confirm the exact paint brand, colour name, sheen, and product line. The cabinet boxes and doors need to match.
Prepare oak and open-grain wood properly
Oak cabinets can look beautiful painted, but the grain may still show. Some homeowners like that subtle texture. Others expect a smooth, modern finish.
If you want the smoothest result, ask about grain filling. It adds labour, but it reduces the open-pore look. If you skip it, expect some grain texture to remain even after primer and paint.
Control dust as much as possible
Dust is the enemy of a smooth finish. Before painting, turn off nearby fans, close windows during dusty weather, and clean the room well.
Use good lighting from the side to spot drips, missed edges, and roller texture. A work light can reveal flaws that overhead kitchen lighting hides.
Do not spray indoors without the right setup
Spraying can produce a gorgeous finish, but it also creates overspray and fine airborne particles. It requires masking, ventilation, proper protective gear, and experience.
That is why sending the doors out is such a practical compromise. You still get the sprayed finish where it matters most, without turning your kitchen into a spray zone.
How to deliver doors to a local finishing shop
Call ahead before removing everything. Ask how the shop wants doors labelled, cleaned, and delivered. Some shops prefer hinges removed. Others may want to inspect the doors first.
Before transport:
Remove knobs and pulls.
Label the back of each door where it will not show.
Keep hinge hardware together.
Protect corners from dents.
Avoid stacking bare surfaces without padding.
Bring a colour sample or product details if you are matching boxes painted at home.
Ask about timelines, curing, touch-up expectations, and whether they spray drawer fronts as well as doors. Also ask what condition the doors should be in when they arrive. Some shops handle full prep. Others expect basic cleaning first.
This approach is one of the most practical options for DIY cabinet painting and door spraying in Ottawa because it gives beginners a clear division of labour. You take on the parts that are easier to learn. The shop takes on the part that needs equipment, space, and repetition.
Ottawa resources for DIY cabinet painters
Ottawa has plenty of places to build confidence before starting. Availability changes, so check current schedules before making plans.
Local paint retailers
Paint stores can help you choose primer, cabinet paint, rollers, and sanding supplies. Bring photos of your cabinets and describe the current finish. If you know whether the cabinets are wood, MDF, laminate, or thermofoil, mention that too.
Look for local retailers that carry cabinet-grade products from brands such as Benjamin Moore, Sherwin-Williams, Dulux, and other professional paint lines.
Hardware and renovation stores
Home Depot, RONA, Home Hardware, and similar stores in the Ottawa area are useful for drop cloths, masking supplies, sanding sponges, drill bits, cleaning products, and replacement hardware.
Many stores also have project guides or occasional how-to sessions. Schedules vary by location.
Lee Valley and woodworking resources
Lee Valley has a strong presence in Ottawa and is well known for tools, finishing supplies, and practical woodworking education. It can be a helpful stop for sanding tools, scrapers, finishing advice, and hardware ideas.
Ottawa Tool Library and maker spaces
For homeowners who do not want to buy every tool, look for community options such as the Ottawa Tool Library or local maker spaces. These can be useful for clamps, hand tools, sanding equipment, and beginner-friendly workshops.
Community education
Check adult learning programs, community centres, and local woodworking groups for short courses. A one-evening class on sanding, finishing, or basic tool use can make the whole cabinet project feel less intimidating.
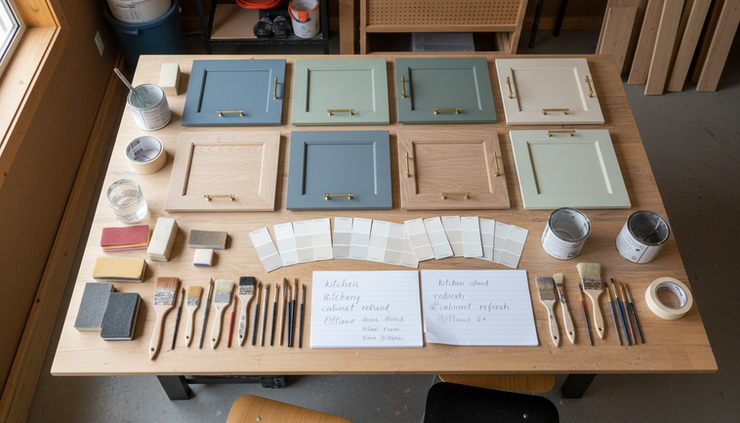
Common beginner mistakes to avoid
Most cabinet painting problems are preventable. Watch for these before they happen.
Mistake | Better approach |
Skipping degreasing | Clean twice near cooking areas and handles |
Using wall paint | Choose paint made for cabinets, trim, or doors |
Painting over gloss | Scuff sand until the shine is dulled |
Applying thick coats | Use thin coats and allow proper drying time |
Losing track of hardware | Bag and label screws, hinges, pulls, and bumpers |
Reinstalling too soon | Give paint time to cure before daily use |
Expecting spray results with a brush | Spray the doors off-site and paint boxes carefully |
What success should look like
A successful beginner cabinet project does not need to be perfect under a magnifying glass. It should look clean, even, and intentional from normal viewing distance.
The doors should have a smooth sprayed finish. The cabinet boxes should match in colour and sheen. The edges should be clean. Handles should line up. The paint should feel solid, not tacky or soft.
Most of all, the kitchen should feel renewed without the cost and waste of tearing out cabinets that still have years of life left.
If the idea of painting an entire kitchen feels overwhelming, split the work. Remove the doors. Let a shop spray them. Take your time on the boxes. With careful prep, patient coats, and the right local support, a polished cabinet update is well within reach for a motivated homeowner.
Comments