Avoid Lead Risk When Refinishing Oak Kitchen Cabinets in Ottawa

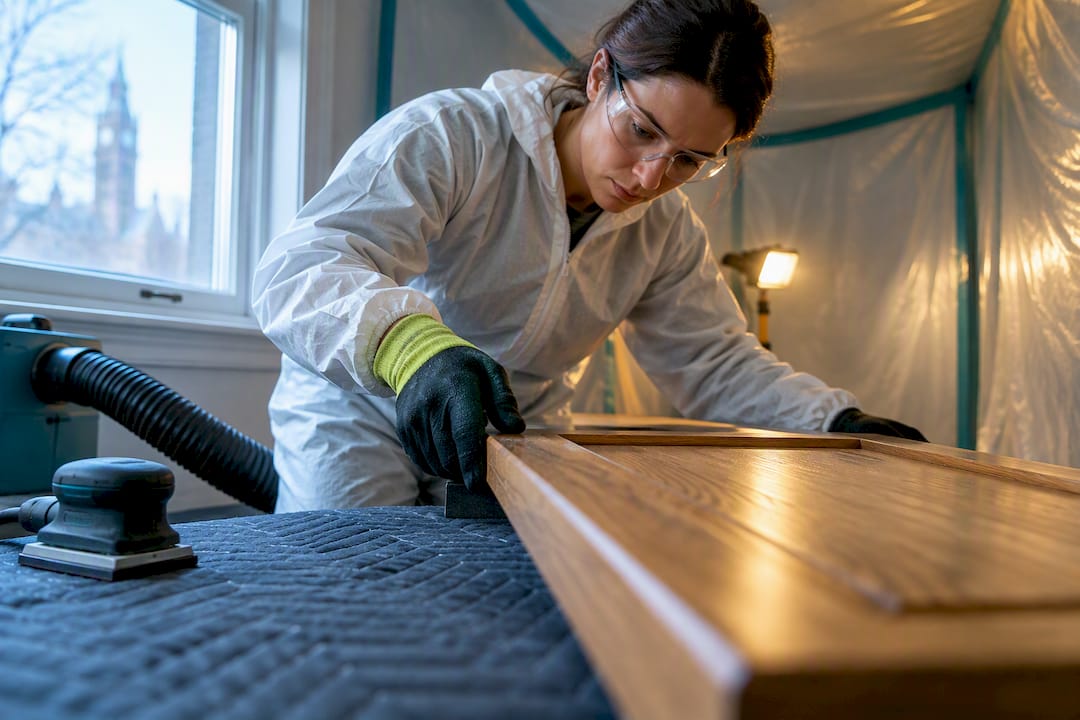
Start by inspecting your cabinets and testing one door before you commit to a method. If the existing finish is sound, clean it and recoat it. If you want the grain to stay visible, restain it. If you want a flat, modern look, plan on painting with proper primer and grain fill. Before any sanding or stripping, test for lead if your home was built before 1991.
TL;DR:
Stripping is unnecessary if the existing finish is intact, as cleaning and light abrasion can often restore the surface without full removal.
Testing for lead is crucial before sanding or stripping cabinets in homes built before 1991 to prevent health hazards from lead dust exposure.
Proper preparation, including repairing damage and cleaning surfaces thoroughly, is essential to achieve a smooth, durable finish on oak cabinets.
Full refinishing with paint requires extra time for grain filling, primer application, and curing, typically extending the project to more than two weeks for DIYers.
Professional refinishing provides a factory-grade finish with consistent color matching and minimal disruption to your kitchen, especially in high-risk or large-scale projects.
Table of Contents
What Are the Best Methods for Refinishing Oak Kitchen Cabinets?
What Tools and Supplies Do You Need to Refinish Oak Cabinets?
What Safety Precautions Should You Take Before Sanding or Stripping?
Why Do My Oak Cabinets Look Different After Finishing, and How Do I Fix It?
When Should You Hire a Professional Instead of Doing It Yourself?
What Are the Best Methods for Refinishing Oak Kitchen Cabinets?
Three paths lead to a finished oak cabinet, and picking the wrong one wastes weekends. The right choice depends on what’s already on the wood, what look you want, and how much time you’re willing to spend in your kitchen with a sander running.
Refresh (clean and recoat) works when the existing finish is intact, just dull or scuffed. You clean, scuff-sand lightly to promote adhesion, and recoat. Canada’s own code of practice for paint stripping points out that stripping isn’t always necessary. Cleaning, light abrasion, or recoating often does the job when the old coating is sound, and it skips the waste and exposure that come with full stripping.
Restaining preserves oak’s grain, which is the whole reason people choose oak in the first place. You’re not stuck with the original color. Gel stains and modern wiping stains open up a wide range from honey to espresso, but oak’s open pores mean uneven absorption is a real risk if prep is rushed.
Painting delivers the flat, showroom look so many Ottawa kitchens are chasing right now, but it demands the most prep. Oak’s open grain shows through paint as texture unless you fill it, so budget extra time and material for grain fill before you ever touch primer.
Run through this checklist before deciding:
Is the current finish cracking, peeling, or chalky, or just tired-looking?
Do you want the wood grain visible, or a smooth painted surface?
How many weekends can you realistically give this project?
What’s your budget for stain, primer, topcoat, and possible sample doors?
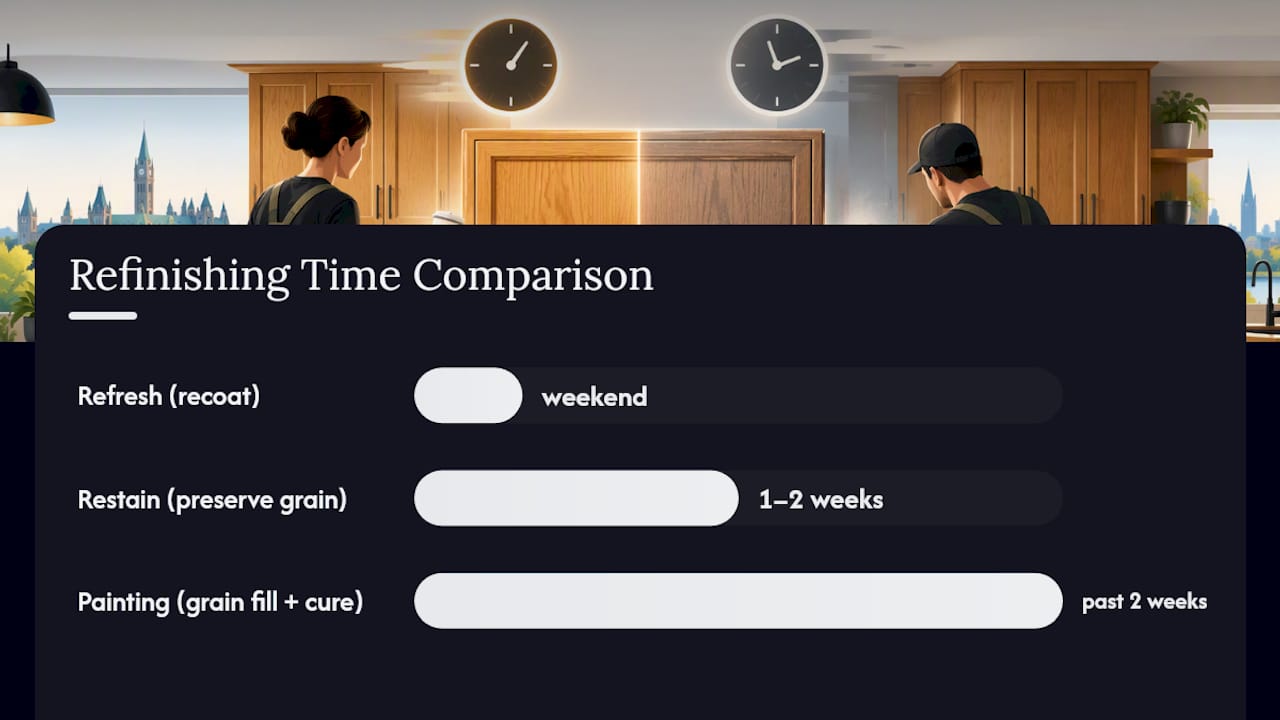
A refresh might take a weekend. Restaining a full kitchen often runs one to two weeks with dry time between coats. Painting properly, with grain fill and cure time, frequently stretches past two weeks for a DIYer working evenings.
What Tools and Supplies Do You Need to Refinish Oak Cabinets?
Gather everything before you remove the first door. Running to the hardware store mid-project, with dust already in the air and a door half-sanded, is how projects stall for a month.
For sanding and surface prep, you’ll want an orbital sander for flat door faces and a palm sander or sanding sponge for edges and profiles. Start at 120 grit to knock down the old finish, then move to 180 or 220 for a smooth surface ready to accept stain or primer. Skipping straight to fine grit on a rough finish just wastes paper.
Finish selection depends on your chosen method:
Gel stain for oak going the restain route (it sits on the surface rather than soaking unevenly into open grain)
Oil-based stains for deeper color penetration and richer tone, though they need longer dry times and mineral spirits for cleanup
Water-based stains for faster dry times and easier cleanup, with slightly less depth of color
Stain-blocking primer if you’re painting, since oak’s tannins bleed through ordinary primer and leave yellow or brown ghosting
Acrylic polyurethane or conversion varnish for the topcoat, since finishing performance depends on how the whole system, from prep to cure, works together
Safety and cleanup gear isn’t optional: a NIOSH-rated respirator for organic vapors, safety goggles, nitrile gloves, a HEPA vacuum, and a stack of tack cloths. Seal the kitchen off from the rest of the house with plastic sheeting, crack a window, and run a fan exhausting outward. Mask countertops and floors with drop cloths, and tape off anything you’re not refinishing before you open a single can.
What Safety Precautions Should You Take Before Sanding or Stripping?
Check your home’s age before you touch a sander to old cabinet finishes. Health Canada warns that homes built before 1991 may contain lead-based paint, and sanding or burning that coating releases lead dust into your air and your lungs. If your cabinets have been repainted multiple times over the decades, or your house predates 1991, test before you sand.
By the Numbers: Commercial paint strippers can contain 70 to 90 percent dichloromethane, a solvent hazardous enough that Canada’s own code of practice recommends avoiding it indoors whenever possible.
Sanding an old finish blindly is a recipe for disaster if lead is present, and stripping with a high-dichloromethane product in an unventilated kitchen carries its own risks. If a chemical stripper is genuinely necessary, Health Canada’s guidance is specific: read the label fully, work outdoors when you can, ventilate the space if you can’t, wear protective clothing and gloves, and use a respirator rated for organic vapors rather than a basic dust mask.
Follow these practices whenever you’re stripping or sanding an unknown finish:
Test suspected lead coatings before disturbing them, and never sand or burn a finish you haven’t cleared
Seal off the work area with plastic sheeting and keep kids and pets out entirely
Ventilate aggressively, ideally with a window fan pulling air outward, not just recirculating it
Clean up with a HEPA vacuum rather than a broom, which just redistributes fine dust
Bag dust and stripping waste for proper disposal rather than tossing it in household trash
Choose a lower-dichloromethane product if stripping is unavoidable, and work at moderate temperatures to limit fumes
If your cabinets test positive for lead, or the job involves stripping an entire kitchen’s worth of doors in an enclosed space, that’s the point to call a professional with proper containment equipment rather than pushing through with a box fan and an open window.
How Do You Refinish Oak Cabinets Step by Step?
Once you’ve cleared safety concerns and gathered your materials, the actual workflow follows a logical sequence. Skipping steps to save a weekend almost always costs you two weekends later fixing the result.
Photograph and label everything. Before you remove a single door, take photos of the kitchen layout and number each door and drawer front with painter’s tape matched to its cabinet frame. Reassembly gets confusing fast once twelve doors look identical and none are attached to anything.
Remove hardware and bag it. Pull hinges, knobs, and pulls, and store them in labeled zip bags per door. Buying new hardware later is fine, but losing track of which screws fit which hinge is an avoidable headache.
Repair damage before finishing. Address loose joints, dented corners, and lifted veneer edges now. Wood filler needs to cure and sand flush before stain or primer goes anywhere near it, and a repair rushed under fresh finish tends to show through later.
Degrease every surface, especially touch points. Grease around handles and range-adjacent doors defeats adhesion even when the wood looks perfectly clean. A practical check is wiping a cleaned area with a fresh white cloth; if it comes away dirty, clean again.
Sand or deglaze based on your chosen method. Sand to your target grit for stain or paint prep, but don’t sand indiscriminately to bare wood on veneered doors. Match your sanding depth to your goal rather than assuming more is always better; oversanding can soften edges or cut through a thin veneer layer.
Remove all dust before finish goes on. HEPA vacuum every surface, then wipe with tack cloths. Dust trapped under a topcoat shows up as texture you’ll be sanding out later.
Test a full sample on a real door before committing. This is the step most DIYers skip, and it’s the one that saves the whole project. Apply your stain or primer and full topcoat system to one actual cabinet door, or an inconspicuous section, and let it cure completely per the manufacturer’s recoat and cure schedule. Approving a fully cured sample before finishing the whole kitchen catches color surprises, blotching, or adhesion problems while you can still fix them cheaply.
Apply your chosen finish. For staining, work with the grain and wipe excess promptly; gel stains sit on the surface and forgive uneven application better than penetrating oils. For painting, prime with a stain-blocking product to prevent oak’s tannins from bleeding through, fill grain if you want a flat look, then apply topcoat in thin, even passes. Spraying gives a smoother result than brushing but requires more setup and ventilation.
Respect cure times before reassembly. Recoat windows and full cure times vary by product, sometimes days apart. Handle doors gently and avoid stacking them until the manufacturer’s cure window has fully passed, then reinstall hardware and rehang doors with care.
Why Do My Oak Cabinets Look Different After Finishing, and How Do I Fix It?
Oak can surprise you once a topcoat goes on, because wet finish darkens and shifts color compared to how the stained wood looked dry. That’s exactly why testing the full system, stain through cured topcoat, on a real sample matters more than trusting how a stain looks straight out of the can.
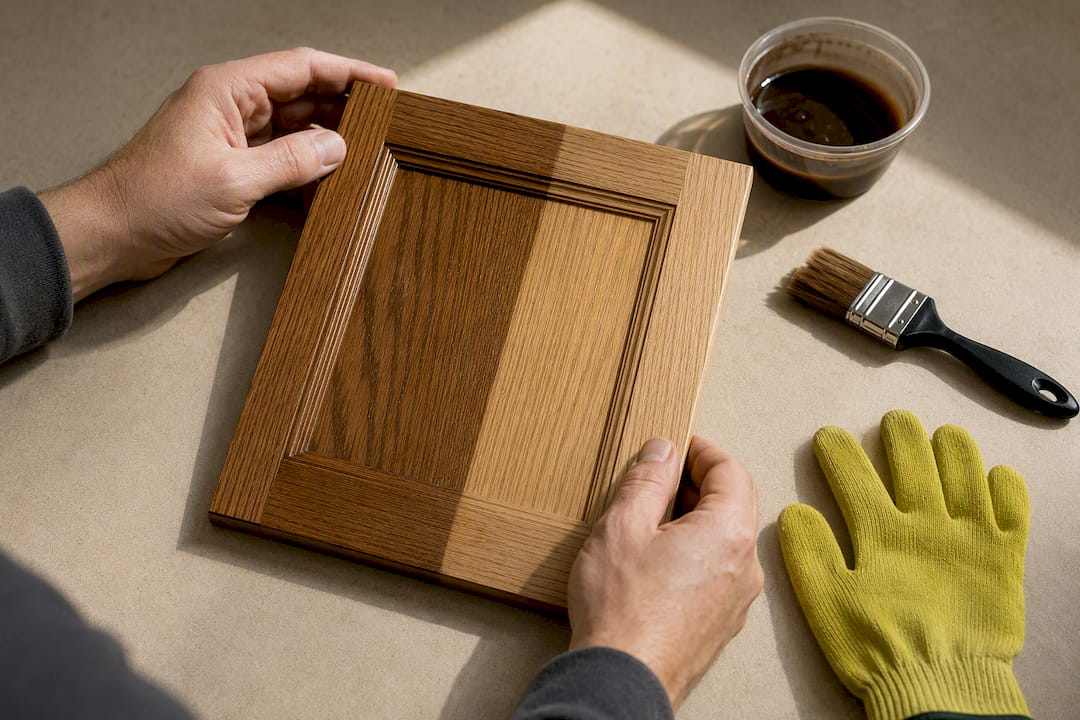
Tannin bleed shows up as yellow or brown blotches creeping through white or light paint, usually within days. Oak’s natural tannins react with certain primers, so switch to a dedicated stain-blocking primer if you see this happening, and reprime before it spreads further.
Blotchy stain absorption happens because oak’s open grain drinks stain unevenly, especially on flat-sawn sections versus quarter-sawn areas. A pre-stain conditioner or switching to gel stain, which sits on the surface rather than soaking in, usually solves this on future doors. Patch fixes on an already-blotchy door often mean a light re-sand and a second, more controlled coat.
Textured or raised grain under paint means the pores weren’t filled before priming. Oak’s open grain needs pore filler for a genuinely flat painted surface; skipping this step is the single most common reason painted oak ends up looking like orange peel instead of the smooth finish homeowners picture.
Pro Tip: Keep your test sample door even after you approve it. Six months from now, it’s the fastest way to check whether your topcoat is holding up as expected or starting to show wear ahead of schedule.
Once your cabinets are finished, protect the investment: wipe spills promptly, avoid ammonia-based cleaners that can dull topcoats, and use soft cloths rather than abrasive sponges around handles and edges.
When Should You Hire a Professional Instead of Doing It Yourself?
Some situations tip the scale toward calling a pro, and it’s rarely about skill alone. Lead risk in an older Ottawa home, an enclosed kitchen with poor ventilation, or a full-kitchen job that requires chemical stripping are exactly the conditions where a controlled shop environment beats a garage setup with a box fan.
Quality is the other half of the equation. A dedicated spray shop delivers a factory-smooth finish that brushing or rolling rarely matches, along with more consistent grain filling and tighter color matching across dozens of doors than most DIYers can hold door to door. Controlled curing conditions also mean less risk of the tackiness or uneven sheen that comes from finishing in a variable-temperature kitchen.
If you’re vetting a refinisher, ask about their workmanship warranty, whether they spray in a dedicated shop or on-site, how they handle sample approval before committing to your whole kitchen, and what their realistic project timeline looks like.
— Ottawa
How Ottawa Cabinet Painting Handles Oak Cabinet Refinishing
If the safety precautions and sample testing above sound like more than you want to manage on ladders in your own kitchen, that’s exactly the gap. Specialists work solely on cabinetry, spraying every door in a dedicated shop for a smooth, factory-grade finish rather than brushing on-site, and the process is built to keep your kitchen usable throughout the project rather than shutting it down for weeks.
A typical quote covers an on-site or virtual assessment of your oak cabinets, a look at color and finish options, and a project timeline, with most jobs completed without losing full use of your kitchen. Workmanship guarantees back the finished result. If a few doors just need repair rather than a full refinish, Single Cabinet Door Repair is a smaller starting point.
Ready to see what your oak cabinets could look like? Request a quote through Ottawa Kitchen Cabinet Refinishing and get a real timeline for your kitchen.
Where to Find Official Safety and Finishing Guidance
For lead testing and DIY chemical safety, Health Canada’s chemical safety guidance for DIY projects covers testing and containment. For stripper-specific precautions, see using paint strippers safely. For the environmental and emissions side of dichloromethane-based strippers, Canada’s code of practice on dichloromethane emissions lays out safer work practices. For finishing chemistry and process planning, Woodworking Canada’s guidance on factory finishing is worth reading before you open a can of anything.
Sources
FAQ
How Much Does It Cost to Refinish Oak Kitchen Cabinets?
DIY costs mainly cover materials, stain, primer, topcoat, sanding supplies, and PPE, which typically run a few hundred dollars for a full kitchen. Professional pricing depends on scope; Ottawacabinetpainting’s Single Cabinet Door Repair starts from $50 per door, while a Full Kitchen Repair starts from $500, with full refinishing quoted after an assessment.
Should I Sand or Strip My Oak Cabinets First?
Neither is automatically required. Canada’s code of practice notes that cleaning, light abrasion, or recoating can suffice when the existing finish is sound, so reserve stripping for finishes that are failing or too thick to sand through safely.
Is It Safe to Sand Old Cabinet Finishes Myself?
Only after testing, especially if your home was built before 1991. Health Canada advises testing suspected lead-based coatings before any sanding, since disturbing lead paint releases hazardous dust into your home.
What’s the Best Finish for Oak Cabinets, Oil or Water-Based?
Oil-based stains and topcoats penetrate deeper and often show richer color, but they take longer to dry and need solvent cleanup. Water-based products dry faster and clean up with water, with a slightly lighter color result. Testing both on a sample door before committing is the safest way to decide.
How Long Does Refinishing Oak Cabinets Take?
A simple clean-and-recoat refresh can take a weekend, while a full restain or paint job with proper cure time between coats often runs one to two weeks for a DIYer. Professional shop refinishing timelines depend on kitchen size and are confirmed during your quote.
Recommended
Comments