Achieve a Modern Look with Cabinet Refinishing Near Me
- demoore5506
- Dec 29, 2025
- 7 min read
Most Ottawa homeowners want a fresh kitchen without spending like an American celebrity remodel. Cabinet refinishing offers a budget-friendly way to transform your space while keeping disruption to a minimum. With a wide range of custom color choices, you can create a stylish and functional kitchen tailored to your taste. This straightforward guide covers each step for a professional-quality finish, so you get lasting beauty and quality without the high cost.
Table of Contents
Quick Summary
Key Point | Explanation |
1. Thorough preparation is essential | Properly preparing your kitchen ensures a professional finish and protects surrounding areas from damage during refinishing. |
2. Clean surfaces for paint adhesion | Deep cleaning cabinets removes grease and grime, allowing paint to adhere properly and enhancing the final appearance. |
3. Sand and repair damaged areas | Sanding surfaces and filling imperfections create a smooth base for painting, significantly improving the overall look of cabinets. |
4. Apply paint in thin, even coats | Using thin coats prevents drips and brush marks, leading to a smoother, more professional-looking finish on your cabinets. |
5. Inspect and reinstall hardware carefully | Inspect finished surfaces for flaws before reassembling, using reference materials for precise hardware placement to avoid misalignment. |
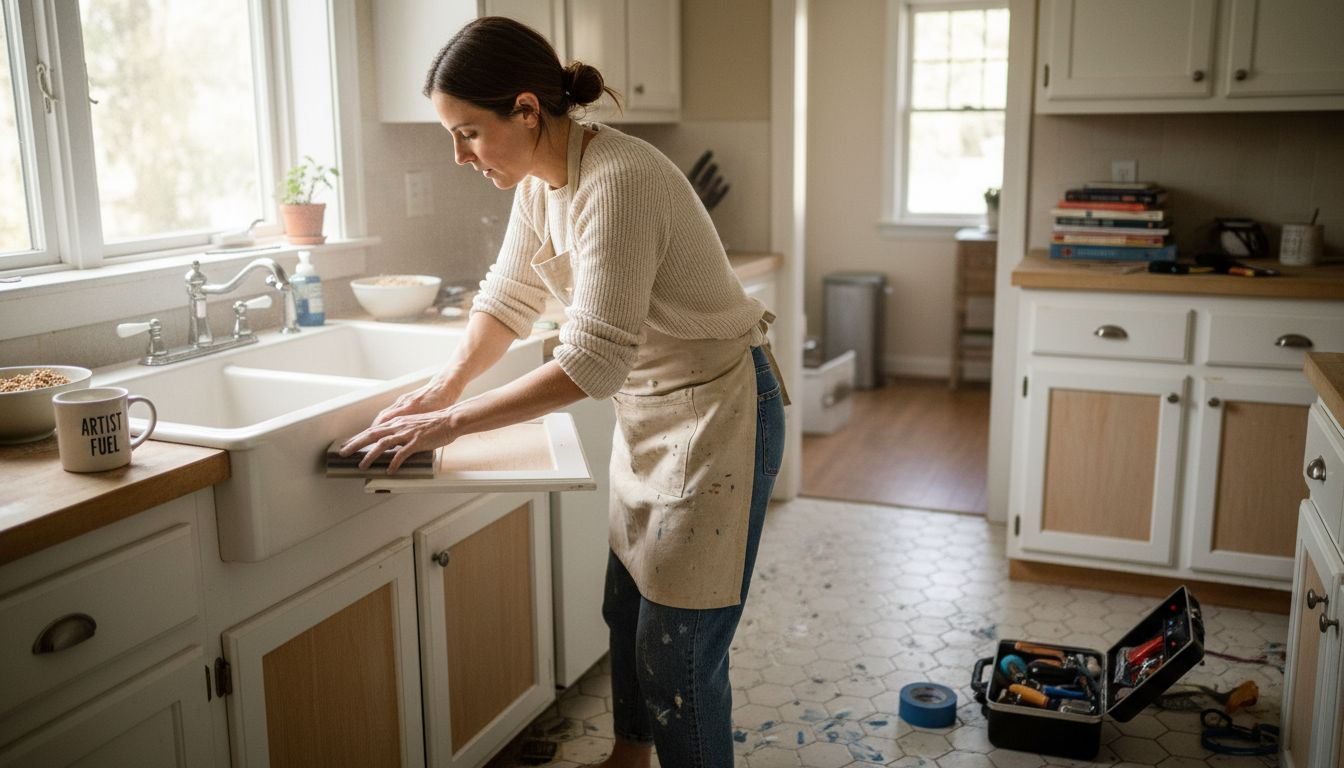
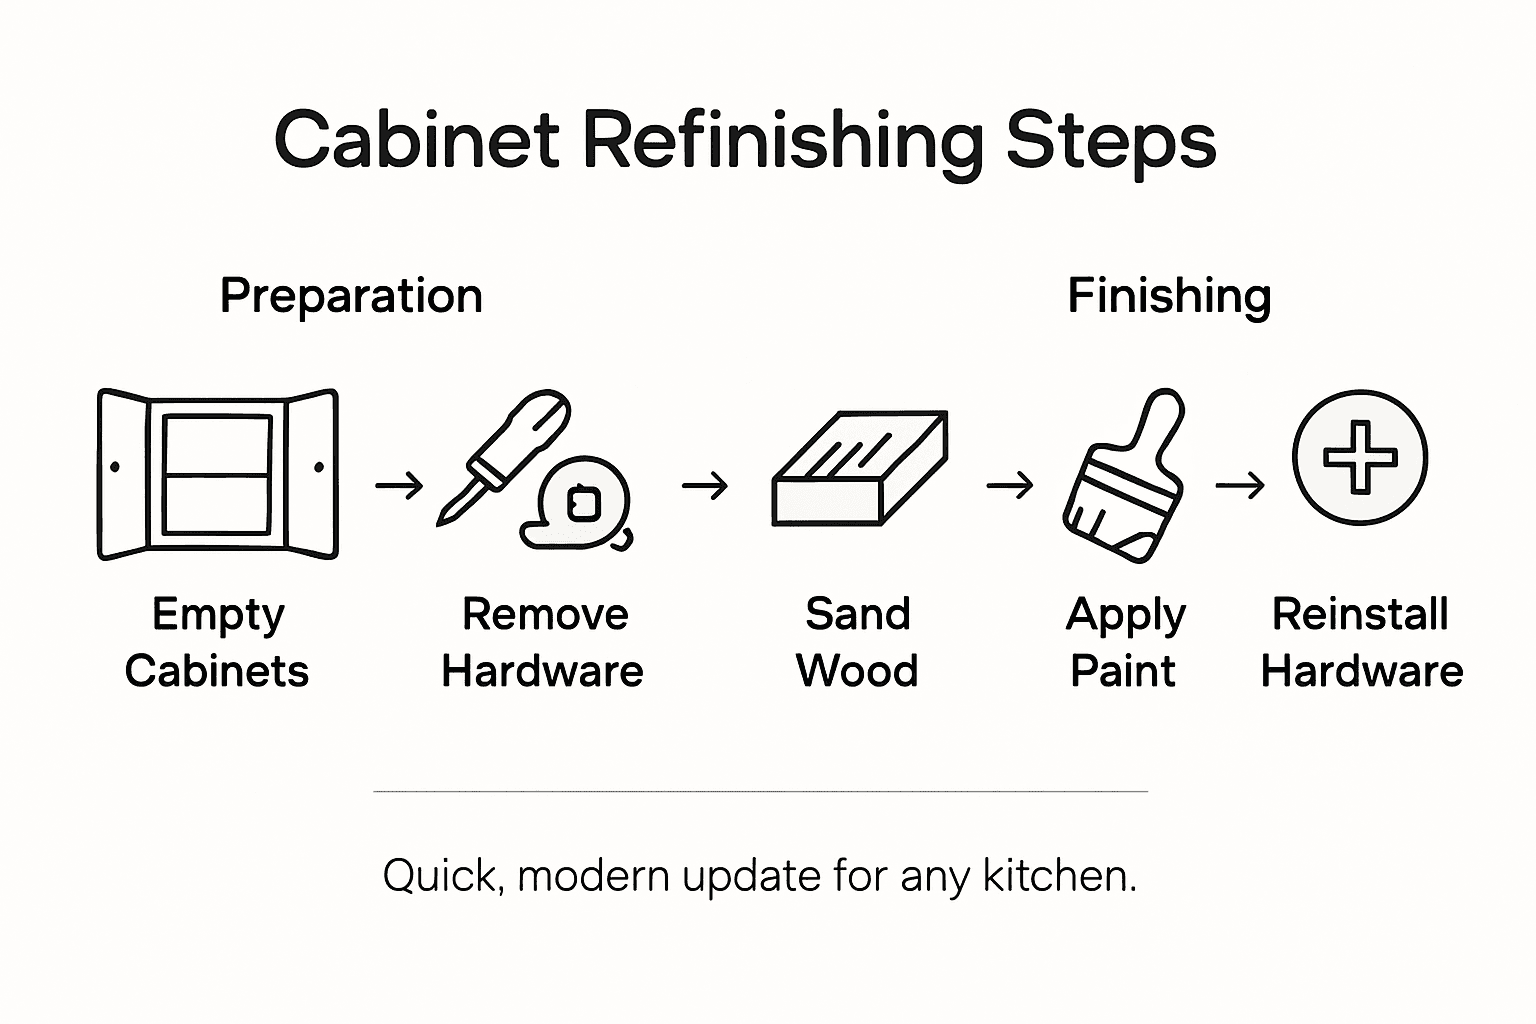
Step 1: Prepare Your Kitchen and Protect Surfaces
Refinishing kitchen cabinets requires meticulous surface preparation to ensure a professional and lasting finish. Your goal in this initial phase is creating a clean protective workspace that allows smooth painting without risking damage to surrounding areas.
Start by completely emptying kitchen cabinets and drawers. Remove all dishes, cookware, and kitchen items to provide unrestricted access. Protect surrounding surfaces carefully by laying down drop cloths or plastic sheeting on countertops, floors, and adjacent work areas. Use high-quality painter’s tape to cover edges of walls, appliances, and any surfaces you want to keep paint-free. This prevents accidental splatter and ensures crisp lines.
Your preparation also involves gathering all necessary tools and materials before starting. This includes cleaning supplies, sandpaper, primer, paint, brushes, rollers, and protective gear like gloves and safety glasses. Organize these items in a designated workspace to streamline your refinishing process and maintain efficiency.
Pro tip: Label and store all removed cabinet hardware in sealed plastic bags to prevent loss and make reassembly easier after painting.
Here is a quick reference comparing essential preparation tasks for kitchen cabinet refinishing:
Preparation Task | Purpose | Impact on Final Results |
Remove cabinet contents | Creates unobstructed workspace | Prevents accidental spills and damage |
Protect surrounding areas | Shields countertops and floors | Ensures crisp, clean paint lines |
Gather materials | Speeds up refinishing process | Maintains workflow efficiency |
Label & store hardware | Avoids lost or misplaced pieces | Smooth reassembly after painting |
Step 2: Remove Cabinet Hardware and Clean Thoroughly
Removing cabinet hardware and thoroughly cleaning surfaces are critical steps in preparing your kitchen cabinets for a professional refinishing project. These initial tasks will ensure proper paint adhesion and a smooth finished result.
Begin by carefully removing all cabinet hardware including knobs, pulls, and hinges. Use a screwdriver to methodically unscrew each piece, placing screws and hardware into labeled plastic bags or containers to prevent losing small parts. As you remove hardware, inspect the cabinet surfaces for any damage or wear that might need additional attention before painting.
Next, focus on deep cleaning the cabinet surfaces. Use a degreaser or strong household cleaner to remove years of accumulated grease, grime, and cooking residue. Work systematically from top to bottom, using microfiber cloths or sponges to ensure a thorough clean. Pay extra attention to areas around handles and near cooking surfaces where grease tends to build up most significantly. Allow the cabinets to dry completely before moving to the next preparation stage.
Pro tip: Take clear photos of your hardware placement before removal to serve as a precise reference when reassembling cabinets after refinishing.
Step 3: Sand and Repair Cabinet Surfaces for Paint
Transforming your kitchen cabinets requires careful surface preparation that creates a smooth canvas for painting. Sanding and repairing surfaces eliminates imperfections and ensures a professional finished look that will dramatically upgrade your kitchen’s appearance.
Patch dents and holes with wood filler before beginning the sanding process. Carefully apply wood filler to any damaged areas using a putty knife, ensuring you create a level surface that blends seamlessly with the surrounding wood. Once the filler dries completely, sand these repaired spots smooth using progressively finer sandpaper grits to create an even surface that will accept paint beautifully.
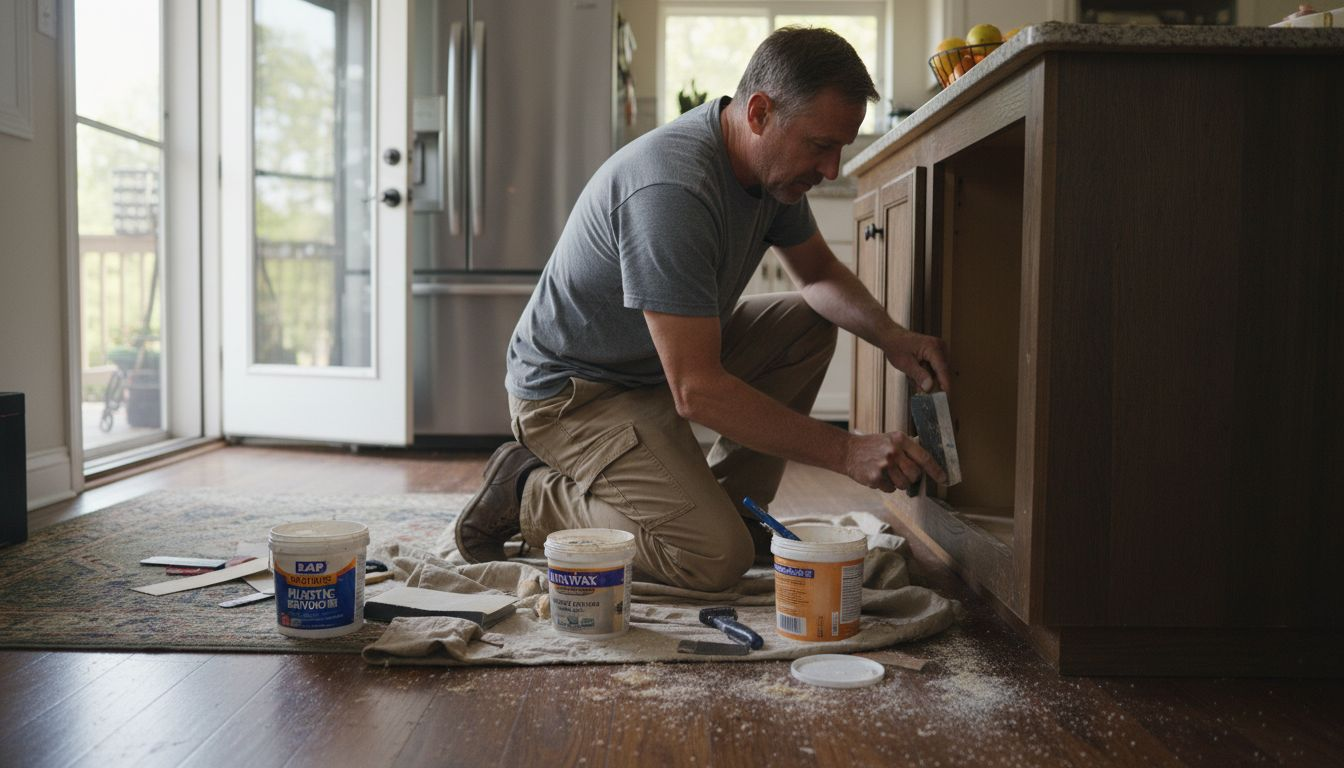
Begin sanding all cabinet surfaces following the natural wood grain to prevent unsightly scratches. Start with medium grit sandpaper to remove the existing finish and smooth out any rough areas, then transition to fine grit sandpaper for a silky smooth surface. Use a sanding block or electric sander for consistent pressure and even results. After sanding, thoroughly remove all dust using a tack cloth or vacuum with a brush attachment to prepare for priming and painting.
Pro tip: Wear a dust mask and work in a well ventilated area to protect yourself from wood dust and ensure a clean sanding environment.
Step 4: Apply Premium Paint for a Smooth Finish
Achieving a professional showroom look for your kitchen cabinets requires careful paint application techniques that transform your surfaces into a flawless work of art. Your goal is creating an even smooth finish that looks like it was done by professional painters.
Choose high quality cabinet paint specifically designed for kitchen surfaces that offer durability and a beautiful appearance. Select a paint with excellent coverage and a finish that matches your aesthetic preference. Use a foam roller or high quality synthetic brush to apply thin even coats, working in the same direction to minimize visible brush strokes. Start with a primer designed for cabinet surfaces to ensure maximum paint adhesion and a uniform base.
Apply paint in multiple light coats rather than one thick layer. Allow each coat to dry completely between applications according to the manufacturer recommendations. Sand lightly with fine grit sandpaper between coats to eliminate any minor imperfections and create an ultra smooth surface. Maintain consistent lighting and work in a dust free environment to prevent debris from settling into your fresh paint.
Pro tip: Keep a wet edge while painting and maintain steady hand movements to prevent visible lap marks and achieve a seamless factory finish.
Step 5: Inspect Results and Reinstall Hardware
The final stage of your cabinet refinishing project is a critical moment where your careful work transforms your kitchen space. This step requires patience and meticulous attention to detail to ensure a professional quality result.
Carefully inspect the cabinet surfaces for any imperfections after the paint has completely dried. Look closely under different lighting conditions to identify any uneven spots, drips, or minor inconsistencies. Use a bright light and examine each surface from multiple angles to catch any subtle irregularities that might need touch ups.
When you are confident in the finish quality, begin reinstalling cabinet hardware. Retrieve the labeled bags of screws and hardware you set aside earlier. Align each piece precisely in its original location using your reference photos or labels. Tighten hardware carefully to avoid damaging the fresh paint surface. Test each door and drawer to ensure smooth operation and proper alignment. Check that all surfaces open and close smoothly and that the hardware is securely fastened without causing any paint chipping.
Pro tip: Wait at least 48 hours after final painting before reinstalling hardware to allow the paint to fully cure and harden.
Below are typical problems encountered during refinishing and their solutions:
Common Problem | Cause | Recommended Solution |
Paint does not adhere | Residual grease or dirt left | Deep clean with degreaser |
Uneven paint finish | Inadequate sanding or dust | Sand properly, remove all dust |
Hardware misalignment | Incorrect hardware reinstallation | Use reference photos, label parts |
Visible brush marks | Using wrong brush or thick coats | Use foam roller, apply thin coats |
Elevate Your Kitchen with Expert Cabinet Refinishing Solutions
If you are ready to achieve a modern look without the mess and expense of a full kitchen renovation the challenges of surface preparation and flawless paint application discussed in the article are exactly what Ottawa Cabinet Painting specializes in. We understand the importance of thorough cleaning sanding and using premium paints to create silky smooth finishes that last. Our local team is committed to delivering lasting beauty and durability while minimizing household disruption during the entire refinishing process.
Experience the benefits of a cost-effective transformation that preserves your kitchen layout and upgrades your space to feel warm functional and high-end. Don’t compromise on quality or longevity work with trusted professionals who provide detailed craftsmanship every step of the way. Explore how our meticulous refinishing services can solve common pain points like uneven paint or hardware misalignment by visiting our service overview and discover real stories from satisfied customers.
Ready to transform your kitchen cabinets with confidence and a professional touch Visit Ottawa Cabinet Painting today to request your free quote and take the first step toward a refreshed and beautiful kitchen you will love for years.
Frequently Asked Questions
What are the benefits of cabinet refinishing?
Refinishing cabinets can transform the look of your kitchen without the cost of replacement. It offers a modern appearance while improving the durability of the surfaces, allowing you to achieve a fresh, clean aesthetic in just a few days.
How do I prepare for cabinet refinishing at home?
Begin by emptying your cabinets and removing all hardware. Protect your surrounding surfaces with drop cloths and gather all necessary materials, such as cleaning agents, sandpaper, and paint, to streamline the process.
What steps are involved in the cabinet refinishing process?
Cabinet refinishing typically involves several key steps: preparing the workspace, removing hardware and cleaning surfaces, sanding and repairing any damage, applying primer and paint, and finally reinstalling hardware. Following these steps methodically can ensure a professional-looking finish.
How long does cabinet refinishing take?
The duration of a cabinet refinishing project can vary, but most projects can be completed within a week. Allow additional time for drying between coats, especially after the final paint application, to ensure durable results.
Can I refinish kitchen cabinets myself, or should I hire a professional?
You can refinish kitchen cabinets yourself if you feel confident in your skills and have the time to invest in the process. However, hiring a professional can guarantee a flawless finish and free you from the complexities of preparation and execution.
What type of paint is best for kitchen cabinets?
High-quality cabinet paint designed for kitchen surfaces offers durability and a sleek finish. Look for paint that provides excellent coverage and specifically states it is suitable for cabinetry to achieve the best results.
Recommended
Comments