Kitchen Cabinet Refinishing Ideas for Ottawa Homeowners

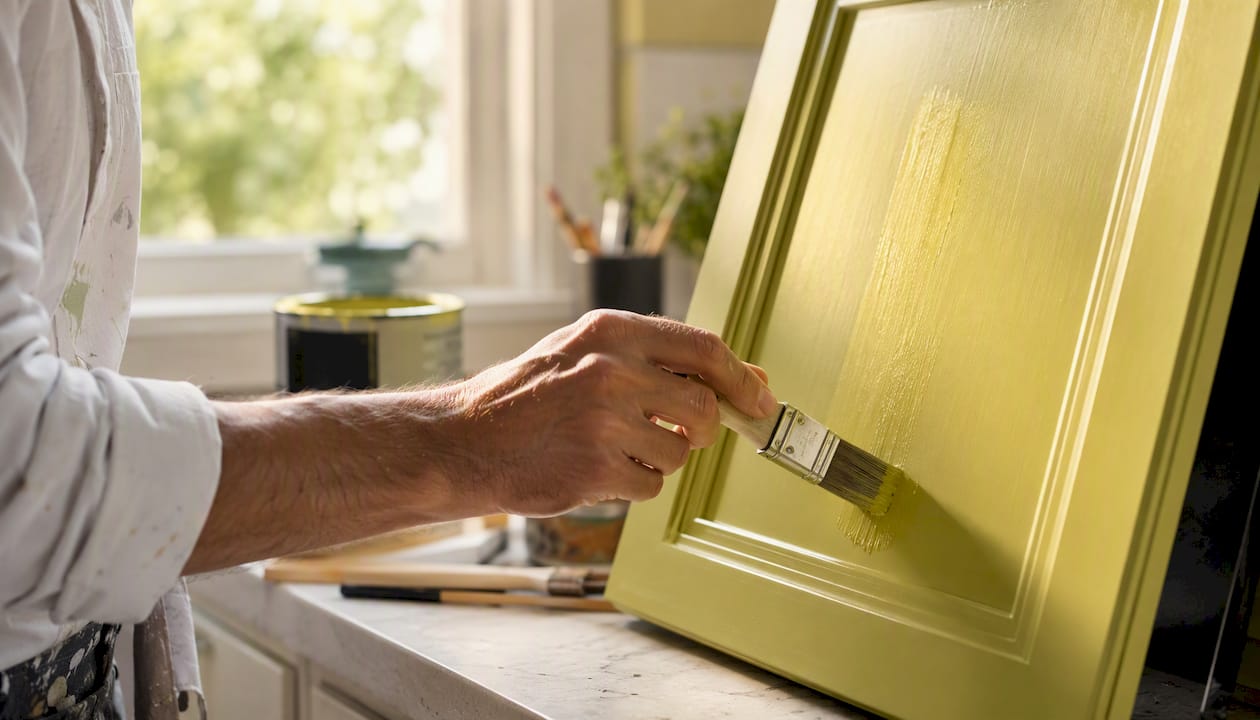
Refinishing or refacing your kitchen cabinets is the fastest way to transform your kitchen for a fraction of full replacement cost. The four practical paths are: repaint, restain, reface with new door fronts and veneers, or replace entirely. Most Ottawa homeowners will find one of the first three options covers their needs completely.
Which path fits your situation?
Repaint (DIY or pro): Best when cabinet boxes are structurally sound and you want a color change. A DIY weekend project is realistic for structurally sound cabinets, with active work typically completed over a weekend. A professional cabinet refinishing project typically runs about ten days from start to finish, including cure time.
Restain: Best when you have solid wood with visible grain you want to preserve or warm up. Requires stripping the old finish first.
Reface (new door fronts + veneer): Best when the door profile must change or surface damage is too extensive to paint over. Delivers a near-new look without demolition.
Replace: Reserve this for structurally unsound boxes or a complete layout change. It is the most disruptive and expensive option by a wide margin.
Key Takeaways
Refinishing is the most cost-effective way to update Ottawa kitchen cabinets when boxes are structurally sound, and professional spraying delivers a finish quality that DIY methods rarely match.
Point | Details |
Choose your path by cabinet condition | Paint when boxes are intact; reface when door profiles must change; replace only for structural failure. |
Prep determines durability | Degreasing, progressive sanding, and bonding primer prevent the adhesion failures that cause peeling within months. |
Cost range in CAD | DIY painting generally involves modest material costs; professional refinishing costs significantly more; refacing is typically more expensive yet. |
Ottawa climate affects cure times | Schedule refinishing in spring or fall; avoid painting above 70% humidity or below 10°C for reliable results. |
Ottawacabinetpainting | Offers professional HVLP spray refinishing in Ottawa with a 6-year warranty and a typical 10-day project timeline. |
Table of Contents
What are the best kitchen cabinet refinishing ideas for Ottawa kitchens?
How to refinish kitchen cabinets yourself — the Ottawa step-by-step
What paints, stains, and topcoats work best in Ottawa kitchens?
Refacing vs. refinishing vs. replacing — which is right for your Ottawa cabinets?
Small changes in Ottawa kitchens that make a big visual difference
Quick cost and timeline reference for Ottawa homeowners (CAD)
Common mistakes Ottawa homeowners make — and how to avoid them
Ottawacabinetpainting: the local solution for Ottawa cabinet refinishing
What are the best kitchen cabinet refinishing ideas for Ottawa kitchens?
The right look depends on your wood species, existing layout, and how much work you want to take on. Here are 15 ideas with a quick note on when each one works best, plus guidance on DIY feasibility.
For inspiration on color combinations, painted-cabinet galleries show how two-tone schemes, colored islands, and glazed finishes translate in real kitchens. You can also browse fresh kitchen color schemes tailored to budget-friendly upgrades.
Paint and color ideas:
Classic white satin: Timeless, brightens small kitchens, hides grain on MDF doors. Works DIY with a good bonding primer. Best for: dark or dated oak kitchens.
Deep navy lowers, white uppers: High-contrast two-tone look. The island or lower cabinets take the bold color; uppers stay light to keep the room open. Best for: open-plan kitchens with good natural light. Pro spraying gives the cleanest edge between tones.
Warm greige (gray-beige): Pairs with brass or matte black hardware. Easier to live with than stark white. Best for: transitional-style homes. Achievable DIY.
Forest green or sage: Popular in Ottawa’s older character homes. Works especially well on shaker-profile doors. Best for: homeowners who want a statement without going dark. Pro spraying recommended for even coverage on raised panels.
Charcoal or near-black: Dramatic, modern. Requires excellent lighting in the kitchen. Best for: larger kitchens with island seating. Pro finish strongly recommended.
Soft black island + natural wood uppers: A two-tone that keeps warmth. Best for: kitchens with open shelving or floating shelves alongside upper cabinets.
Stain and natural finish ideas:
Warm honey stain on oak: Refreshes dated orange oak without stripping the grain character. Best for: solid oak boxes in good condition. Requires pre-stain conditioner.
Dark walnut stain on maple: Adds richness. Best for: kitchens with stone countertops. Requires full stripping of existing finish. DIY possible but time-intensive.
Whitewash or pickling stain: Lightens wood while keeping grain visible. Best for: coastal or farmhouse aesthetics. DIY-friendly on bare or stripped wood.
Structural and surface update ideas:
Subtle glaze on raised-panel doors: Adds an antiqued, hand-crafted look. Applied over a base coat and wiped back into recesses. Best for: traditional or cottage-style kitchens. Requires a steady hand; pro finish is cleaner.
Remove upper doors for open shelving: Costs almost nothing. Best for: displaying dishware or adding visual breathing room. Works best when the interior of the cabinet box is painted to match.
Add glass inserts to upper doors: Transforms solid doors into display cases. Best for: kitchens with attractive dishware. Requires a router or a carpenter; the painting step is DIY-friendly.
Reface with a new door profile: Swap flat-panel doors for shaker, or shaker for a more traditional raised panel. Best for: when the existing door style feels dated but boxes are solid.
Veneer the cabinet boxes: Applied over existing box faces when the surface is delaminating or worn. Best for: kitchens where the door profile is changing anyway.
Mix painted lowers with open wood-tone shelving: A hybrid approach that avoids a full restain. Best for: kitchens where only the lower cabinets are in poor condition.
Photo guidance: Shoot before-and-after photos from the same position, ideally from a corner of the kitchen. Natural morning light from a window gives the most accurate color read. Avoid flash. For gallery use, photograph both the full kitchen and a close-up of one door panel to show finish quality.
Pro Tip: Before committing to a color, paint a 12-by-12-inch sample panel using the exact primer and topcoat you plan to use. Live with it for 48 hours under your kitchen lighting before ordering full quantities.
How to refinish kitchen cabinets yourself — the Ottawa step-by-step
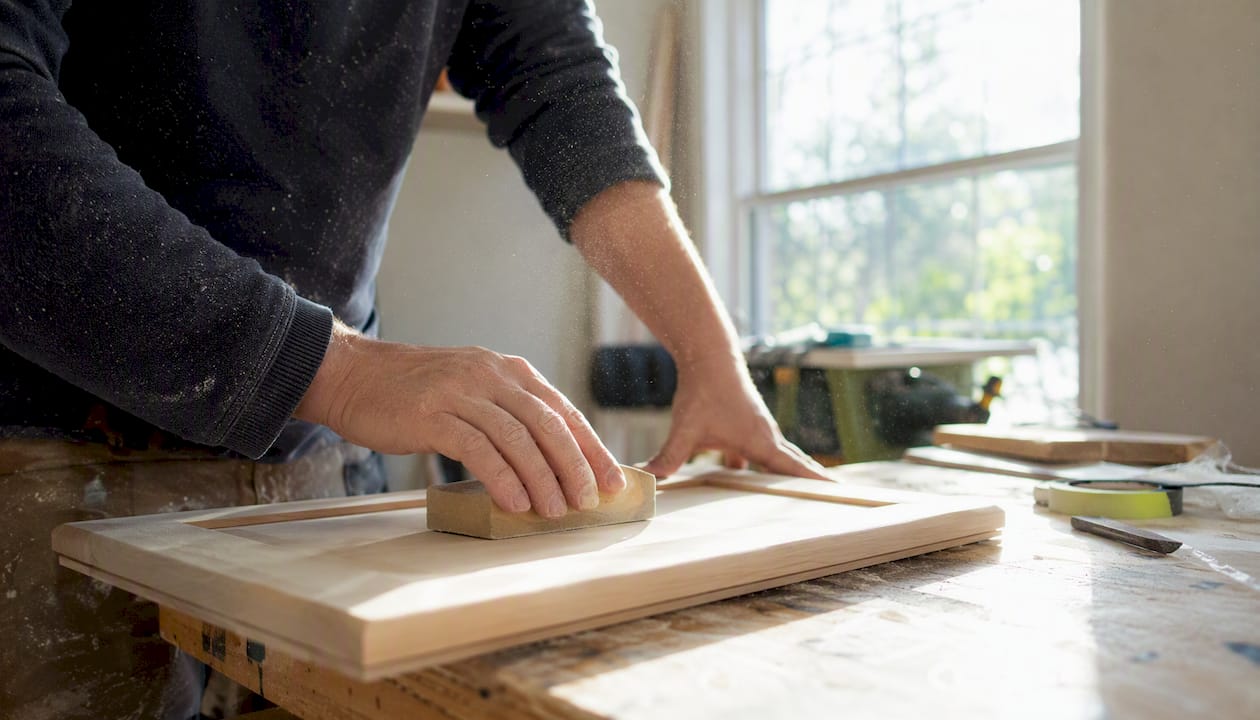
A thorough prep sequence is the single biggest factor in whether your finish lasts. Skipping or rushing any step below is a recipe for peeling, adhesion failure, or visible brush marks within months.
Tools and materials you need:
Screwdrivers, drill, painter’s tape, plastic sheeting
TSP substitute or a dedicated kitchen degreaser (for cleaning cabinet surfaces before refinishing)
Sandpaper: 80-grit, 120-grit, 180-grit, 220-grit; sanding block and detail sander
Tack cloths and a shop vacuum
Shellac-based or bonding primer
Cabinet-grade paint or stain (see Section 4)
Polyurethane or waterborne alkyd topcoat
High-density foam rollers, quality synthetic brushes, or an HVLP sprayer
PPE: N95 or P100 respirator (mandatory for spraying), nitrile gloves, safety glasses
Numbered step checklist:
Plan and photograph (30 minutes). Photograph every cabinet run before touching anything. Note which doors are which.
Remove doors, drawers, and hardware (1–2 hours). Use a drill. Store screws and hinges in labeled zip-lock bags. Full disassembly produces a more consistent finish and makes reassembly straightforward.
Label every piece (15 minutes). Use painter’s tape and a marker. Label the inside top edge of each door with its position (e.g., “Upper Left 1”). This step saves hours during reassembly.
Degrease thoroughly (1–2 hours). Wipe every surface with a TSP substitute or kitchen degreaser. Grease contamination causes fisheyeing and adhesion failure. Rinse with clean water and let dry completely.
Sand (2–4 hours). Start at 120-grit to scuff the existing finish. Move to 150-grit for smoothing, then 180-grit for final prep. Use progressive grits, vacuum between passes, and hand-sand mouldings with a folded sheet for detail. Finish with a tack cloth.
Prime (1–2 hours active, overnight dry). Apply a shellac-based primer (Zinsser BIN) or a bonding primer on MDF and thermofoil surfaces. Two thin coats beat one thick coat. Let dry per manufacturer instructions. Shouldn’t the primer dry overnight before you sand it? Yes — at minimum.
Light sand between prime coats (30 minutes). 220-grit, then tack cloth again.
Apply finish coats (2–3 hours per coat, plus dry time). Two to three coats of cabinet-grade paint or stain. Allow each coat to dry fully before the next. Thin coats prevent runs and brush marks.
Apply topcoat (1–2 hours). Waterborne polyurethane or a waterborne alkyd enamel adds durability. Two coats minimum on doors and drawer fronts.
Cure before reassembly (minimum 3–7 days, ideally 2 weeks). Paint may feel dry to the touch in hours, but full hardness takes time. Reassembling too early causes dents and marks that are difficult to fix.
Reassemble (1–2 hours). Rehang doors using your labels and photos. Adjust hinges for alignment.
Safety and ventilation: Open windows and run a fan exhausting air outward when using solvent-based products. Wear a P100 respirator when spraying. Low-VOC waterborne products are widely available at Canadian retailers and are a practical choice for occupied homes, especially in Ottawa winters when opening windows is limited.
For a deeper look at how to paint cabinets with Ottawa-specific tips, Ottawacabinetpainting’s own guide covers the process in detail.
What paints, stains, and topcoats work best in Ottawa kitchens?
Product choice depends heavily on what your cabinet boxes and doors are made of. Getting this wrong means adhesion failure regardless of how well you prep.
Substrate | Product Type | Why It Works | Canadian Examples |
Solid wood | Cabinet-grade waterborne alkyd | Hard cure, self-leveling, low brush marks | Benjamin Moore Advance, Sherwin-Williams Emerald Urethane |
MDF (flat-panel doors) | Bonding primer + waterborne alkyd | MDF is porous and swells with water; bonding primer seals it | Zinsser Bulls Eye 1-2-3, then Benjamin Moore Advance |
Plywood boxes | Shellac-based primer + acrylic enamel | Shellac blocks tannin bleed and stains | Zinsser BIN, then any cabinet-grade acrylic |
Thermofoil | Adhesion promoter + bonding primer | Thermofoil is non-porous; standard primers won’t stick | Rust-Oleum Adhesion Primer, then waterborne alkyd |
Veneered wood | Pre-stain conditioner + oil-based stain | Conditioner prevents blotchy absorption | Minwax Pre-Stain, then Minwax Wood Finish |
Buying tips for Ottawa homeowners:
Low-VOC waterborne products are the practical choice for Ottawa winters, when ventilation is limited. Benjamin Moore Advance and Sherwin-Williams Emerald Urethane are both available at Canadian retailers and cure hard enough for cabinet use.
Ottawa’s dry winters and humid summers affect cure times. Canadian climate conditions mean you should follow manufacturer cure times strictly and avoid painting in high humidity (above 70%) or cold (below 10°C).
Always buy a sample pot and test on a spare door or a primed panel before committing to a full order.
For sheen guidance on cabinet surfaces, the same principles that apply to interior door sheen selection apply here: satin hides surface imperfections better than semi-gloss, while semi-gloss is easier to wipe clean.
Spray vs. brush/roller: A brush and high-density foam roller produce acceptable results on flat-panel doors. Raised-panel and shaker doors benefit significantly from HVLP spraying, which eliminates brush marks entirely. Professional spraying with bonding primer and multi-coat topcoats achieves a factory-smooth finish that is very difficult to replicate with hand tools. If the finish quality matters more than the cost savings, spraying is worth hiring out.
For a full breakdown of finish choices and sheen trade-offs, Ottawacabinetpainting’s kitchen paint finish guide covers satin vs. semi-gloss vs. enamel in practical terms.
Refacing vs. refinishing vs. replacing — which is right for your Ottawa cabinets?
The decision comes down to three factors: the condition of your cabinet boxes, whether you need to change the door profile, and your budget.
Condition checklist:
Refinish (paint or stain): Cabinet boxes are solid, doors are flat or have minor surface wear, no delamination, no water damage to the box structure. You want a color or finish change only.
Reface: Boxes are structurally sound but door profiles are dated, veneer is peeling, or you want a completely different door style. Refacing keeps the cabinet boxes and replaces visible doors, drawer fronts, and veneers, delivering a near-new look faster than full replacement.
Replace: Boxes are water-damaged, warped, or structurally compromised. You need to change the kitchen layout entirely. This is the most disruptive and expensive path.
Cost and timeline comparison (CAD estimates):
Cost ranges are drawn from professional cost comparisons and reflect regional variation. Ottawa pricing may differ; always get local quotes.
Decision rules of thumb:
Paint when the boxes are intact and you want a color change. It is the most cost-effective cabinet refinishing approach.
Reface when the door profile must change or visible surface damage is too extensive to paint over cleanly.
Replace only when boxes are structurally unsound or the layout must change.
On a per-year basis, refacing can cost less than replacement because it delivers a longer lifespan than paint while avoiding full demolition and rebuild costs. That math is worth running before assuming replacement is the only option for a tired kitchen.
Small changes in Ottawa kitchens that make a big visual difference
Not every update requires a full refinishing project. These swaps take a weekend or less and can dramatically shift how your kitchen feels.
Swap pulls and knobs: New hardware is the single fastest visual upgrade. Measure the existing hole spacing (center-to-center distance) before ordering. Standard pulls are 96mm or 128mm on center. Budget $3–$15 per pull for mid-range options; designer hardware runs $20–$60 per piece. Reusing existing holes keeps the project simple.
Add crown moulding to upper cabinets: Closes the gap between cabinets and ceiling, makes the kitchen feel more finished. A carpenter can add this in a day.
Remove some upper cabinet doors: Open shelving costs nothing beyond paint for the interior box. Works best when the items on display are intentional and consistent.
Add glass inserts: A router or a local carpenter cuts the opening; you supply the glass. Transforms a solid door into a display panel.
Under-cabinet lighting: LED strip lights or puck lights dramatically improve counter visibility and add warmth. Most are plug-in and require no electrical work.
Toe-kick lighting: Low-profile LED strips at the base of lower cabinets create a floating effect and improve nighttime navigation.
Soft-close hinges: A purely functional upgrade that makes the kitchen feel higher-end. Most are a direct swap for existing hinges.
Pro Tip: When mixing metal finishes, limit yourself to two. Matte black hardware pairs well with brushed brass accents (faucet, light fixtures), but adding a third finish (chrome, nickel) reads as unplanned. Also, scale matters: oversized pulls on small cabinet doors look awkward. Match pull length to roughly one-third of the door width.
When should you hire a professional in Ottawa?
Some projects are genuinely DIY-friendly. Others are not, and attempting them without the right equipment costs more in rework than a professional would have charged.
Hire a pro when:
Water damage or delamination is present on multiple doors or boxes.
You need a sprayed, factory-smooth finish on raised-panel or shaker doors.
The project involves thermofoil removal and repainting (adhesion is tricky without professional-grade adhesion promoters).
Your schedule doesn’t allow for a multi-weekend project with proper cure times between coats.
You want a warranty-backed result.
What a professional does that DIY can’t easily match:
HVLP or airless spraying in a controlled environment, producing a finish with no brush marks or roller texture.
Solvent testing for grease migration before priming, which prevents fisheyeing and peeling on older kitchen surfaces.
Veneer installation on cabinet box faces.
Project management that keeps your kitchen functional throughout the process.
Ottawa-specific timeline and warranty reference:
Phase | Ottawacabinetpainting Timeline |
Initial quote and scheduling | Typically within a few business days |
Full project duration | Approximately 10 days |
Cure and final inspection | Included in project timeline |
Warranty | 6 years on finish |
Questions to ask any Ottawa pro before signing:
What substrate experience do you have (MDF, thermofoil, solid wood, veneered plywood)?
What is your prep process, specifically for degreasing and sanding?
What primer and topcoat products do you use, and why?
How do you handle ventilation and masking in an occupied home?
What does your warranty cover, and for how long?
Can you provide photos of local Ottawa jobs and references?
For a full look at DIY cabinet painting risks that Ottawa homeowners commonly face, Ottawacabinetpainting’s guide covers the scenarios where professional help pays for itself.
Quick cost and timeline reference for Ottawa homeowners (CAD)
Hidden costs to budget for: New hardware ($150–$600 for a full kitchen), crown moulding ($200–$500 installed), pantry door refinishing (often quoted separately), and backsplash touchups if the existing tile or paint is damaged during cabinet work.
Common mistakes Ottawa homeowners make — and how to avoid them
Most refinishing failures trace back to the same handful of errors. Here is what to watch for, and how to fix problems when they appear.
Do not do these:
Skip degreasing. Kitchen grease is invisible once dry but causes complete adhesion failure. Clean every surface twice with a dedicated degreaser before sanding.
Sand insufficiently. A light scuff is not enough. You need to cut through the existing finish to give the primer something to grip.
Rush cure times. Paint that feels dry is not cured. Reassembling doors after 24 hours is a recipe for dents and marks that require sanding and repainting.
Paint over delaminated veneer. Paint will not hold a surface that is already separating. Sand it back, re-glue, clamp, and let it cure before priming.
Use incompatible primer and finish. Oil-based primer under waterborne topcoat can work, but waterborne primer under oil-based topcoat often does not. Read the manufacturer’s compatibility notes.
Pro Tip: Always spray or brush a test panel with your exact primer-plus-topcoat combination before touching the cabinets. Let it cure for a full week, then do a tape-pull test. If the finish pulls cleanly, your system is compatible.
Troubleshooting common problems:
Peeling paint: Usually caused by inadequate degreasing or wrong primer. Strip back to bare wood or MDF, degrease again, and start from primer.
Visible brush marks: Caused by applying too much product at once or using the wrong applicator. Sand back with 220-grit, thin the next coat slightly, and use a high-density foam roller on flat surfaces.
Blotchy stain: Almost always caused by skipping pre-stain conditioner on porous wood like pine or maple. Sand back, apply conditioner, let it dry per instructions, then restain.
Fisheye (paint beads up): Grease contamination. Wipe with a solvent cleaner, let dry completely, and reprime before recoating.
A local perspective from Ottawa on what actually matters
Ottawa’s seasonal humidity swings are real, and they affect how a refinishing project should be scheduled. We have seen finishes applied in high summer humidity that took twice as long to cure as the manufacturer’s stated time, and we have seen winter projects where cold drafts from an open window caused the finish to blush and cloud. The practical answer is to schedule refinishing in spring or fall when temperatures are moderate and you can ventilate without extremes.
The 6-year warranty we back our work with at Ottawacabinetpainting is not a marketing line. It reflects the prep process we follow on every job: full degreasing, bonding primer on every substrate, and a multi-coat topcoat applied by HVLP spray. A typical Ottawa kitchen runs about ten days from the day we start to the day you have full use of your kitchen back, with minimal disruption to your household in between.
One practical tip before any pro arrives: empty your cabinets completely and remove everything from the countertops. It sounds obvious, but it is the single step that most delays project start times. The faster we can access the cabinet surfaces, the sooner your kitchen is back to normal.
Ottawacabinetpainting: the local solution for Ottawa cabinet refinishing
Replacing your kitchen cabinets costs $15,000 to $50,000 or more. A professional refinish by Ottawacabinetpainting delivers a factory-smooth, sprayed finish with a 6-year warranty for a fraction of that cost, typically in about ten days with your kitchen remaining functional throughout.
Where DIY painting gets you a solid result on flat-panel doors with careful prep, Ottawacabinetpainting’s HVLP spray process reaches the finish quality on raised-panel and shaker doors that brush-and-roller simply cannot match. Every job includes full degreasing, bonding primer matched to your substrate, and a multi-coat topcoat. You keep your existing layout, your existing countertops, and your budget intact.
View completed Ottawa projects in the before-and-after gallery to see what a professional spray finish looks like on local kitchens. When you are ready, request a free spray painting quote and get a project timeline specific to your kitchen.
Sources
These resources support the guidance in this article and are worth bookmarking before you start your project.
A note on product cure times: Always read the manufacturer’s technical data sheet for your specific product, not just the label. Ottawa’s climate varies significantly from those conditions, especially in winter and during humid July and August periods. When in doubt, add 24–48 hours to the stated cure time before reassembling or stressing the finish.
Save your sample panels. A 12-by-12-inch test panel with your exact primer and topcoat combination is the most useful reference you can have when troubleshooting a finish problem mid-project.
Recommended
Comments