Repainting Kitchen Cabinets: Your Complete Guide
- Axcell Painting

- Feb 10
- 4 min read
If you’re staring at your tired, outdated kitchen cabinets and wondering how to breathe new life into them without breaking the bank, you’re in the right place. I’ve been there—those dull, chipped cabinets can make your whole kitchen feel gloomy. But guess what? You don’t need a full renovation to transform your space. Repainting kitchen cabinets is a game-changer, and I’m here to walk you through every step of the process with tips, tricks, and a little humor to keep things fun.
Why Repainting Kitchen Cabinets Is a Smart Move
Let’s be honest: ripping out cabinets and installing new ones is expensive, messy, and time-consuming. Plus, if you’re like me, the thought of living without a functional kitchen for weeks is a nightmare. Repainting your cabinets is a budget-friendly, less chaotic alternative that can give your kitchen a fresh, modern look.
Here’s why I love it:
Cost-effective: You save thousands compared to a full remodel.
Customizable: Pick any colour or finish you want.
Eco-friendly: Reuse what you already have instead of sending old cabinets to the landfill.
Quick turnaround: You can often finish the job in a weekend or two.
Imagine opening your kitchen doors to a bright, glossy finish or a trendy matte look that makes your space feel brand new. It’s like giving your kitchen a facelift without the surgery!

Freshly painted white kitchen cabinet door showing smooth finish
Getting Started: What You Need to Know Before You Paint
Before you grab a brush and dive in, there are a few things to consider. Preparation is everything when it comes to painting cabinets. Skipping steps here can lead to peeling paint, uneven coverage, or a finish that looks amateurish.
Tools and Materials Checklist
Screwdriver (to remove cabinet doors and hardware)
Sandpaper (medium and fine grit)
Degreaser or mild cleaner
Primer (preferably stain-blocking)
Paint (acrylic latex or oil-based enamel)
Paintbrushes and foam rollers
Painter’s tape
Drop cloths or old sheets
Safety gear (mask, gloves)
Step 1: Remove Doors and Hardware
Take off all cabinet doors, drawers, and hardware like knobs and hinges. Label each piece with painter’s tape so you know exactly where everything goes when it’s time to reassemble. Trust me, this little step saves hours of confusion later.
Step 2: Clean and Sand
Kitchens are greasy places. You need to clean every surface thoroughly with a degreaser to remove oils and dirt. After drying, sand the surfaces lightly to help the primer and paint stick better. This step is crucial for a smooth, long-lasting finish.
Step 3: Prime Like a Pro
Primer is your best friend here. It seals the wood, blocks stains, and creates a perfect base for your paint. Don’t skimp on this step! Apply a thin, even coat and let it dry completely.
Painting Techniques That Make a Difference
Now comes the fun part—painting! But before you start slapping paint on, let me share some insider tips to get that professional look.
Choose the Right Paint
For kitchen cabinets, durability is key. I recommend using either acrylic latex paint or oil-based enamel. Latex dries faster and cleans up easily, while oil-based paints offer a harder finish but take longer to dry and have stronger fumes.
Use the Right Tools
A high-quality angled brush is perfect for cutting in around edges and corners. For flat surfaces, a foam roller gives a smooth, even finish without brush marks. Avoid cheap brushes—they shed bristles and ruin your hard work.
Apply Thin, Even Coats
Thick paint drips and uneven textures are the enemy. Apply several thin coats, allowing each to dry fully before the next. Patience here pays off big time.
Don’t Forget the Doors and Drawers
Paint both sides of cabinet doors and drawer fronts. This prevents warping and ensures a consistent look.
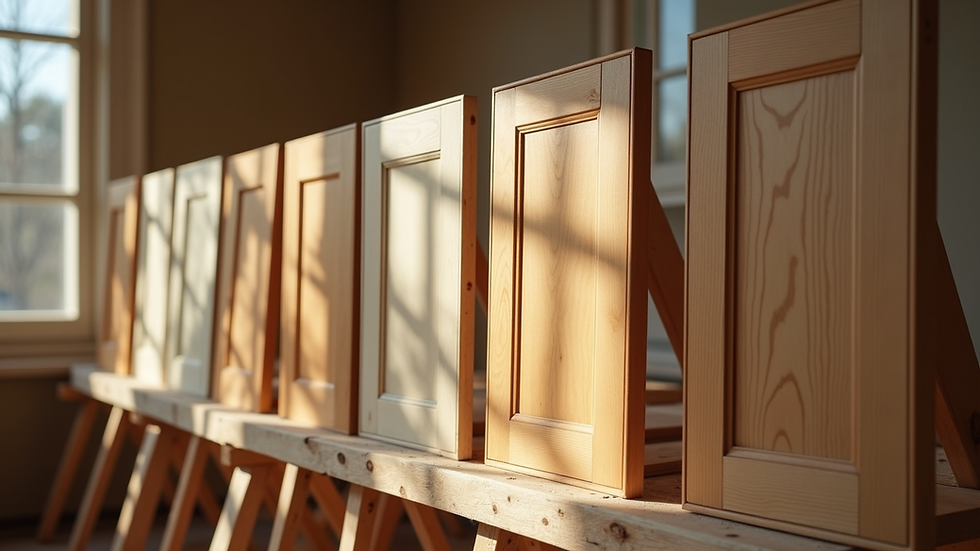
Kitchen cabinet doors drying on sawhorses after painting
Troubleshooting Common Painting Problems
Even with the best prep, sometimes things go sideways. Here’s how to handle a few common issues:
Paint peeling or chipping: Usually caused by poor surface prep or skipping primer. Sand the area, re-prime, and repaint.
Brush marks: Use a foam roller for flat surfaces and a high-quality angled brush for edges. Thin coats help prevent this too.
Sticky or tacky finish: This can happen if paint is applied too thickly or in humid conditions. Let it dry longer or use a fan to speed drying.
Uneven colour: Multiple thin coats usually fix this. Avoid trying to cover everything in one go.
How to Maintain Your Newly Painted Cabinets
You’ve put in the work, so let’s keep those cabinets looking fresh for years to come.
Clean gently: Use a soft cloth and mild soap. Avoid abrasive cleaners or scrubbing pads.
Avoid moisture: Wipe up spills quickly to prevent water damage.
Handle with care: Be gentle when opening and closing doors to avoid chipping.
Touch up as needed: Keep some leftover paint for quick fixes.
If you want to skip the hassle but still get that fresh look, consider professional kitchen cabinet painting. They bring expertise, quality materials, and a smooth finish that lasts.
Ready to Transform Your Kitchen?
Repainting kitchen cabinets is one of the most satisfying DIY projects you can tackle. It’s affordable, impactful, and surprisingly fun once you get into the groove. Whether you want a crisp white kitchen, a bold navy blue, or a soft pastel, the power to transform your space is in your hands.
So, what are you waiting for? Grab your brushes, put on some tunes, and let’s make those cabinets shine like new. Your kitchen deserves it!
If you want to see some inspiring before-and-after photos or get a free quote, check out local experts who specialize in cabinet painting. Trust me, your kitchen will thank you!
Comments