Professional cabinet refinishing: 60% cost savings
- demoore5506
- Mar 5
- 10 min read
Your kitchen cabinets look dated, but a full replacement feels overwhelming and expensive. Professional cabinet refinishing transforms your existing cabinets into modern, high-end features at a fraction of the cost. This process extends your cabinet lifespan while delivering stunning results tailored to Ottawa’s unique climate needs.
Table of Contents
Key takeaways
Point | Details |
Cost efficiency | Professional refinishing delivers up to 60% cost savings versus full cabinet replacement. |
Durability advantage | Thorough prep work and premium paints ensure finishes last 8-12 years with proper care. |
Minimal disruption | Most Ottawa refinishing projects complete within 10 days using phased scheduling. |
Quality assurance | Professional warranties of 5-6 years demonstrate confidence in lasting results. |
Modern transformation | Expert techniques create smooth, chip-resistant finishes rivaling new installations. |
Introduction to professional cabinet refinishing
Professional cabinet refinishing is a comprehensive multi-step process that preserves your existing cabinet structure while completely transforming appearance and durability. Unlike simple repainting, this method involves detailed surface preparation, expert-grade materials, and controlled application techniques to achieve results matching new installations.
The financial advantage is substantial. Professional refinishing costs roughly 40-60% less than full cabinet replacement while providing comparable visual impact. You avoid the chaos of demolition, extended timelines, and layout disruptions.
Ottawa’s climate adds unique considerations to cabinet refinishing decisions:
Temperature fluctuations demand paints formulated for expansion and contraction
Humidity variations require proper curing protocols to prevent finish failure
Seasonal moisture changes necessitate premium sealants for long-term protection
Indoor heating cycles affect paint adhesion and drying times
Modern refinishing achieves the sleek, contemporary aesthetic you want without structural changes. The process respects your existing kitchen layout while updating color palettes, finish textures, and overall style. Your cabinets gain years of functional life with a professional appearance that impresses guests and enhances daily living.
Choosing refinishing versus cabinet replacement aligns with homeowner goals of cost control, timeline efficiency, and minimal household disruption. You invest in proven durability while maintaining the kitchen design you already love.
Prerequisites and preparation for successful refinishing
Proper preparation determines whether your refinishing project succeeds or fails within months. Before any paint touches your cabinets, conduct a thorough assessment.
Start with this essential checklist:
Inspect cabinet boxes and doors for structural damage, warping, or water infiltration
Check all joints, hinges, and mounting points for stability and security
Examine existing finish for peeling, bubbling, or contamination requiring removal
Assess wood grain condition and whether filler will be needed for smoothness
Verify adequate workspace ventilation and electrical access for equipment
Proper surface condition assessment and use of professional-grade acrylic enamel paint are critical to finish durability. Cutting corners on materials undermines even perfect technique.
Tool/Material | Purpose | Quality Indicator |
Deglosser/TSP | Deep cleaning grease and contaminants | Professional-grade, not household cleaners |
Sandpaper (120-220 grit) | Surface preparation and smoothing | Multiple grits for staged refinement |
Wood filler | Repairing minor damage and grain | Matches wood density, sands smooth |
Premium primer | Adhesion foundation | Blocks tannins, seals uniformly |
Acrylic enamel paint | Durable finish coat | Self-leveling, chip-resistant formulation |
HVLP sprayer or quality brushes | Even application | Professional equipment, not disposable tools |
Ventilation and safety equipment protect your health throughout the process. N95 respirators filter fine dust particles during sanding. Chemical-resistant gloves prevent skin exposure to harsh cleaners and paint compounds. Eye protection guards against airborne debris.
Pro Tip: Ottawa’s winter humidity drops significantly with indoor heating. Schedule refinishing during spring or fall when moderate temperatures allow proper paint flow and curing without extreme environmental stress.
Environmental factors influence paint selection. Low-VOC formulations reduce indoor air quality impact while meeting modern environmental standards. Temperature-stable acrylic enamels handle Ottawa’s seasonal extremes better than oil-based alternatives.
Investing in cabinet refinishing preparation sets the foundation for results lasting over a decade. Rush this phase and you guarantee premature failure.
Step-by-step professional cabinet refinishing process
Professional refinishing follows a precise sequence that cannot be shortened without compromising quality.
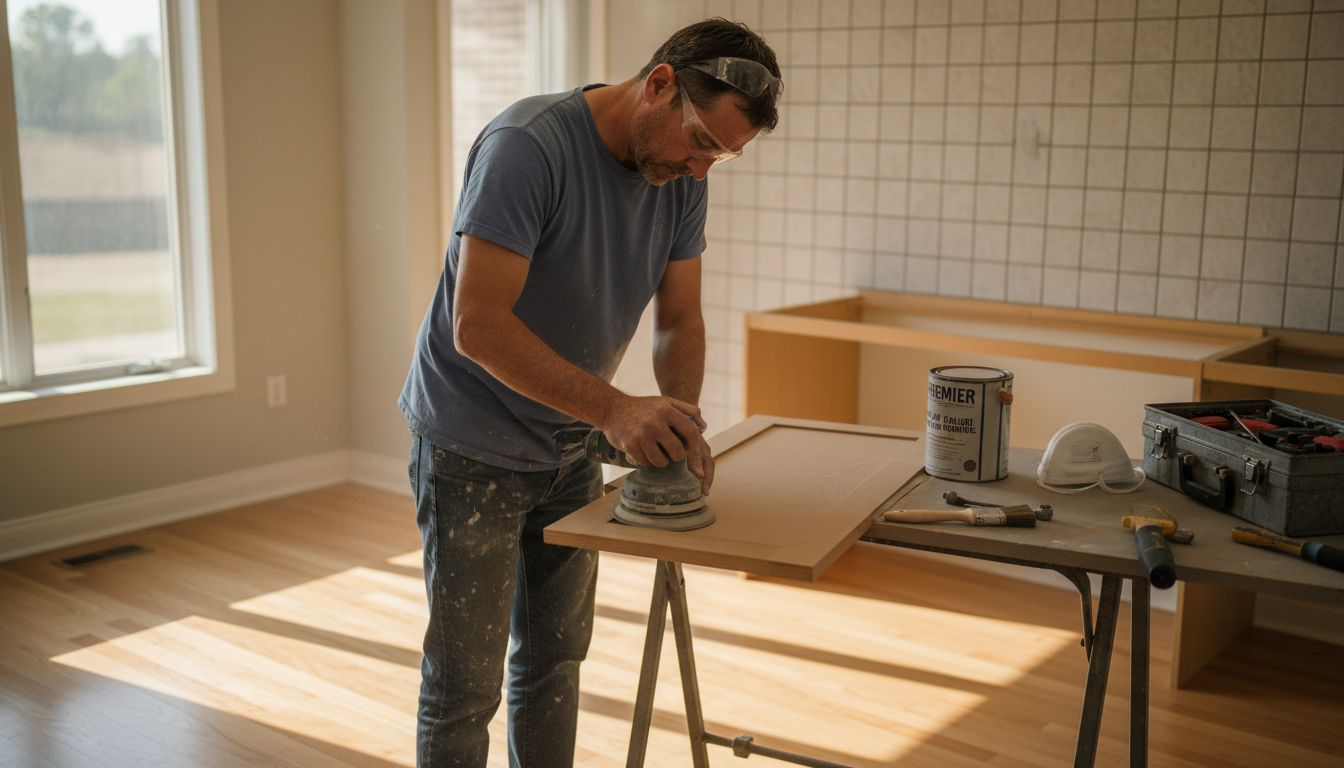
Step 1: Surface preparation and repair
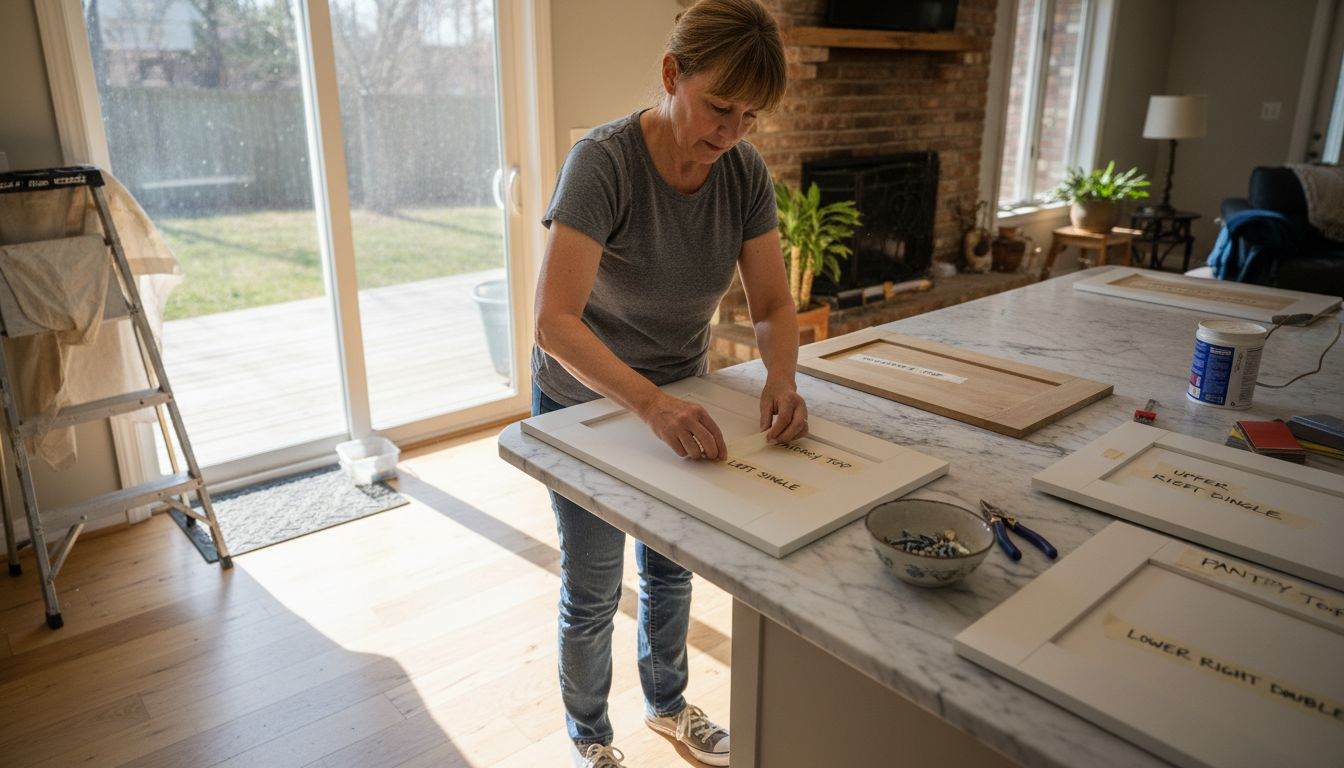
Remove all cabinet doors, drawer fronts, and hardware. Label everything for accurate reinstallation. Deep clean surfaces with TSP or professional degreaser to eliminate cooking oils, dirt, and residue that prevent paint adhesion.
Sand all surfaces with 120-grit paper to remove existing finish and create mechanical tooth. Progress to 220-grit for final smoothing. Fill any dents, scratches, or imperfections with quality wood filler. Sand repairs flush once dry.
Step 2: Primer and paint application
Apply bonding primer designed for cabinet surfaces. This creates the critical foundation layer that determines long-term adhesion. Allow complete drying per manufacturer specifications.
Apply the first coat of premium acrylic enamel paint using consistent technique. Professional sprayers deliver the smoothest results, though quality brushes work with proper skill. Acrylic enamel paint lasts up to 5 years longer without chipping than standard formulations.
Light sanding between coats with 320-grit paper removes dust nibs and creates interlayer adhesion. Apply a minimum of two finish coats for durability and even color coverage.
Step 3: Controlled curing and drying
This phase separates amateur from professional results. Paint feels dry to touch within hours, but full chemical cure requires days. Maintain controlled temperature and airflow without rushing.
Allow at least 7 days before reinstalling doors and subjecting surfaces to normal use. During this period, paint molecules cross-link into the hard, durable finish you expect.
“The difference between a 2-year finish and a 12-year finish is respecting cure time. Impatience destroys otherwise perfect work.”
Step 4: Final inspection and reinstallation
Examine all surfaces under good lighting for imperfections requiring touch-up. Address any issues before reassembly. Reinstall hardware, doors, and drawer fronts using your labeling system.
Adjust hinges and catches for smooth operation. Clean all surfaces one final time.
Pro Tip: Wait 30 days before placing heavy items on shelves or cleaning with anything beyond gentle soap and water. This extended cure period maximizes finish hardness.
The refinishing process steps demand patience and precision. Rushing any phase compromises the entire investment.
Common refinishing mistakes and how to avoid them
Most refinishing failures trace back to predictable errors. Understanding these pitfalls helps you avoid costly do-overs.
Inadequate surface preparation tops the failure list. Skipping degreasing or light sanding leaves contaminants that prevent paint bonding. Within months, finish peels or chips despite perfect application technique. Always invest extra time in prep work.
Using wrong or low-quality paint guarantees disappointment. Standard wall paint lacks the hardness and chemical resistance cabinets require. Up to 70% of DIY cabinet refinishing fails within one year due to poor prep and using incorrect paint types. Choose products specifically formulated for cabinetry.
Mistake | Consequence | Professional Fix |
Skipping degreasing | Paint adhesion failure, peeling | TSP wash, solvent wipe, thorough drying |
Insufficient sanding | Rough texture, poor bonding | Multi-grit progression, dust removal |
Using wall paint | Chips, scratches, yellowing | Cabinet-specific acrylic enamel |
Rushing cure time | Soft finish, damage from use | Minimum 7-day cure before reassembly |
Poor ventilation | Health hazards, uneven drying | Exhaust fans, fresh air circulation |
Failing to allow sufficient drying between coats creates soft spots that never fully harden. Paint needs time to release solvents and cure chemically. Stacking wet coats traps moisture and compounds, resulting in finish that remains tacky or dents easily.
Ignoring safety protocols endangers your health:
Sanding dust contains particles small enough to penetrate deep into lungs
Paint fumes cause headaches, dizziness, and long-term respiratory issues
Chemical exposure through skin absorption affects liver and kidney function
Inadequate ventilation concentrates volatile organic compounds indoors
Uneven application shows as streaks, brush marks, or thin spots that expose underlying color. Maintain consistent technique, overlap passes properly, and use adequate material per coat.
Learning from common refinishing mistakes prevents wasted time, money, and materials. Professional results require professional attention to detail.
Managing timelines and minimizing household disruption
Refinishing timelines balance quality requirements against homeowner convenience. Understanding realistic durations helps you plan effectively.
Professional refinishing projects in Ottawa typically complete in about 10 days with phased scheduling to reduce disruption. This breaks down into distinct stages:
Days 1-2: Removal, cleaning, and initial sanding
Days 3-4: Repairs, priming, and first paint coat
Days 5-6: Additional paint coats with inter-coat sanding
Days 7-9: Controlled curing in ventilated space
Day 10: Final inspection, touch-ups, and reinstallation
Phased approaches keep your kitchen partially functional during work. Some contractors refinish upper and lower cabinets separately, allowing continued use of appliances and counter space. Others work section by section, maintaining access to essentials.
Communication with your contractor establishes clear expectations:
Confirm daily work hours and noise levels
Understand ventilation requirements and indoor air quality management
Establish protected zones for dust containment
Agree on cleanup protocols and waste disposal
Set contingency plans for weather delays affecting cure times
Professionals manage dust through plastic sheeting barriers and HEPA filtration. They control fumes with exhaust fans and fresh air circulation. Safety protocols protect occupants, especially children and pets sensitive to chemical exposure.
Pro Tip: Plan refinishing when you can spend more time away from home. The process is safe with proper precautions, but reducing household activity simplifies contractor access and speeds completion.
Realistic timelines and disruption expectations prevent frustration. Quality work cannot be rushed without compromising results that should last over a decade.
Safety and environmental considerations during refinishing
Protecting health and environment during refinishing requires deliberate practices beyond basic precautions.
Respiratory protection filters harmful particles and vapors. N95 respirators provide minimum protection during sanding. For paint application, especially with spray equipment, upgrade to organic vapor cartridge respirators that block chemical fumes.
Skin protection prevents absorption of harsh chemicals:
Chemical-resistant nitrile gloves during all cleaning, sanding, and painting
Long sleeves and pants to minimize skin exposure
Safety glasses or goggles protecting eyes from splashes and airborne particles
Disposable coveralls preventing contamination of regular clothing
Ventilation makes the difference between safe and hazardous working conditions. Open windows create cross-breezes that exhaust fumes outdoors. Position fans strategically to pull contaminated air away from breathing zones. Never work in confined spaces without forced air exchange.
“Indoor air quality during refinishing directly impacts long-term health. Cutting ventilation corners saves time today but costs health tomorrow.”
Proper disposal of refinishing waste protects Ottawa’s environment. Never pour paint, thinners, or strippers down drains. These contaminate water treatment facilities and natural waterways. Ottawa’s hazardous waste depot accepts leftover paints, solvents, and contaminated materials for safe processing.
Environmental responsibility extends to product selection. Low-VOC and zero-VOC paints reduce indoor air pollution while meeting performance standards. Water-based acrylic formulations minimize solvent exposure compared to oil-based alternatives.
Ottawa regulations govern chemical use and disposal in residential settings. Compliance protects you from fines while demonstrating environmental stewardship. Professional contractors maintain current knowledge of local requirements.
Safety during cabinet refinishing cannot be optional or improvised. Established protocols exist because previous injuries proved their necessity.
Expected results and quality assurance from professional refinishing
Professional refinishing delivers measurable, lasting improvements that justify the investment.
Longevity expectations center on 8-12 years of functional, aesthetic finish performance. A thorough refinishing process extends cabinet life 8-12 years compared to 3-5 years with superficial painting. This extended lifespan depends on proper execution of every process phase.

Warranty coverage demonstrates contractor confidence in workmanship and materials. Reputable Ottawa refinishing companies offer 5-6 year warranties covering finish adhesion, color consistency, and resistance to normal wear. These guarantees protect your investment while establishing accountability.
Industry benchmark: Professional cabinet refinishing provides 2.5x longer durability than DIY attempts while costing 40-60% less than replacement.
Visual quality indicators separate professional from amateur results:
Smooth, glass-like surface free from brush marks, roller texture, or orange peel
Uniform color coverage without streaks, thin spots, or variations
Clean edges and corners showing attention to detail
Consistent sheen level across all surfaces and angles
No drips, sags, or accumulated paint at edges
Tactile quality reveals finish hardness and durability. Properly cured cabinet paint resists fingernail indentation and feels smooth under your hand. It withstands normal cleaning without softening or showing wear patterns.
Chip resistance comes from proper surface preparation creating mechanical and chemical bonding. Premium paints flex slightly with wood movement rather than cracking. Edges and corners, typically vulnerable points, show the same durability as flat surfaces.
Customer satisfaction stems from meeting expectations established during consultation. Professional contractors conduct final walkthroughs, addressing any concerns before considering the job complete. Touch-ups handle minor issues discovered after reinstallation.
Cabinet refinishing durability reflects the compound effect of material quality, technical skill, and process discipline. Each element contributes to results that transform your kitchen for years.
Discover expert cabinet refinishing services in Ottawa
Transforming your kitchen cabinets from dated to stunning requires expertise you can trust. Ottawa Cabinet Painting specializes in interior cabinet refinishing services tailored to local climate challenges and homeowner needs. We use premium materials and proven techniques delivering smooth, durable finishes that last over a decade.
Our process minimizes household disruption through efficient phased scheduling. You’ll work with experienced professionals who respect your home and timeline. Explore our kitchen cabinet color options during personalized consultations matching your style vision.
Ready to upgrade your kitchen affordably? Request free spray painting quotes today and discover how professional refinishing transforms your space without renovation chaos.
Frequently asked questions
What is the average cost of professional cabinet refinishing in Ottawa?
Costs vary by kitchen size and cabinet condition but typically range 40-60% less than full replacement. Average cabinet refinishing cost includes thorough prep work, premium materials, and professional labor. Most Ottawa homeowners invest between $3,000-$6,000 for complete kitchen cabinet refinishing compared to $15,000-$30,000 for new cabinets.
How long does the cabinet refinishing process usually take?
Professional refinishing projects typically complete within 10 days using phased scheduling. This includes surface preparation, multiple paint coats, and essential curing time. Contractors often work in sections to maintain partial kitchen functionality throughout the process.
What safety measures are important during cabinet refinishing?
Use N95 respirators and chemical-resistant gloves to protect from dust and fumes during all work phases. Ensure continuous ventilation with exhaust fans and open windows. Safe disposal of paints, solvents, and contaminated materials through Ottawa’s hazardous waste facilities protects both health and environment.
Can refinished cabinets achieve a modern, high-end look like new replacements?
High-quality refinishing gives kitchens a modern, premium finish at significantly lower cost and disruption than replacement. Professional techniques using premium acrylic enamel paints create smooth, durable surfaces matching new cabinet appearance. You achieve contemporary style while preserving your existing layout and functionality.
Recommended

Comments