Step-by-Step Guide to Painting Oak Cabinets
- Axcell Painting

- Nov 2, 2025
- 4 min read
So, you’ve been staring at those oak cabinets in your kitchen or bathroom, wondering if there’s a way to give them a fresh new look without breaking the bank or tearing everything apart. I get it! Oak cabinets have that classic charm, but sometimes they just scream “dated” or “too busy” with all those wood grains. Lucky for you, I’m here to walk you through the painting oak process that can transform your space from drab to fab. And trust me, it’s easier than you think.
Let’s dive in and get those cabinets looking like a million bucks without spending a fortune or hiring a full renovation crew.
Why Choose the Painting Oak Process?
Before we get our hands dirty, let’s talk about why this process is a game-changer. Oak cabinets are notoriously tricky to paint because of their strong grain patterns and dense wood. But with the right steps, you can achieve a smooth, durable finish that lasts for years.
Here’s why the painting oak process is worth it:
Cost-effective: Way cheaper than replacing cabinets.
Less mess: No demolition or construction chaos.
Customizable: Pick any colour that suits your style.
Eco-friendly: Reuse what you already have.
Quick turnaround: You can often finish in a weekend.
Imagine walking into your kitchen and seeing those cabinets gleaming in a fresh coat of paint, making the whole room feel brighter and more modern. Sounds good, right?

The Painting Oak Process: Step-by-Step
Alright, here’s where the magic happens. I’m going to break down the painting oak process into easy-to-follow steps. Grab your supplies, put on some tunes, and let’s get started!
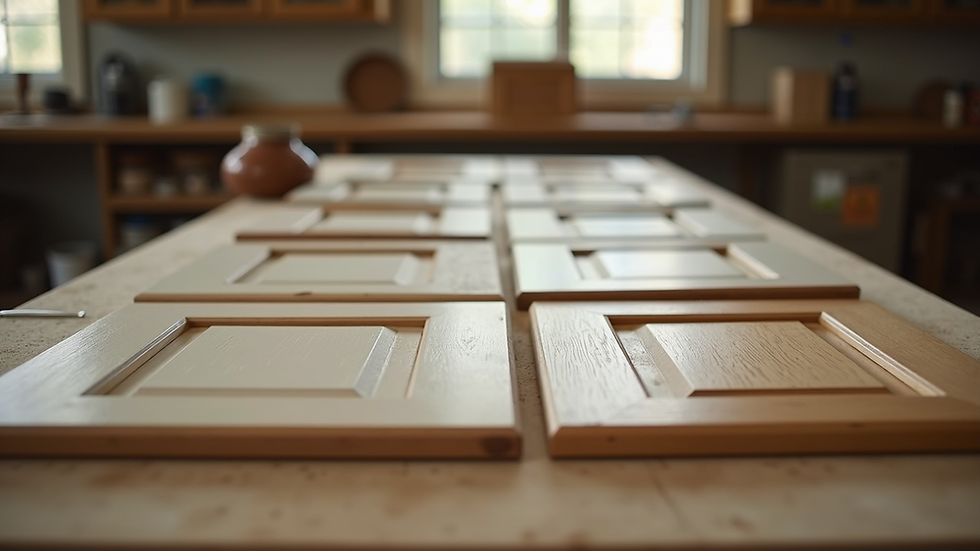
1. Remove Cabinet Doors and Hardware
First things first, take off all the cabinet doors, drawers, and hardware like knobs and hinges. This makes painting way easier and ensures you don’t miss any spots. Pro tip: label each door and its matching spot with painter’s tape so you don’t get lost during reassembly.
2. Clean Thoroughly
Oak cabinets can be greasy or dusty, especially in kitchens. Use a degreaser or a mix of warm water and mild dish soap to scrub every surface. Rinse and let dry completely. This step is crucial because paint won’t stick well to dirty surfaces.
3. Sand the Surface
Here’s where patience pays off. Sanding smooths out the grain and roughens the surface so the primer and paint adhere better. Use a medium-grit sandpaper (around 120-150 grit) and sand in the direction of the grain. Don’t worry about sanding off all the wood grain - just dull the shine.
After sanding, wipe down with a tack cloth to remove dust.
4. Apply Primer
Priming is the secret weapon in the painting oak process. It blocks tannins from the oak that can bleed through paint and provides a solid base. Use a high-quality bonding primer designed for wood.
Apply a thin, even coat with a brush or roller. Let it dry fully (usually a few hours). For best results, lightly sand the primer with fine-grit sandpaper (220 grit) and clean off dust again.
5. Paint Your Cabinets
Now for the fun part! Choose a durable, high-quality paint made for cabinets or trim. Semi-gloss or satin finishes work great because they’re easy to clean and have a nice sheen.
Use a brush for edges and details, and a foam roller for flat surfaces to avoid brush marks. Apply thin coats and let each dry before adding the next. Usually, two to three coats do the trick.
6. Seal for Durability
If you want your cabinets to stand up to years of kitchen chaos, consider a clear polyurethane topcoat. It adds extra protection against scratches and stains. Just make sure your paint is fully cured before sealing.
7. Reassemble and Enjoy!
Once everything is dry and cured, put your hardware back on and hang those doors. Step back and admire your handiwork. You just gave your cabinets a stunning makeover!
Can you paint right over oak cabinets?
Great question! The short answer is: technically, yes, but it’s not the best idea if you want a long-lasting, smooth finish.
Oak has a very pronounced grain and natural oils that can cause paint to peel or show imperfections if you skip prep. Painting right over oak cabinets without sanding and priming often leads to:
Peeling or chipping paint
Visible wood grain texture under the paint
Uneven colour and finish
Shorter lifespan of the paint job
So, while it might be tempting to slap on some paint and call it a day, trust me - taking the time to prep properly with sanding and priming will save you headaches and money down the road.
Tips and Tricks for a Flawless Finish
Painting oak cabinets is a bit of an art and science combo. Here are some insider tips I’ve picked up to make your project smoother and more enjoyable:
Use quality brushes and rollers: Cheap tools leave streaks and brush marks.
Work in a dust-free environment: Dust can ruin your finish.
Thin your paint if needed: Sometimes thinning helps with smoother coats.
Don’t rush drying times: Patience is key for durability.
Consider professional help for large projects: If you want a flawless finish without the hassle, painting oak cabinets pros can save you time and stress.
Why Ottawa Homeowners Love This Approach
If you’re in Ottawa and dreaming of a kitchen or bathroom refresh, this painting oak process is a fantastic option. It’s affordable, less disruptive, and gives your home a fresh vibe without the chaos of a full renovation.
Plus, with Ottawa’s changing seasons, a durable paint job can protect your cabinets from humidity and temperature swings better than bare wood.
If you want to skip the DIY stress but still get that fresh look, local experts like Ottawa Cabinet Painting specialize in this exact process. They know the ins and outs of painting oak cabinets and can deliver a professional finish that lasts.
Ready to Transform Your Cabinets?
There you have it - a complete, step-by-step guide to the painting oak process that can breathe new life into your kitchen or bathroom cabinets. Whether you’re tackling this yourself or calling in the pros, you’re one step closer to a beautiful, updated space.
Remember, the key is in the prep and patience. So roll up your sleeves, grab your supplies, and get ready to fall in love with your cabinets all over again!
Happy painting!
Comments