How to Fix Peeling Cabinet Paint: Restore Your Kitchen in 2025
- demoore5506
- Aug 29, 2025
- 10 min read
Restoring old kitchen cabinets might sound like a huge project, but the payoff can be massive. Over 80 percent of homeowners say a fresh cabinet finish completely transforms their kitchen’s look. Most people expect new paint to be the hardest part. Instead, it’s actually the careful prep work and honest assessment that makes or breaks your result.
Table of Contents
Quick Summary
Key Point | Explanation |
1. Assess cabinet condition thoroughly | A detailed inspection helps identify if cabinets need painting or repairs, ensuring successful restoration efforts. |
2. Prepare with essential repair supplies | Gather all necessary tools and materials, including sandpaper and cleaning solutions, to streamline the restoration process. |
3. Focus on surface preparation | Properly clean and sand surfaces to ensure the best adhesion for paint, resulting in a smooth finish. |
4. Use high-quality primers and paints | Invest in premium products specifically for cabinets to enhance durability and appearance, ensuring lasting results. |
5. Inspect the finish carefully | After painting, check for imperfections and functionality, making touch-ups as needed for a professional look. |
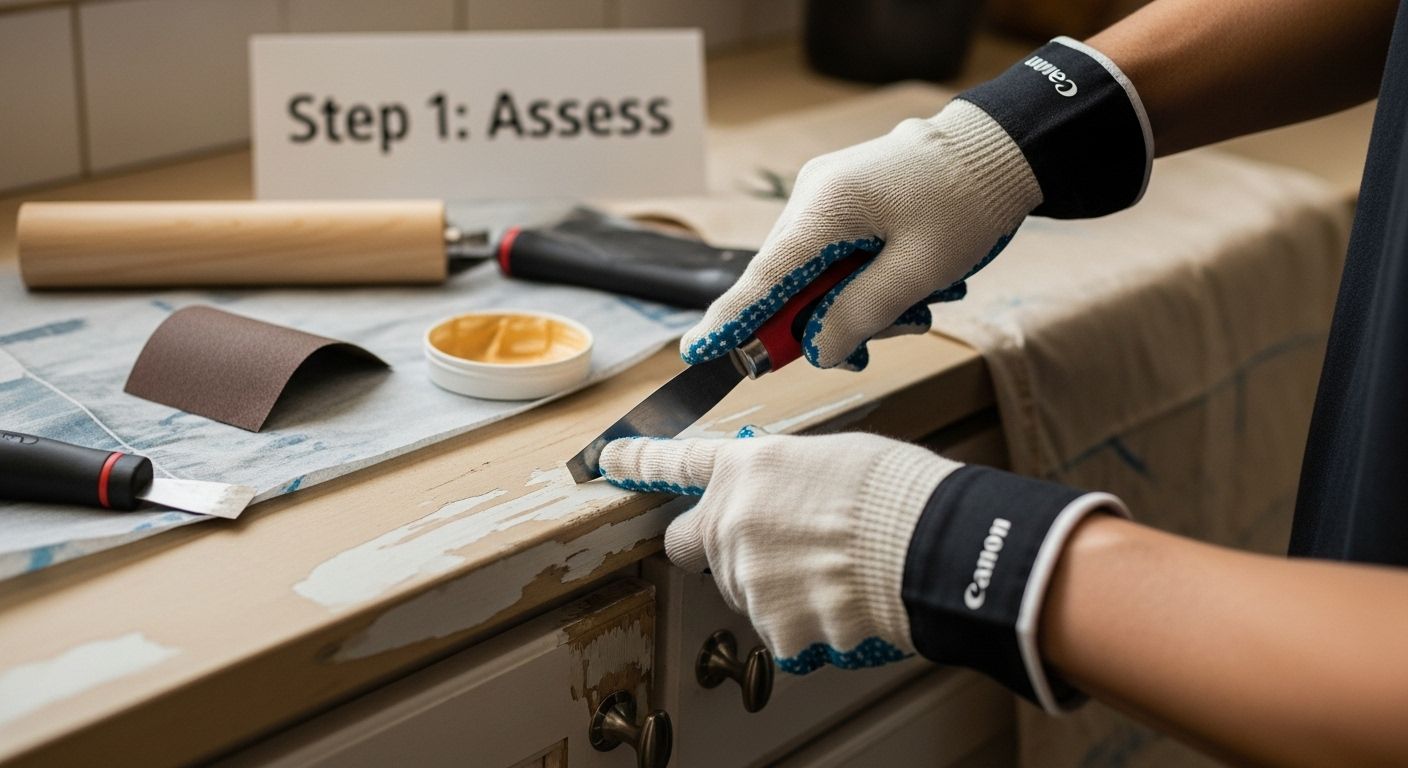
Step 1: Assess Your Current Cabinet Condition
Restoring your kitchen cabinets begins with a thorough and honest assessment of their current condition. This critical first step determines whether your cabinets are candidates for painting or require more extensive repairs. Grab a flashlight, put on your detective glasses, and prepare to examine every inch of your cabinet surfaces with the precision of a professional.
Start by clearing out your cabinets completely. Remove all dishes, utensils, and stored items to create an unobstructed view of the interior and exterior surfaces. Natural daylight works best for this inspection, so open curtains and position yourself near a window or use bright, direct lighting. Look for specific signs of wear and damage that will impact your painting project: peeling paint layers, deep scratches, water damage, wood rot, or areas with significant chipping.
Learn about cabinet surface preparation to understand how different materials require unique approaches. Wood cabinets typically show wear through:
Visible crack lines in paint or wood grain
Discoloration around edges and corners
Bubbling or separating veneer
Loose or warped cabinet doors
Noticeable moisture stains
Metal and laminate surfaces present different challenges. They might exhibit chalky residue, rust spots, or complete paint separation that requires specialized treatment. Run your fingers gently across surfaces to feel for irregularities invisible to the naked eye. Pay special attention to high-moisture areas like near the sink or areas exposed to direct sunlight, which accelerate paint degradation.
Documenting your findings is crucial. Take clear, well-lit photographs of problem areas from multiple angles. These images will serve as a reference point throughout your restoration process and help you track progress. Measure any significant damage areas and note their precise locations. This documentation ensures you have a comprehensive understanding of the repairs needed before applying new paint.
Successful cabinet restoration starts with recognizing that not all imperfections require complete replacement. Many surface issues can be effectively addressed through proper preparation, high-quality primers, and professional painting techniques. Your careful assessment now will determine the success of your entire kitchen transformation project.
Step 2: Gather Essential Repair Supplies
With your cabinet condition thoroughly assessed, the next critical phase involves assembling the right arsenal of tools and materials. Think of this step as preparing for a precise surgical intervention, where every tool serves a specific purpose in reviving your kitchen’s heart. Professional-grade preparation is the difference between a mediocre touch-up and a stunning transformation.
Your repair kit will require several specialized categories of supplies. Begin with surface preparation tools: medium and fine-grit sandpaper (120 and 220 grits), tack cloths for dust removal, and a reliable electric sander for larger surfaces. Invest in high-quality, lint-free microfiber cloths that won’t leave residue during cleaning and preparation stages. Explore our comprehensive cabinet painting guide for additional insights into professional-level preparation.
Chemical supplies are equally crucial. You will need a robust degreasing solution specifically designed for kitchen surfaces, trisodium phosphate (TSP) for deep cleaning, and a non-ammonia based cleaner that won’t damage existing finishes. Select a quality wood filler or spackling compound matching your cabinet’s material for repairing minor scratches and holes. Ensure these products are compatible with the paint system you plan to use.
Protective gear is non-negotiable. Stock up on disposable nitrile gloves, safety glasses, and a respirator mask rated for chemical vapors. Select drop cloths or plastic sheeting to protect surrounding surfaces, painter’s tape for precise edges, and several sizes of high-quality synthetic brushes and foam rollers designed for smooth, even paint application.
Organize your supplies systematically before beginning. Arrange tools in order of use, ensuring everything is within easy reach. Your repair kit should include:
Electric sander with dust collection
Multiple grits of sandpaper
Degreasing solution
Wood repair compounds
High-quality primer
Paint trays and liners
Painter’s tape
Drop cloths
Microfiber cleaning cloths
Personal protective equipment
A well-prepared workspace dramatically increases your chances of success. Check each item’s expiration date and condition, replacing any dried-out or degraded supplies. Remember, the quality of your preparation directly influences the final result. Professional painters know that 80% of a perfect paint job happens before the first brushstroke touches the surface.
Below is a table summarizing the essential tools and materials needed for cabinet restoration, along with their purpose and any special notes. This helps ensure you organize your repair kit efficiently before starting.
Item | Purpose | Notes |
Electric sander | Smooths large surfaces | Speeds up sanding; use with dust collection |
Medium & fine-grit sandpaper | Preps surfaces for paint | 120 and 220 grit for best results |
Degreasing solution | Removes grease and residue | Kitchen-specific cleaner recommended |
Wood filler/spackling compound | Repairs scratches and holes | Match to cabinet material |
Microfiber cleaning cloths | Cleans and wipes surfaces | Lint-free to avoid residue |
High-quality primer | Ensures paint adhesion | Choose cabinet-appropriate primer |
Painter’s tape | Creates clean paint edges | Use for edges and trim |
Drop cloths/plastic sheeting | Protects surrounding areas | Prevents paint splatter |
Personal protective equipment | Safety during prep and painting | Gloves, safety glasses, respirator recommended |
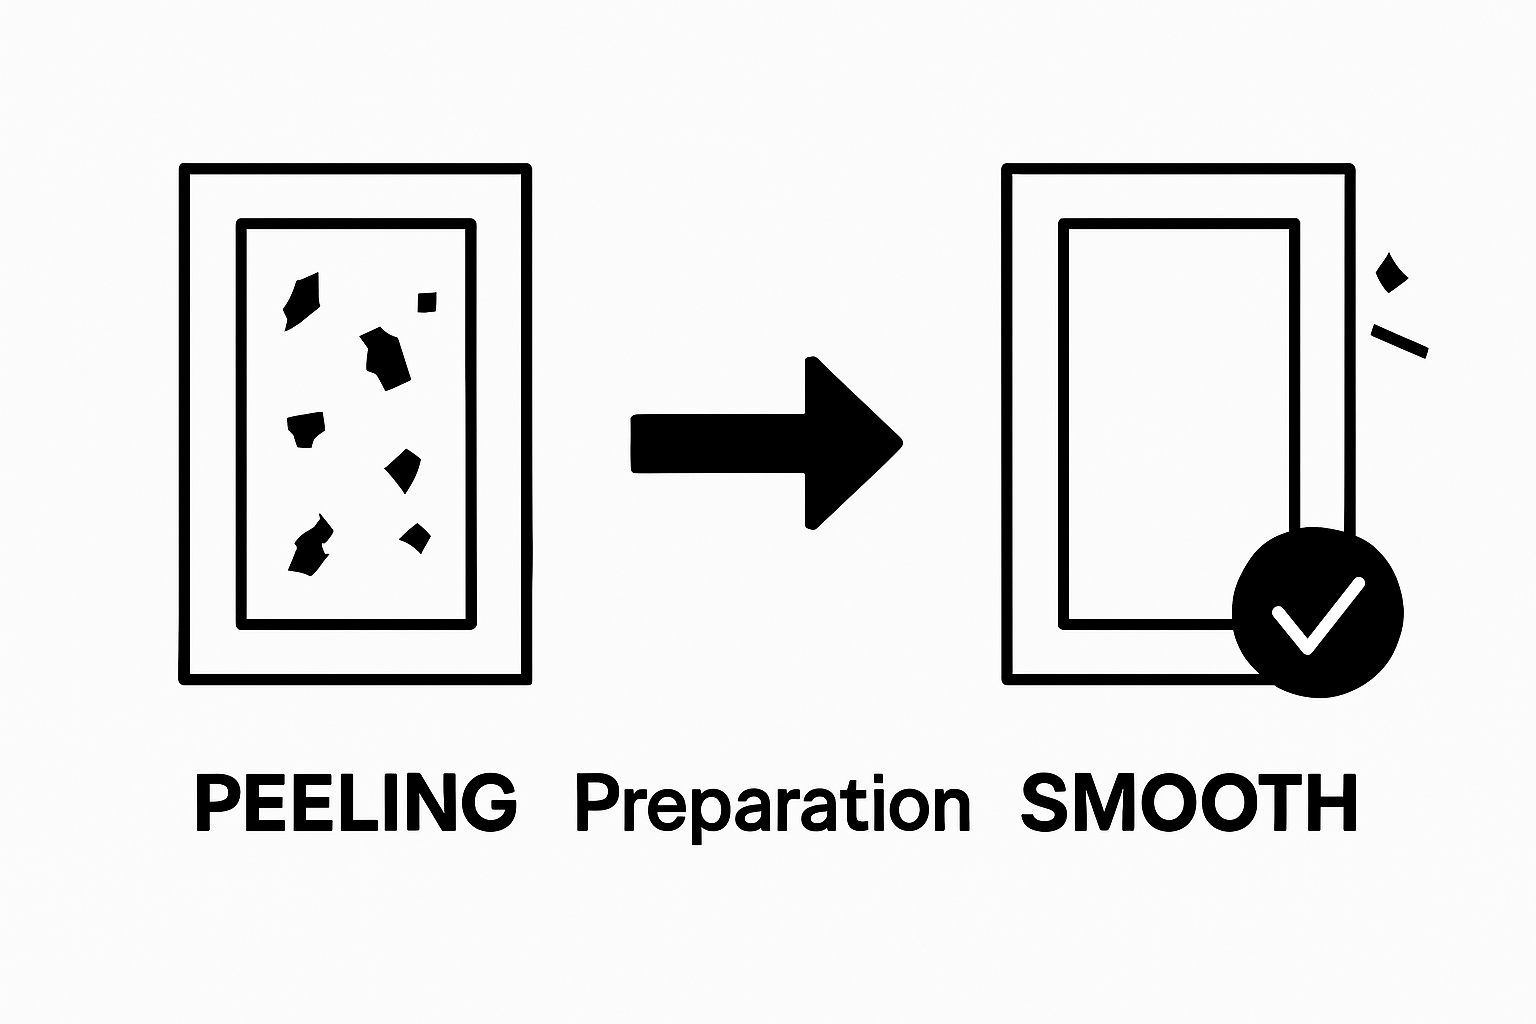
Step 3: Prepare Surfaces for Painting
Prepping your cabinet surfaces is where the real transformation begins. This critical stage determines whether your paint job will look professionally finished or disappointingly amateur. Proper surface preparation is the foundation of a flawless cabinet restoration. Think of it like creating a smooth canvas for an artist - every imperfection you address now prevents future headaches.
Explore our complete cabinet prep techniques to understand the nuanced approach professionals use. Start by thoroughly cleaning each surface using a degreasing solution specifically designed for kitchen cabinets. Mix your cleaning solution in a well-ventilated area, wearing protective gloves to shield your hands from harsh chemicals. Work systematically from top to bottom, using lint-free microfiber cloths to remove years of accumulated grease, cooking residue, and dirt. Pay extra attention to areas around handles and edges where grime tends to collect.
Once cleaned, you will need to sand the surfaces to create a receptive texture for your new paint. Sanding isn’t just about roughing up the surface - it’s about creating the perfect adhesion environment. Select medium-grit sandpaper (120 grit) for initial smoothing, followed by fine-grit paper (220 grit) for a silky finish. Use circular motions and consistent pressure, being careful not to dig into the wood or create uneven patches. Electric sanders can speed up this process, but hand sanding allows more precision in detailed areas like corners and decorative trim.
After sanding, remove all dust meticulously. Use a tack cloth to pick up fine particles, followed by a vacuum with a brush attachment. This step is crucial - any remaining dust will create bumps and imperfections in your final paint layer. Wipe surfaces with a slightly damp microfiber cloth, then immediately dry with a clean cloth to prevent moisture absorption.
Your preparation checklist should include:
Thorough degreasing of all surfaces
Complete sanding with progressive grits
Comprehensive dust removal
Surface inspection for remaining imperfections
Final wipe down with clean, dry cloth
Professional painters know that patience during preparation separates outstanding results from mediocre ones. Take your time, work methodically, and remember that each careful motion brings you closer to a kitchen that looks like it was just installed. The extra hours spent preparing will reward you with a finish that looks smooth, professional, and built to last.
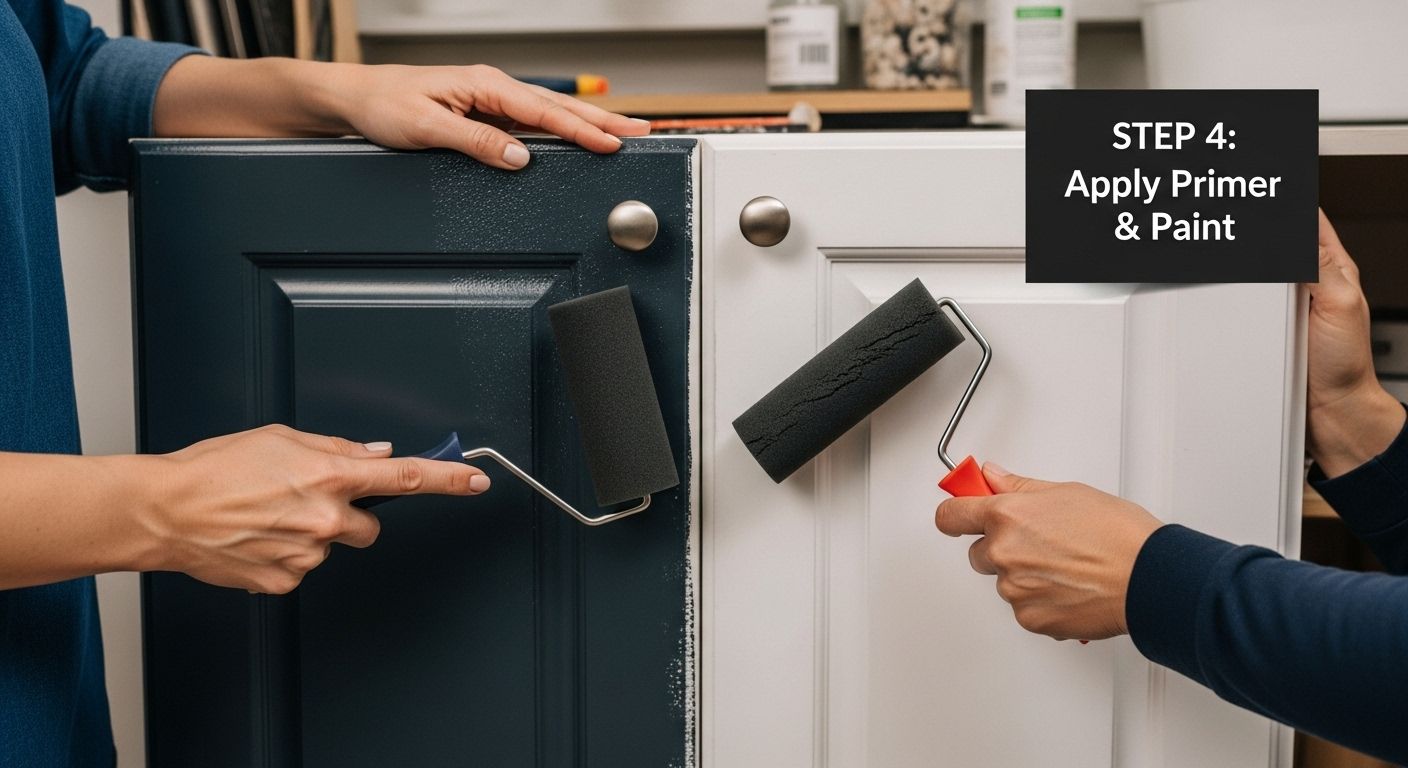
Step 4: Apply Appropriate Primer and Paint
With surfaces meticulously prepared, you are now ready to transform your cabinets from worn to wonderful. Primer and paint application is where technical precision meets artistic vision. This stage requires patience, steady hands, and a strategic approach that professionals have perfected over decades.
Discover expert painting techniques to elevate your cabinet restoration project. Begin by selecting a high-quality bonding primer specifically designed for your cabinet material. Oil-based primers work exceptionally well for wood surfaces, creating a smooth foundation that prevents future peeling and ensures maximum paint adhesion. Use a foam roller for large, flat surfaces and high-quality synthetic brushes for detailed areas and edges. Apply the primer in thin, even strokes, working systematically from top to bottom to prevent drips and uneven coverage.
Allowing sufficient drying time between primer coats is crucial. Most primers require at least two hours of drying time, but check the manufacturer’s specific instructions. Temperature and humidity significantly impact drying speed, so ensure your workspace maintains a consistent environment around 70 degrees Fahrenheit with moderate humidity. Once the primer has completely dried, lightly sand the surface with fine-grit sandpaper to create an ultra-smooth base for your topcoat.
When selecting paint, invest in a premium, cabinet-specific formula designed to withstand frequent cleaning and daily wear. Semi-gloss or satin finishes work best in kitchen environments, offering durability and easy maintenance. Choose colors that complement your kitchen’s existing palette, remembering that lighter shades can make spaces feel larger and more open. Apply paint using the same technique as the primer - thin, even coats using foam rollers and synthetic brushes. Most cabinet paint requires two to three coats for optimal coverage and longevity.
Your painting success checklist should include:
Use high-quality, cabinet-specific primer
Apply primer in thin, even strokes
Allow adequate drying time between coats
Lightly sand primer before painting
Select premium, kitchen-grade paint
Apply multiple thin coats
Maintain consistent temperature and humidity
Professional painters understand that rushing this process guarantees subpar results. Take your time, maintain a steady hand, and focus on creating smooth, consistent layers. The extra effort invested in careful application will reward you with cabinets that look professionally refinished, transforming your kitchen’s entire aesthetic.
Step 5: Verify the Finish and Make Adjustments
With paint applied, you are now entering the critical stage of finish verification - where professional results are distinguished from amateur attempts. This step transforms your project from a painting job to a precision restoration. Take a deep breath and prepare to scrutinize every inch of your newly painted cabinets with the eye of a professional craftsman.
Learn about professional finishing techniques to understand the nuanced approach to surface perfection. Begin by allowing your final paint coat to dry completely according to manufacturer recommendations, typically 24 to 48 hours. Natural daylight provides the most accurate assessment, so position yourself near a window or use bright, consistent lighting that reveals every subtle imperfection. Examine surfaces from multiple angles - standing, crouching, and using a small handheld mirror to catch reflection details that might escape initial inspection.
Focus your verification on several key areas: uniform color coverage, edge smoothness, corner transitions, and overall surface consistency. Look for telltale signs of imperfection such as visible brush strokes, tiny air bubbles, dust particles, uneven thickness, or slight color variations. Use a bright light source at a 45-degree angle to highlight these subtle irregularities. Keep a small artist’s brush and matching touch-up paint nearby for immediate corrections. Minor imperfections can often be addressed with gentle sanding and a carefully applied touch-up coat.
Pay special attention to high-traffic areas like drawer fronts, cabinet handles, and edges where wear is most likely to occur. Test the paint’s durability by gently running a clean, soft cloth across surfaces to ensure proper adhesion and smoothness. Check that cabinet doors open and close smoothly, with no paint interference at hinges or contact points. Verify that paint thickness is consistent, preventing future peeling or chipping.
Your final verification checklist should include:
This table offers a concise overview checklist for verifying your painted cabinet finish before completing your project. Following these verification steps helps ensure a flawless, professional-quality result.
Verification Step | What to Check For | Recommended Method |
Confirm paint is fully dry | No tackiness or soft spots | Wait 24-48 hours as needed |
Inspect from multiple angles | Hidden imperfections | Use daylight & mirrors |
Check color consistency | No blotches or shade variation | Stand back & review |
Verify smooth surface texture | No bumps, dust, or brush marks | Run clean hand over area |
Test paint adhesion | Paint stays on under gentle rub | Use soft clean cloth |
Ensure cabinet functionality | Doors and drawers operate freely | Open/close each component |
Prepare for touch-ups | Small chips or missed spots | Use artist brush, extra paint |
Confirm complete paint drying
Inspect from multiple angles and lighting
Check color uniformity
Verify smooth surface texture
Test paint adhesion
Ensure cabinet functionality
Prepare touch-up materials
Remember that patience during this verification stage separates exceptional results from mediocre ones. Professional painters understand that a meticulous final inspection is the difference between a good paint job and an outstanding kitchen transformation. Take your time, be critical, and don’t hesitate to make small adjustments that elevate your entire project.
Transform Your Kitchen Cabinets with Lasting Results—No More Peeling Paint!
You have just learned step-by-step how to tackle peeling cabinet paint and restore your kitchen for 2025. But even with careful preparation, finding the time, expertise, and patience can leave you feeling overwhelmed. Homeowners just like you want a kitchen that looks brand new without breaking the bank or dealing with endless mess. Are you ready to achieve a truly flawless, durable finish and avoid the hassle of mistakes or patchy repairs?
Let Ottawa Cabinet Painting handle your cabinet transformation and experience the peace of mind that comes with professional service. Our team prioritizes meticulous prep work, superior paint application, and a smooth, uninterrupted process—all delivered in about ten days with minimal disruption to your home. Skip the uncertainty and get a kitchen you love with real long-term value. Visit our home page now to request your quote and see why Ottawa families trust us to bring their kitchens back to life. Want to understand our cabinet technique in even more detail? Take a look at our popular cabinet surface preparation guide for expert insights, then return to Ottawa Cabinet Painting and start your transformation today.
Frequently Asked Questions
What causes cabinet paint to peel?
Peeling cabinet paint is typically caused by improper surface preparation, moisture exposure, or the use of low-quality paint. Signs of wear, such as humidity and temperature fluctuations, can also contribute to paint degradation.
How can I prepare my cabinets for painting to prevent peeling?
Thoroughly clean, sand, and prime your cabinets before painting. Ensuring a smooth, dust-free surface will improve paint adhesion and reduce the likelihood of future peeling.
What type of primer should I use for kitchen cabinet restoration?
Use a high-quality bonding primer suitable for your cabinet material. Oil-based primers are excellent for wood cabinets, while shellac-based primers can work well for both wood and laminate surfaces.
How many coats of paint should I apply to my cabinets?
Apply two to three thin coats of paint for optimal coverage and durability. Allow sufficient drying time between each coat to achieve a smooth, professional finish.
Recommended

When considering Kitchen Remodeling in Tustin, CA, homeowners often focus on optimizing space and improving layout efficiency. From installing custom cabinets to upgrading countertops and appliances, every element plays a vital role in creating a cohesive and practical kitchen environment. Thoughtful design ensures that your kitchen becomes a central hub for cooking, dining, and gathering.