How to Choose Paint Finish: Guide for Kitchen Upgrades
- demoore5506
- Aug 22, 2025
- 10 min read
Choosing a paint finish for your kitchen sounds simple, but the results can change everything. Kitchens with heavy use need finishes that survive daily scrubbing and steam, since durable finishes reduce repainting by nearly 30 percent. You might think the color is what matters most, but the finish actually controls how your kitchen looks, feels, and survives daily life.
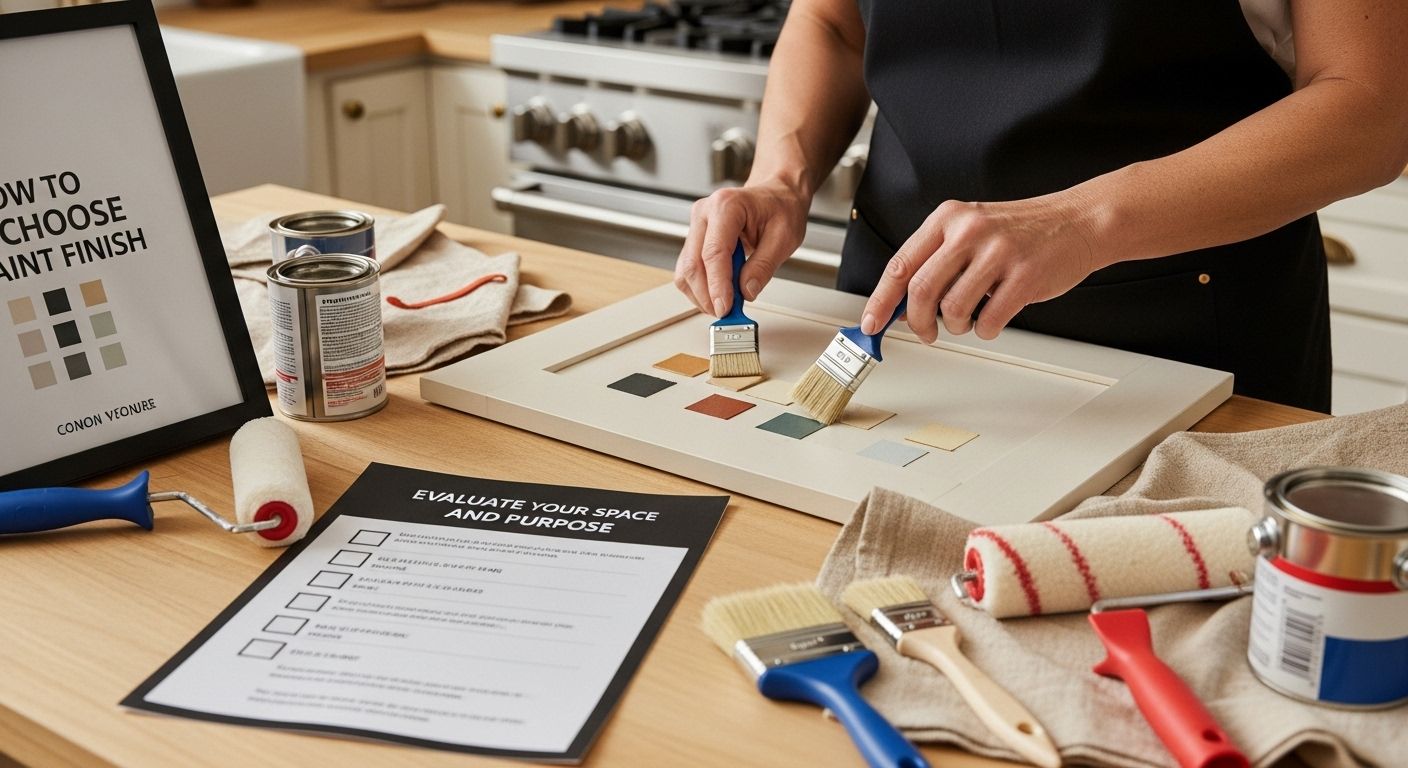
Table of Contents
Quick Summary
Key Point | Explanation |
1. Evaluate kitchen characteristics first | Assess your kitchen’s traffic, moisture, and lighting to choose the most suitable paint finish for durability and aesthetics. |
2. Research compatible paint finishes | Understand each finish type and its compatibility with your kitchen surfaces to ensure long-lasting results and easy maintenance. |
3. Test paint samples thoroughly | Apply samples in different lighting to observe how they perform and look under various conditions before making a final choice. |
4. Consider how light affects finish | Acknowledge that light exposure alters the appearance and feel of finishes; select one that enhances your kitchen’s brightness and space. |
5. Gather quality supplies for execution | Ensure you have the right tools and high-quality paints to achieve a professional finish, enhancing both performance and appearance. |
Step 1: Evaluate Your Space and Purpose
Choosing the right paint finish for your kitchen starts with a strategic assessment of your specific space and functional needs. Understanding your kitchen’s unique characteristics will directly influence which paint finish will deliver both aesthetic appeal and practical performance.
Begin by conducting a comprehensive visual and functional inspection of your kitchen. Walk through the space and critically observe the current condition of your cabinets, walls, and overall environment. Note areas with high moisture exposure, like near the sink or stove, and spaces that experience significant traffic or potential impact from cooking activities, utensils, and daily household movement.
The lighting conditions in your kitchen play a crucial role in paint finish selection. Natural light from windows, overhead lighting, and task lighting will interact differently with various paint sheens. Rooms with abundant natural light might benefit from a finish that minimizes glare, while spaces with limited light could use a finish that reflects and brightens the environment.
Consider your household’s lifestyle and usage patterns. Do you have young children who might create frequent scuffs and marks? Are you an avid home cook who generates significant steam and potential splatter? Families with active kitchens require more durable finishes that can withstand frequent cleaning and resist staining. Learn more about kitchen design for busy households to help inform your finish selection.
Take measurements and document the total surface area you’ll be painting. This information will help you calculate the amount of paint needed and understand the scope of your project. A typical kitchen might require different finishes for various surfaces - perhaps a more washable finish for lower cabinet areas and a slightly different sheen for upper cabinets or walls.
Key verification points for this evaluation stage include:
Comprehensive notes on kitchen traffic patterns
Lighting condition assessment
Measurement of total paintable surface area
Identification of high-moisture or high-impact zones
Understanding of household lifestyle demands
By meticulously evaluating your space and purpose, you’re laying the groundwork for a paint finish that will not just look beautiful, but perform exceptionally in your unique kitchen environment.
Step 2: Research Paint Finish Options
With your kitchen space thoroughly evaluated, the next critical step involves diving deep into understanding the nuanced world of paint finishes. Paint finishes are more than just aesthetic choices - they represent a strategic decision that impacts durability, maintenance, and overall kitchen performance.
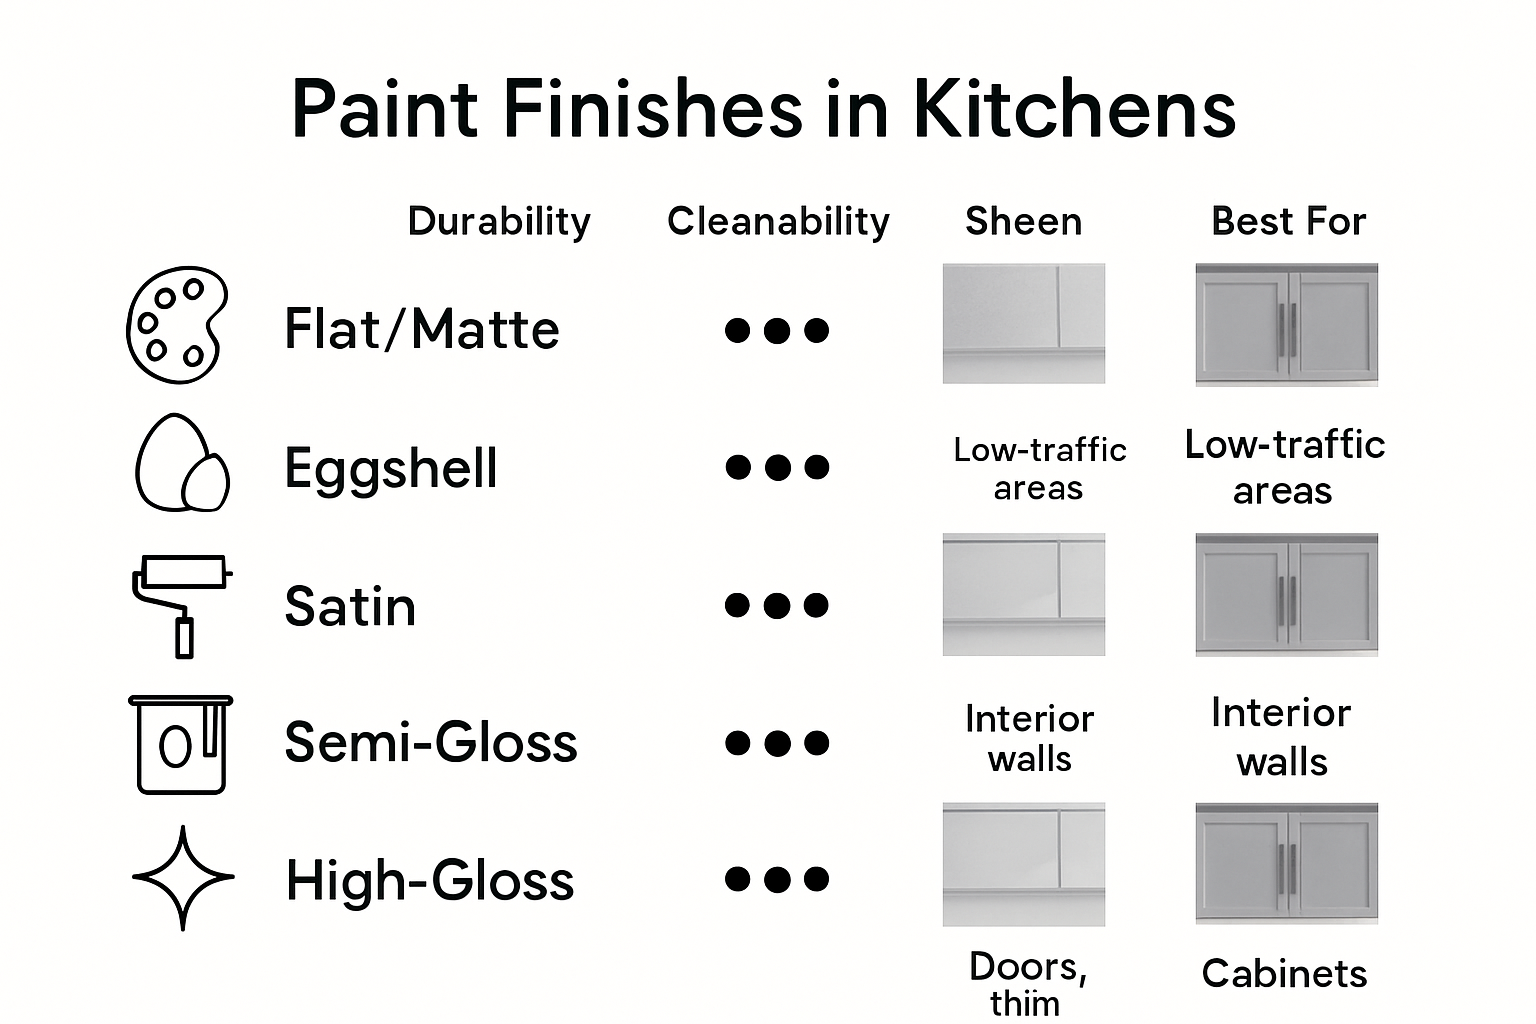
Start by familiarizing yourself with the standard paint finish spectrum: flat/matte, eggshell, satin, semi-gloss, and high-gloss. Each finish offers unique characteristics that can dramatically transform your kitchen’s appearance and functionality. Flat and matte finishes provide a smooth, non-reflective surface ideal for hiding surface imperfections, while high-gloss options deliver maximum shine and exceptional cleanability.
To help you compare paint finish options for your kitchen, here is a quick reference table summarizing key features, durability, and cleaning considerations for each type.
Finish Type | Appearance | Durability | Easy to Clean | Best Used On |
Flat/Matte | Non-reflective, hides imperfections | Low | No | Ceilings, low-traffic walls |
Eggshell | Soft sheen, slight reflectivity | Medium | Moderate | Walls with moderate use |
Satin | Subtle sheen, smooth look | Good | Yes | Kitchen cabinets, walls |
Semi-gloss | Noticeable shine, reflective | Excellent | Yes | Cabinets, trim, doors |
High-gloss | Very shiny, high reflectivity | Maximum | Yes | Cabinets, details, metal |
For kitchen environments, durability and ease of cleaning are paramount. Explore professional cabinet finish recommendations to understand how different sheens perform under real-world conditions. Satin and semi-gloss finishes typically emerge as top contenders for kitchen cabinets, offering a balanced approach between aesthetic appeal and practical maintenance.
Consider the specific materials of your kitchen surfaces. Wood cabinets, laminate surfaces, and metal fixtures might respond differently to various paint finishes. Take time to research manufacturer recommendations and professional painter insights specific to your cabinet material. Some finishes adhere better to certain surfaces, ensuring long-lasting results and preventing premature wear.
Utilize multiple research channels to gather comprehensive information. Visit local paint stores, consult professional painters, explore manufacturer websites, and review home improvement forums. Many paint brands offer online visualization tools that allow you to digitally preview how different finishes might look in your kitchen.
Key verification points for your paint finish research include:
Comprehensive understanding of finish characteristics
Compatibility with your specific kitchen surface materials
Durability ratings and cleaning recommendations
Color and sheen interaction with your kitchen’s lighting
Professional recommendations tailored to your environment
By methodically researching paint finish options, you’re transforming a potentially overwhelming choice into a strategic decision that balances aesthetic vision with practical kitchen performance.
Step 3: Test Samples on Surfaces
After researching paint finish options, the critical next phase involves practical testing to validate your theoretical choices. Sample testing is your insurance policy against potential painting disappointments, allowing you to preview how different finishes will perform in your specific kitchen environment.
Begin by purchasing small paint samples in your selected finishes and preparing clean, representative test surfaces. Ideally, use actual cabinet door sections or inconspicuous areas that closely match your kitchen’s primary surfaces. Discover professional tips for cabinet painting techniques to ensure accurate testing methodology.
Prepare your test surfaces meticulously by cleaning them thoroughly and lightly sanding to create optimal paint adhesion. Apply each paint finish using the same techniques you intend to use for the full project - whether that involves brushes, rollers, or spray equipment. This approach ensures you’re experiencing the exact application method and final result you’ll achieve during the complete kitchen upgrade.
Lighting is a crucial factor in your sample testing. Examine your test surfaces under multiple lighting conditions - natural daylight, morning light, evening artificial lighting, and direct overhead kitchen lights. Paint finishes can dramatically transform appearance based on light exposure, so comprehensive observation is key. Move your test panels around the kitchen to simulate different angles and lighting scenarios.
Document your testing process comprehensively. Take clear photographs of each sample in various lighting conditions, and make detailed notes about application ease, drying time, initial appearance, and how each finish responds to gentle cleaning with a damp cloth. Pay special attention to how different finishes highlight or mask surface imperfections, reflecting your kitchen’s unique characteristics.

Key verification points for your sample testing include:
Consistent application technique across all samples
Comprehensive lighting condition evaluations
Detailed photographic and written documentation
Performance assessment under simulated kitchen conditions
Comparison of finish durability and aesthetic appeal
By methodically testing paint samples, you transform an abstract selection process into a scientifically informed decision, ensuring your kitchen upgrade meets both your visual expectations and practical performance requirements.
Step 4: Consider Light and Room Usage
Light and room usage are pivotal factors that can dramatically influence your paint finish selection. The interplay between light and surface finish determines how your kitchen will ultimately look and feel, transforming a simple color choice into a strategic design decision.
Begin by conducting a comprehensive light assessment of your kitchen throughout different times of day. Natural daylight streaming through windows, overhead lighting, task lighting, and evening ambient illumination will each interact uniquely with your chosen paint finish. Track how sunlight moves across your kitchen surfaces from morning through evening, noting areas of direct and indirect light exposure.
Explore professional kitchen design insights to understand how different paint sheens respond to varying light conditions. High-gloss finishes can create dramatic reflections in brightly lit spaces, while matte finishes might absorb light in darker areas, potentially making your kitchen feel more compact or subdued.
Room usage patterns significantly impact your finish selection. A busy family kitchen with frequent cooking, high traffic, and potential contact from utensils, hands, and cooking equipment requires a more durable finish. Semi-gloss or satin finishes offer excellent washability and resistance to moisture, grease, and everyday wear. Conversely, a less frequently used kitchen might allow for more delicate, lower-sheen options that prioritize aesthetic appeal over extreme durability.
Consider the psychological impact of light and finish interactions. Lighter, more reflective finishes can make a small kitchen feel more spacious and bright, while deeper, less reflective finishes might create a sense of warmth and intimacy. Your paint finish becomes a design tool that extends beyond mere color, actively shaping the perceived atmosphere of your kitchen space.
Key verification points for light and room usage assessment include:
Comprehensive daylight movement tracking
Evaluation of artificial lighting conditions
Analysis of kitchen traffic and usage patterns
Assessment of potential surface interaction and wear
Understanding of psychological space perception
By meticulously considering how light and room usage influence your paint finish, you transform a technical selection process into a nuanced design strategy that enhances both the functionality and emotional experience of your kitchen.
Step 5: Finalize Your Decision and Purchase Supplies
With comprehensive research and testing complete, the moment has arrived to solidify your paint finish selection and gather the necessary supplies for your kitchen transformation. This step bridges your careful planning with practical execution, turning your design vision into a tangible project.
Review your sample testing documentation, comparing notes from different lighting conditions, durability tests, and aesthetic evaluations. Select the paint finish that most comprehensively meets your kitchen’s unique requirements. Remember that your choice should balance visual appeal with practical performance, considering factors like cleaning ease, light reflection, and long-term durability.
Explore professional cabinet painting recommendations to ensure you’re making an informed final selection. When purchasing paint, invest in high-quality products specifically designed for kitchen environments. Premium paints with enhanced durability and moisture resistance will provide better long-term results, protecting your investment and maintaining your kitchen’s aesthetic appeal.
Before you begin painting your kitchen, ensure you have all the necessary tools and materials as outlined in this table. This checklist will help you prepare for a professional quality result.
Item | Purpose/Specification |
High-quality kitchen paint | Durable, moisture-resistant for high-use spaces |
Synthetic bristle brushes | Best for water-based paints and smooth application |
Foam rollers | Ensures an ultra-smooth finish on cabinets and walls |
Painter's tape | Protects edges and ensures clean lines |
Sandpaper (various grits) | Surface preparation and smoothing for adhesion |
Primer (surface-appropriate) | Promotes better paint adhesion and coverage |
Drop cloths | Protects floors and surrounding surfaces |
Cleaning supplies | For pre-paint surface cleaning and prep |
Gather a comprehensive set of supplies before beginning your project. Beyond the paint itself, you’ll need professional-grade tools that ensure a smooth, professional finish. This includes high-quality brushes with synthetic bristles for water-based paints, foam rollers for an ultra-smooth application, painter’s tape for clean edges, sandpaper with varying grits, primer appropriate for your surface material, drop cloths, and cleaning supplies.
Calculate the exact amount of paint needed by measuring your total surface area and consulting the manufacturer’s coverage specifications. Purchase slightly more paint than your calculations suggest to account for potential touch-ups or unexpected coverage requirements. Many professionals recommend adding 10-15% extra paint to your initial estimate to prevent mid-project interruptions.
Key verification points for finalizing your decision and purchasing supplies include:
Comprehensive review of sample testing results
Selection of paint finish matching kitchen requirements
Procurement of high-quality, kitchen-specific paint
Collection of professional-grade painting tools
Accurate paint quantity calculations
Preparation of workspace and protective materials
By methodically finalizing your paint finish decision and carefully selecting your supplies, you’re setting the stage for a successful kitchen transformation that combines meticulous planning with professional execution.
Bring Your Kitchen Vision to Life With Professional Cabinet Refinishing
You have just learned how careful paint finish decisions can transform your kitchen, but even the best plans need expert execution for outstanding results. Many homeowners face the stress of balancing visual appeal with everyday durability. Concerns about mess, disruption, and unpredictable finishes can hold you back from enjoying a beautiful new space. If you want that silky, smooth finish explained in the article—and a kitchen that stands up to real family life—let our team help.
Let Ottawa Cabinet Painting handle the entire process for you. From meticulous prep work to the premium finishes discussed in the “How to Choose Paint Finish: Guide for Kitchen Upgrades,” our local experts deliver a high-end transformation without the chaos of a full remodel. See real customer experiences and discover your options now by visiting our main site. Ready for a quote or need advice on the perfect paint finish for your kitchen? Contact us today and make your dream kitchen a reality.
Frequently Asked Questions
How do I evaluate the best paint finish for my kitchen?
Start by assessing your kitchen’s unique characteristics, including moisture exposure, traffic patterns, and lighting conditions. Consider your household’s lifestyle demands and take notes on areas that may require more durable finishes.
What are the different types of paint finishes suitable for kitchens?
The main paint finishes include flat/matte, eggshell, satin, semi-gloss, and high-gloss. Satin and semi-gloss are often recommended for kitchens due to their balance of durability and aesthetic appeal.
How can I test paint samples before making a final decision?
Purchase small paint samples and apply them to clean, representative surfaces in your kitchen. Observe the samples under different lighting conditions and document their appearance, application, and how they perform with cleaning.
Why is lighting important when choosing a paint finish?
Lighting affects how the paint finish looks and performs in your kitchen. Different finishes respond uniquely to natural and artificial light, influencing the overall look and feel of the space. Bright, glossy finishes can reflect light, while matte finishes may absorb it.
Recommended
Comments