Grain Filling for Cabinets: A DIY Guide for Ottawa Homes
- Axcell Painting

- Jun 2
- 9 min read

TL;DR:
Grain filling is an essential step to achieve smooth, professional-looking cabinet finishes by sealing open wood pores before painting or finishing. It is particularly crucial for open-grained woods like oak, ash, and mahogany, especially when aiming for high-gloss or semi-gloss surfaces that reveal flaws. Proper application, drying, and inspection—including multiple coats if necessary—ensure a flat, flawless surface that enhances the durability and appearance of cabinetry.
Grain filling is defined as the process of packing open wood pores with a paste or liquid filler before applying any finish, primer, or paint to cabinet surfaces. Without this step, finish absorbs into the pores of open-grained woods like oak and ash, leaving a pitted, uneven texture that shows through even multiple coats of paint. The result is a surface that looks rough rather than polished, no matter how good your topcoat is. Understanding grain filling for cabinets is the difference between a factory-smooth result and a finish that telegraphs every pore in the wood. Products like SENTIENT grain fillers, Timbermate, and oil-based paste fillers are the most common solutions professionals and serious DIYers reach for.
Understanding grain filling for cabinets: why it matters
Grain filling solves a specific problem. Open-pored woods require grain filling for polished, flat finishes because finish absorbs into vessel openings and creates visible pitting, especially under semi-gloss and full-gloss coatings. That pitting is not a paint quality issue. It is a surface preparation issue, and no amount of sanding between coats will fix it after the fact.
The industry term for this preparation step is “pore filling” or “grain filling,” and both terms refer to the same process. You will also hear it called “filling the grain” or “sealing the pores.” All of these describe applying a filler compound across the wood surface before finishing so that the pores are level with the surrounding wood fibers.
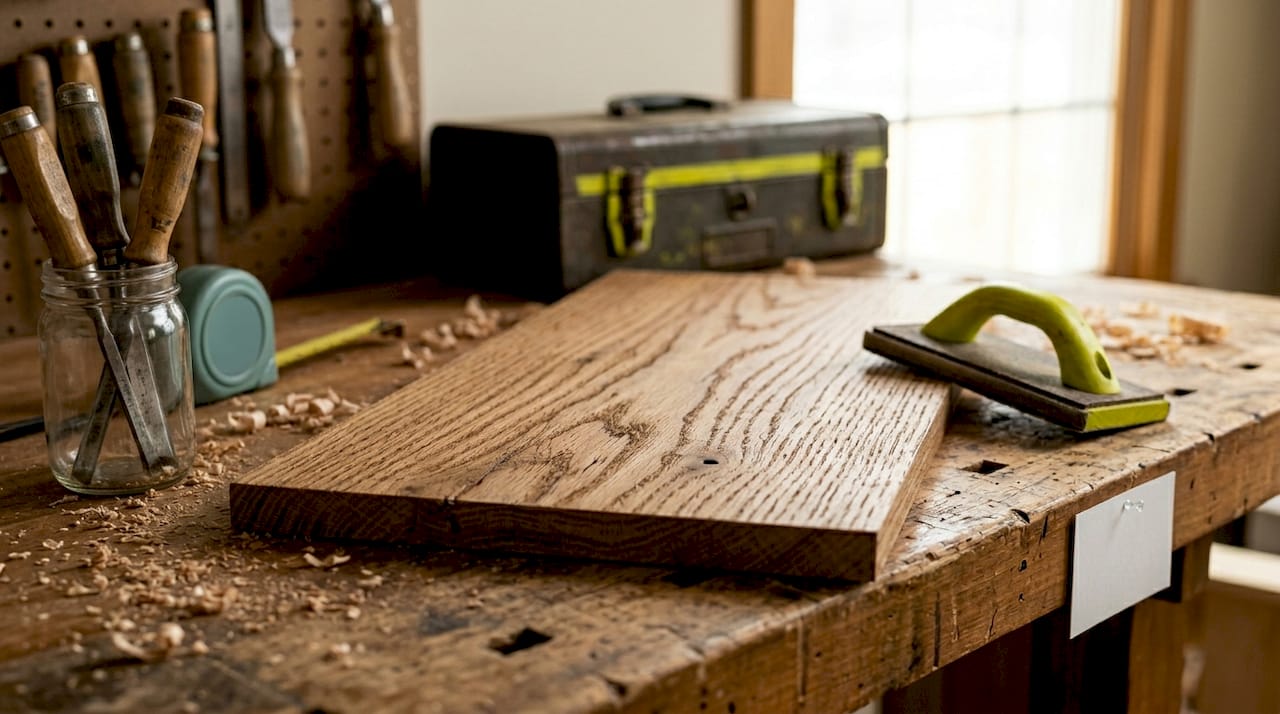
For cabinet projects specifically, this step matters more than it does for furniture or flooring. Cabinets are viewed at close range every day, and kitchen lighting tends to be direct and bright. Any surface texture becomes visible under those conditions. A properly filled and finished cabinet door looks like it came off a factory line. One that skipped grain filling looks handmade in the wrong way.
Which wood types need grain filling and why?
Not every wood species requires grain filling. The need depends on how open the wood’s pores are and what finish sheen you are targeting.
Wood Species | Grain Type | Grain Filling Needed? | Notes |
Red Oak | Open | Yes, always | Deep pores telegraph through paint |
White Oak | Open | Yes, always | Similar to red oak, very porous |
Ash | Open | Yes | Large vessels, highly visible pores |
Mahogany | Open | Yes for gloss | Less aggressive than oak |
Maple | Closed | Rarely | Fine grain, minimal pore depth |
Cherry | Closed | Rarely | Smooth surface, low porosity |
Walnut | Semi-open | Sometimes | Depends on finish sheen level |
MDF/Plywood | N/A | No | No grain structure to fill |

Oak is the most common cabinet wood in Ottawa homes, and it is also the most demanding when it comes to grain filling. Grain filling is the professional solution to avoid grain telegraphing through paint on oak cabinets for smooth, modern finishes. If you have oak cabinets and want a painted finish, skipping this step is a recipe for disappointment.
Finish sheen level also drives the decision. A flat or matte finish hides surface texture because it scatters light. A semi-gloss or high-gloss finish reflects light directly, which makes every pore and imperfection visible. If you are targeting a gloss finish on walnut or mahogany, grain filling becomes necessary even though those woods are not as open as oak.
What are the best grain fillers for cabinets?
Choosing the right grain filler depends on your wood species, your topcoat, and how much time you have. Grain filler differs from wood putty and epoxy: grain filler fills open pores pre-finishing, wood putty fills surface dents post-finish, and epoxy fills structural voids. Using the wrong product leads to finish failures, so the distinction matters.
Oil-based grain fillers
Penetrate deeply into open pores for thorough filling
Require 72 or more hours of drying time before applying clear coats
Strong odor and require mineral spirits for cleanup
Compatible with oil-based and solvent-based topcoats like lacquer and oil-based polyurethane
Best for: oak and ash cabinets where maximum pore penetration is needed
Water-based grain fillers
Dry in approximately 4 hours, making them practical for multi-day projects
Low odor and easy soap-and-water cleanup
Compatible with water-based topcoats and latex paints
Slightly less penetrating than oil-based options on very deep pores
Best for: maple, cherry, or lighter-grained woods; also suitable for oak when time is limited
Paste fillers
Thick consistency that fills large pores in one application
Available in natural (clear) and tinted versions for color matching
Tinted fillers can complement or contrast the wood tone for decorative effects
Natural fillers disappear under paint; tinted fillers matter more under clear finishes
Pro Tip: Always confirm filler-to-topcoat compatibility before you buy. An oil-based filler under a water-based topcoat can cause adhesion failures. When in doubt, stay within the same product family.
Oil-based fillers need 72+ hours before clear coats, while water-based fillers dry in about 4 hours. That drying time difference is significant for Ottawa homeowners planning a weekend cabinet project. Water-based products give you more flexibility without sacrificing quality on most wood species.
Step-by-step grain filling techniques for Ottawa cabinet projects
Ottawa’s climate adds one variable worth noting: humidity levels in spring and fall can slow drying times for both oil-based and water-based fillers. Work in a ventilated space with stable temperature, ideally between 65°F and 75°F, and avoid applying filler on high-humidity days if possible.
Here is the full grain filling process explained from start to finish:
Sand the wood surface. Start with 120-grit sandpaper and finish with 150-grit. Sanding opens the pores and removes any mill glaze or surface contamination. Always sand with the grain to avoid cross-grain scratches.
Clean thoroughly. Remove all sanding dust with a vacuum, then wipe the surface with a tack cloth or a clean rag dampened with mineral spirits (for oil-based filler) or water (for water-based filler). Oils and dust prevent filler from bonding to the wood.
Thin the filler to a workable consistency. Most paste fillers need thinning before application. Follow the manufacturer’s instructions. The filler should spread like thick paint, not like peanut butter.
Apply filler across the grain. Use a stiff brush, rubber squeegee, or putty knife to work the filler into the surface. Moving across the grain forces the filler down into the pores rather than sliding over them. This is the most critical step in the entire process.
Wait for the wet sheen to dull. Watch the surface. The standard workflow calls for waiting 5 to 15 minutes until the wet sheen fades before wiping. This tells you the filler has started to set in the pores.
Wipe excess filler off across the grain. Use a coarse rag or burlap and wipe across the grain, not with it. Scraping and wiping across the grain forces filler into the pores and avoids pulling it back out. Wiping with the grain drags filler out of the pores you just filled.
Allow full cure before sanding. Water-based fillers cure in about 4 hours. Oil-based fillers need a full 72 hours or more. Do not rush this step.
Sand lightly with 220-grit. Sand the surface to remove any filler residue sitting above the wood surface. You want the pores filled and the surrounding wood clean. Use a light touch to avoid cutting into the filled pores.
Inspect and apply a second coat if needed. Hold the panel at a low angle to a light source. If you still see pore shadows, apply a second coat. Some open-grained species like oak often require a second application to achieve complete pore filling for a flawless finish.
Apply sealer or primer. Once the surface is smooth and fully cured, apply your chosen sealer or primer before painting or clear-coating.
For Ottawa homeowners painting oak cabinets, this process is not optional. Oak’s deep grain will show through primer and paint if the pores are not filled first.
How grain filling affects the final finish in Ottawa kitchens
Grain filler improves light reflection and creates flatness, but it is not a protective finish. The durability of your cabinet surface depends entirely on the topcoat applied over the filled wood. This is a point many DIYers miss. They assume filling the grain adds protection. It does not. It creates the surface condition that allows a topcoat to perform at its best.
Think of grain filling as part of a finishing system. The filler levels the pores, the sealer locks everything in, and the topcoat provides durability and moisture resistance. Skip any one of those layers and the system underperforms.
“A properly filled surface is what separates a painted cabinet that looks like furniture from one that looks like a painted cabinet.”
Common mistakes that undermine the grain filling process:
Wiping with the grain during removal. This pulls filler out of the pores instead of leaving it there. Always wipe across the grain.
Applying filler too thick. Excess filler sitting on the surface hardens and creates a film that is difficult to sand without damaging the wood.
Sanding too aggressively after cure. Heavy sanding removes the filler from the pores along with the surface residue. Use 220-grit and a light touch.
Skipping grain filling on oak. Professional cabinet painters fill oak grain before priming because oak’s deep open grain telegraphs through finishes otherwise. This is not a step you can skip and compensate for later.
Assuming one coat is enough. On heavily open-grained woods, one application rarely fills every pore completely. Inspect under raking light and apply a second coat where needed.
Using incompatible products. An oil-based filler under a water-based topcoat is a recipe for peeling and adhesion failure. Confirm compatibility before you start.
Starting with a smooth, properly prepared surface is critical because pores or unevenness undermine finishing results regardless of topcoat quality. The finish can only be as good as the surface beneath it.
Key takeaways
Grain filling is the non-negotiable preparation step that determines whether a cabinet finish looks factory-smooth or visibly textured, and it must be paired with a compatible topcoat to deliver lasting results.
Point | Details |
Open-grain woods need filling | Oak, ash, and mahogany require grain filling before any semi-gloss or gloss finish. |
Direction of application matters | Always apply and remove filler across the grain to pack pores correctly. |
Drying time varies by product | Oil-based fillers need 72+ hours; water-based fillers are ready to sand in about 4 hours. |
Filler is not a protective layer | Durability comes from the topcoat. Filler only creates the flat surface the topcoat needs. |
Second coats are often necessary | Heavily open-grained woods like oak frequently need two filler applications for full pore coverage. |
What we have learned from years of Ottawa cabinet projects
After working on hundreds of cabinet refinishing projects across Ottawa, the single most consistent mistake we see from homeowners who attempt grain filling themselves is rushing the wipe-off step. They apply the filler correctly, wait a few minutes, and then wipe with the grain because it feels natural. That one mistake undoes the entire application.
The second most common issue is underestimating how many coats oak actually needs. Homeowners apply one coat, sand it, and move straight to primer. Then they call us wondering why the grain is still showing through three coats of paint. Oak is demanding. It often needs two full filler applications, each properly cured and sanded, before the surface is truly ready for primer.
Ottawa’s climate also plays a role that most guides do not mention. During humid spring and fall months, water-based fillers can take significantly longer to cure than the label suggests. We always recommend checking the surface by touch before sanding. If it feels at all tacky, it is not ready.
The right products matter too. We have seen homeowners use wood putty as a substitute for grain filler because it was already in the garage. Wood putty is designed for surface repairs, not pore filling. It does not penetrate the grain the same way, and it creates adhesion problems under paint. Use the right product for the job. For a step-by-step guide to painting oak cabinets that covers the full process from prep to final coat, we have put together a detailed resource that walks you through every stage.
— Ottawa
Get a flawless cabinet finish with Ottawacabinetpainting
Grain filling done correctly takes patience, the right materials, and attention to detail at every step. If you want that factory-smooth finish on your Ottawa kitchen cabinets without the trial and error, Ottawacabinetpainting handles the entire process, from pore filling and priming to final topcoat application. We use professional-grade products and a meticulous prep process that produces results you can see and feel. Whether you have oak cabinets with deep open grain or a lighter wood that needs a light touch, we tailor our approach to your specific cabinetry. Request a free quote and find out what a professionally finished cabinet surface looks like in your home.
FAQ
What is grain filling and why do cabinets need it?
Grain filling is the process of packing open wood pores with a filler compound before applying finish, primer, or paint. Cabinets made from open-grained woods like oak need it to prevent finish from sinking into pores and creating a pitted, uneven surface.
Which woods require grain filling before painting cabinets?
Oak, ash, and mahogany are the primary woods that require grain filling before painting or clear-coating. Fine-grained woods like maple and cherry rarely need it unless you are targeting a high-gloss finish.
How long does grain filler need to dry before painting?
Water-based grain fillers dry in approximately 4 hours before sanding, while oil-based fillers require 72 or more hours before applying any clear coat or primer. Always confirm full cure by touch before proceeding.
Can I use wood putty instead of grain filler on cabinets?
No. Wood putty is designed to fill surface dents and repairs after finishing, not to fill open wood pores before finishing. Using wood putty as a grain filler leads to adhesion failures and an uneven surface under paint.
How many coats of grain filler does oak need?
Oak frequently requires two full applications of grain filler to achieve complete pore coverage, especially under high-sheen finishes. Inspect the surface under raking light after the first coat to determine whether a second application is needed.
Recommended

Comments