Declutter Your Kitchen for a Fresh, Functional Space
- demoore5506
- Nov 1, 2025
- 7 min read
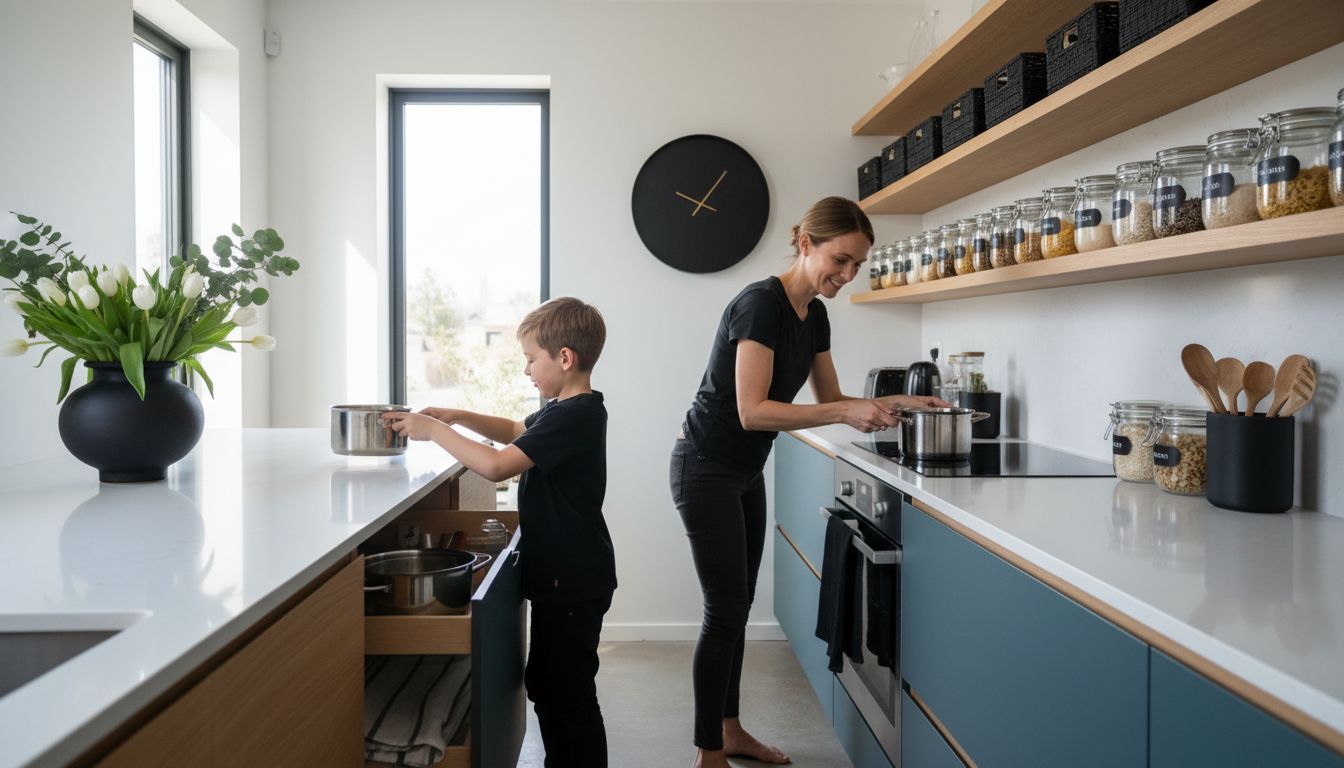
Did you know the average family spends nearly 60 minutes a day navigating kitchen clutter? A disorganized kitchen can make meal prep stressful and waste both time and energy. Practical organization not only frees up space but also transforms daily routines. Discover simple strategies that turn a chaotic kitchen into an efficient, clean, and welcoming hub for your household.
Table of Contents
Quick Summary
Key Point | Explanation |
1. Allocate Dedicated Time for Decluttering | Block out 2-3 hours in your schedule, ideally on weekends, to focus solely on decluttering your kitchen effectively. |
2. Sort and Categorize Every Item | Empty cabinets and group kitchen items into categories to identify duplicates and unnecessary items for easy sorting. |
3. Implement a Purging System | Create clear criteria for keeping or discarding items; be decisive about what no longer serves a purpose. |
4. Clean Surfaces Before Reorganization | Sanitize all kitchen surfaces thoroughly to provide a fresh start for your new organizational system. |
5. Maintain Your Kitchen Organization Regularly | Conduct monthly reviews to assess and adjust your organizational systems, ensuring your kitchen stays clutter-free. |
Step 1: Set Aside Time and Gather Decluttering Tools
Decluttering your kitchen starts with strategic planning and preparation. According to vreg, allocating specific time slots ensures focused effort and transforms what might seem like an overwhelming task into a manageable project.
Begin by blocking out dedicated time in your schedule specifically for kitchen decluttering. Most people find weekend mornings or quiet weekend afternoons work best. Aim for a 2-3 hour window where you can work uninterrupted. As homeorganization suggests, having the right tools will streamline your process dramatically.
Gather your essential decluttering tools before starting:
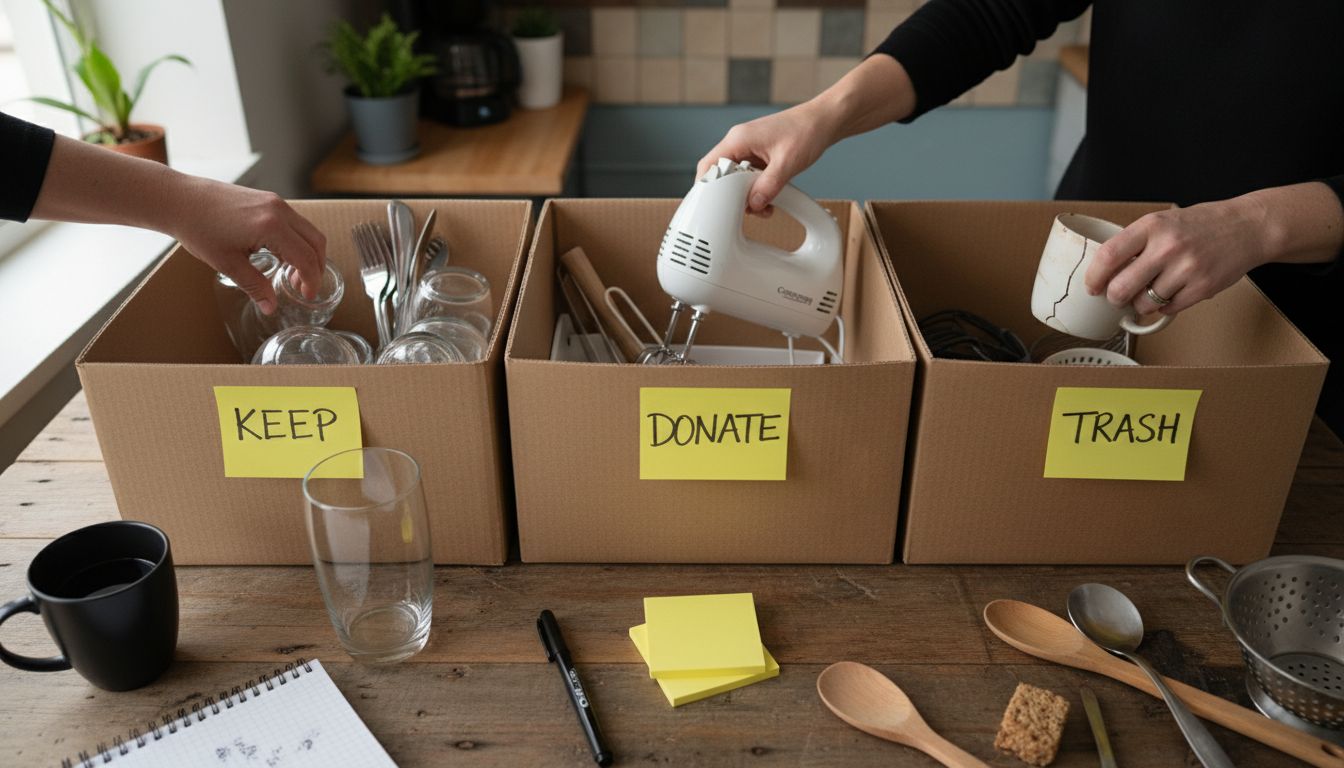
Sturdy cardboard boxes or plastic bins (labeled: Donate, Trash, Keep)
Garbage bags
Cleaning supplies (all-purpose cleaner, microfiber cloths)
Permanent marker for labeling
Notepad for tracking progress
Pro tip: Create a systematic approach by working in quadrants. Start with one cabinet or counter section at a time to prevent feeling overwhelmed. This methodical strategy helps you maintain focus and see tangible progress quickly. Check out our guide on kitchen organization for additional strategies to maximize your efforts.
Remember that decluttering is a marathon, not a sprint. Be patient with yourself and celebrate small victories as you transform your kitchen into a more functional space.
Step 2: Empty Cabinets and Sort All Kitchen Items
Now that you have prepared your workspace, it is time to tackle the core of kitchen decluttering by emptying and sorting all kitchen items. According to readersdigest, removing all items from cabinets allows for a comprehensive assessment that facilitates better organization.
Start by completely emptying each cabinet one at a time. Place all items on a clean, clear surface where you can see everything. As womanandhome suggests, grouping similar items together will help you identify duplicates and unnecessary kitchenware. Sort your items into these primary categories:
Cookware (pots, pans, baking sheets)
Dinnerware (plates, bowls, mugs)
Utensils and cooking tools
Small appliances
Food storage containers
Rarely used or specialty items
As you sort, ask yourself critical questions about each item: When was the last time I used this? Is it functional? Does it have sentimental value? This process helps you make objective decisions about what truly belongs in your kitchen.
Learn more about maximizing kitchen storage to help streamline your organizational strategy.
Pro tip: Create a maybe box for items you are uncertain about. Store these items separately and if you do not use them within three months, it is likely safe to donate or discard them.
Step 3: Purge Unnecessary Items and Group Essentials
With your kitchen items sorted, it is time to make critical decisions about what stays and what goes. According to vreg, eliminating items that are no longer needed is crucial for enhancing kitchen functionality and reducing clutter.
Begin your purge by establishing clear criteria for keeping or discarding items. As homeorganization suggests, systematically grouping essential tools and ingredients maintains an organized kitchen space. Create three primary piles: keep, donate, and discard.
Be ruthless in your assessment and consider these guidelines:
Discard items that are broken or cannot be repaired
Donate duplicate tools or appliances in good condition
Remove expired food items and spices
Eliminate single-purpose gadgets that rarely get used
Donate unused cookware or dishes
To make this process more manageable, set a timer for 30 minutes and work decisively. Trust your initial instincts about each item. Explore our guide on kitchen organization ideas to help refine your decluttering strategy.
Pro tip: If you have not used an item in the past year, it is likely time to let it go. Remember that an organized kitchen is about functionality and creating a space that supports your cooking and lifestyle needs.
Step 4: Clean All Surfaces and Prepare for Organization
With your kitchen items sorted and purged, it is time to create a pristine foundation for your new organizational system. According to readersdigest, thoroughly cleaning kitchen surfaces ensures a hygienic environment and sets the stage for effective reorganization.
Begin by gathering your cleaning supplies and systematically working through each surface. As womanandhome suggests, sanitizing all kitchen surfaces provides a clean slate for implementing new organizational systems. Focus on these key areas:
Countertops
Cabinet interiors and exteriors
Backsplash
Appliance surfaces
Windowsills
Floor
Use a multi surface cleaner and microfiber cloths to remove grime, dust, and sticky residues. Pay special attention to corners, edges, and areas behind appliances where dirt tends to accumulate. Check out our spring cleaning kitchen checklist for additional deep cleaning insights.
Pro tip: Allow surfaces to dry completely before replacing items. This prevents moisture buildup and potential mold growth, ensuring your newly organized kitchen remains fresh and clean.
Step 5: Reorganize Cabinets and Optimize Storage Solutions
Now that your kitchen is clean, it is time to transform your cabinets into highly efficient storage spaces. According to readersdigest, implementing storage solutions like shelf organizers and clear containers maximizes cabinet space and maintains order.
Start by considering the frequency of item usage. As womanandhome suggests, strategically arranging items based on usage frequency and utilizing vertical space enhances cabinet organization and accessibility. Here are key strategies to optimize your cabinet storage:
Install adjustable shelf risers
Use clear plastic containers for visibility
Group similar items together
Implement drawer dividers
Utilize door mounted organizers
Stack lightweight items vertically
Zoning your cabinets can dramatically improve functionality. Place frequently used items at eye level and less used items on higher or lower shelves. Explore our essential tips for organizing small kitchens to further refine your storage approach.
Pro tip: Invest in uniform storage containers that stack well. Matching containers not only look aesthetically pleasing but also maximize your available space more efficiently.
Step 6: Evaluate Results and Maintain a Clutter-Free Kitchen
Congratulations on transforming your kitchen into an organized space. According to vreg, regularly assessing the effectiveness of organizational systems and making necessary adjustments helps sustain a clutter-free kitchen.
Establish a monthly review routine to ensure your new organizational strategy remains effective. As homeorganization suggests, periodic decluttering keeps your kitchen functional and free of unnecessary items. During these monthly check-ins, evaluate your current system and be prepared to make adjustments:
Remove items that have accumulated since your last organization
Reassess item placement and functionality
Donate items you have not used in the past few months
Clean surfaces and reorganize as needed
Adjust storage solutions that are not working efficiently
Maintain your labeling and sorting systems
Consistent maintenance is key to preventing future clutter buildup. Learn more about decluttering kitchen counters to help refine your ongoing organizational strategy.
Pro tip: Set a recurring calendar reminder for your monthly kitchen organization review. Treating this as a scheduled task helps make maintenance a natural part of your routine, preventing chaos from creeping back into your newly organized space.
Transform Your Decluttered Kitchen with Stunning Cabinet Refinishing
After clearing out clutter and creating a fresh, functional kitchen space, the next step is making your cabinets look as beautiful and organized as your newly cleaned countertops. Many homeowners face the challenge of wanting to modernize their kitchen without the expense and disruption of a full renovation. At Ottawa Cabinet Painting, we specialize in transforming tired cabinets into high-end, stylish focal points that enhance your entire kitchen’s appeal.
Imagine your kitchen with smooth, durable finishes that feel like new but without replacing a single cabinet. Our expert process includes meticulous prep work and premium paint application, ensuring your cabinets have a lasting, elegant look. This approach perfectly complements your efforts to declutter and reorganize by creating a cohesive and inviting environment. Ready to enjoy a kitchen that truly feels like the heart of your home while saving time and money? Visit Ottawa Cabinet Painting to learn how our refinishing services can bring harmony to your freshly decluttered space.
Get started today by exploring our refinishing solutions and reach out for a personalized quote. Your renewed kitchen is just a few steps away from becoming your favorite room again.
Frequently Asked Questions
How can I set aside time for kitchen decluttering?
Allocate specific time slots in your schedule dedicated to kitchen decluttering. Aim for a 2-3 hour window on a weekend morning or afternoon to work uninterrupted, allowing you to focus and make significant progress.
What tools do I need to declutter my kitchen effectively?
Gather essential decluttering tools such as labeled cardboard boxes, garbage bags, cleaning supplies, and a notepad for tracking progress. Having everything prepared will streamline your decluttering process and improve efficiency.
What steps should I take to sort kitchen items?
Start by emptying each cabinet one at a time and placing all items on a clear surface. Sort them into categories like cookware, dinnerware, and utensils, asking yourself critical questions about each item’s usage to help decide what to keep or discard.
How do I decide what kitchen items to keep?
Establish criteria for keeping or discarding items based on their condition and frequency of use. Be decisive and consider eliminating items you haven’t used in the past year or those that are broken or duplicate.
What cleaning tasks should I prioritize during kitchen decluttering?
Thoroughly clean kitchen surfaces, including countertops, cabinet interiors, and appliances, before reorganizing your items. Focus on removing grime and dust to create a fresh base for your new organizational strategy.
How can I maintain a clutter-free kitchen after decluttering?
Establish a monthly review routine to assess your kitchen’s organization. Regularly remove items that accumulate and reassess your storage solutions to keep your kitchen functional and reduce clutter.
Recommended

Comments