Cabinet Prep for Paint: 4 Steps for 5+ Year Finish
- demoore5506
- Feb 28
- 12 min read
Your kitchen cabinets look tired, but a full renovation isn’t in the budget. Maybe you’ve noticed chipped paint or outdated colors draining life from your space. Proper preparation is the secret to transforming those cabinets affordably with a finish that lasts years. This guide walks you through professional prep steps that Ottawa homeowners use to achieve durable, high quality results without the chaos of replacement.
Table of Contents
Key Takeaways
Point | Details |
Thorough cleaning | Removes oils and grease that prevent paint from bonding properly to cabinet surfaces. |
Sanding creates texture | Using 120 to 150 grit sandpaper provides the ideal surface for primer adhesion. |
Primer extends durability | Stain blocking primer substantially improves paint life and prevents finish failure. |
Safety protects health | Proper ventilation and respirator use during prep reduce harmful chemical exposure. |
Method affects prep | Spray and brush painting require different preparation approaches and safety protocols. |
Why Proper Cabinet Prep Matters
Skipping prep steps is the fastest way to ruin a cabinet painting project. Proper prep prevents finish failure and extends paint life significantly. When you invest time cleaning, sanding, and priming correctly, you create a bond between paint and wood that resists peeling for years.
The aesthetic difference is striking. Properly prepped cabinets have a smooth, professional appearance that mimics factory finishes. Shortcuts lead to visible brush strokes, uneven coverage, and premature chipping that screams amateur work.
Consider the financial angle. Cabinet replacement costs $8,000 to $20,000 for an average kitchen. Professional painting runs $3,000 to $5,000. DIY prep and painting? Under $500 in materials. That savings multiplies when your finish lasts five years instead of failing within one due to poor prep.
The importance of prep work cannot be overstated for long term results. Think of it this way: prep is insurance against costly do overs. Spending an extra weekend on preparation saves you from repainting in two years.
Pro Tip: Treat cabinet prep as an investment in your home’s value and your daily quality of life. The kitchen is where families gather, and beautiful cabinets set the tone for the entire space.
Prerequisites and Preparation
Before touching a single cabinet, gather your materials and assess your workspace. You’ll need:
Heavy duty degreaser or trisodium phosphate (TSP)
120 to 150 grit sandpaper and sanding blocks
Stain blocking, bonding primer formulated for cabinets
Respirator with VOC filters rated for paint fumes
Canvas drop cloths and high quality masking tape
Vacuum with brush attachment and tack cloths
Microfiber cleaning cloths and disposable gloves
Ventilation makes or breaks your health during this project. Open windows on opposite sides of your kitchen to create cross ventilation. If that’s not possible, rent or buy a mechanical ventilator to exhaust fumes outdoors.
Site readiness matters more than most homeowners realize. Check that your floors are level and walls are plumb. Uneven surfaces affect how cabinets hang and how paint flows, potentially creating visible defects in your final finish.
Clear countertops completely and remove everything from cabinets. You need easy access to all surfaces. Label cabinet doors with painter’s tape noting their original location to simplify reinstallation later.
Material | Purpose | Selection Tips |
Degreaser | Removes oils and contaminants | TSP or ammonia free alternatives work well |
Sandpaper | Creates surface texture | Medium grit 120-150 prevents wood damage |
Primer | Seals and bonds surfaces | Choose stain blocking formulas for cabinets |
Respirator | Protects respiratory system | Must filter VOCs, not just dust particles |
A kitchen makeover without renovation starts with smart preparation. Organize your materials within arm’s reach to maintain workflow efficiency.
Cleaning and Surface Preparation
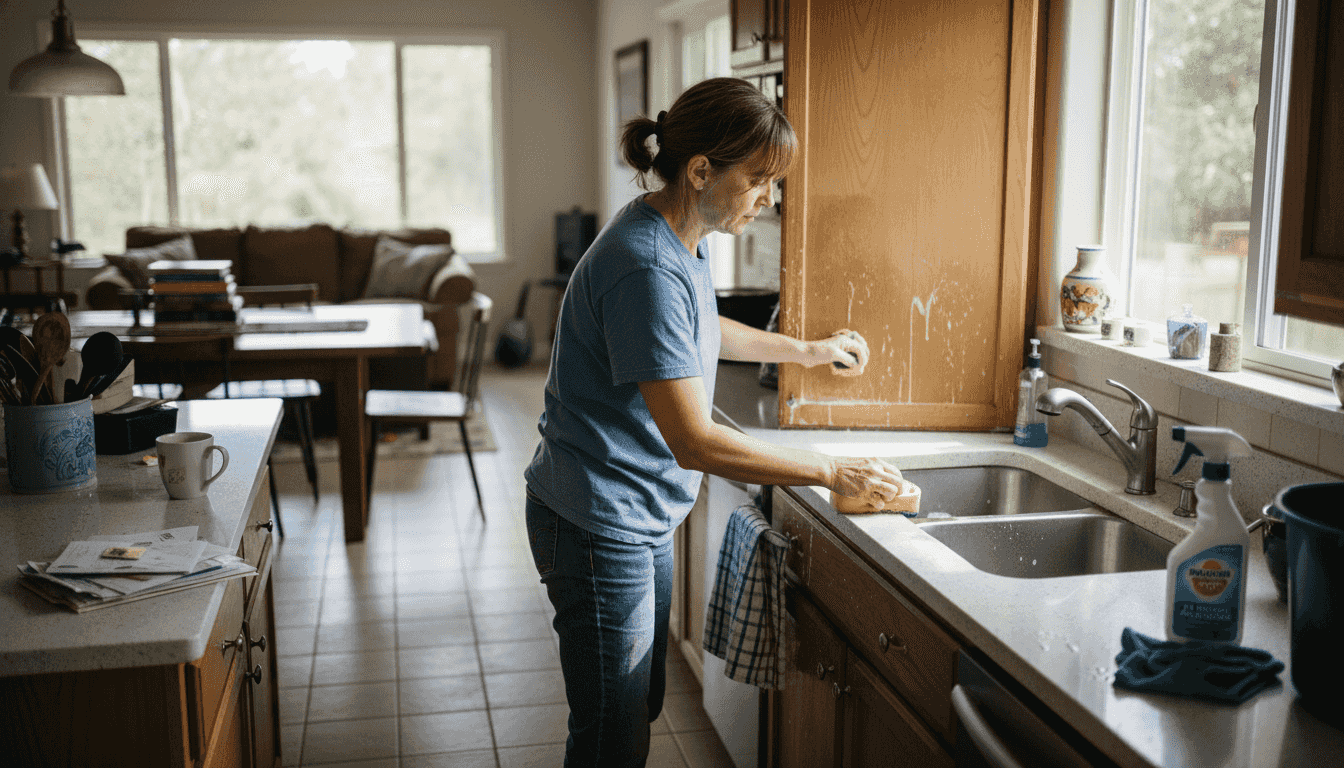
Cabinet surfaces accumulate years of cooking grease, oils from hands, and airborne grime. This invisible layer blocks paint adhesion like a shield. Cleaning cabinets thoroughly before sanding removes these contaminants completely.
Mix TSP according to package directions or use a commercial degreaser rated for kitchen use. Wear gloves and eye protection. Work from top to bottom so dirty runoff doesn’t recontaminate cleaned areas.
Apply cleaner with a sponge, scrubbing in circular motions. Pay extra attention to areas around handles where oils concentrate. Corners and crevices hide grime, so use an old toothbrush for detailed work. Rinse thoroughly with clean water on a fresh sponge to remove all cleaner residue.
Drying time is critical. Wait at least 24 hours before sanding. Moisture trapped in wood fibers causes paint to bubble and peel later. Use fans to accelerate drying if your timeline is tight.
Pro Tip: Change your cleaning cloth or sponge frequently during the process. A dirty cloth just spreads grease around instead of removing it. Microfiber cloths trap oils better than cotton rags.
The importance of prep work for cabinets becomes obvious when you see how much grime comes off during cleaning. Dark water in your rinse bucket proves you’re removing barriers to paint adhesion.
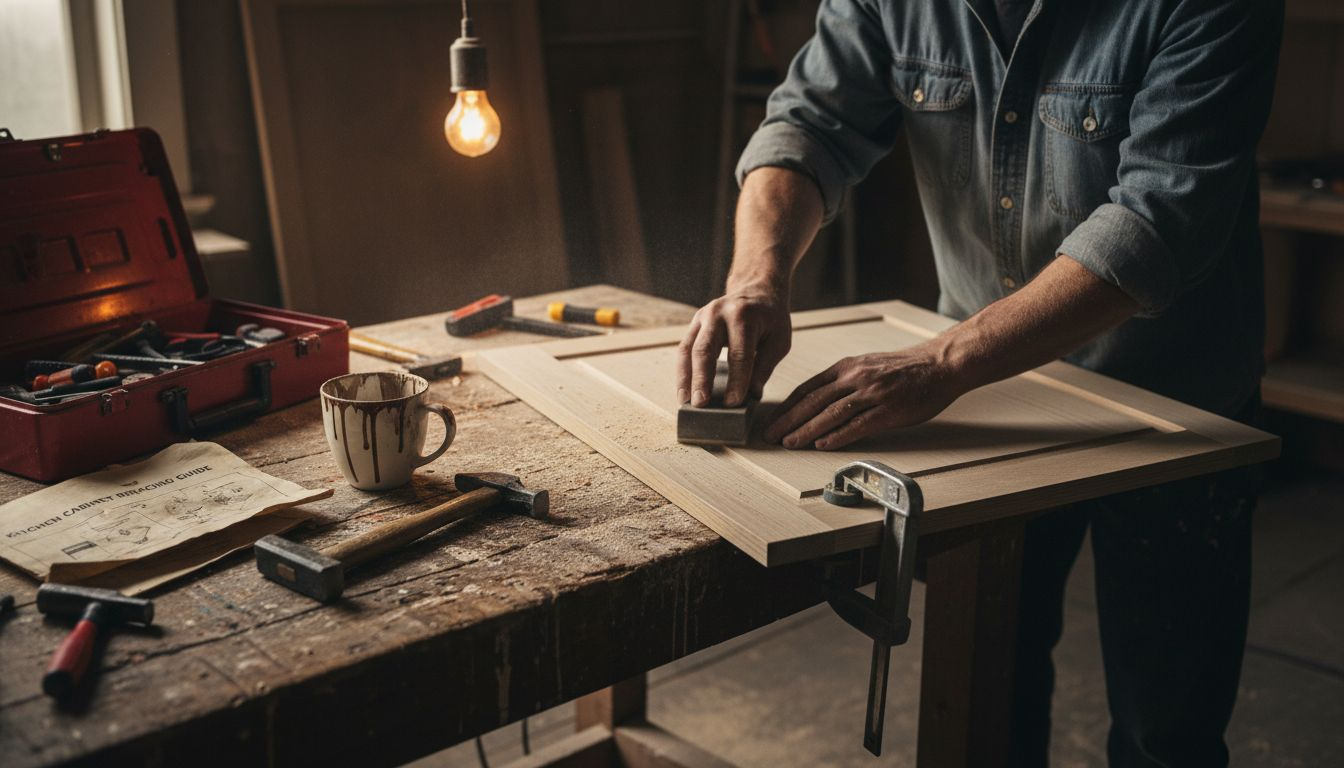
Sanding and Surface Smoothing
Sanding creates tiny scratches that give primer something to grip. Without this texture, even the best primer slides off eventually. The goal is roughening the surface without damaging the underlying wood.
Start with 120 to 150 grit sandpaper. Coarser grits remove too much material and create deep scratches visible through paint. Finer grits don’t provide enough tooth for adhesion.
Sanding cabinet surfaces properly requires consistent, gentle pressure. Let the sandpaper do the work rather than forcing it.
Follow this process:
Wrap sandpaper around a sanding block for flat surfaces to maintain even pressure.
Sand in the direction of the wood grain using smooth, overlapping strokes.
Apply light to medium pressure, never pressing hard enough to create gouges.
Sand edges and corners carefully by hand to avoid rounding over details.
Feel the surface with your palm to identify rough spots needing more attention.
Vacuum all surfaces thoroughly using a brush attachment to capture loose dust.
Wipe down with a slightly damp tack cloth to grab remaining fine particles.
Your cabinets should feel uniformly smooth but not slick. If areas feel glossy, sand them again. Glossy spots indicate insufficient surface preparation that will cause adhesion problems.
Dust removal is as important as sanding itself. Paint mixed with dust creates a gritty texture that ruins your finish. Vacuum first to capture bulk dust, then follow with tack cloth for fine particles.
Priming and Sealing
Primer is the foundation of cabinet durability. It seals porous wood, blocks stains from bleeding through, and creates a uniform surface for topcoat adhesion. Skipping this step guarantees premature paint failure.
Select a high quality, stain blocking bonding primer specifically formulated for cabinetry. These products contain specialty resins that grip existing finishes and bare wood equally well. Priming cabinets with proper products improves paint durability dramatically and helps achieve smooth finishes lasting years.
Choose primers labeled for use on glossy surfaces and wood
White or tinted primer matching your topcoat color improves coverage
Oil based primers offer superior blocking but require mineral spirits cleanup
Water based primers dry faster with easier cleanup but may raise wood grain slightly
Application technique affects final results significantly. Apply thin, even coats rather than one thick coat. Thick primer runs, drips, and takes forever to dry. Two thin coats build faster and look better.
Use a high quality brush for detailed areas like door frames and corners. A small foam roller works well for flat door panels and cabinet boxes. Maintain a wet edge by working quickly to avoid visible lap marks where wet primer meets dry.
Drying time varies by product and humidity. Most primers dry to touch in one to two hours but need four to eight hours before light sanding. Read your product label and add extra time in humid conditions.
Light sanding between primer coats with 220 grit sandpaper removes any raised grain or dust nibs. Wipe with tack cloth before applying the next coat. This extra step makes your final painted surface silky smooth.
Understanding the cabinet refinishing process helps you appreciate why professionals emphasize primer quality and application.
Safety Precautions During Cabinet Prep
Paint products contain volatile organic compounds (VOCs) that damage respiratory health with prolonged exposure. Treating safety casually puts your wellbeing at risk unnecessarily.
Ventilation comes first. Cross ventilation through open windows provides fresh air circulation that dilutes fume concentration. Point a fan out one window to create negative pressure that pulls fresh air through another window. This setup exchanges air continuously.
Safety precautions such as working in well ventilated areas, wearing respirators, and using low VOC paints reduce health risks during cabinet painting prep substantially.
Always work in well ventilated areas with continuous fresh air supply
Wear respirators equipped with organic vapor cartridges, not just dust masks
Use chemical resistant gloves when handling cleaners, primers, and paints
Wear safety glasses to protect eyes from splashes and airborne particles
Take frequent breaks outdoors to give your lungs rest from fume exposure
Never work in confined spaces like closed kitchens without mechanical ventilation
Respirators protect where ventilation alone cannot. Dust masks filter particles but allow chemical vapors through freely. You need a respirator rated for organic vapors with replaceable cartridges. Change cartridges when you start smelling fumes through the mask.
OSHA requires adequate ventilation and respiratory protection when painting indoors. General mechanical or local exhaust ventilation must maintain worker exposure below permissible limits. Use supplied air respirators in confined spaces with inadequate ventilation.
Children and pets should stay out of work areas completely until fumes dissipate. VOCs affect developing bodies more severely than adults. Plan projects when family can stay elsewhere or restrict access to work zones.
Headaches, dizziness, or nausea signal dangerous exposure levels. Stop work immediately, get fresh air, and improve ventilation before continuing. Cabinet painting safety tips protect both your health and project quality.
Common Mistakes and Troubleshooting
Even experienced DIYers make mistakes that compromise cabinet finishes. Knowing what goes wrong helps you avoid these pitfalls entirely.
Insufficient cleaning is the most common error. Homeowners wipe surfaces quickly and move to sanding, leaving invisible grease that causes paint to peel within months. If you’re not seeing dirty water when rinsing, you haven’t cleaned enough.
Wrong sandpaper grit damages surfaces or fails to create proper texture. Coarse 80 grit paper scratches too deeply, creating visible lines through paint. Fine 220 grit polishes rather than roughens, leaving insufficient tooth for primer adhesion.
Skipping primer to save time or money guarantees failure. Common mistakes include insufficient cleaning, wrong sandpaper grit, skipping primer, and inadequate ventilation leading to adhesion failure. Paint applied directly to cabinets chips within one to two years as the bond fails.
Poor ventilation creates health hazards and affects finish quality. High humidity from insufficient air exchange causes paint to dry slowly and unevenly, creating texture problems and extending project timelines unnecessarily.
Mistake | Impact | Fix |
Insufficient cleaning | Paint peels within 6 to 12 months | Strip failed paint, clean thoroughly, start over |
Wrong sanding grit | Visible scratches or poor adhesion | Sand again with correct 120 to 150 grit paper |
Skipping primer | Paint chips and fails early | Remove paint, prime properly, repaint |
Poor ventilation | Health issues and slow drying | Open windows, use fans, wear respirator |
Rushing between coats | Poor adhesion and soft finish | Allow full cure time before use |
Time pressure causes mistakes. Rushing through cleaning, sanding, or drying stages undermines all your other efforts. Cabinet painting requires patience at every step.
Temperature matters more than most realize. Working in cold conditions below 50°F prevents proper paint curing. High heat above 90°F causes products to dry too fast, creating application problems. Aim for 60 to 80°F for ideal results.
Avoiding cabinet prep mistakes means following proven processes rather than taking shortcuts that seem harmless but cause expensive failures.
Alternative Approaches and Tradeoffs: Spray vs. Brush Painting
Your painting method changes prep requirements and final results significantly. Both spray and brush techniques work, but each demands different approaches.
Spray painting delivers the smoothest, most professional looking finish possible. The atomized paint settles evenly without brush marks, creating a factory like appearance. However, this method requires extensive masking of surrounding areas and powerful ventilation to manage overspray.
Spray painting offers smoother finishes but requires more masking and ventilation, while brush painting is simpler but can leave brush marks.
Brush painting gives more control for small jobs and detail work. You can paint without elaborate masking, making setup and cleanup faster. The tradeoff is visible brush strokes unless you have excellent technique and use premium brushes with proper paint consistency.
Method | Prep Requirements | Benefits | Drawbacks | Ventilation Needs |
Spray | Extensive masking, remove hardware | Smoothest finish, fastest application | Equipment cost, overspray mess | Critical: requires exhaust fan |
Brush | Minimal masking, optional hardware removal | Lower cost, better control | Visible brush marks possible | Moderate: open windows sufficient |
Roller | Some masking, works on flat panels | Faster than brush, decent finish | Limited to flat surfaces | Moderate: similar to brush |
Equipment investment differs substantially. Spray systems cost $100 to $500 for consumer models, plus you need an air compressor for some types. Quality brushes and rollers run $30 to $60 total.
VOC exposure is higher with spraying because more paint becomes airborne. This intensifies the need for respirators and mechanical ventilation. Brush painting keeps more paint on surfaces rather than in the air.
Many professionals combine methods, spraying door panels for smooth finish while brushing frames and tight spots requiring precision. This hybrid approach optimizes results while managing complexity.
Your skill level and available ventilation should guide your choice. Cabinet painting process options vary based on these factors and desired outcome quality.
Expected Timelines and Results for Cabinet Prep and Painting
Understanding realistic timelines prevents frustration and helps you plan around your household schedule. Quality work cannot be rushed, and each phase needs adequate time.
Typical professional prep and painting completes in about 10 days, yielding durable and attractive cabinet finishes. DIY projects often take longer because you’re working around other commitments.
Break down the timeline this way:
Cleaning: 4 to 6 hours for average kitchen, plus 24 hours drying time
Sanding: 6 to 8 hours including dust removal and surface preparation
Priming: 4 to 6 hours application, 12 to 24 hours drying between coats
Painting: 8 to 12 hours for two topcoats, 24 hours drying between coats
Curing: 7 to 14 days before cabinets handle normal use without damage
Total active work time runs 25 to 35 hours spread over 10 to 14 days. Weekend warriors might stretch this across three to four weekends to avoid disrupting weekday routines.
Results from proper prep include smooth, durable finishes lasting five to six years or more with normal use. Some professionally painted cabinets look excellent after 10 years. Durability depends on prep quality, product selection, and household wear patterns.
Cost savings are substantial. The average kitchen cabinet replacement runs $12,000 to $18,000. Professional painting costs $3,500 to $6,000. DIY painting with quality materials totals $400 to $700. You’re saving $11,000 to $17,000 compared to replacement.
Set expectations around household disruption. Your kitchen remains partially functional during painting, but you’ll need temporary meal solutions and patience with limited access to cabinets. Plan simple meals and inform family members about timeline and restrictions.
The cabinet refinishing timeline helps you coordinate the project with household needs and special events to minimize inconvenience.

Upgrade Your Ottawa Kitchen Cabinets with Expert Painting Services
While DIY cabinet prep delivers great results, professional services save time and guarantee outcomes through experience. Ottawa Cabinet Painting specializes in transforming tired kitchen cabinets into stunning focal points without renovation chaos.
Our meticulous prep process includes thorough cleaning, precise sanding, and premium stain blocking primers that extend paint life beyond typical DIY results. We complete projects in about 10 days with minimal disruption to your household routine.
Professional benefits include:
Expert surface preparation ensuring maximum paint adhesion and durability
Premium materials and equipment delivering factory quality finishes
Efficient timelines that minimize kitchen downtime and household disruption
6 year warranty backing our workmanship and your investment
Explore our Ottawa interior cabinet painting services for comprehensive kitchen transformation options. We offer free consultations and detailed quotes tailored to your specific cabinets and finish preferences.
Ready to upgrade your kitchen affordably? Request free spray painting quotes to discover how professional cabinet refinishing can fit your budget and timeline. Our local Ottawa team understands the unique needs of busy households seeking lasting quality.
Frequently Asked Questions About Cabinet Prep for Paint
How do I know if my kitchen cabinets need repainting or replacement?
If your cabinet boxes and doors are structurally sound with no warping, water damage, or broken joints, repainting is the smart choice. Surface issues like chipped paint, outdated colors, or worn finishes are perfect candidates for refinishing. Replacement only makes sense when cabinets are damaged beyond repair or you’re changing the kitchen layout entirely.
Can I prep and paint cabinets during winter in Ottawa?
Yes, but maintain indoor temperatures between 60°F and 80°F for proper paint curing. Winter’s low humidity actually helps paint dry evenly, but you must balance ventilation needs with heat loss. Crack windows slightly while running heating to maintain temperature and air exchange. Avoid painting during extreme cold snaps below 10°F when ventilation becomes impractical.
How important is drying time between sanding and priming?
Critical. Wood must be completely dry before primer application or moisture will be trapped underneath, causing bubbling and peeling later. Wait at least 24 hours after cleaning before sanding, and another 12 to 24 hours after sanding if you used water for dust control. Feel cabinet surfaces; any coolness indicates remaining moisture.
What type of paint finishes work best after proper prep?
Semi gloss and satin finishes offer the best balance of durability and appearance for kitchen cabinets. Semi gloss resists moisture and wipes clean easily but shows surface imperfections more readily. Satin provides a softer look with good durability and hides minor flaws better. Avoid flat finishes in kitchens as they don’t withstand cleaning and moisture exposure.
Is it necessary to remove cabinet doors for painting and prep?
Yes, removing doors and hardware produces dramatically better results. You can prep and paint all surfaces evenly without awkward angles or missed spots. Doors laid flat eliminate drips and runs that occur when painting vertical surfaces. The extra effort of removal and reinstallation pays off in professional quality appearance and easier application.
Recommended
Comments