Wait 2–36 Hours: Use Wood Filler Before Painting Ottawa Cabinets

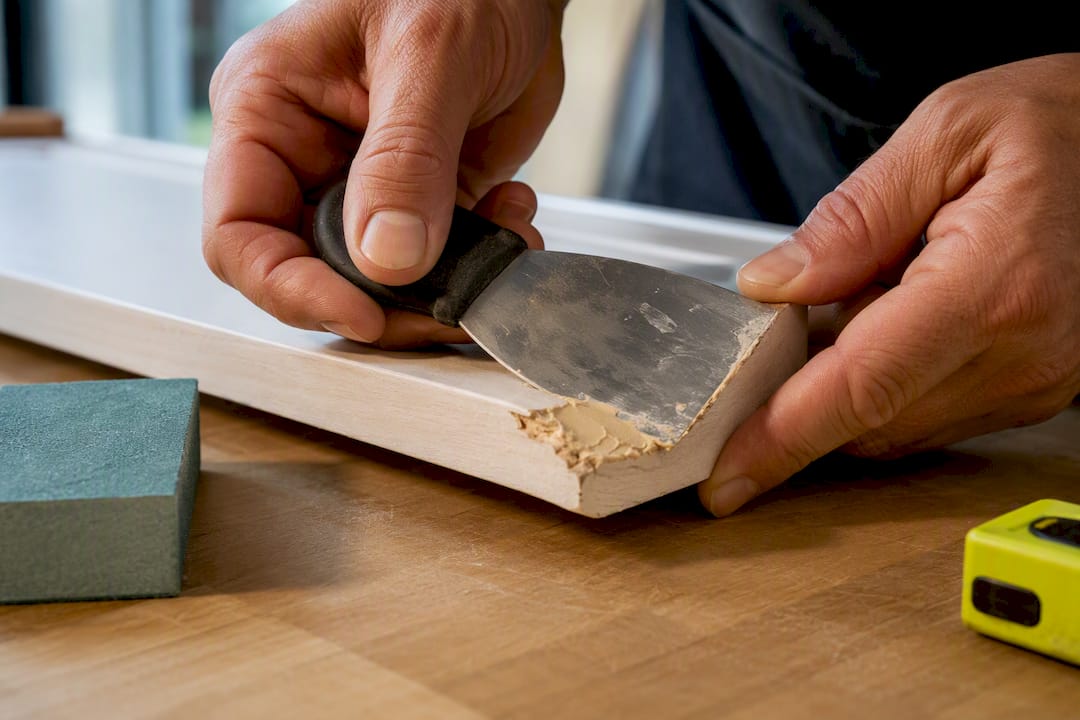
Use a paintable wood filler for structural repairs like gouges and nail holes, and a grain or pore filler on open-grain woods such as oak when you want a smooth, factory-finished paint job. Wood putty, unless the label says “paintable,” stays flexible and should never go under paint. Confirm the manufacturer’s cure time, sand it flush, prime, then paint.
TL;DR:
Using the correct, paintable filler is essential, especially for deep gouges or open-grain woods like oak, to prevent cracking or peeling when painting.
Sanding cured filler with progressively finer grit and applying primer before paint ensures a smooth, durable finish that hides repairs and prevents visible imperfections.
Deep fills shrink more as they cure, requiring overfilling slightly and full curing before sanding flush, to avoid uneven surfaces or gaps.
Skipping primer or painting too early after filler application often results in peeling, so testing the entire process first can save time and avoid costly rework.
Full kitchen or large-area grain filling is best handled by professionals, offering warranties, proper sequence, and a guaranteed quality finish for extensive projects.
Table of Contents
What Wood Filler Is (And Why It’s Not the Same as Wood Putty)
Wood filler is a rigid compound that hardens as it cures, sands smooth, and accepts paint once fully set. Wood putty behaves differently. It’s typically formulated to stay somewhat flexible even after it sets, which makes it useful for finished surfaces where wood naturally shifts, but a poor candidate for painting unless the label specifically states “paintable.” Confusing the two is one of the most common reasons a DIY paint job cracks or peels within a season, according to Canadian Woodworking.
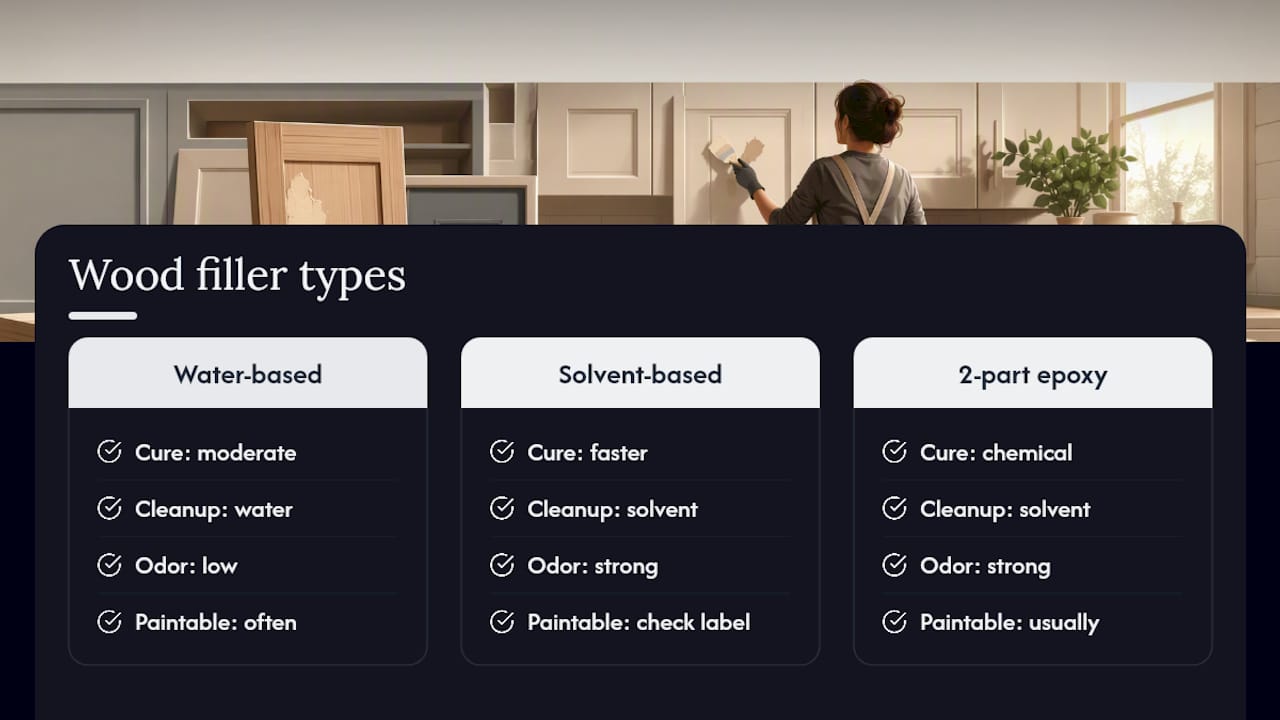
You’ll find three main formulations on hardware store shelves: water-based fillers (easy cleanup, moderate cure times), solvent-based fillers (faster drying, stronger odor), and two-part epoxy fillers like 3M Bondo Wood Filler, which cure through a chemical reaction rather than evaporation. Each has different cure behavior and different handling rules, so check the can before you buy based on price alone.
Before you commit to a product, read the label for four things: “paintable,” “sandable,” whether it’s rated for interior or exterior use, and any color-change indicator that tells you when the product has fully cured; for expert advice on paint selection, see the best color to paint interior doors. DAP Plastic Wood-X, for instance, darkens slightly as it dries, giving you a visual cue alongside the stated cure window. Skip any product missing the word “paintable” if a paintbrush is anywhere in your plans.
Spot Fillers vs. Grain Fillers: Which One Do You Need?
Spot fillers and grain fillers solve two completely different problems, and using the wrong one wastes both time and money.
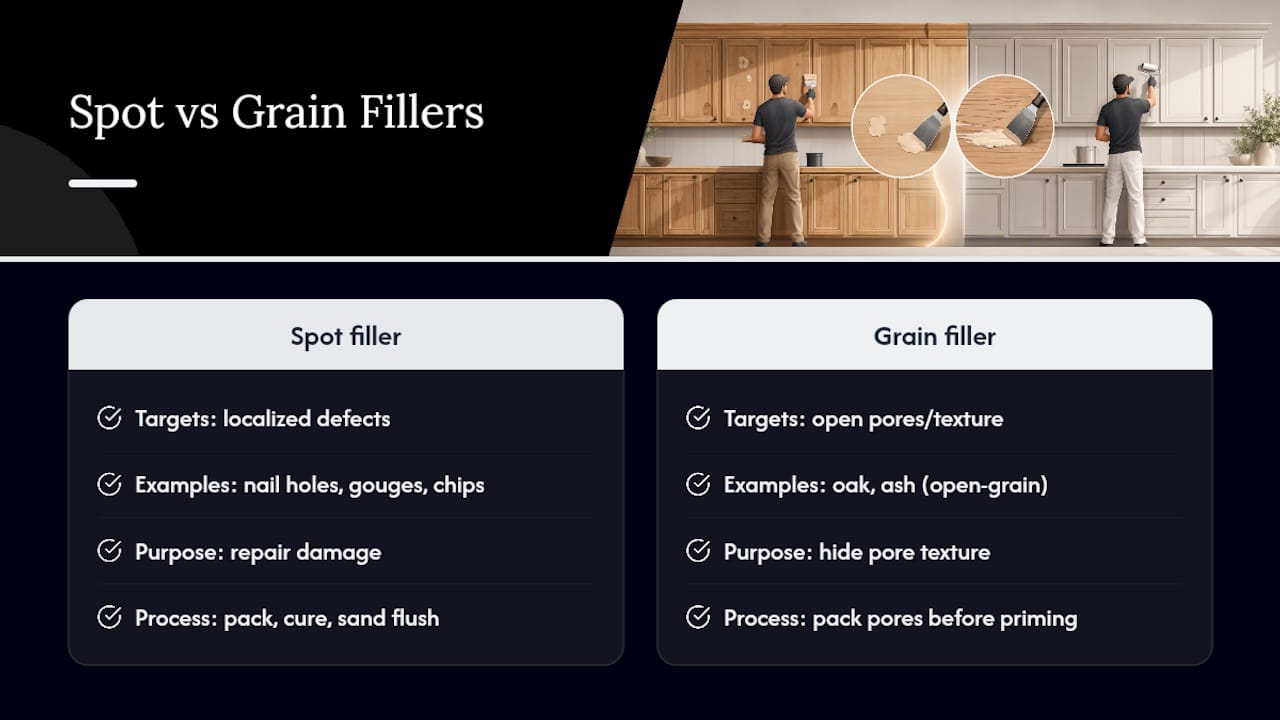
Spot (repair) fillers are built for localized damage: nail holes, gouges, dents, chipped corners. You pack the defect, let it cure, sand it flush, and move on. This is the category where DAP Plastic Wood-X and similar products live, and it’s what most homeowners picture when they hear “wood filler.”
Grain or pore fillers solve a different issue entirely. Open-grained woods like oak and ash have visible pores running through the surface, and paint alone won’t hide that texture. Instead, the grain “telegraphs” through the topcoat, especially under raking light or a glossy sheen. A dedicated pore filler packs those channels before priming, which the folks at Canadian Woodworking note is far more efficient than trying to bury the texture under coat after coat of paint.
Tight-grained woods like maple or birch usually don’t need this step. Oak kitchen cabinets almost always do, particularly if you’re going for a satin or semi-gloss finish where every imperfection catches light.
How to Use Wood Filler Before Painting: A Step-by-Step Timeline
Getting a paintable, professional-looking result comes down to sequence and patience, not brand loyalty. Here’s the order that actually works:
Clean and scuff-sand the surface. Degrease with a mild cleaner, then scuff with 120 to 150 grit sandpaper so the filler has something to grip.
Apply the filler. For gouges, pack it slightly proud of the surface since most fillers shrink a little as they cure. For grain filling, trowel it across the surface and wipe off the excess while it’s still workable, following the technique outlined by Canadian Woodworking.
Let it cure fully. Shallow repairs with DAP-style fillers typically cure in 2 to 6 hours, but deep fills can need up to 36 hours. Two-part fillers like Bondo can set in minutes to an hour, but they behave nothing like a water-based product, so always check the label rather than guessing.
Sand it smooth. Start with 120 grit to level the repair, then feather the edges outward so there’s no visible ridge where filler meets bare wood. Finish with 220 grit for a paint-ready surface.
Remove the dust. A tack cloth or lightly damp rag lifts sanding residue that would otherwise trap under your primer, a step emphasized in professional cabinet-prep guides.
Prime, then paint. A bonding or stain-blocking primer hides the filler’s color and evens out how the surface absorbs paint. Apply your topcoat in thin coats rather than one heavy layer.
Pro Tip: Deep gouges shrink more than shallow ones as they cure. Overfill by a hair, let it set the full recommended time, then sand flush instead of trying to eyeball a perfect fill on the first pass.
Common Mistakes That Ruin an Otherwise Good Paint Job
Most filler failures trace back to one of a handful of predictable errors. Painting before the filler has fully cured, not just dried to the touch, is the biggest one. A repair can feel solid on the surface while the core is still soft, and paint applied too early often blotches or peels within weeks.
Using non-paintable putty because it was already in the garage, rather than checking the label for “paintable” or “sandable.”
Assuming “dry” means “cured.” They’re not the same thing, especially with deep fills.
Skipping a primer coat over dark or tinted filler, which lets it telegraph through light-colored paint.
Painting an entire cabinet door before testing filler, primer, and topcoat together on a hidden section.
Pro Tip: Test your full system, filler, primer, and paint, on the inside of a cabinet door or drawer box before committing to visible surfaces. It takes fifteen extra minutes and catches problems before they’re permanent.
Grain Filling for Ottawa Cabinet Projects: A Local Note
Oak cabinets are common across Ottawa homes, and their open grain almost always needs pore filling before paint to avoid a textured, unfinished look. Our grain filling guide for Ottawa homes walks through that process in more depth. Small repairs suit a weekend DIYer, but whole-kitchen grain filling is where a professional timeline and warranty start to earn their cost.
Should You DIY This or Call a Pro?
A few doors with nail holes or minor gouges? That’s a reasonable weekend project. Full-cabinet grain filling, water damage, or veneer failure is a different animal, and it’s where mistakes get expensive fast.
DIY costs less upfront but eats your weekends and carries real risk of a redo. A professional refinish costs more but comes with a defined timeline and warranty coverage, which matters if your kitchen needs to function again quickly.
— Ottawa
Ottawa Cabinet Painting: The Professional Option When DIY Isn’t Worth the Risk
If your cabinets need more than a few spot repairs, especially full-surface grain filling on oak or extensive prep across a whole kitchen, Professional specialists handle the entire process so you don’t have to gamble a weekend on it. Such teams follow a meticulous prep sequence, sand and prime correctly the first time, and often work to a defined timeline from start to finish, sometimes backed by a multi-year warranty. That’s the trade-off DIY can’t offer: guaranteed results without living in a construction zone. Browse real before-and-after results from past Ottawa projects, or get a free quote on cabinet painting to see what a professional refinish would cost for your kitchen.
Sources
Cure times, filler selection, and grain-filling technique referenced here come from Canadian Woodworking and WoodWorkingAdvisor.
FAQ
Is Wood Filler Necessary Before Painting?
It’s necessary whenever there’s a hole, gouge, or open wood grain that would otherwise show through paint; smooth, tight-grained surfaces without damage may not need it.
How Long Does Wood Filler Need to Cure Before Painting?
Shallow repairs with fillers like DAP Plastic Wood-X typically cure in 2 to 6 hours, while deep fills can take up to 36 hours; two-part fillers like Bondo can set much faster, so always follow the label.
Can I Use Wood Putty Instead of Wood Filler Before Painting?
Only if the putty is explicitly labeled “paintable.” Standard wood putty stays flexible and tends to crack or lift under a paint film.
Do I Need Grain Filler on All Wood Types?
No. Grain filler matters most on open-grained woods like oak and ash; tight-grained woods like maple rarely need it before painting.
Should I Hire a Professional Instead of Doing Cabinet Repairs Myself?
Small spot repairs are fine to DIY, but full-cabinet grain filling or extensive damage is where a service like Ottawacabinetpainting’s guaranteed, low-disruption process becomes worth the investment.
Recommended
Comments