Shop Finished Conversion Varnish for Ottawa Cabinets in 10 Days

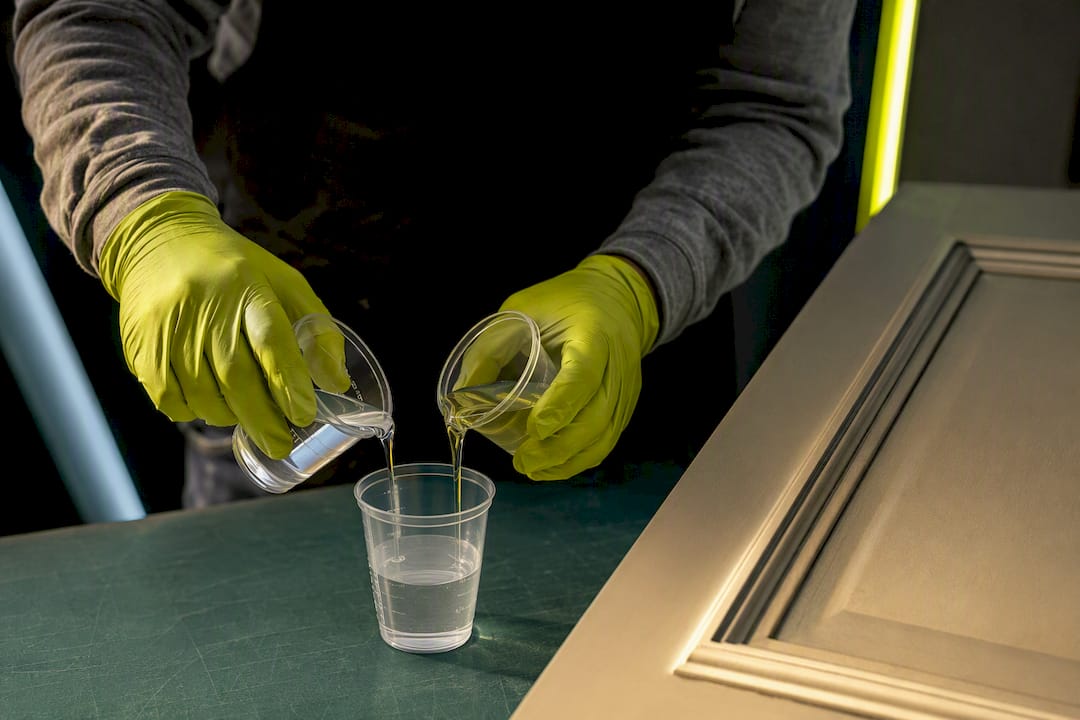
Conversion varnish is a two-part, acid-catalyzed clear finish that cross-links chemically as it cures, giving Ottawa cabinets a factory-hard, durable topcoat that resists kitchen abuse far better than standard lacquer. It’s the finish we reach for when a homeowner wants that smooth, showroom look built to last for years. The catch is real: conversion varnish needs professional spray equipment, precise catalyst mixing, and controlled curing conditions to perform as designed, which is why it’s rarely a weekend DIY project.
TL;DR:
Conversion varnish offers superior chemical and abrasion resistance but requires professional application in a controlled environment to achieve optimal durability.
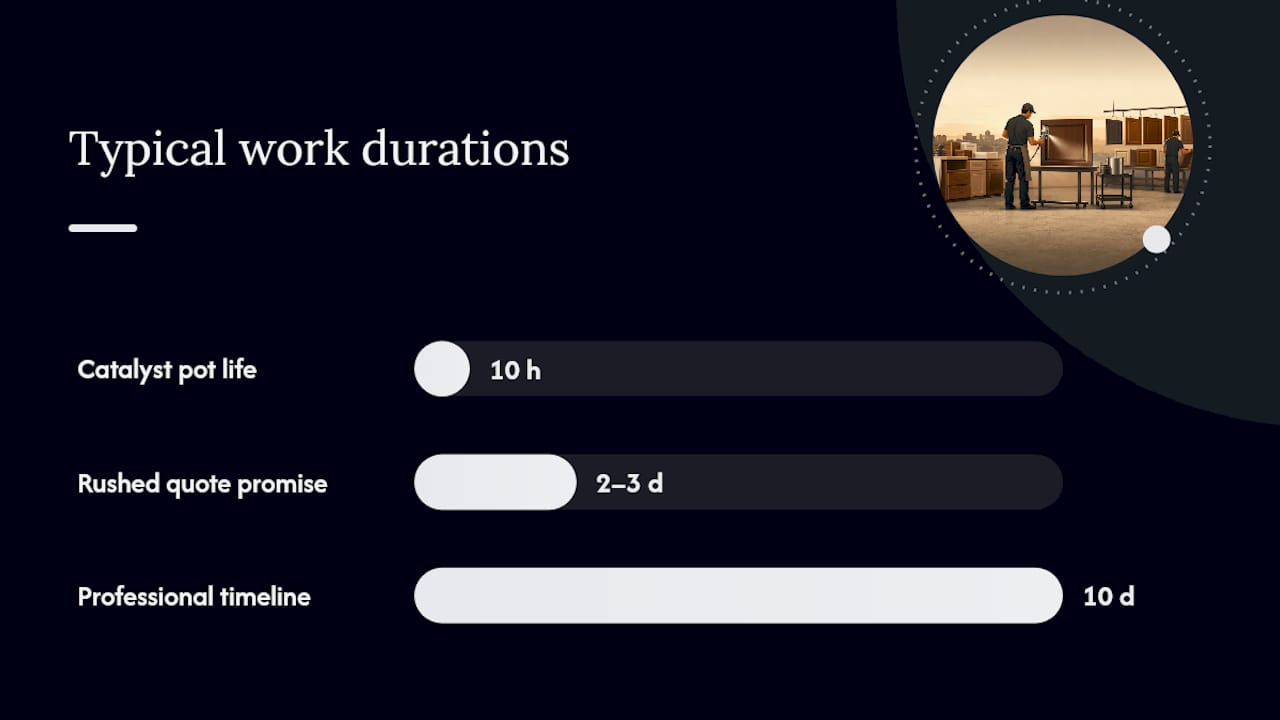
It has a pot life of 8 to 12 hours, longer than most polyurethane products, allowing for more flexible spray schedules.
Proper curing involves careful temperature and humidity control, with a typical project timeline of about ten days from start to finish.
Repairing conversion varnish after installation is difficult, often requiring full-panel refinishing rather than spot touch-ups.
The finish’s long-lasting qualities depend heavily on skilled application; rushing or improper conditions considerably reduce its performance.
Table of Contents
What is conversion varnish for cabinets, exactly?
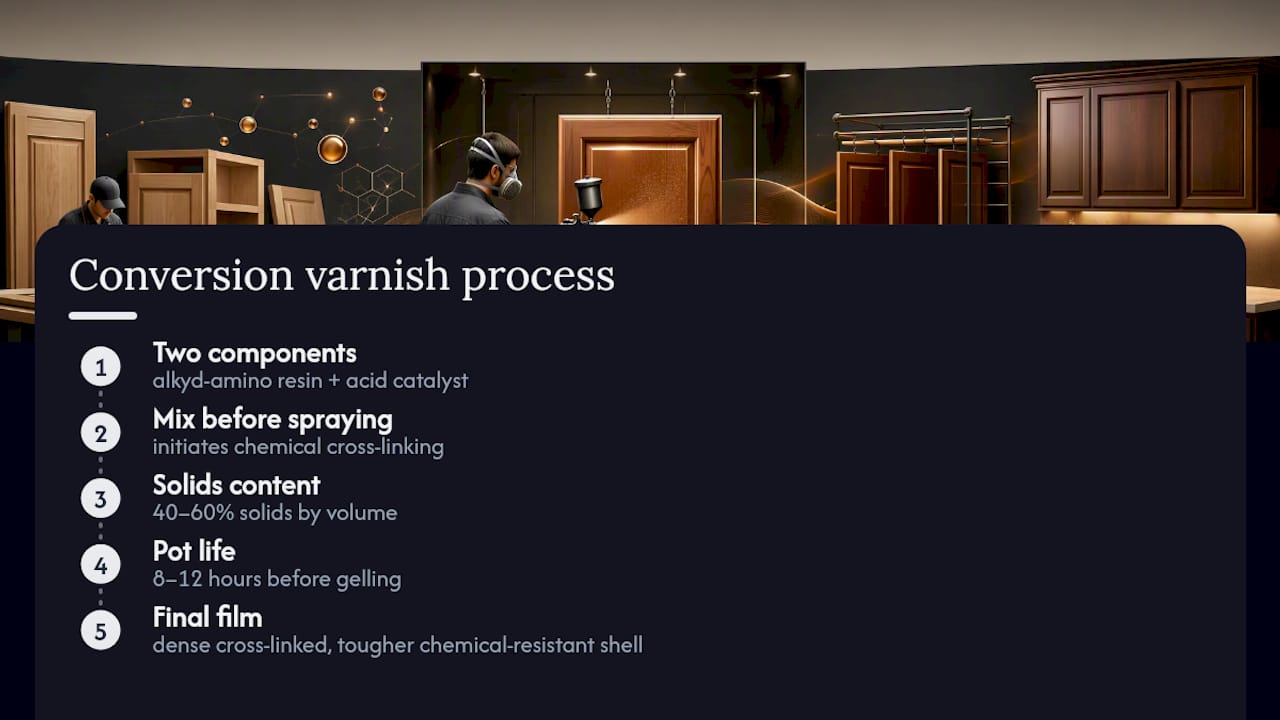
Conversion varnish is built from an alkyd-amino resin base combined with a separate acid catalyst, mixed together right before spraying. Once combined, the two components don’t just dry, they undergo a chemical reaction called cross-linking, which locks the finish into a dense, interconnected molecular structure. That’s fundamentally different from finishes that simply lose solvent as they harden.
This chemistry matters for one big reason: solids content. Conversion varnish typically runs 40 to 60 percent solids by volume, which means more actual film builds up with every coat compared to thinner lacquers. More build means a tougher, more chemically resistant shell protecting the wood underneath.
Once you mix the catalyst in, the clock starts ticking. Conversion varnish generally holds a pot life of 8 to 12 hours before it starts to gel in the pot, which is actually longer than many 2K polyurethane products offer. That window gives a shop crew enough working time to spray a full batch of doors without racing the clock on every gun load.
Why does curing versus evaporation matter so much for your cabinets? A finish that cures through cross-linking forms a harder, more stable surface than one that dries by simple solvent flash-off. That translates directly into better resistance to grease, cleaning chemicals, and the daily wear a kitchen dishes out, along with reduced tendency to yellow over time.
Conversion varnish pros and cons for your kitchen
Homeowners considering conversion varnish deserve a straight answer on what they’re gaining and what they’re trading away. Here’s the honest breakdown.
Advantages:
Excellent resistance to chemicals, grease, and abrasion, which matters most on high-traffic doors and drawer fronts
Builds film thickness faster, meaning fewer coats to hit target durability
Tends to resist yellowing better than older nitrocellulose lacquers
Dries fast enough for efficient shop throughput, keeping project timelines tight
Disadvantages:
Difficult to touch up invisibly once the cabinet is installed and living in your kitchen
Requires careful catalyst handling and generates chemical waste that needs proper disposal
Sensitive to temperature and humidity during application and cure
Older formulations can raise formaldehyde-related off-gassing concerns, though formaldehyde-free versions now exist
Pro Tip: Ask any cabinet finisher you’re considering whether they use a formaldehyde-free conversion varnish line. It’s a quick question that tells you a lot about how current their product knowledge actually is.
For most Ottawa homeowners, the practical trade-off is this: you get a finish that needs almost no maintenance for years, but you’re relying entirely on the installer getting the application right the first time. There’s very little room to patch mistakes later.
Conversion varnish vs lacquer vs 2K polyurethane
Three finish families dominate professional cabinet work, and each behaves differently once it’s on your doors.
Lacquer dries by solvent evaporation alone. No chemical reaction, no catalyst. It sprays beautifully and dries fast, but it stays somewhat soft and can reflow if hit with strong solvents later, which is actually part of why it’s easier to touch up than catalyzed alternatives.
Conversion varnish, as covered above, cures through cross-linking with an acid catalyst, landing squarely between lacquer’s flexibility and polyurethane’s toughness.
Two-component polyurethane (2K poly) uses an isocyanate hardener rather than an acid catalyst, and it generally builds even more film thickness and chemical resistance than conversion varnish, though often with a shorter pot life of just 3 to 5 hours for many products.
Here’s how they stack up on the factors that matter to you:
Repairability: Lacquer easiest, conversion varnish hardest, 2K poly comparably difficult to CV
Working time: Conversion varnish’s longer pot life gives crews more flexibility than most 2K polys
Best fit: Lacquer for budget projects and easy future touch-ups; conversion varnish for durable factory finishes on new or refinished doors; 2K poly for the toughest commercial-grade applications
When conversion varnish makes sense for your cabinets
New cabinet doors sprayed in a shop. Conversion varnish shines when doors come off the wall and get finished flat in a controlled booth, which is exactly the workflow industry consultants point to as the reason cabinet manufacturers rely on it at scale.
High-wear kitchens with kids, pets, or heavy cooking. The chemical resistance pays off daily when you’re wiping grease and sauce splatters constantly.
Projects prioritizing a factory-level finish. If your goal is that ultra-smooth, seamless look, conversion varnish delivers it consistently.
Skip conversion varnish, or at least think twice, if you’re planning frequent DIY touch-ups, spraying without proper ventilation and a dust-free space, or working in an unheated garage in January. Alternatives worth discussing with your finisher include pre-catalyzed lacquer (easier repairs, less durable), modern 2K polyurethane (tougher but shorter pot life), and waterborne systems (lower odor, improving durability each year). For more on matching a finish to your specific kitchen, our guide on choosing the right cabinet finish walks through the decision in more detail.
How professionals apply conversion varnish correctly
Getting conversion varnish right isn’t a matter of buying the product and grabbing a sprayer. It’s a sequence, and skipping a step shows up in the final finish.
The workflow typically runs like this:
Thorough surface prep, including sanding and cleaning to remove grease and old finish residue
A sealer or barrier coat when needed, especially over stains, glazes, or existing finishes, since adhesion failures over incompatible substrates are a documented risk
Catalyst mixed into the varnish immediately before spraying, timed against that 8 to 12 hour pot life
Even spray application in a controlled booth, followed by sanding between coats
A full cure period before doors go back on the cabinets
Temperature and humidity control isn’t optional here. Most practitioner guidance recommends application and curing above roughly 65 to 70°F, since cooler or more humid conditions can leave the finish under-cured and softer than it should be. A climate-controlled shop environment, not a garage in February, is what gets you the hardness the product is capable of.
Pro Tip: If a quote promises cabinet doors back on the wall in two or three days, ask how they’re managing cure time. Rushing conversion varnish off the rack almost always shows up later as scuffing or reduced chemical resistance.
When you hire a professional shop for this level of work, expect a project timeline closer to ten days from start to finish, with your kitchen staying largely functional the whole time. That’s the trade you’re making: patience up front for a finish that shouldn’t need attention again for years.
Keeping a conversion-varnished finish looking new
Conversion varnish rewards you with low maintenance, but “low” doesn’t mean “none.” Heavy daily use, harsh abrasive cleaners, and sustained heat near the stove all shorten the effective life of any cabinet finish, conversion varnish included.
Stick to mild dish soap and a soft cloth for routine cleaning, and skip anything abrasive or solvent-heavy that could dull the sheen. Our full aftercare guide covers the specifics room by room.
Here’s the part homeowners are often surprised by: because conversion varnish cures through a chemical reaction rather than simple drying, repairs are often a full-panel respray rather than a quick touch-up with a small brush. A minor scratch might blend in fine on lacquer. On conversion varnish, that same scratch may need the whole door pulled and refinished to disappear completely. Factor that into your decision now, not after the first ding shows up.
Our take: is conversion varnish worth it for your Ottawa kitchen?
The conventional advice treats finish choice like a simple durability ranking, toughest wins. That misses the real question: who’s applying it, and under what conditions? Conversion varnish’s advantages only show up when it’s mixed correctly, sprayed in a controlled environment, and cured at the right temperature. Skip any of that, and you’ve got a finish that’s expensive, hard to fix, and no better than a well-applied lacquer.
What we’d tell any Ottawa homeowner weighing this decision: prioritize the shop and the process over the product name on the can. A conversion varnish job done in an uncontrolled space with rushed cure times will underperform a properly applied lacquer every time. The finish is only as good as the conditions it cured in, and that’s the detail most homeowners never think to ask about until something goes wrong.
— Ottawa
If you’re weighing conversion varnish against other finish options for your own kitchen, Ottawacabinetpainting sprays every project in controlled shop conditions with proper catalyst handling and cure times built into the schedule, backed by a 6-year warranty on the finished work. Browse real transformations on our before and after gallery, or get a free spray painting quote to see what a factory-level finish would cost for your cabinets.
Sources
Recommended
Comments