7–10 Day Pro MDF Cabinet Finish in Ottawa, Seal Edges

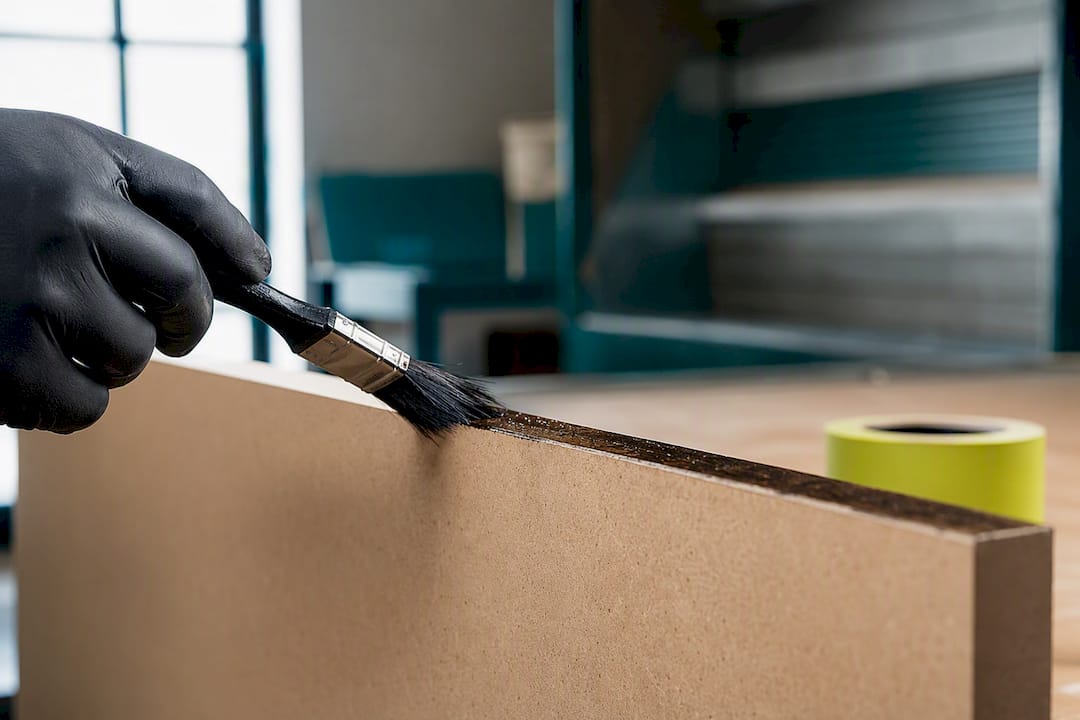
The MDF cabinet finishing process is a multi-step prep-and-coating workflow, not a paint job in the usual sense. It relies on sealing every raw edge and choosing the right primer to keep MDF fibers from swelling, then building up thin, sanded topcoats for a smooth, factory-like result. Done right by a professional shop, the whole cycle runs 7 to 10 days and holds up under daily kitchen use for years.
TL;DR:
Proper MDF finishing requires sealing raw edges with shellac-based primer or drywall mud to prevent uneven absorption and future chipping.
Using an HVLP sprayer produces the smoothest, factory-like finish, but most homeowners should hire a professional for full kitchens to ensure quality and consistency.
The entire finishing process typically takes 7 to 10 days, including curing times, with on-site spraying preferred for durability and a flawless appearance.
Skipping edge sealing or applying water-based primer directly on raw MDF edges causes swelling, fuzzing, and paint failure that is difficult to repair later.
DIY projects are best suited for small repairs or touch-ups; full kitchen refinishing benefits from professional workflows that budget for proper preparation and curing.
Table of Contents
What Is an MDF Cabinet Finishing Process, Step by Step?
Refinishing MDF cabinets is closer to industrial finishing than house painting. Most of the timeline is spent on preparation rather than coating, and finishers who treat this as a step-by-step production process tend to get finishes that outlast the ones rushed through in a weekend. Here’s the sequence that actually works:
Remove and label everything. Doors, drawer fronts, and hardware come off first. Label each piece with painter’s tape and a number so nothing gets mismatched when it’s time to rehang.
Degrease thoroughly. Kitchen cabinets carry an invisible film of cooking oil, and even a trace of it will stop primer from bonding, causing peeling within months. A dedicated degreaser, not just soapy water, is what actually cuts through it.
Scuff sand and extract dust. A light pass with 150 to 180 grit opens up the surface for primer without gouging the substrate. Every bit of dust needs to come off before the next step, ideally with a vacuum and a tack cloth, not just a dry rag.
Seal the edges first. Cut and routed MDF edges are far more porous than the faces, and this is where most amateur jobs fail.
Prime the whole panel. Once edges are locked down, the entire door and box gets a uniform coat of primer.
Micro-sand between coats. A fine pass at 220 to 320 grit between primer and topcoat, and again between topcoats, is what separates a smooth cabinet finish from one you can feel with your fingertips.
Apply two thin topcoats. Heavy single coats sag and trap texture. Two light passes level out far better than one thick one.
Let it cure before rehanging. Curing is chemical, not just evaporation, and rushing this step is how finishes get dented before they’ve fully hardened.
What Tools and Materials Does MDF Finishing Require?
The right products matter more on MDF than on solid wood, because MDF has zero forgiveness for shortcuts on absorption or adhesion. A basic shopping list looks like this:
Edge and bonding primers: shellac-based products like Zinsser BIN, or bonding primers like INSL-X Stix, built specifically to grip MDF edges without soaking in unevenly.
Edge fillers: high-build primer or even lightweight drywall mud, used to fill porous cut edges before priming.
Topcoats: waterborne alkyds or cabinet-grade enamels for durability; pro two-part catalyzed systems where available, since they cure into a harder, more chemical-resistant film.
Application equipment: an HVLP sprayer for the smoothest result, or a quality foam roller and brush for smaller touch-ups.
Dust control and PPE: a respirator rated for fine particulates, safety glasses, and a dust extraction setup or shop vac attachment.
Why Do You Have to Seal MDF Edges Before Priming?
Cabinet faces are covered in a dense resin layer that resists moisture and absorbs primer evenly. Cut edges are raw fiber, and they drink up whatever you put on them. Uneven absorption on edges causes visible blotching, a rough “fuzzed” texture, and eventually paint failure right at the corners, which is why sealing raw or cut MDF edges is treated as the defining step of the entire process.
You have a few real options here. Drywall mud gives the smoothest, most fully filled edge, but it takes longer to apply and sand. Shellac-based primer like BIN is faster and highly effective on its own. Thinned PVA glue is a field trick some finishers use for smaller touch-ups or repairs, and it’s economical, though it doesn’t fill the way mud does.
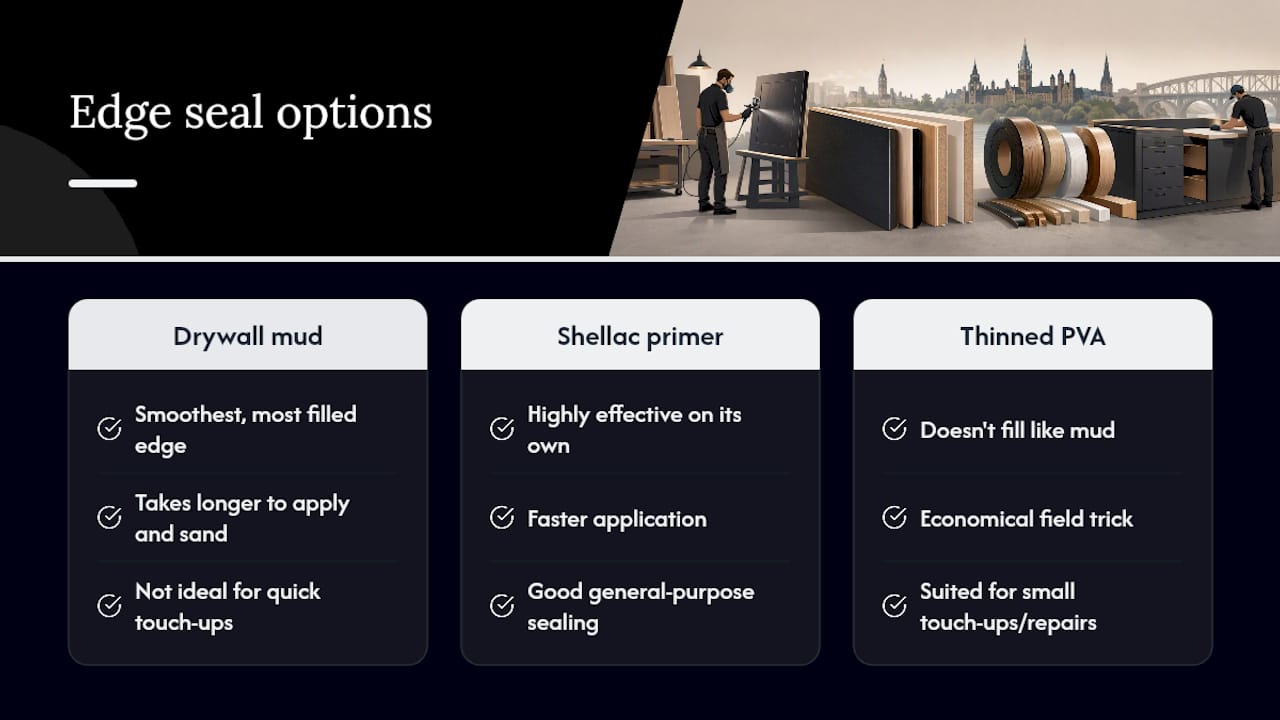
The rule that trips up most DIYers: never put a water-based primer directly on raw MDF edges. It swells the fibers almost immediately, and that swelling doesn’t reverse. Lock edges first with a high-solids, bonding, or shellac primer, sand them flush, then prime the full panel as one continuous surface.
Pro Tip: Run your finger along a freshly cut MDF edge before you seal it. If it feels the slightest bit fuzzy or soft, it will absorb primer unevenly, so treat that edge before it touches any paint.
Should You Spray or Brush MDF Cabinets?
Spraying is what gives cabinets that showroom look, because it lays down an even film with no brush marks or roller stipple. Professional spraying setups using controlled booths and curing environments produce a harder, more level finish than anything achievable by hand in a home kitchen. The tradeoff is logistics: spraying properly requires a controlled space, careful masking, and real ventilation, which is why most homeowners either send doors to a shop or hire someone who has one.
Brush and foam roller work can be acceptable for a single door repair or a small touch-up, but it will not match a sprayed sheen side by side.
A few practical notes on either method:
Two thin coats beat one thick one, regardless of application method.
Micro-sand between every coat with 220 to 320 grit for the best leveling.
Reserve DIY brushwork for small jobs; hire a sprayer for full kitchens or high-gloss finishes, where any texture becomes obvious under kitchen lighting.
For more on the equipment side, our guide on spraying MDF cabinet doors walks through the setup professionals actually use.
How Long Does an MDF Cabinet Refinishing Project Take?
Drying and curing are not the same thing. A cabinet door can feel dry to the touch within hours, but the coating keeps hardening for days to weeks depending on the chemistry. Waterborne alkyds cure faster than catalyzed two-part coatings, but neither reaches full hardness overnight.
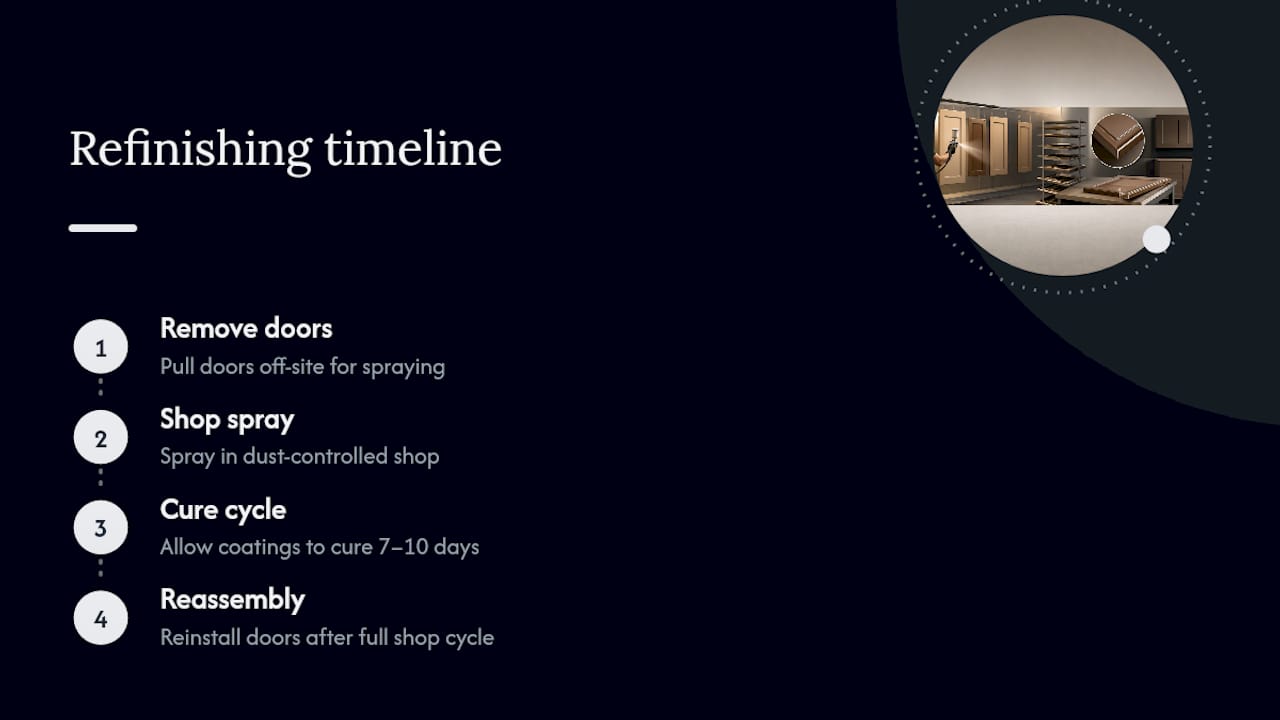
Professional workflows typically pull doors off-site, spray them in a shop, and cycle through 7 to 10 days total before reassembly. That shop-spray approach controls dust and curing conditions far better than spraying in a live kitchen, and it’s a major reason your kitchen stays usable while the real work happens elsewhere.
How Do You Maintain a Finished MDF Cabinet?
Stick to mild soap and water for cleaning, and skip ammonia-based or abrasive cleaners, which dull even a hardened topcoat over time. Minor chips can often be touched up with a small amount of matching paint; deeper gouges that expose bare MDF need a proper refinish, not a quick dab.
The mistakes that cause the most callbacks:
Skipping edge sealing entirely, which shows up as fuzzing or chipping at corners within a year.
Using a water-based primer straight on raw MDF, which causes irreversible swelling.
Poor dust control between coats, leaving visible grit under the topcoat.
Applying one heavy coat instead of two thin ones, which sags and never levels properly.
Ottawa Cabinet Painting’s Take: When DIY Makes Sense and When It Doesn’t
Small touch-ups and single-door repairs are fair game for a patient DIYer with the right primer. Full kitchens are a different animal. Getting edge sealing, degreasing, and spray-level coats right on many doors consistently is what separates a shop-spray process from a weekend project, and it’s why a professional workflow often runs on a 7 to 10 day timeline backed by a warranty on the finish.
— Ottawa
Get a Pro-Grade Finish Without a Full Kitchen Replacement
Ottawacabinetpainting is the alternative to gutting your kitchen for a new look. Instead of weeks of demolition and a new-cabinet budget, our dedicated cabinet specialists run doors through a shop-spray process built around the same edge sealing and thin-coat sequencing covered above, typically finishing in 7 to 10 days with minimal disruption to your daily routine. Every job is backed by a 6-year warranty on workmanship. If you’re weighing a full kitchen versus targeted work, the thermofoil and custom finish repair page covers smaller jobs starting at $50 per door, while the Ottawa kitchen cabinet refinishing page is where to start if you want a full-kitchen quote. Reach out through either page to get your specific project scoped.
Sources
Always check your specific primer and topcoat datasheets, since formulas vary by manufacturer.
FAQ
Can You Use Latex Primer on MDF Cabinets?
Latex and other water-based primers work fine on properly sealed cabinet faces, but they’re risky directly on raw MDF edges because they swell the wood fibers. Seal edges first with a shellac-based or bonding primer, then a water-based primer can go over the sealed panel safely.
How Long Before MDF Cabinets Are Usable After Painting?
A finish can feel dry within hours, but full cure takes days to weeks depending on the coating chemistry. Professional shop-spray workflows typically plan for a 7 to 10 day cycle before doors are rehung and put back into daily use.
Is Spraying Necessary for a Smooth MDF Finish?
Spraying isn’t strictly required, but it’s the only method that reliably produces a factory-level, brush-mark-free surface. A foam roller and brush can work for small touch-ups, though the sheen and texture will visibly differ from a sprayed finish.
What’s the Biggest Mistake People Make Finishing MDF Cabinets?
Skipping edge sealing is the most common and most damaging mistake, since raw edges absorb primer unevenly and eventually fuzz or chip. The edge sealing step has to happen before any full-panel primer coat.
How Much Does Ottawa Cabinet Painting Charge for Cabinet Repairs?
Single cabinet door repairs start from $50 per door, and a full kitchen repair starts from $500, both detailed on the thermofoil repair page. Pricing for full refinishing and refacing projects is available on request through a quote request.
Recommended
Comments