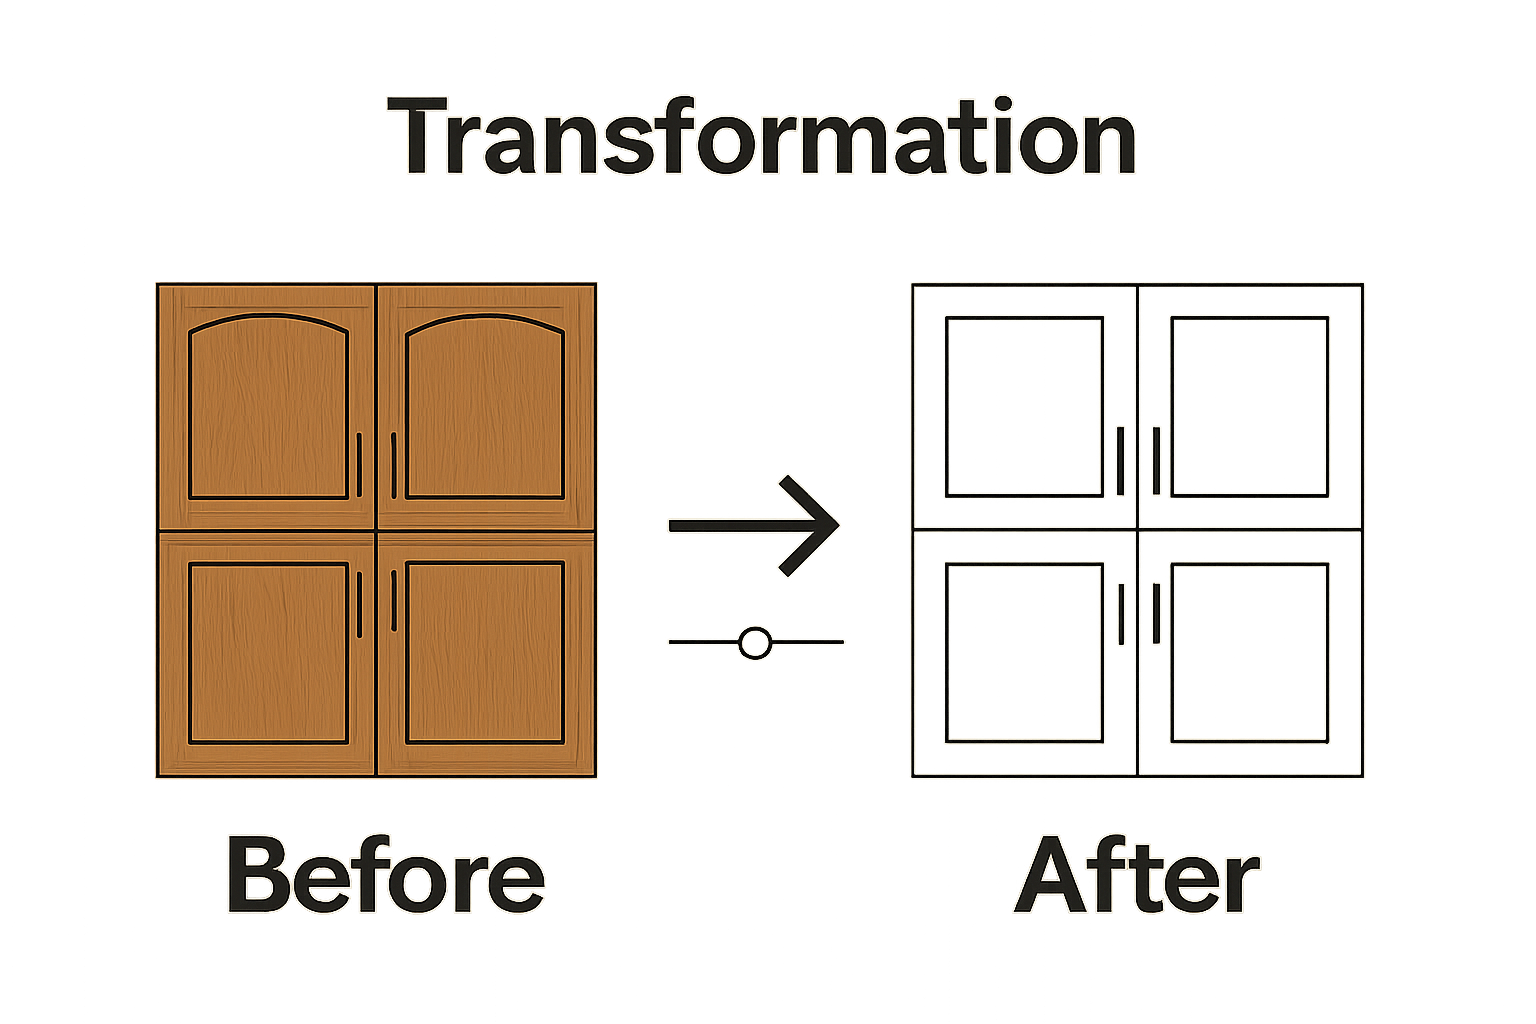
Transform Your Kitchen with Painting Oak Cabinets
- demoore5506
- Sep 29, 2025
- 11 min read
Painting oak cabinets might sound like a weekend project, but small mistakes can lead to headaches and costly fixes down the road. Surprisingly, professional painters say that nearly 80 percent of a flawless finish comes down to proper prep and the right tools, not painting itself. Perfect looking cabinets are less about fancy brushwork and more about steps people usually rush right past.
Table of Contents
Quick Summary
Key Point | Explanation |
1. Gather the right tools for success | Use high-quality supplies like sandpaper, primer, and paint brushes for a professional finish. |
2. Thoroughly prepare cabinet surfaces | Remove hardware, clean, and sand the surfaces to ensure optimal paint adhesion. |
3. Apply a quality shellac-based primer | This primer seals the oak and provides a solid foundation for paint, preventing bleed-through. |
4. Use thin, even paint coats | Apply multiple thin layers of paint instead of one thick layer to avoid drips and enhance finish quality. |
5. Inspect and reinstall hardware methodically | After painting, check for imperfections and reinstall hardware carefully to maintain the finish’s integrity. |
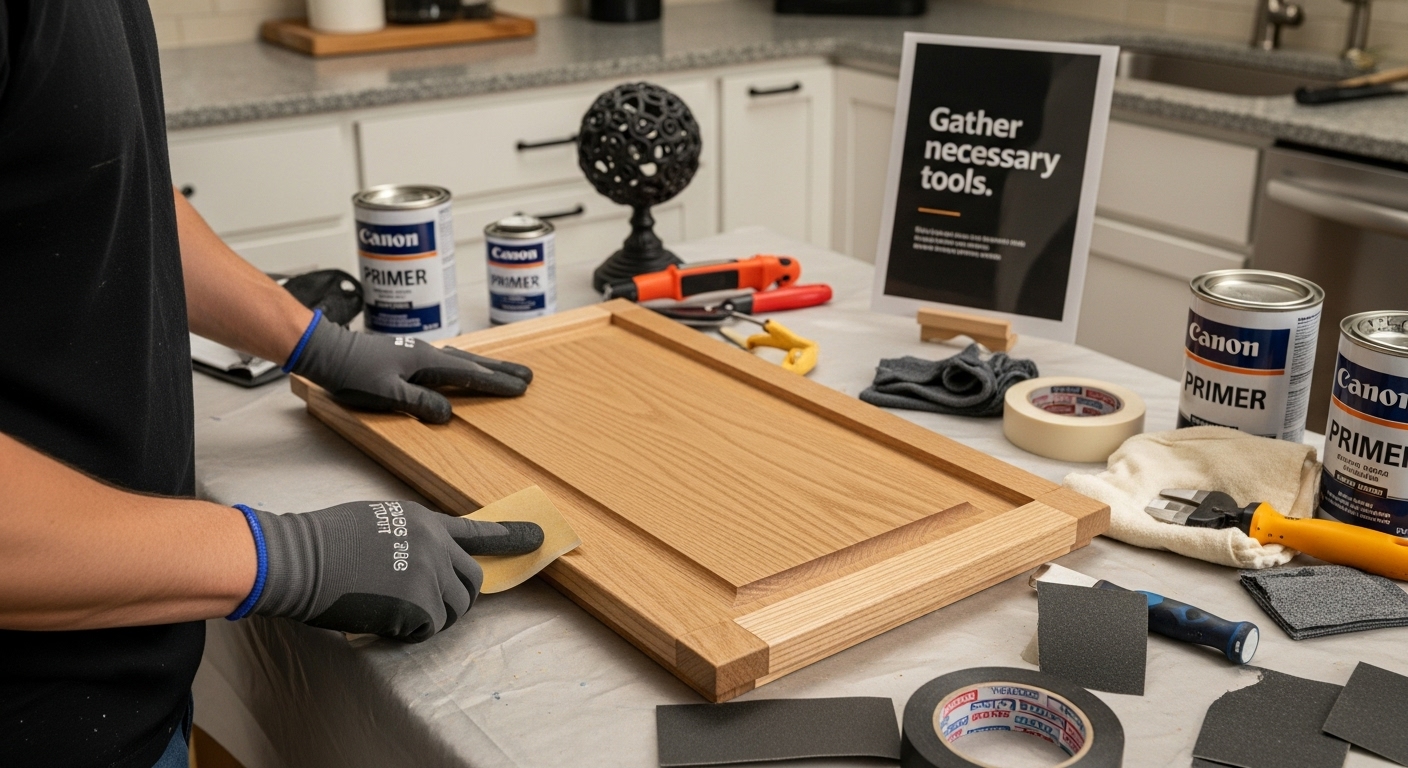
Step 1: Gather necessary tools and materials
Painting oak cabinets transforms your kitchen’s appearance, but success starts with meticulous preparation and the right equipment. Professional painters understand that gathering tools and materials is not just a preliminary step but the foundation of a flawless finish. Before you begin, create a dedicated workspace that allows you to organize your supplies and work efficiently.
Essential Tools and Materials
Your toolkit will determine the quality of your cabinet painting project. You will need precision tools that enable smooth, professional results. Start with high-quality supplies: a selection of medium-grit sandpaper (120-150 grit), tack cloths for dust removal, painter’s tape, drop cloths, and an array of paintbrushes and rollers designed for smooth surfaces. Our guide on essential painting materials offers comprehensive insights into selecting the right equipment.
For oak cabinets specifically, invest in premium materials that complement the wood’s unique grain and texture. Choose shellac-based primer to ensure optimal paint adhesion, and select a paint specifically formulated for wood surfaces. Latex or oil-based paints with a semi-gloss or satin finish work exceptionally well for kitchen cabinets, providing durability and easy cleaning.
Additional recommended tools include:
Screwdriver set for hardware removal
Degreasing cleaner
Plastic putty knife
Fine-grit sandpaper (220 grit) for final surface smoothing
Disposable gloves
Respirator mask
Safety glasses
Organizing your workspace is crucial. Clear a well-ventilated area with stable work surfaces, ensuring you have enough room to lay out cabinet doors and drawers during the painting process.
Here is a step overview table summarizing each main stage of painting oak cabinets, with suggested time estimates and key outcomes to help you plan your project more efficiently.
Step | Estimated Time | Key Outcome |
Gather tools and materials | 1–2 hours | Organized, equipped workspace |
Prepare cabinet surfaces | 2–3 hours | Cleaned, sanded, and dust-free surfaces |
Apply primer | 2–3 hours (plus drying) | Even, sealed base ready for paint |
Paint cabinets | 3–5 hours (plus drying) | Smooth color application with full coverage |
Allow drying & apply second coat if needed | 4–8 hours (total drying) | Cured, durable paint finish |
Reinstall hardware and check finish | 1–2 hours | Complete, functional cabinets with final check |
To help you stay organized and ensure a smooth workflow, here is a table summarizing the essential tools and materials needed for painting oak cabinets, along with their purpose.
Tool/Material | Specification/Type | Purpose |
Medium-grit sandpaper | 120-150 grit | Scuffing and prepping cabinet surfaces |
Fine-grit sandpaper | 220 grit | Final surface smoothing between coats |
Tack cloths | Lint-free | Removing dust after sanding |
Shellac-based primer | For wood surfaces | Sealing oak and blocking tannin bleed |
Latex or oil-based paint | Semi-gloss or satin | Durable, easy-to-clean cabinet finish |
Synthetic brushes/foam rollers | For smooth surfaces | Applying primer and paint evenly |
Painter’s tape | High-adhesion | Masking off areas not to be painted |
Drop cloths | Protective fabric/plastic | Shielding floors and counters |
Degreasing cleaner | Kitchen-safe | Removing grease and grime from surfaces |
Screwdriver set | Versatile heads | Removing and reinstalling cabinet hardware |
Disposable gloves | Nitrile/latex | Hand protection from chemicals and paint |
Respirator mask | For paint fumes | Ensuring safe breathing during painting |
Safety glasses | Impact resistant | Protecting eyes during prep and painting |
Step 2: Prepare the cabinet surfaces for painting
Preparing oak cabinet surfaces is a critical step that determines the quality and longevity of your paint job. Professional painters know that thorough preparation prevents future painting problems and ensures a smooth, durable finish. Prepping Cabinets for Paint: Easy Steps for 2025 Upgrades offers additional insights into this crucial process.
Begin by removing all cabinet hardware including knobs, handles, and hinges. Place these small components in labeled plastic bags to prevent losing them and to make reassembly straightforward. Use a screwdriver to carefully detach each piece, keeping track of which hardware belongs to specific doors or drawers.
Cleaning and Degreasing
Oak cabinets accumulate years of cooking residue, grease, and grime that can prevent paint from adhering properly. Use a powerful degreasing cleaner specifically designed for kitchen surfaces. Apply the cleaner with a soft, lint-free cloth, working in circular motions to break down stubborn grease deposits. Rinse thoroughly with clean water and allow surfaces to dry completely. This step eliminates potential barriers that could compromise paint adhesion.
Sanding and Surface Preparation
Sanding creates the ideal surface for paint to grip. Use medium-grit sandpaper (120-150 grit) to lightly scuff the entire surface, breaking down the existing finish and creating microscopic texture. Focus on creating a uniform surface without removing too much wood. Wipe away sanding dust with tack cloths, ensuring a completely clean surface. For oak cabinets with intricate grain patterns, pay extra attention to recessed areas and corners.
Verify your preparation by running your hand across the surface. It should feel smooth and slightly rough, without visible dust or residue. Proper surface preparation is the foundation of a professional-quality paint job that will transform your kitchen’s appearance and protect your valuable cabinets for years to come.
Step 3: Apply primer to the cabinets
Priming oak cabinets is a crucial step that creates the perfect foundation for a professional-looking paint finish. This stage bridges the gap between your prepared surface and the final paint color, ensuring superior adhesion and a smooth, lasting result. How to Paint Cabinets: Transform Your Kitchen Economically provides additional context for this critical process.
Selecting the Right Primer
Choose a high-quality shellac-based primer specifically designed for wooden surfaces. Oak’s distinctive grain and porous nature require a primer that seals the wood effectively and provides a uniform base for your chosen paint color. Shellac-based primers offer exceptional adhesion, block wood tannins, and create a smooth surface that prevents bleed-through and ensures a flawless final appearance.
Apply the primer using smooth, consistent strokes with a high-quality synthetic brush or foam roller. Work in the direction of the wood grain, maintaining a wet edge to prevent lap marks and ensure even coverage. For intricate areas and detailed surfaces, use a smaller brush to reach corners and recessed details. Take your time and apply thin, even coats rather than thick, uneven layers that could lead to drips or uneven texture.
Application Techniques
Begin priming on a horizontal surface, laying cabinet doors flat to prevent drips and ensure uniform coverage. Use long, smooth strokes that follow the wood grain, overlapping slightly to create a seamless finish. Allow each coat to dry completely according to the manufacturer’s instructions, typically 2-4 hours. Lightly sand between primer coats using fine-grit sandpaper (220 grit) to remove any minor imperfections and create an ultra-smooth surface.
Verify your primer application by examining the surface under good lighting. The finish should be smooth, uniform, and free of drips, brush marks, or visible wood grain. A well-primed surface will appear slightly matte and provide the perfect canvas for your final paint color.
Patience during the priming stage sets the foundation for a professional-quality cabinet transformation that will revitalize your kitchen’s aesthetic.
Step 4: Paint the cabinets with chosen color
Painting oak cabinets requires precision, patience, and a strategic approach to achieve a professional-looking finish. This transformative step will breathe new life into your kitchen, creating a custom look that reflects your personal style. How to Choose Paint Finish: Guide for Kitchen Upgrades can help you select the perfect paint characteristics for your project.
Color Application Techniques
Select a high-quality latex paint specifically formulated for kitchen cabinets, preferably in a semi-gloss or satin finish that offers durability and easy cleaning. Begin painting with smooth, deliberate strokes using a high-quality synthetic brush or foam roller. Work systematically, maintaining a consistent direction that follows the wood grain. For oak cabinets, use light, multiple coats rather than one thick application to prevent drips and ensure an even, professional appearance.
Start painting from the center of each cabinet panel and work outward, using long, smooth strokes that blend seamlessly. Pay special attention to edges and corners, where paint can easily accumulate and create unsightly ridges. Apply paint in thin, even layers, allowing sufficient drying time between coats. Typically, two to three light coats will provide optimal coverage and a smooth, uniform finish.
Handling Complex Surfaces
Oak’s distinctive grain pattern requires extra care during painting. Use a combination of foam rollers for large, flat surfaces and high-quality angled brushes for detailed areas and decorative moldings. When painting cabinet doors laid horizontally, rotate them periodically to prevent pooling and ensure an even coat. Use natural lighting to help identify any missed spots or uneven areas. Between coats, lightly sand with fine-grit sandpaper to remove any minor imperfections and create an ultra-smooth surface.
Verify your painting by checking for consistent color, smooth texture, and complete coverage under good lighting. The final result should showcase a uniform, professional finish that highlights the beautiful oak woodwork while providing a fresh, updated look for your kitchen.
Patience and attention to detail during this step will reward you with stunning, long-lasting results.
Step 5: Allow drying and apply a second coat if needed
Drying and potentially applying a second coat are critical steps in achieving a professional-grade finish for your oak cabinets. This stage requires patience and careful observation to ensure optimal paint coverage and durability. Understanding How Long Does Cabinet Paint Take to Cure provides additional insights into this crucial process.
Proper Drying Conditions
Create an optimal drying environment by maintaining a consistent room temperature between 65-75 degrees Fahrenheit with low humidity. Ensure proper ventilation by opening windows or using fans, but avoid direct drafts that could introduce dust or disturb the wet paint surface. Horizontal surfaces like laid-out cabinet doors require careful placement on clean, level surfaces covered with painter’s plastic to prevent sticking or dust accumulation.
Typically, latex paint requires 2-4 hours between coats, but this can vary based on humidity and temperature. Test the surface by lightly touching an inconspicuous area. If the paint feels tacky or leaves a fingerprint, it needs more time to dry. Professional painters recommend waiting the full recommended drying time to prevent potential adhesion issues or uneven finish.
Evaluating the Need for a Second Coat
After the first coat has completely dried, carefully inspect the cabinets under bright, natural light. Look for areas with uneven coverage, visible wood grain, or slight transparency. Oak’s distinctive grain pattern might require a second coat to achieve a truly uniform appearance. When applying the second coat, use the same careful techniques as the first application: thin, even strokes following the wood grain, maintaining a wet edge to prevent lap marks.
Before declaring the project complete, perform a thorough visual and tactile inspection. The final finish should appear smooth, consistent, and free of drips, brush marks, or visible imperfections. Run your hand gently across the surface to confirm a buttery-smooth texture. Remember that patience during the drying and potential second coating stage will result in a professional-looking transformation that will revitalize your kitchen for years to come.
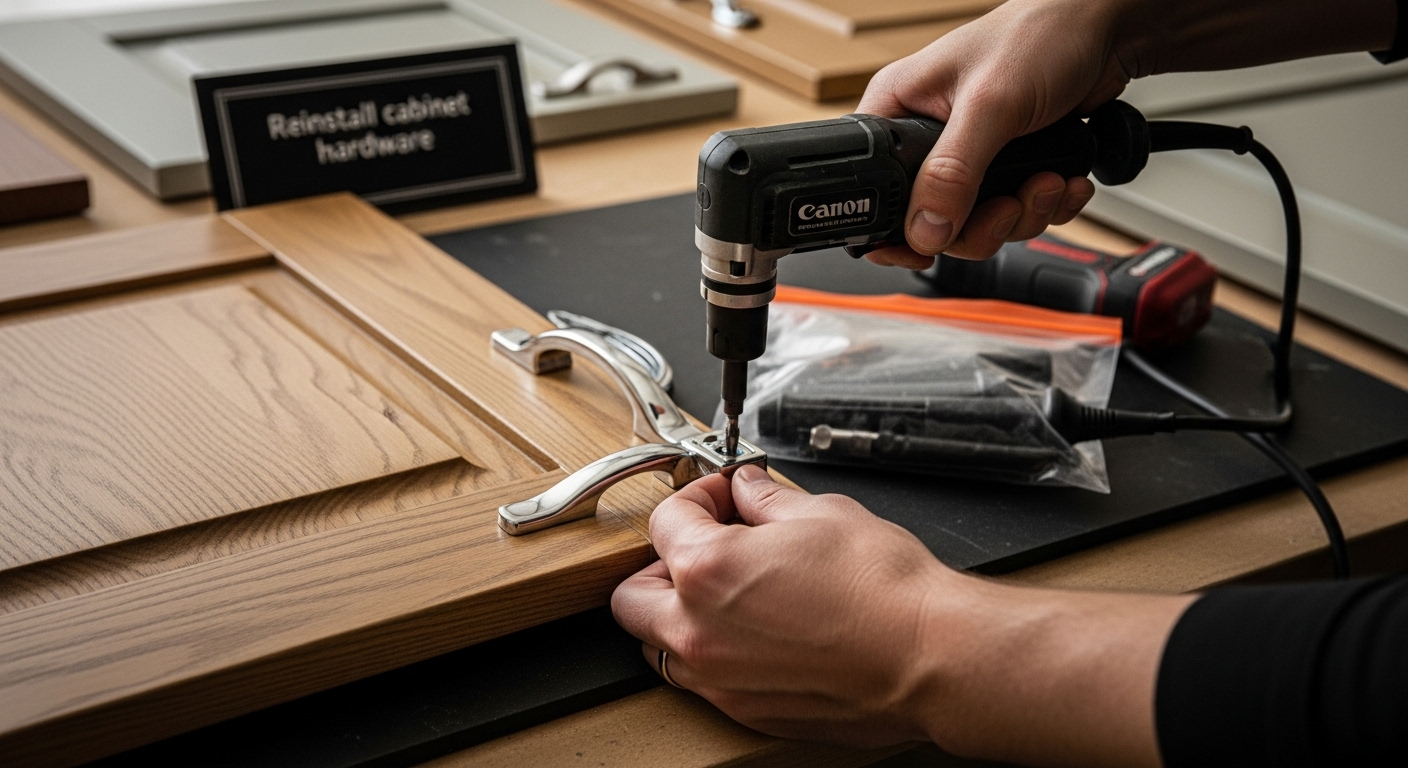
Step 6: Reinstall cabinet hardware and check final finish
Reinventing your kitchen’s aesthetic culminates in the meticulous process of reinstalling hardware and performing a final quality check. This final stage transforms your painted oak cabinets from a project in progress to a stunning kitchen upgrade. How to Remove Cabinet Doors: A Step-by-Step Guide offers complementary insights into handling cabinet components with care.
Systematic Hardware Reinstallation
Begin by carefully reviewing the labeled hardware bags you prepared during the initial disassembly. Clean each hardware piece thoroughly using a soft cloth and mild cleaner to remove any dust or painting residue. If the original hardware shows significant wear, consider this an opportunity to upgrade to new knobs or handles that complement your freshly painted cabinets. When reinstalling, use a powered screwdriver with adjustable torque to prevent overtightening and potential paint damage.
Approach the reinstallation methodically. Start with drawer fronts, ensuring each handle or knob is aligned precisely and tightened to a consistent tension. For cabinet doors, check the alignment carefully. Adjust the hinges if necessary to guarantee smooth opening and closing without rubbing against the freshly painted surface. Take your time during this process, as rushed work can compromise the professional finish you’ve carefully created.
Final Finish Inspection
Conduct a comprehensive visual and tactile inspection under bright, natural lighting. Run your hand gently across the painted surfaces, checking for any subtle imperfections like dust nibs, paint drips, or uneven areas. Look for consistent color coverage, smooth transitions between panels, and crisp edges. Pay special attention to corners, recessed areas, and around the hardware mounting points. Use a small artist’s brush for any minimal touch-ups required, blending the paint seamlessly with the existing surface.
A professional finish means more than just visual perfection. Test the durability by gently opening and closing cabinet doors, observing the paint’s resilience and the hardware’s smooth operation. Your meticulously painted oak cabinets should now reflect a transformation that not only updates your kitchen’s appearance but also showcases your attention to detail and craftsmanship.
Turn the Dream of a Modern Kitchen Into Reality With Ottawa Cabinet Painting
You have just learned the detailed steps needed to paint oak cabinets the right way. From gathering tools to precise surface prep and achieving that silky smooth finish, each phase demands time, accuracy, and specialized products. Many homeowners discover that doing it themselves often leads to uneven coating, lingering wood grain, or unexpected setbacks that disrupt family life for weeks. If you value lasting beauty, a hassle-free process, and a finish that feels truly high-end, why risk it?
Skip the worry of sanding dust, tricky primer choices, or time-consuming touch-ups. Let trusted local professionals deliver the kitchen transformation you want—flawless and durable. Visit Ottawa Cabinet Painting to see real results, read success stories, and request your free estimate today. The heart of your home deserves expert care. Take the first step toward a stunning kitchen now.
Frequently Asked Questions
How do I prepare oak cabinets for painting?
Start by removing all hardware, then clean the surfaces with a degreasing cleaner. Sand the cabinets lightly with medium-grit sandpaper to create a textured surface for better paint adhesion. Make sure to wipe away any dust with a tack cloth before proceeding.
What type of primer should I use for painting oak cabinets?
Choose a high-quality shellac-based primer specifically designed for wood surfaces. This type of primer effectively seals the wood, enhances paint adhesion, and prevents bleed-through of tannins from the oak.
How many coats of paint do I need for my oak cabinets?
Typically, two to three light coats of high-quality latex paint are recommended for a smooth, even finish. It’s important to allow adequate drying time between coats to ensure the best results.
What should I do if I see imperfections after painting?
Carefully inspect for any dust nibs, drips, or uneven areas. Use a small artist’s brush for touch-ups, blending the paint for a seamless finish. It’s important to address imperfections before reinstalling hardware or using the cabinets.
Recommended
Comments