Get Modern Kitchen Cabinet Doors in Ottawa in 10 Days

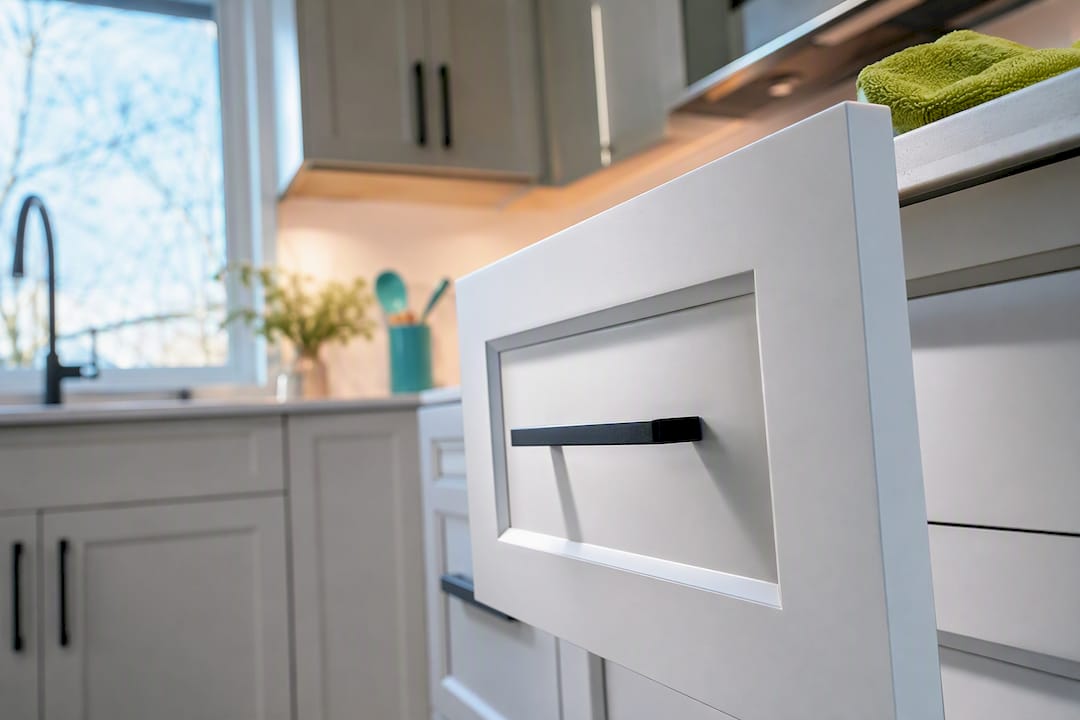
The fastest, most budget-friendly ways to modernize kitchen cabinet doors are painting, refacing, replacing, or small hardware upgrades. DIY paint jobs cost the least; professional cabinet painting in Ottawa typically runs $1,500 to $8,500, refacing sits in the mid-range, and full replacement costs the most. Painting or refacing only makes sense when your cabinet boxes are still structurally sound.
TL;DR:
Painting is cost-effective and practical if cabinet boxes are sound, with DIY options costing little more than supplies and professional jobs ranging from $1,500 to $8,500.
Replacing or refacing works best when cabinet boxes are damaged or you desire a different door style, with refacing being a mid-range option and full replacement needed for structural issues.
DIY repainting requires thorough degreasing, proper sanding, and suitable primer matching the substrate, with most projects taking a weekend or two and full cure taking up to two weeks.
Choosing the right hardware and style, such as matte black pulls or glass inserts, can modernize the look with minimal expense, while professional finishes deliver smoother, durable results.
Maintaining painted cabinets involves gentle cleaning, soft-close hardware, and quick touch-ups to preserve the finish over the years, while off-site spray finishing offers a flawless, factory-like look.
Table of Contents
Quick options: paint, reface, replace, or small upgrades
Not every kitchen needs a full teardown to feel new again. Here’s how the four main paths stack up:
Paint: Fast and affordable. Best when boxes are solid and you just want a new color or sheen. Decision rule: if the doors close flush and the wood underneath is sound, paint first.
Reface: Swaps door and drawer fronts and veneers while keeping the existing boxes, giving you a new door style without full demolition. Decision rule: choose refacing when you want a different door profile but the layout works fine.
Replace: Necessary when boxes are water damaged, warped, or you’re changing the kitchen layout. Decision rule: if a cabinet flexes, sags, or shows swollen particleboard, replacement is the safer long-term call.
Small upgrades: Hardware swaps, glass inserts, and open shelving deliver outsized visual impact for modest spending. Decision rule: use these when your cabinets already look decent but feel dated.
How do you repaint cabinet doors yourself?
Repainting is the DIY project most Ottawa homeowners can realistically finish over a weekend or two, provided you don’t rush the prep.
Tools and supplies checklist: degreaser, sandpaper in 120 and 220 grit, a bonding primer, your chosen paint (latex, alkyd, or lacquer), painter’s tape, drop cloths, foam rollers or a fine-finish sprayer, and wood filler for chips.
Number and photograph each door and drawer front before removal so reinstallation is painless.
Remove hardware and hinges, then label everything in labeled bags.
Degrease every surface, since kitchen grease is invisible and will wreck paint adhesion if skipped.
Sand or deglosss to give primer something to grip. Fill chips and dents, then sand smooth once dry.
Prime based on substrate: solid wood takes a standard bonding primer, MDF needs a primer that seals the porous edges, and laminate or thermofoil requires a specialized bonding primer made for slick surfaces.
Apply paint in thin, even coats, brushing and rolling for texture control or spraying for a smoother factory-style finish. Lightly sand between coats with fine grit.
Let each coat dry fully before the next. Most projects need two to three coats.
Reinstall only after full cure time has passed, checking hinge alignment and door swing before calling it done.
Pro Tip: Don’t rehang doors the moment they feel dry to the touch. Surface-dry paint can still be soft underneath, and hanging doors too early causes hinges to stick and paint to peel at the edges. Give it the full cure window before it goes back on the box.
What do cabinet materials and finishes cost by kitchen size?
Paint type matters as much as color. Latex and acrylic paints are the most forgiving and lowest-odor option for DIYers, but they’re softer than alkyd enamel, which cures to a harder, more washable shell ideal for high-touch cabinet doors. Spray lacquer delivers the smoothest, most factory-like finish but usually requires professional equipment.
Substrate changes everything about prep time. Solid wood sands and primes easily. MDF swells if it gets wet during degreasing, so a light touch matters. Laminate and thermofoil resist paint adhesion entirely without a bonding primer built for slick, non-porous surfaces, and previously painted doors often need extra prep that adds to the bill.
Kitchen size | Typical professional cost range |
Small (few doors) | Lower end of the range |
Medium (moderate number of doors) | Mid range |
Large (many doors, islands, built-ins) | Upper end of the range |
Professional cabinet painting in Canada runs $1,500 to $8,500, with most homeowners landing between $2,500 and $5,500. Labor drives most of that number. It typically accounts for roughly 60 to 75% of the total quote, so door count and prep complexity matter far more than which paint can you buy.
Which cabinet door styles and hardware look modern now?
A two-tone kitchen, neutral perimeter cabinets paired with a contrasting island in navy, forest green, or charcoal, remains one of the easiest ways to read modern without repainting every surface in the room.
Matte black, satin brass, and brushed nickel pulls read current; size pulls to roughly a third of the drawer’s width for proportion.
Glass inserts in upper cabinets break up solid door fronts and add depth.
Removing center rails for a cleaner slab look, or adding shaker trim to flat doors, changes the whole profile for relatively little cost.
When should you hire a professional instead of DIYing it?
Certain situations call for a professional finish rather than a weekend project.
The cabinet boxes show water damage, warping, or swelling, since painting only pays off when the boxes underneath are structurally sound.
You’re repainting an entire kitchen and want a spray-shop, brush-mark-free finish.
Your doors are laminate or thermofoil showing signs of delamination or peeling.
You want oak or another open-grain wood filled and leveled for a true factory look, which usually requires grain-fill primer.
A reputable local cabinet painter includes full prep, an off-site spray option, multiple finish coats, and a written warranty in their quote.
Ask any pro for a breakdown by door count and finish method, not just a flat number. Also ask about warranty length, total timeline, cure time before the kitchen is usable again, and whether grain-fill is needed for your wood species.
Getting those five answers before you sign anything is the single best way to compare bids apples to apples.
How long does a cabinet door makeover take?
Most professional cabinet repainting projects run 2 to 7 days on-site for removal, prep, and finish coats, with full cure taking another 7 to 14 days after reinstallation. Spraying usually happens off-site and can stretch the calendar slightly, while brush-and-roll work can sometimes finish faster since there’s no shop transport involved.
Doors and drawer fronts come off and get labeled.
Surfaces are degreased, sanded, and repaired.
Primer goes on, followed by two to three coats of paint or lacquer.
Doors cure, then get reinstalled with hardware and hinge adjustments.
To save money: remove and label the doors yourself before a pro arrives, paint only the island or upper cabinets instead of the whole kitchen, choose brush-and-roll over spray if a slightly more textured finish is acceptable, and always get multiple quotes broken down by door count.
Pro Tip: If your doors are heading off-site for spraying, set up a simple “kitchen station” with a mini fridge or folding table nearby. It sounds minor, but not having your countertops fully unusable makes the missing week far less disruptive on daily life.
What eco-friendly options exist for cabinet updates?
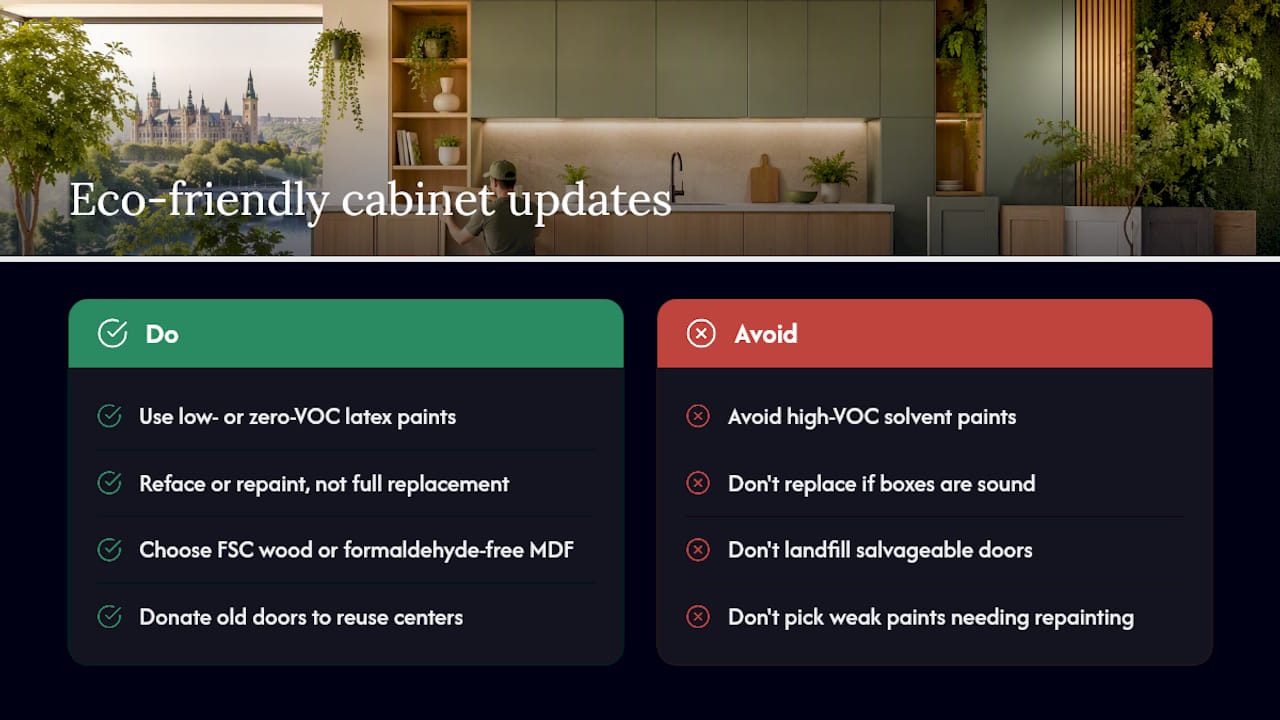
Modernizing cabinet doors doesn’t have to mean a heavy chemical footprint in your home. Low-VOC and zero-VOC latex paints have improved enough in recent years so that they perform close to traditional formulas while off-gassing far less into your kitchen air, which matters given how much time families spend in that room.
Refacing and painting are inherently greener choices than full replacement, since they keep the existing cabinet boxes out of the landfill and cut down on new lumber, particleboard, and shipping. If you’re leaning toward replacement because your boxes have failed structurally, ask suppliers about FSC-certified wood or formaldehyde-free MDF, both of which reduce the environmental load of new cabinetry without changing how the kitchen looks.
Water-based bonding primers have also closed much of the performance gap with older solvent-based formulas, meaning you no longer have to trade durability for lower emissions. If you’re removing old doors entirely rather than refinishing them, check whether a local habitat reuse store or building materials exchange will take them instead of sending them to a landfill. Solid wood doors in particular often get a second life in someone else’s renovation.
Small choices add up. Choosing a durable alkyd or hybrid enamel over a weaker paint means you won’t be repainting again in three years, which is itself a form of waste reduction. The most sustainable cabinet update is often the one that lasts the longest.
What mistakes ruin a cabinet door modernization project?
Skipping degreasing is the single most common failure point. Kitchen cabinets accumulate a thin film of cooking oil that’s invisible to the eye but deadly to paint adhesion; skip this step and you’ll see peeling within months, no matter how good the paint itself is.
Rushing cure time comes in a close second. Paint can feel dry to the touch within hours but remain soft underneath for days. Homeowners who rehang doors too early end up with hinge marks, stuck drawers, and dented finishes that require redoing the whole job.
Using the wrong primer for the substrate causes slow, frustrating failures. Standard wood primer doesn’t bond to laminate or thermofoil, so paint applied over it eventually chips off in sheets. Always match primer to the actual material underneath, not just the color you’re covering.
Underestimating oak’s open grain is another frequent misstep. Skipping grain-fill primer on oak doors leaves visible wood texture through even multiple coats of paint, which reads as an unfinished job rather than a modern one. Homeowners also frequently misjudge door count when budgeting, forgetting drawer fronts, end panels, and the inside of glass-front cabinets, all of which add labor.
Finally, choosing paint sheen without thinking through daily use trips up a lot of first-time DIYers. High-gloss shows every fingerprint and imperfection, while flat finishes stain and scuff easily near handles. A satin or semi-gloss enamel splits the difference for busy kitchens.
How do you measure cabinet doors for a custom replacement?
Ordering custom or semi-custom replacement doors starts with measuring the opening, not the old door itself, since doors are typically sized slightly larger than the opening to allow for overlay.
Measure width at three points, top, middle, and bottom, and use the smallest number if they differ even slightly, since cabinet boxes are rarely perfectly square after years of use. Do the same for height at three points along each side. Note whether your current setup uses full overlay, where doors nearly cover the entire face frame, partial overlay, which leaves visible frame between doors, or inset, where doors sit flush within the frame, since replacement doors must match your existing overlay style exactly or they won’t hang correctly.
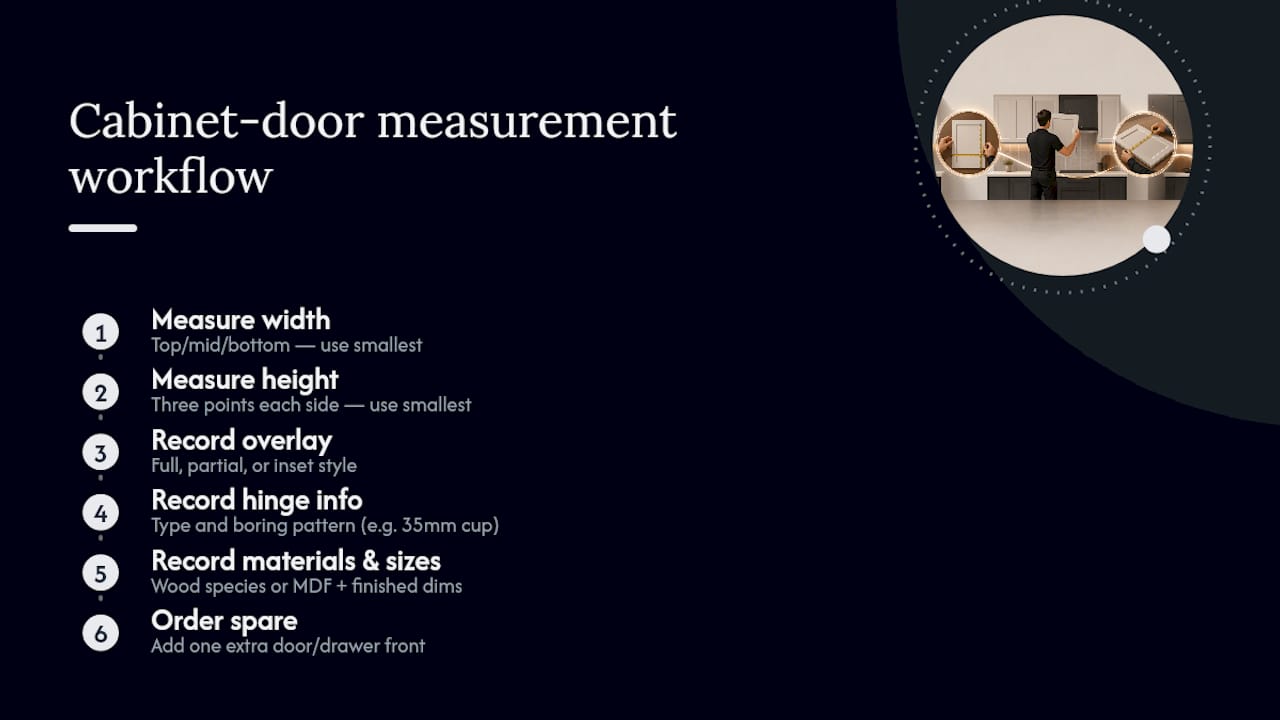
Record hinge type and hinge boring pattern too. Most modern cabinets use concealed European-style hinges with a standard 35mm cup hole, but older Ottawa homes sometimes have face-mount hinges that require a different door preparation entirely. If you’re ordering semi-custom doors from a supplier rather than a local shop, they’ll typically want your finished width and height, overlay type, hinge specifications, and wood species or MDF preference.
Order one extra door or drawer front beyond your count if your budget allows. Manufacturing defects and shipping damage happen, and having a spare on hand avoids a delayed reinstallation while you wait for a replacement of a replacement.
How do you keep painted cabinets looking new?
A freshly painted or refaced kitchen holds its finish for years when you treat it right from day one, but the wrong cleaning habits can undo months of prep work in a single season.
Wipe spills immediately, especially near the stove and sink, where grease and water exposure are highest. Use a soft cloth with mild dish soap diluted in warm water; avoid abrasive sponges, magic erasers, and anything with bleach, since these can dull sheen and wear through enamel over time.
Install soft-close hinges or door bumpers if your cabinets don’t already have them. Cabinet doors that slam repeatedly chip paint at the corners far faster than doors that close gently, and this is one of the most preventable causes of early touch-ups.
Avoid hanging damp dish towels directly on cabinet doors near the sink. Trapped moisture against painted MDF or wood can cause the finish to soften or bubble over time. Touch up small chips as soon as you notice them using leftover paint from the original job; a small dab now prevents a larger, more visible repair later.
A note from the field
Homeowners always ask the same thing before we start: how much mess, and for how long? Fair questions. Good prep means taping, covering countertops, and treating your kitchen with the same care we’d want in our own homes. A kitchen is where people gather, cook, and argue about whose turn it is to load the dishwasher, and getting it right matters.
— Ottawa
Ready to modernize your Ottawa kitchen cabinets?
Painting your own cabinets over a weekend works if you have the time and patience for careful prep. If you’d rather skip the sanding dust and hand off the job to people who do it daily, Professional local cabinet painting services handle the entire process, from full degreasing and sanding through primer selection matched to your cabinet material, multi-coat finishing, and reinstallation, typically wrapped up in about ten days with minimal disruption to your kitchen routine. Many reputable providers back their work with multi-year warranties to ensure durability.
Browse real before-and-after transformations from kitchens like yours, or head straight to the free quote request page to get a door-count breakdown for your specific kitchen. There’s no obligation, just a clear number to compare against any DIY budget you’ve already sketched out.
Sources
FAQ
Are painted cabinet doors durable long term?
Yes, when properly primed and finished with a durable enamel, painted cabinet doors can last many years, though high-touch areas near handles benefit from periodic touch-ups.
Can you paint laminate or thermofoil cabinet doors?
Yes, but only with a bonding primer designed for slick, non-porous surfaces; standard wood primer will not adhere and the paint will eventually peel.
Is spray finishing worth the extra cost?
Spray application typically adds $500 to $1,500 over brush-and-roll but delivers a smoother, brush-mark-free finish that closely resembles factory cabinetry.
How much does professional cabinet painting cost in Ottawa?
Professional cabinet painting in Canada generally ranges from $1,500 to $8,500, with most homeowners paying between $2,500 and $5,500 depending on door count and finish method. Professional cabinet painting services typically provide a door-count breakdown with quotes to help customers understand cost components.
Should I paint, reface, or replace my cabinet doors?
Paint or reface when your cabinet boxes are structurally sound and you just want a new look; replace only if boxes are water damaged, warped, or you’re changing the kitchen layout entirely.
Recommended

Comments