Ottawa Kitchen Pantry Storage Ideas That Actually Work

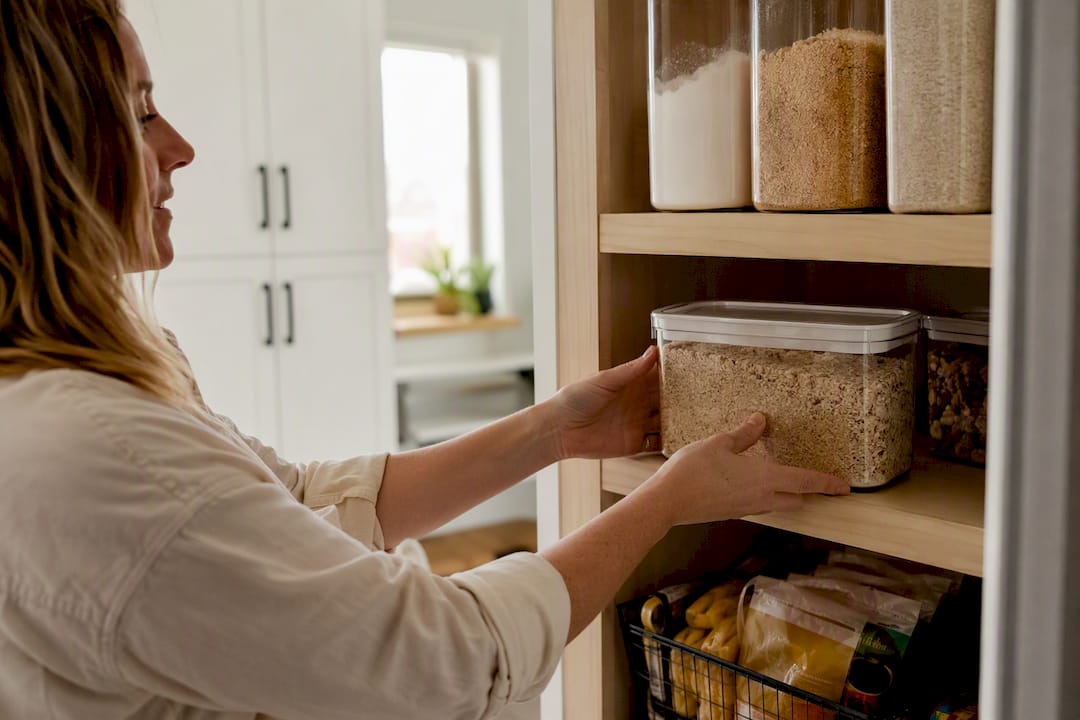
The three fastest wins for any pantry are decluttering, zoning your daily items into the waist to eye level range, and swapping bags and boxes for clear, labeled bins. That’s it. That’s the whole first move, and you can finish it in an afternoon.
Expect to spend 2 to 4 hours and $20 to $100 on a basic reset, depending on how many containers you need and whether you already own a step stool. A 4 to 8 hour, $200 to $600 reach-in overhaul comes later, once you know what your pantry actually needs.
Two simple things to try tonight:
Put a lazy Susan under your cooking oils and vinegars so nothing hides in a back corner.
Decant crackers, chips, and snack bags into clear bins so kids (and you) can easily see what’s left before buying more.
Quick math: A $12 turntable and three $8 clear bins gets you a functionally reorganized pantry zone for under $40, in less time than it takes to watch a movie.
TL;DR:
Keeping the prime pantry zone at waist to eye level is essential for maximizing daily accessibility and reducing duplicate purchases.
Using clear turntables, stackable bins, and tiered shelves improves visibility and organization, especially for frequently used and canned items.
Measure shelves and door clearance carefully before buying containers or installing pull-out baskets to avoid wasted space and unnecessary expense.
Focus on zoning by food category rather than container type to efficiently store baking, canned goods, snacks, and perishables.
Lighting upgrades like motion-sensor LED strips enhance visibility and maintenance, preventing clutter from hiding behind poorly lit shelves.
Table of Contents
Kitchen Pantry Storage Ideas Grouped By How You Actually Cook
Random pantry products don’t fix a messy pantry. Matching the right tool to the right problem does. Here’s how Ottawa homeowners we talk to tend to organize their thinking, grouped by use case rather than by aisle.
For everyday visibility, the goal is making sure nothing gets lost behind something else.
Clear turntables (lazy Susans). Best for oils, spices, and condiments you reach for constantly. Buy one for $10 to $25 at IKEA, or repurpose a cheap cake stand. Anything you’d otherwise dig for goes here.
Stackable clear bins. Perfect for snacks, baking mixes, or anything that arrives in a floppy bag. A basic set runs $20 to $50; dollar-store versions work fine for lighter items.
Tiered shelf organizers. Great for canned goods so you’re not stacking cans three deep and forgetting the ones in the back. Expect $15 to $35 per unit.
For bulk and heavy items, weight and reach matter more than looks.
Floor-level bins with lids. Bulk rice, flour, and pet food belong on the floor or lowest shelf, never above eye level, both for safety and so you’re not straining to lift a 20 pound bag. Budget $25 to $60 for a sturdy set.
Rolling carts. If your pantry is landlocked (renters, take note), a slim rolling cart from a big box store ($30 to $80) absorbs overflow without any installation.
For kid-friendly zones, lower shelves should hold what kids are allowed to grab without asking.
Low, open bins at knee height. Snacks, juice boxes, and lunch supplies go here so kids can self-serve, which, honestly, saves you a hundred small interruptions a week.
For small appliances and a prep station, cabinets and pantry shelves need to share the load.
Appliance shelves or pull-out trays. A dedicated shelf for the blender or slow cooker keeps counters clear. DIY with an $8 wire shelf riser, or buy a purpose-built pull-out tray for $40 to $90.
For spices and condiments, vertical space is almost always wasted.
Door-mounted spice racks. These reclaim dead space behind the pantry door for $15 to $45 and often free up an entire shelf.
If you’re weighing whether to also refresh the cabinetry around your pantry while you’re at it, our guide on kitchen pantry solutions compares painting versus replacing.
How To Measure And Zone Your Pantry Before You Buy Anything
Buying containers before you measure is the single most common (and most expensive) mistake we see. Measure first. Buy second.
The zoning logic professional organizers use breaks a pantry into roughly seven functional zones: daily essentials, backup stock, bakeware, small appliances, bulk goods, snacks, and rarely-used items. The one zone that matters most is the prime real estate band at waist to eye level for most adults. Consumer Reports recommends reserving that band exclusively for what you use daily, both because it reduces duplicate purchases (you can actually see what you already own) and because it keeps heavier bulk items down near knee height, away from shoulders and eyes where a fall risk turns into an actual accident.
Before you buy a single bin, run this checklist:
Measure door swing clearance. A door that opens into a narrow galley kitchen limits how deep your storage can be.
Measure shelf depth at each level. Shelves deeper than 16 inches usually need pull-outs or risers; anything shallower can often stay as-is.
Note ceiling height at the top shelf. If you need a step stool for it, that’s your rarely-used zone, not your snack zone.
Shelves in the 12 to 16 inch depth range work well for canned goods and boxed items without pull-outs. Anything deeper benefits from a pull-out basket, which typically adds $30 to $70 per shelf but eliminates the “lost in the back” problem entirely. A full reach-in reset runs $200 to $600 in materials and 4 to 8 hours of labor; walk-in systems with built-in shelving run $700 to $1,200 installed.
Which Storage Pieces Help Most, And Easy Weekend DIY Installs
Not every container earns its shelf space. A small set of 6 to 10 large containers and 8 to 12 small ones covers most households, according to Homestorage, and that’s worth repeating because the instinct to buy two dozen mismatched jars is exactly how pantries get cluttered again within a month.
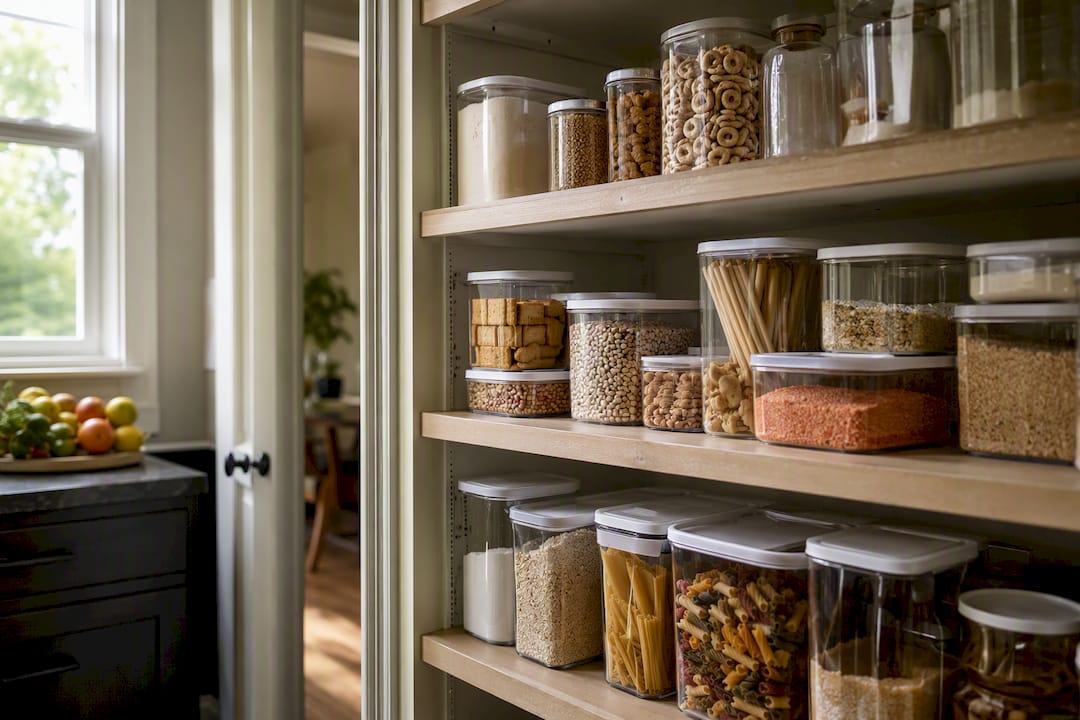
Material matters more than most people expect. Airtight glass containers beat open bags for flour, sugar, and grains, and in humid Ontario summers, that airtight seal can add two to three months of usable shelf life to dry goods compared to a clipped-shut bag. Plastic bins are lighter and cheaper but can absorb odors over time, so reserve them for packaged items rather than anything with a strong smell, like coffee or spices.
For deep or awkward reach-in pantries, pull-out baskets consistently outperform fixed shelves for accessibility. If you’re retrofitting an existing reach-in, here are three installs you can knock out in a weekend:
Shelf risers (30 minutes, $15 to $30): Set a wire or acrylic riser on any shelf holding cans or jars to instantly double usable surface area without touching a screwdriver.
Lazy Susan placement (5 minutes, $10 to $25): Position it on the shelf closest to eye level, load your most-used oils and sauces, and stop digging.
Over-door rack install (45 minutes, $20 to $50): Most hook onto standard door thickness with no drilling; check the weight rating before loading canned goods.
Pro Tip: Measure your deepest shelf before buying pull-out baskets. A basket that’s too shallow just becomes another thing cluttering the shelf instead of fixing it.
Cheap Pantry Hacks That Don’t Require A Renovation Budget
You don’t need a full pantry system to see a real difference. The smartest spending order, according to HomeStorage.com, is labels and clear bins first, then risers and turntables, then pull-outs only if the budget stretches that far. Each tier delivers visible results before you move to the next.
A few repurposing tricks cost almost nothing:
Mason jars for flour, sugar, pasta, and rice. Free if you already have them; $1 to $3 each new.
Shower caddies hung on the pantry door hold snack bags or juice pouches for kids. $8 to $15.
Tension rods installed low in a cabinet corral foil, plastic wrap, and cutting boards vertically instead of letting them slide into a pile. $5 to $12 for a set.
Dollar-store bins work fine for anything that doesn’t need an airtight seal, think napkins, snack bars, or paper goods.
Secondhand shops and marketplace listings are worth a scan too. A used wire shelving unit or cart often costs a third of retail, and pantry hardware rarely wears out.
Lighting And Upkeep: Keep It Organized After The Weekend
An organized pantry you can’t see into is only half-solved. Good Housekeeping calls hands-free lighting close to essential, and motion-sensor LED strips solve the classic “what’s hiding on the back shelf” problem for $15 to $30, with no wiring required since most run on batteries or stick-on adhesive.
Maintenance is where most pantries quietly slide back into chaos. Build a simple cadence:
Weekly: A 5-minute scan to push older items forward (first in, first out) and toss anything obviously stale.
Twice a year: A full purge and inventory check, matching the purge-measure-contain workflow organizers recommend.
As needed: Refresh labels that fade or peel, especially on anything stored near heat or moisture.
For humidity and pests, keep dry goods sealed rather than in their original packaging, and wipe shelves down during your biannual purge to catch spills before they attract anything unwanted.
When To Hire A Pro (And Why Ottawa Homeowners Choose Cabinet Refinishing)
Bins and lighting fix organization. They don’t fix cabinets that are chipped, dated, or the wrong color for the kitchen you actually want. That’s a different project, and it’s where Ottawacabinetpainting comes in for homeowners ready to go beyond the pantry shelf itself.
Our process centers on meticulous prep work, which is the difference between a paint job that peels in a year and one that holds up for a decade.
Most cabinet refinishing projects run on a roughly 10-day timeline, built to minimize the chaos a full renovation creates.
Every completed project carries a 6-year warranty, which matters if you’re weighing a quick DIY paint job against a professional finish.
Lighter, refreshed cabinet interiors also make pantry contents easier to see, pairing naturally with the visibility upgrades covered above.
If your pantry cabinets are the actual bottleneck rather than the shelving inside them, our cabinet painting and refinishing services are worth a look before you commit to a full replacement.
Tips For Organizing Your Pantry By Food Category
Grouping by category, not by container type, is what actually makes a pantry usable under time pressure, like on a Tuesday night when dinner needs to happen fast.
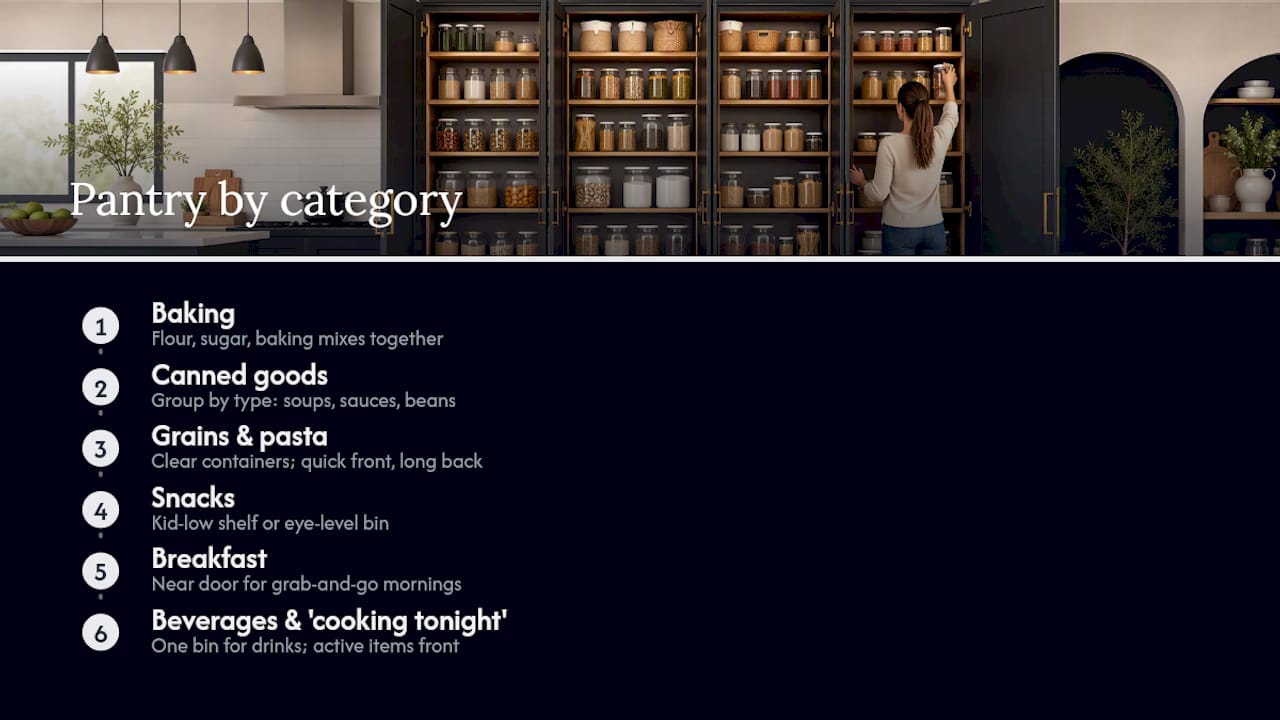
Start with baking: flour, sugar, baking soda, and mixes belong together, ideally on one shelf, since most baking recipes pull from the same handful of ingredients. Canned and jarred goods get their own zone, arranged by type (soups, sauces, beans) rather than dumped together, so you’re not moving six cans to find the diced tomatoes.
Grains and pasta work well in uniform clear containers grouped by cooking time; quick-cooking items like couscous near the front, longer-cooking grains like farro further back. Snacks deserve a kid-accessible, low shelf if you have children, or an eye-level bin if you don’t. Breakfast items like cereal and oatmeal cluster near the door for grab-and-go mornings.
Beverages and drink mixes often get forgotten and end up scattered across two or three shelves. Give them one dedicated spot, even if it’s just a single bin. Finally, keep a small “cooking tonight” zone near the front for whatever you’re actively working through, a partial bag of rice, an open box of pasta, so it doesn’t get buried behind full, unopened stock.
Handling Bulk Goods, Spices, And Perishables
Bulk goods, spices, and perishables each fail differently if you store them wrong, so each needs its own approach.
Bulk goods (rice, flour, pet food, oats bought in large bags) should live in airtight containers on the floor or lowest shelf. Beyond the two to three months of extra shelf life that airtight glass or heavy plastic offers in humid conditions, floor-level placement keeps the heaviest items away from shoulder height, reducing strain and the risk of a container slipping off a high shelf.

Spices lose potency fast when exposed to heat and light, so avoid storing them on a shelf above the stove no matter how convenient that feels. A door-mounted rack or a drawer insert near, but not directly above, the cooktop keeps them both visible and protected. Label with purchase dates; ground spices lose their punch within about a year.
Perishables that don’t need refrigeration, potatoes, onions, garlic, some fruit, do best in ventilated bins rather than sealed containers, which trap moisture and speed up spoilage. Keep onions and potatoes separate; stored together, they make each other go bad faster.
Maximizing A Small Pantry With Creative Storage
A small pantry isn’t a lost cause. It just needs every inch working harder than a big one does.
Vertical space is the first place to look. If your pantry has one tall, mostly empty gap above a shelf, an adjustable riser or a slim stackable bin turns dead air into usable storage. Door space is the second most overlooked resource. A door-mounted rack can hold an entire category, spices, snack packets, foil and wrap, that would otherwise eat into shelf real estate.
For pantries too small to fit a full shelving unit, look just outside the door. A slim rolling cart parked in an adjacent cabinet or nook absorbs overflow without permanent installation, which also makes it a strong option for renters who can’t modify built-ins. If you’re weighing bigger structural changes to a cramped kitchen layout, our broader guide on maximizing kitchen storage covers strategies beyond the pantry itself, and One Day Doors & Closets offers modular organization systems worth comparing if you’re considering a more built-in, closet-style conversion.
The last trick costs nothing: measure twice before buying anything. A bin that’s a half inch too wide for a small pantry shelf is worse than no bin at all.
What Actually Moves The Needle In A Pantry Project
Most pantry advice online treats every tip as equally important, and that’s where it misleads people. It isn’t. Zoning the 48 to 60 inch band and decanting into clear containers do more for daily function than any amount of dollar-store shopping, and they cost almost nothing beyond a Saturday afternoon.
Where conventional advice falls short is the assumption that more containers equal more organization. They don’t. A pantry with 30 mismatched bins is often harder to navigate than one with 10 well-chosen ones, because nothing has a consistent home. Buy fewer containers, but buy the right sizes for what you actually store.
The other gap: people fix the shelves and ignore the cabinets around them. If your pantry doors are chipped, mismatched, or just tired-looking, no amount of turntables changes how the kitchen feels when you walk in. That’s a separate project, and it’s worth treating it as one instead of layering more bins onto a space that needs a real refresh.
Start with the free fixes. Measure before buying. Then decide if the cabinets themselves deserve their own project.
— Ottawa
Key Takeaways
A well-organized pantry depends on zoning items by frequency of use, decanting into airtight containers, and matching storage tools to shelf depth rather than buying more products.
Point | Details |
Zone the prime band | Keep daily items in the 48 to 60 inch range; store bulk goods below knee height for safety. |
Start with a quick reset | A basic declutter and bin swap takes 2 to 4 hours and costs $20 to $100. |
Buy fewer, better containers | A set of 6 to 10 large and 8 to 12 small containers covers most pantries without overbuying. |
Match tools to shelf depth | Shelves deeper than 16 inches benefit most from pull-out baskets or risers. |
Add lighting before more bins | Motion-sensor LED strips fix visibility problems that no amount of extra storage solves. |
Sources
Recommended
Comments