Ottawa Kitchen Pantry Solutions: Paint or Replace Cabinets?

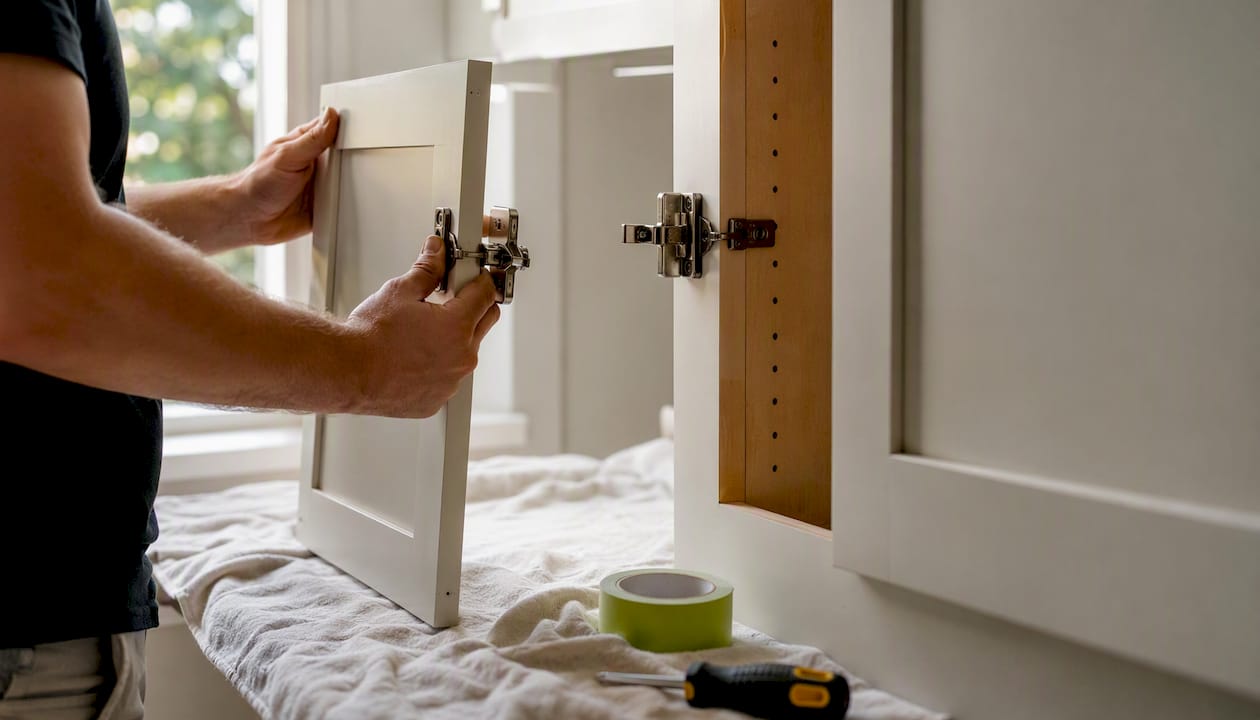
If your pantry cabinet boxes are structurally sound, repainting or refinishing them is the smartest kitchen pantry solution available, delivering the biggest visual change for the smallest budget. Ottawa homeowners typically pay between $1,500 and $8,500 for professional cabinet painting, with a thorough job running about ten days from start to finish. Compare that to a full pantry replacement, which often means weeks of disruption and a much bigger check.
Ottawa Cabinet Painting handles this exact job daily, and the products that make it work are well established: primers like Fresh Start prep bare wood and laminate for solid adhesion, while cabinet-grade finishes like Benjamin Moore Advance turn tired pantry doors into something that looks factory-built. The math only works, though, if your cabinet boxes are still sound. Before you commit to paint, watch for these red flags that point toward replacement instead:
Water damage or staining along the base or around the sink wall
Delamination where the laminate or veneer is peeling away from the substrate
Warped, swollen, or soft cabinet boxes that no longer sit square
Doors and drawers that won’t close flat even after adjustment
Key Takeaways
Painting or refinishing structurally sound pantry cabinets delivers the best visual return per dollar, provided prep, primer, and cure times are never rushed.
Point | Details |
Run the condition check first | Confirm doors close flat and boxes show no water damage or delamination before committing to paint. |
Match primer to substrate | Use bonding primer like KILZ 3 on laminate or thermofoil, and Fresh Start for major color changes on wood. |
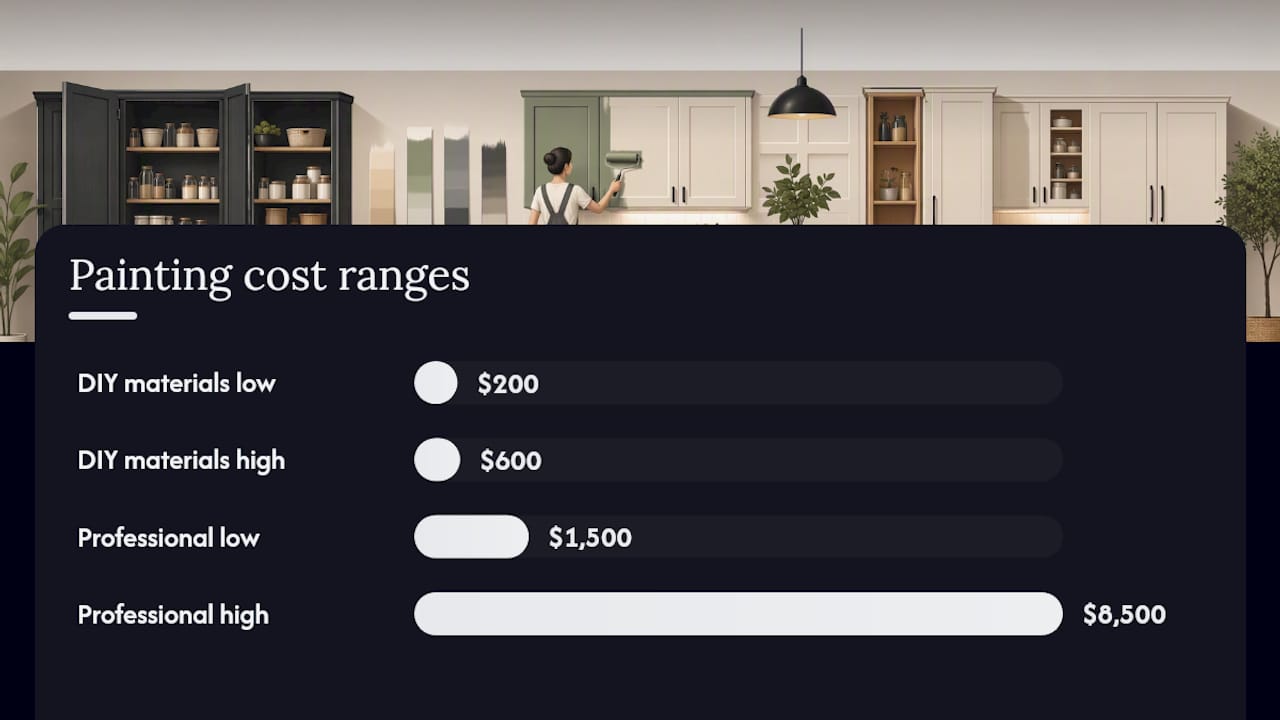
Budget realistically | Expect $200 to $600 for DIY materials or $1,500 to $8,500 for a professional job. |
Respect cure times | Wait at least 24 hours before rehanging doors and 5 to 7 days before heavy daily use. |
Call a pro for warranty and speed | Ottawa Cabinet Painting completes thorough projects efficiently and offers a multi-year warranty. |
Table of Contents
How Do You Decide Between Painting and Replacing Pantry Cabinets?
What Is the Step-by-Step Process for Refinishing Pantry Cabinets?
Is It Better to DIY or Hire a Pro for Pantry Cabinets in Ottawa?
How Much Does Pantry Cabinet Painting Cost and How Long Does It Take?
What Does an Ottawa Pantry Refinishing Project Actually Look Like?
How Do You Decide Between Painting and Replacing Pantry Cabinets?
Run a five-minute inspection before you call anyone. Open every pantry door and drawer and check whether they sit flush and close without catching. Press on the panels near the floor and under the sink cutout, since soft or spongy wood there signals water damage that paint won’t fix. Look along the seams of laminate or thermofoil doors for lifting edges, a telltale sign of delamination that will only get worse under a paint job.
The material you’re working with changes the approach:
Solid wood takes paint reliably and holds up to sanding and multiple coats without much fuss.
MDF paints well too, but cut edges soak up primer differently than the flat faces, so they need extra attention to avoid a blotchy finish.
Laminate and thermofoil are the trickiest surfaces because standard paint won’t bond to them at all without a bonding primer formulated for slick, nonporous materials.
Pro Tip: The single most common reason a pantry paint job fails within months isn’t bad paint, it’s skipping bonding primer on laminate or thermofoil doors. That step feels optional until the finish starts peeling off in sheets six weeks later.
Painting gives you a full color change and a refreshed look while keeping your existing layout intact. Replacing solves structural problems and lets you redesign the footprint, but it costs significantly more and takes your kitchen out of commission far longer.
What Do You Need to Prep Pantry Cabinets Before Painting?
Skipping prep is the fastest way to waste a weekend and a can of paint. Start with the physical setup:
Remove every door, drawer front, and piece of hardware, and label each one with painter’s tape so reassembly doesn’t turn into a puzzle
Set up a ventilated workspace, ideally a garage or a room with open windows and a fan running
Lay drop cloths over countertops, floors, and appliances before you open a single can
On the supply side, you’ll want 100 to 150 grit sandpaper for the initial scuff, 220 grit for sanding between coats, a strong degreaser to cut through cooking grease, and a bonding primer if you’re working with laminate or thermofoil. Cabinet-grade paint, quality brushes or mini rollers, and a sprayer if you want a smoother finish round out the list. Add a respirator rated for solvent fumes if you’re spraying or using a chemical stripper.
Statistic Callout: Labor, not paint or primer, is what drives most professional quotes. HomeStars reports that labor accounts for roughly 60 to 75 percent of a typical pro invoice, which is exactly why DIY prep work saves real money if you’re willing to put in the hours yourself.
Pro Tip: Good ventilation isn’t just about comfort. Poor airflow slows drying time, traps fumes near your work surface, and can leave dust settling back into wet paint before it skins over.
What Is the Step-by-Step Process for Refinishing Pantry Cabinets?
A properly refinished pantry follows the same sequence whether you’re doing it yourself or watching a professional crew work through it.
Label and remove every door, drawer, and piece of hardware, keeping screws bagged and tagged to their original spot.
Clean and degrease every surface thoroughly. Cooking oil residue is invisible but will wreck adhesion if left behind.
Sand or strip the surface. A medium scuff sand at 100 to 150 grit is usually enough; heavily glossed or damaged finishes may need stripping first.
Repair chips, dents, and edge damage with wood filler, then sand those spots smooth once dry.
Prime according to substrate. Use Fresh Start primer for major color changes on wood, or a bonding primer like KILZ 3 for laminate and thermofoil surfaces.
Sand between coats at 220 grit to knock down any texture before the next layer goes on.
Apply two or more thin topcoats of a cabinet-grade paint. Benjamin Moore Advance and Sherwin-Williams Emerald Urethane are both built for the wear a pantry door takes daily.
Cure before reinstalling. Benjamin Moore recommends 24 to 72 hours before handling doors, and a full 5 to 7 days before they see heavy daily use.
Spraying gets you the smoothest, most factory-like finish because it eliminates brush marks entirely, which is why professionals often move doors off-site to a spray booth. Brush and roller work costs less and is entirely doable at home, but it demands patience: roll the flat panels, brush the details and edges, and always work in the direction of the grain to hide any texture.
Statistic Callout: Sherwin-Williams recommends testing primer adhesion on an inconspicuous spot before committing to the whole project, a five-minute test that can save you from repainting the entire pantry two months later.
Pro Tip: Rehang doors too early and you risk them sticking shut or leaving paint transfer marks on the frame. Give the full cure window before you reinstall, even if the paint feels dry to the touch.
Should You Refinish or Replace Pantry Hardware?
New hardware finishes off a repainted pantry, but you don’t always need to buy new. Refinishing old knobs and pulls is a fast, low-cost project: wash them in warm soapy water, scuff the surface lightly, prime, and spray with a metal-rated finish. Most hardware paint sets up within an hour and cures fully within a day.
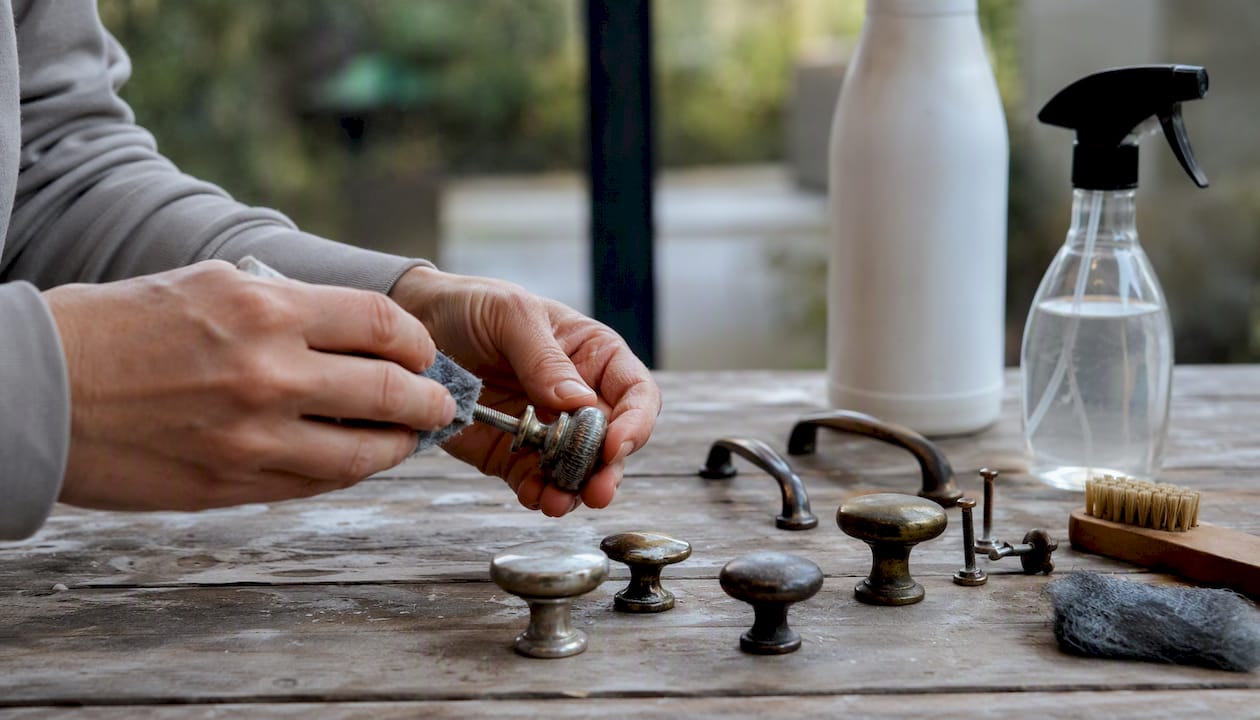
Before you shop for replacements, measure the backset (the distance from the edge of the door to the center of the screw hole) and the center-to-center spacing on any handles, so new hardware lines up with existing holes and you avoid drilling new ones.
Replace hardware outright when styles are mismatched across the pantry, when screw threads are stripped, or when you want to upgrade to soft-close hinges. Whichever route you choose, match the hardware finish to your new cabinet sheen. Brushed nickel and matte black both read well against a satin or semi-gloss painted finish, while high-shine hardware can look out of place against a flatter paint sheen.
Pro Tip: If your pantry pulls are original to the house, check for solid brass underneath tarnish before tossing them. A quick strip and repaint can turn a dated pull into a feature piece.
Is It Better to DIY or Hire a Pro for Pantry Cabinets in Ottawa?
The right answer depends on how much your time is worth and how much disruption your household can tolerate.
Factor | DIY | Professional |
Cost | $200 to $600 in materials | $1,500 to $8,500 depending on door count and method |
Timeline / disruption | Spread over multiple weekends; kitchen usable between sessions | About 10 days for a thorough job, often with off-site spraying |
Durability / finish quality | Good if prep is careful; brush marks possible | Spray-applied, factory-like finish with fewer visible flaws |
Warranty / guarantee | None | Ottawa Cabinet Painting backs its work with a 6-year warranty |
Skill / tool requirements | Sanding, priming, and painting skills, plus ventilation setup | Crew handles prep, spraying, and reassembly |
DIY makes sense if you’re comfortable with sanding and painting and don’t mind your pantry being partially disassembled for a couple of weeks. Hiring a professional makes more sense when you want a spray-applied finish, a warranty backing the work, and minimal interruption to your daily kitchen routine. If your pantry also needs structural repairs, a professional assessment before you start painting can save you from discovering a bigger problem halfway through the job. For a closer look at where the two paths diverge, see this comparison of DIY versus professional cabinet painting.
How Do You Fix Peeling Paint or Sticky Pantry Doors?
Most cabinet paint problems trace back to a shortcut somewhere in the prep stage.
Peeling or poor adhesion: Usually means the primer wasn’t matched to the substrate, or the surface wasn’t degreased before painting. Strip back to bare material and start over with the correct bonding primer.
Sticky or slow-to-open doors: Often means the paint hadn’t fully cured before reinstallation. Remove the door, let it cure longer in a ventilated space, and lightly sand any tacky spots.
Visible brush marks: Sand lightly with 220 grit and apply another thin coat, ideally rolled rather than brushed, or switch to a sprayer for the final layer.
Paint won’t stick to a glossy old finish: The surface wasn’t deglossed. Scuff sand thoroughly before any new primer goes on.
If you’re seeing warping, soft spots, or repeated adhesion failures even after correcting your process, that’s often a sign the cabinet box itself has deeper damage that painting can’t solve. That’s the point to call in a professional for an honest assessment rather than repainting the same spot a third time. Ottawa homeowners dealing with early paint failure can find more detail in this breakdown of common DIY cabinet painting risks.
How Much Does Pantry Cabinet Painting Cost and How Long Does It Take?
Budget and schedule both hinge on the same variables: how many doors you’re painting, what condition they’re in, and whether you’re spraying or brushing.
Timeline:
DIY door removal, prep, and painting typically spreads across two to three weekends
A professional project usually runs about 10 days when done thoroughly, including off-site spraying
Minimum 24 hours before rehanging doors; 5 to 7 days before subjecting them to heavy daily use
Cost:
DIY materials-only projects run $200 to $600
Professional quotes range from $1,500 to $8,500 depending on door count and finish method
Bonding primer for laminate or thermofoil adds a modest incremental cost
Spray application through a shop typically costs more than brush-and-roll but delivers a smoother result
Statistic Callout: Door and drawer count is the single biggest driver of your quote, followed closely by whether surface repairs are needed and whether your cabinets are laminate, which requires that extra bonding primer step.
If you’re trying to save money, do the door and hardware removal yourself before a pro takes over, or limit the project to your uppers or a single wall of pantry cabinets rather than the whole kitchen. Don’t skip the degreasing step to save time, no matter how tempting it feels.
How Should You Organize a Pantry for Better Storage?
A repainted pantry is the perfect moment to rethink what’s inside it, since the doors are already off and everything is out on the counter. Small pantries benefit most from vertical thinking: adding a second shelf tier in tall, underused gaps can double usable storage without touching the walls. Kitchens with a narrow reach-in pantry do better with door-mounted storage for spices and small jars, freeing the shelves for bulkier items.
Larger kitchens with walk-in pantries have more flexibility to zone by category, grouping baking supplies, canned goods, and snacks into distinct sections so nothing gets lost behind taller boxes. Whatever the size, keeping your most-used items at eye level and reserving the top and bottom shelves for occasional-use items makes daily cooking noticeably smoother.
What Types of Pantry Storage Solutions Work Best?
Once your cabinets are refinished, upgrading the internal hardware is often the next logical step. Pull-out shelves bring items stored at the back within easy reach, which matters most in deep pantry cabinets where things get lost behind taller containers. Lazy Susans solve the same problem in corner cabinets, spinning contents into view instead of forcing you to dig blindly.
Adjustable shelving is the most flexible option of the three, since it lets you reconfigure the space as your storage needs change, whether that means taller gaps for bulk items one season or shorter shelves for canned goods the next. Many homeowners combine two or three of these solutions within a single pantry, using pull-outs for the lower cabinets and adjustable shelving up top.
What Materials Work Best for a Pantry Renovation?
Solid wood cabinet doors hold paint the longest and can be refinished multiple times over their lifespan, but they cost more upfront and are heavier to work with. MDF offers a smooth, consistent painting surface at a lower price point, though the cut edges need careful sealing to prevent moisture absorption over time.
Laminate and thermofoil are the most budget-friendly materials and resist moisture well, but as covered earlier, they require a bonding primer without exception, and even then the finish won’t hold up quite as long under heavy daily wear as painted solid wood. For pantry shelving itself, melamine-coated particleboard is common and reasonably durable, while solid wood shelving costs more but tolerates heavier loads without sagging over time.
How Do You Maximize Pantry Space and Accessibility?
Efficiency in a small pantry comes down to using every inch of vertical space and keeping frequently used items accessible without a step stool. Clear containers let you see what’s running low at a glance, cutting down on duplicate grocery purchases. Labeling shelves, even loosely by category, helps everyone in the household put things back where they belong instead of creating clutter.
If your pantry door swings into a tight kitchen walkway, a different door style can reclaim floor space entirely. Partners like One Day Doors & Closets cover how door selection affects both access and workflow in small kitchens, which is worth a look if your current door is part of the problem.
How Do You Maintain a Painted Pantry Cabinet?
A properly cured cabinet-grade finish is genuinely durable, but a few habits keep it looking fresh for years. Wipe spills immediately rather than letting them sit, since standing liquid can dull even a high-quality topcoat over time. Clean with a soft cloth and mild soap and water, avoiding abrasive scrubbers or harsh degreasers that can strip the sheen.
Skip ammonia-based cleaners on painted cabinetry, since they can break down the finish faster than expected. Touch up small chips as soon as you notice them with a matching sample of your original paint, since a small unaddressed chip tends to spread once moisture gets underneath the edge.
What Does an Ottawa Pantry Refinishing Project Actually Look Like?
A typical pantry job here starts the same way every time: doors and drawers come off, hardware gets bagged, and everything heads to a controlled space for spraying while the boxes stay in place at the house. That off-site step matters more in Ottawa than people expect, because our humidity swings hard between seasons, and a controlled spray environment keeps the cure consistent no matter what the weather outside is doing.
Winter jobs need extra planning around ventilation and drying time, since cold air slows cure rates and homeowners understandably don’t want windows open in January. A thorough project runs about ten days start to finish, and every job carries a 6-year warranty, because a paint job that starts failing after eighteen months isn’t a shortcut, it’s a problem deferred. If you’re weighing whether your own pantry qualifies for a repaint or needs something more involved, an in-person look at the boxes tells you more in five minutes than any checklist can. We’re always glad to walk through before-and-after examples from other Ottawa kitchens so you can see what the finish actually looks like once it’s cured and back on the hinges.
Get a Guaranteed, Low-Disruption Pantry Refresh
If you’ve read this far, you already know that painting well takes more prep than most people expect, and that’s exactly where a professional crew earns its keep. Ottawa Cabinet Painting handles the parts homeowners find hardest to get right themselves: off-site door spraying for a smooth, brush-mark-free finish, proper surface repair before any primer goes on, and a work schedule built to keep your kitchen usable while the job is underway. Every project comes backed by a 6-year warranty, and most thorough jobs wrap up in about ten days, not the weeks that a full replacement demands. If your pantry cabinets are structurally sound and you just want them to look new again without living out of boxes for a month, request a free quote on our cabinet painting services and we’ll tell you honestly whether paint is the right call for your kitchen.
Frequently Asked Questions
Is painting pantry cabinets a good kitchen pantry solution compared to replacement? Yes, as long as the cabinet boxes are structurally sound. Painting costs a fraction of replacement and can be completed in about ten days with a professional, versus weeks for a full renovation.
How long do painted pantry cabinets last before they need touch-ups? A properly prepped and cured finish using cabinet-grade paint typically holds up for many years with normal cleaning, though high-touch areas like handles and edges may need occasional touch-ups sooner.
Can you paint laminate or thermofoil pantry cabinets? Yes, but only with a bonding primer designed for slick, nonporous surfaces. Skipping this step is the most common reason laminate cabinet paint peels within months.
Do painted cabinets need a specific type of hardware to match? Not strictly, but matching hardware finish to your paint sheen creates a more cohesive look. Matte finishes pair well with satin or semi-gloss paint, while high-shine hardware suits a glossier topcoat.
What’s the biggest mistake homeowners make when refinishing pantry cabinets themselves? Rushing the cure time before rehanging doors. Reinstalling too soon leads to sticky doors, transferred paint, and a finish that never fully hardens correctly.
Sources
Recommended
Comments