Kitchen Cabinet Redo DIY: Achieve a Modern, Durable Finish
- demoore5506
- Jan 1
- 7 min read
Most American kitchen renovations climb far beyond what many Ottawa homeowners want to spend, yet smart DIYers know that cabinet refinishing can cost as little as one tenth of a full remodel. Instead of living through weeks of dust and disruption, you can refresh your cabinets with a process that combines durability, visual appeal, and practical efficiency right at home. This guide reveals step by step instructions to help you achieve a professional look with less mess and minimal downtime.
Table of Contents
Quick Summary
Key Point | Explanation |
1. Clear Kitchen Cabinets First | Completely empty your cabinets to create an unobstructed work area for refinishing. |
2. Protect Surfaces with Drop Cloths | Cover countertops and floors with drop cloths to catch dust and paint drips, preventing damage. |
3. Use Quality Primer and Paint | Invest in high-quality primer and paint specifically for cabinets to ensure a durable finish. |
4. Label Hardware During Disassembly | Use tape to label cabinet doors and hardware for easy reassembly, maintaining alignment and order. |
5. Inspect Finish Before Reassembly | Thoroughly check the painted surface for imperfections prior to reinstalling hardware to ensure a professional look. |
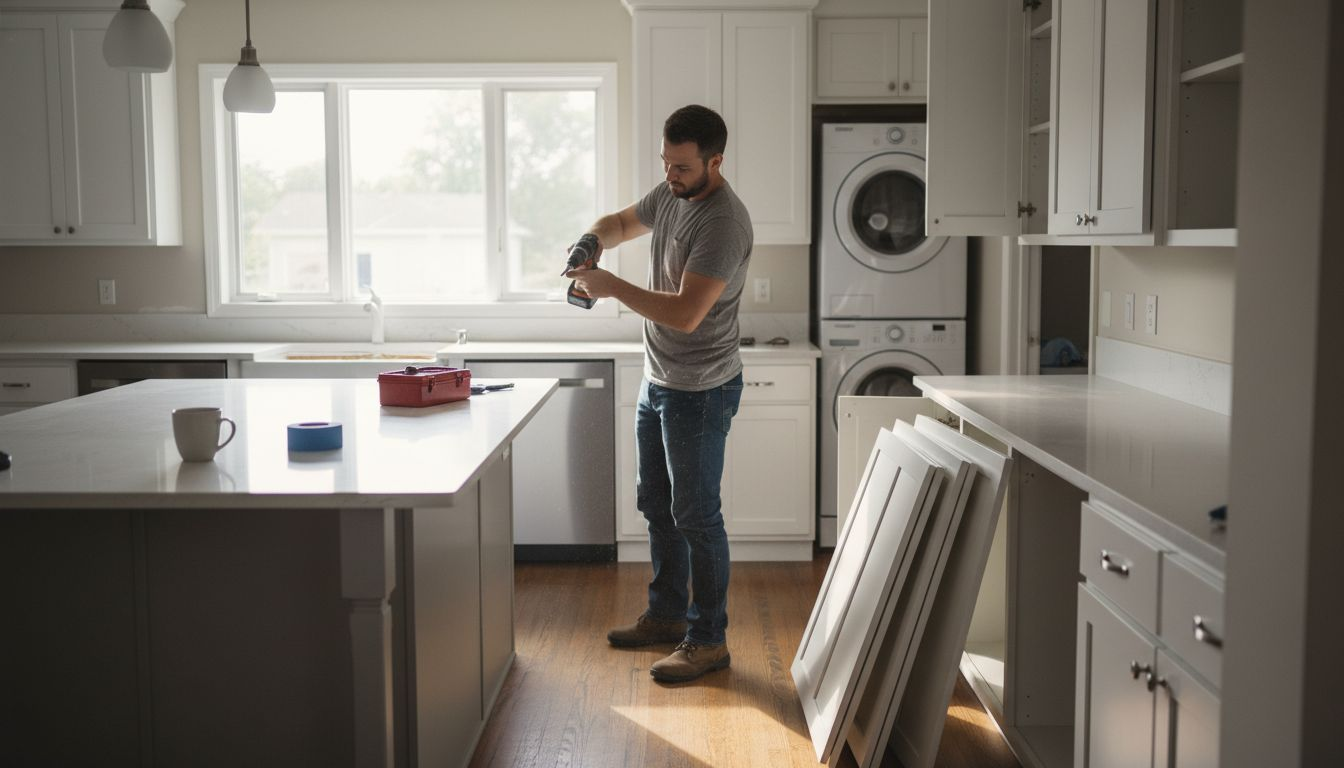
Step 1: Prepare Workspace and Remove Cabinet Doors
Transforming your kitchen cabinets starts with strategic workspace preparation and careful door removal. This initial step sets the foundation for a smooth, professional refinishing project that will give your cabinets a showroom-worthy appearance.
Begin by completely clearing out your kitchen cabinets, removing all dishes, cookware, and stored items to create an unobstructed work area. Carefully protect your countertops and floor by laying down clean drop cloths or sturdy plastic sheeting. These protective layers will catch any dust, paint drips, or debris and prevent potential damage to your kitchen surfaces.
Next, gather your essential tools: a power drill or screwdriver, painter’s tape, a marker, and small containers for hardware storage. Work systematically by labeling each cabinet door and its corresponding hardware with matching numbered or lettered tape. This critical step ensures you can reinstall doors precisely in their original positions. Remove doors by carefully unscrewing the hinges, supporting the door’s weight to prevent sudden dropping or potential damage. Place screws and hinges in clearly marked containers to keep everything organized.
Below is a summary of essential tools and their roles in a cabinet refinishing project:
Tool | Purpose | Benefit |
Power Drill | Removes doors, attaches hardware | Saves time and effort |
Painter’s Tape | Labels doors, protects surfaces | Ensures precise placement |
Sanding Block | Smooths wood surfaces | Ensures even sanding |
Microfiber Cloth | Removes dust and debris | Creates clean surfaces |
Pro Tip: Take a quick smartphone photo of each cabinet configuration before removing doors to provide an extra reference point for reassembly.
Step 2: Clean and Sand Surfaces for Paint Adhesion
Preparing your kitchen cabinet surfaces is a critical step in achieving a professional paint finish that will look seamless and last for years. This process involves thorough cleaning and strategic sanding to create the ideal base for your new paint application.
Start by completely degreasing your cabinet surfaces using a strong kitchen cleaner or degreasing solution. Pay special attention to areas near handles and cooking zones where grease and grime accumulate. Use progressively finer sandpaper to smooth surfaces and enhance paint adhesion, beginning with a coarse 80 or 120 grit sandpaper and working your way to a fine 220 grit paper. Always sand in the direction of the wood grain to prevent unsightly scratches and maintain a smooth surface. After sanding, use a vacuum with a brush attachment or a tack cloth to remove all dust particles thoroughly.
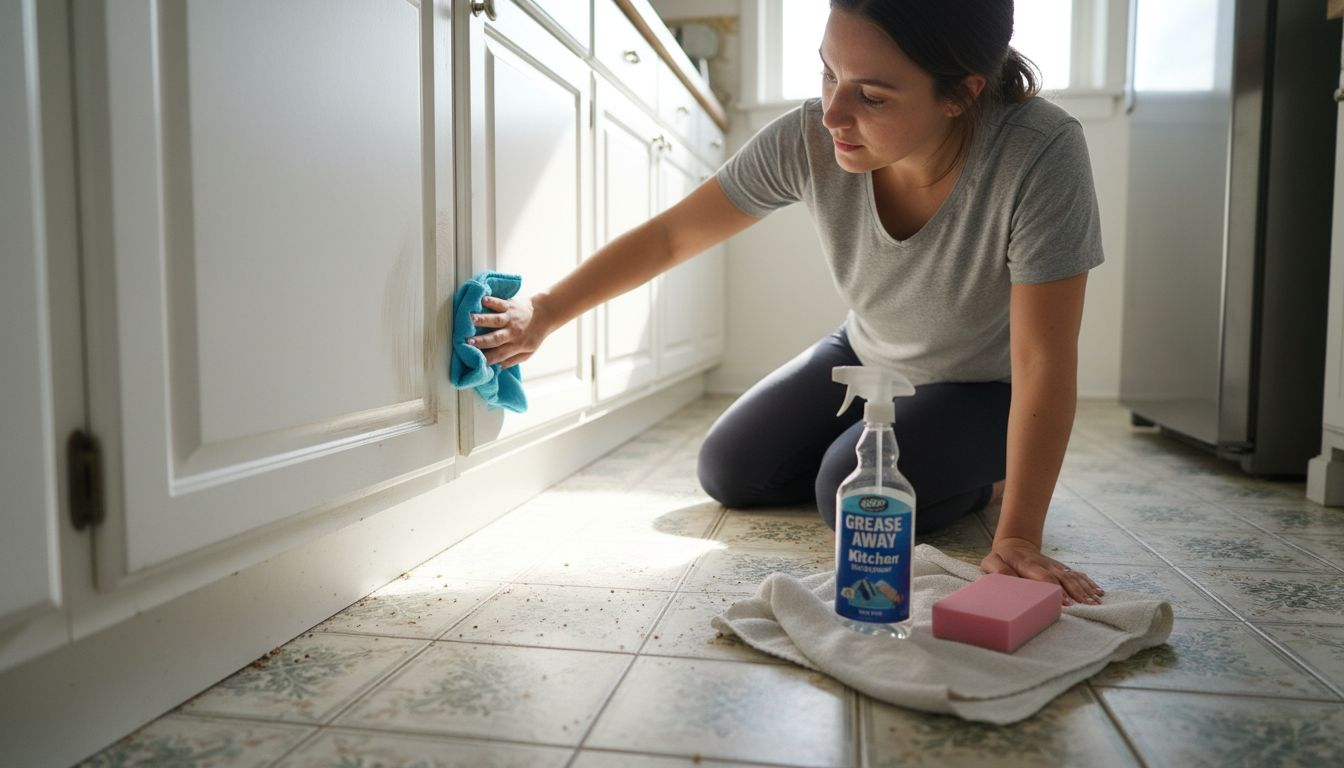
Once you have completed sanding, wipe down all surfaces with a clean microfiber cloth to ensure a completely dust free environment. This meticulous preparation will help your primer and paint adhere perfectly, creating a showroom quality finish that transforms your kitchen cabinets.
Pro Tip: Invest in a sanding block or electric sander to maintain consistent pressure and achieve a more uniform surface preparation.
Step 3: Apply Primer and Allow Proper Drying
Priming your kitchen cabinets is a crucial step that creates the foundation for a professional-looking paint finish. This stage transforms your sanded surfaces into the perfect canvas for your new cabinet color, ensuring maximum paint adhesion and a smooth final result.
Choose a high-quality primer specifically designed for kitchen cabinet surfaces, selecting a formula that matches your cabinet material and intended paint type. Use a high-quality brush and foam roller to apply primer evenly, working carefully along the wood grain. Raise cabinet doors on sawhorses or a clean work surface to ensure complete coverage on all edges. Apply thin, consistent coats to prevent drips and uneven texture. The key is patience and precision.
Allow the primer to dry completely according to manufacturer instructions, typically between 2 to 4 hours. Avoid rushing this process, as proper drying time is essential for creating a durable base that prevents future peeling or chipping. Once the primer is fully dry, lightly sand the surface with fine grit sandpaper to create an ultra smooth foundation for your paint application.
Pro Tip: Use a tack cloth to remove any microscopic dust particles after sanding to guarantee an absolutely pristine surface for painting.
Step 4: Paint Cabinets Using Premium Materials
Applying paint to your kitchen cabinets is the transformative moment that will bring your renovation vision to life. Your careful preparation now pays off as you create a showroom worthy finish that will dramatically upgrade your kitchen’s appearance.
Select a premium paint specifically formulated for cabinet surfaces, focusing on durability and smooth application. Use high-quality brushes for edges and trim work, switching to a microfibre roller for larger flat panel areas. Apply thin, even coats working systematically along the wood grain, maintaining consistent pressure to avoid drips or uneven texture. Each coat should be light and deliberate, allowing complete drying time between applications.
Plan to apply multiple thin layers rather than one thick coat, which can create an unprofessional looking finish. After each coat dries completely, lightly sand with fine grit sandpaper to ensure maximum paint adhesion and an ultra smooth surface. This methodical approach creates a factory finished look that will protect and beautify your cabinets for years to come.
Pro Tip: Keep a clean, lint free cloth nearby to quickly address any unexpected dust or debris that might settle during painting.
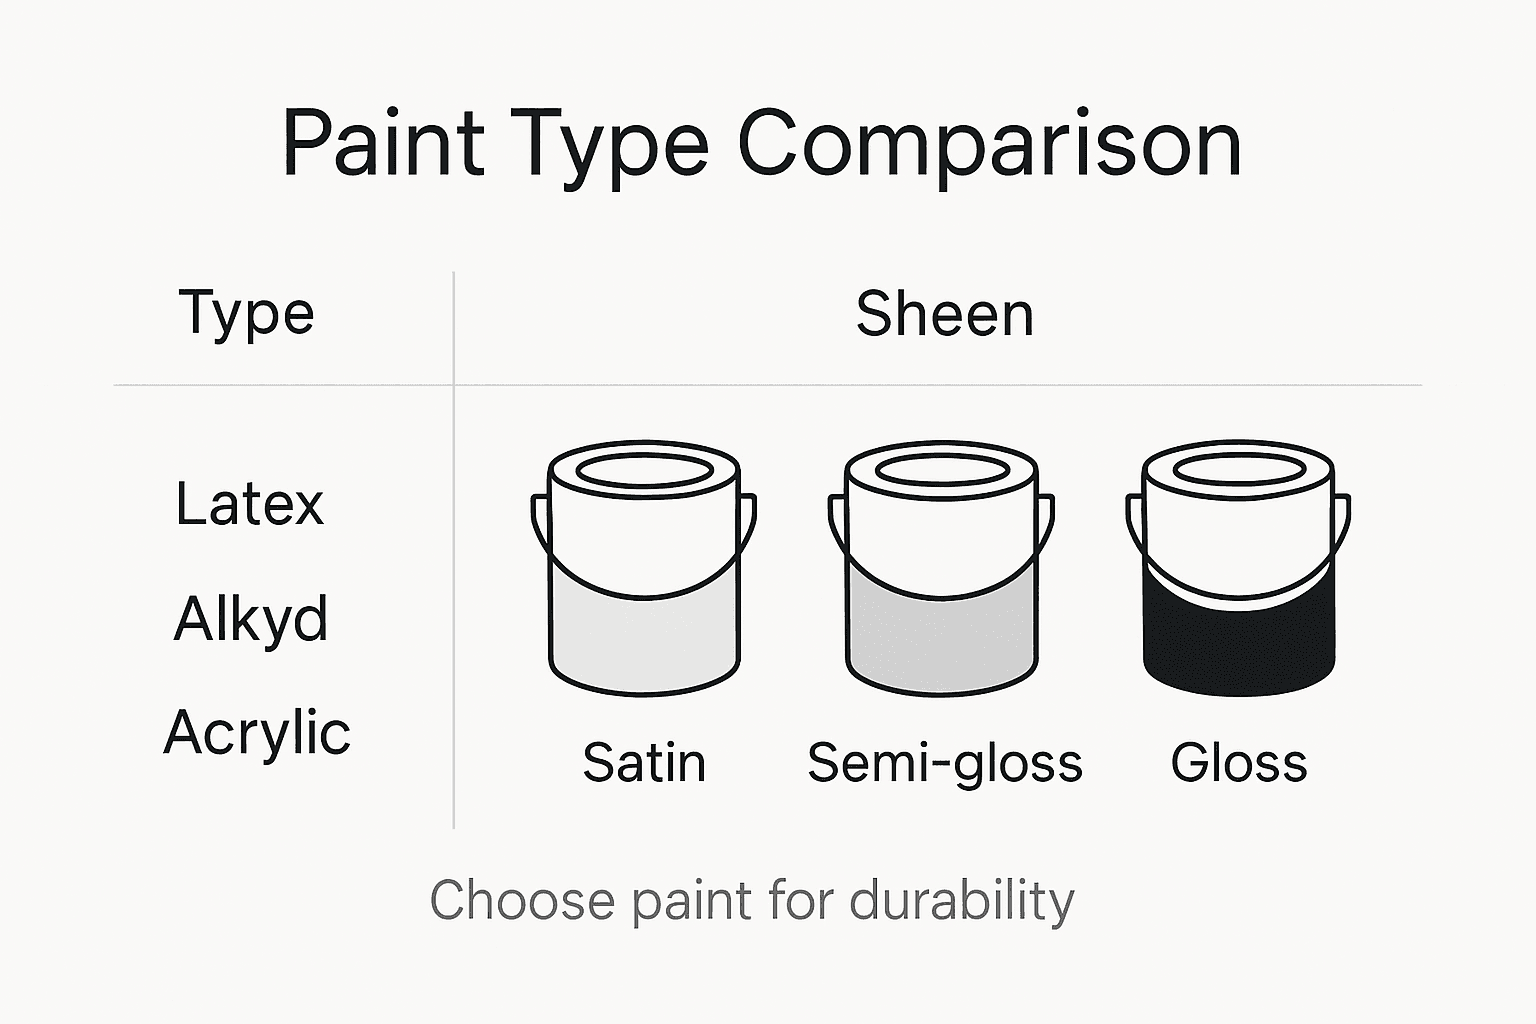
Here’s a quick comparison of paint types commonly used for cabinets:
Paint Type | Durability Level | Sheen Options | Best For |
Acrylic Latex | Moderate to High | Satin, Semi-Gloss | Wood and MDF cabinets |
Alkyd (Waterborne) | High | Semi-Gloss, Gloss | Kitchens with heavy use |
Oil-Based | Very High | Gloss, Matte | Traditional cabinet refinish |
Chalk Paint | Moderate | Matte | Vintage or distressed look |
Step 5: Inspect Finish and Reinstall Hardware
With your freshly painted cabinets now complete, the final stage involves carefully inspecting the finish and meticulously reinstalling your hardware to bring the entire project together. This critical step transforms your refinished cabinets from a painting project to a professional looking kitchen upgrade.
Carefully verify hardware placement and alignment before drilling or screwing in any new or existing knobs and pulls. Reference the original markings or photographs you took during disassembly to ensure precise positioning. Use a tape measure and level to guarantee each piece is perfectly aligned, maintaining visual symmetry across your cabinet surfaces. Take your time during this process, as even minor misalignments can disrupt the polished look you have worked hard to achieve.
Inspect the entire painted surface under good lighting, checking for any imperfections such as small bubbles, dust specks, or uneven areas. Use a fine grit sandpaper to gently smooth out any minor irregularities if necessary. Once satisfied with the finish, carefully reinstall each piece of hardware, ensuring screws are tightened securely but not over tightened, which could damage the new paint surface.
Pro Tip: Work with clean hands and wear cotton gloves to prevent oils from your skin transferring onto the freshly painted surface during hardware installation.
Elevate Your Kitchen Cabinet Redo with Expert Refinishing
Tackling a kitchen cabinet redo yourself can be rewarding but challenging. The article highlights key steps like thorough workspace preparation, careful sanding, and applying premium paint to achieve a modern, durable finish. Homeowners often struggle with issues such as achieving smooth paint adhesion, managing cabinet hardware during removal and reinstallation, and creating a high-end look without a full costly renovation. These challenges make the process time-consuming and sometimes frustrating.
At Ottawa Cabinet Painting, we understand the importance of precise prep work and premium materials in transforming your kitchen cabinets into the centerpiece of your home. Our professional refinishing process delivers a silky, long-lasting finish while minimizing household disruption. You can trust our local expertise and 6-year warranty to protect your investment and keep your kitchen looking modern and warm. Ready to save time and avoid common DIY pitfalls? Visit our main page to learn how our cabinet painting services can refresh your kitchen with expert care. Contact us today for a consultation and start your journey toward stunning cabinets that last.
Frequently Asked Questions
How do I prepare my kitchen cabinets for painting?
To prepare your kitchen cabinets for painting, start by completely clearing out your cabinets and protecting your countertops with drop cloths. Next, clean and sand the surfaces to ensure proper paint adhesion before applying primer.
What type of primer should I use for kitchen cabinets?
Use a high-quality primer specifically formulated for kitchen cabinet surfaces to create a strong foundation for your paint. Ensure that the primer matches your cabinet material and is compatible with the paint you plan to apply.
How many coats of paint do I need for a durable finish?
Plan to apply at least two to three thin coats of paint for a durable finish on your kitchen cabinets. Allow each coat to fully dry before sanding lightly to ensure maximum adhesion and a smooth appearance.
What steps can I take to inspect my cabinet finish before reinstalling hardware?
Inspect your cabinet finish carefully under good lighting for any imperfections like bubbles or dust specks. Smooth out any minor irregularities with fine grit sandpaper before reinstalling hardware to maintain a flawless look.
How can I keep my cabinet surfaces clean during the painting process?
Keep a clean, lint-free cloth nearby to quickly address any dust or debris that might settle during painting. Additionally, wear cotton gloves to prevent oils from your skin transferring onto the freshly painted surfaces.
What is the best way to ensure hardware aligns perfectly when reinstalling?
Use the original markings or reference photos taken during disassembly to ensure precise positioning of your hardware. Measure and level each piece for visual symmetry to achieve a professional finish.
Recommended

Comments