How to Touch Up Painted Cabinets for a Fresh Look
- demoore5506
- Sep 30, 2025
- 12 min read
Touching up painted cabinets can seem stressful. People worry that a bad fix will leave even more visible marks in their kitchen. Yet professionals get flawless results every day and their secret starts way before any brush touches wood. Digital spectrophotometers in paint stores can match your cabinet color with stunning accuracy, erasing those obvious patch jobs for good. The real surprise is that anyone with basic supplies and a patient approach can pull off cabinet touch-ups that look just as seamless at home.
Table of Contents
Quick Summary
Key Point | Explanation |
1. Gather essential touch-up supplies | Collect high-quality brushes, sandpaper, and matching paint for successful touch-ups. |
2. Ensure thorough surface cleaning | Clean cabinets with soap and rubbing alcohol to maximize paint adhesion and smoothness. |
3. Perfect color matching is critical | Use digital color matching technology at paint stores for the best paint match. |
4. Apply paint in thin layers | Multiple thin coats allow for better blending and a uniform finish without drips. |
5. Inspect and refine touch-ups carefully | Allow paint to cure, then check for imperfections and correct them with careful sanding. |
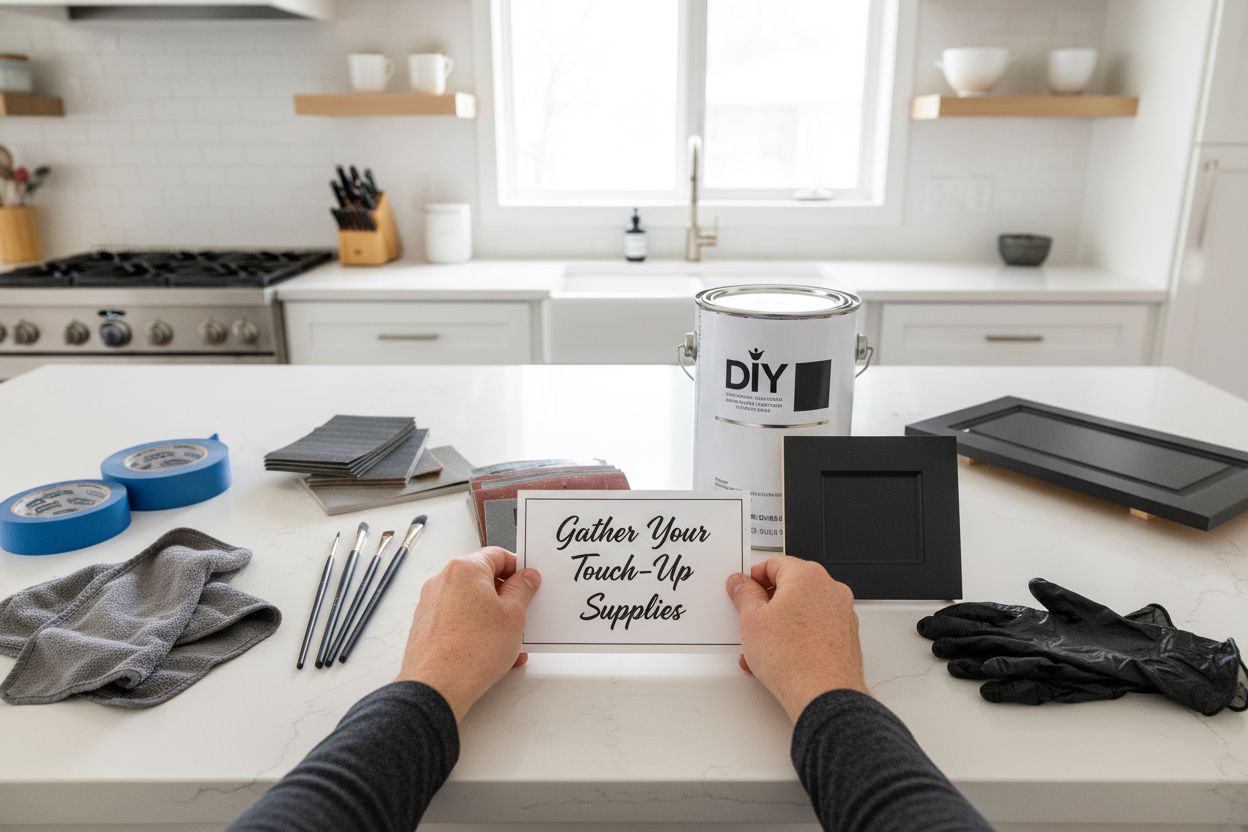
Step 1: Gather Your Touch-Up Supplies
Touch-up painting requires precision and the right equipment. Before diving into the cabinet restoration process, collecting the appropriate supplies will set you up for a professional-looking result. Understanding what materials you need can transform a potentially frustrating project into a smooth, satisfying experience.
For successful cabinet touch-ups, you’ll want to assemble a comprehensive toolkit that includes specialized painting materials. Matching paint color is the most critical component, so start by identifying the original paint type and shade. If you no longer have the original paint can, consider bringing a small cabinet door sample to a local paint store for precise color matching. Professional paint shops often have advanced color matching technology that can replicate your existing cabinet color with remarkable accuracy.
Your essential touch-up supplies should include high-quality, fine-tipped artist brushes for precision work, fine-grit sandpaper (220-grit recommended), painter’s tape, clean microfiber cloths, rubbing alcohol for surface cleaning, and primer specifically designed for your cabinet’s original paint type. For wood cabinets, select a shellac-based primer that provides excellent adhesion and coverage. Latex or oil-based primers work differently, so matching the primer to your original paint ensures the best results.
Learn more about essential painting materials for your specific project requirements. Having the right tools not only makes the job easier but also significantly improves the final appearance of your touch-up work.
Prepare a clean, well-ventilated workspace with good lighting. Lay down drop cloths or plastic sheeting to protect surrounding surfaces from potential paint splatters. Wear disposable gloves to keep your hands clean and prevent oils from your skin interfering with paint adhesion. Organize your supplies within easy reach, creating an efficient workflow that minimizes interruptions during the touch-up process.
By meticulously gathering these supplies beforehand, you’ll be well-equipped to approach your cabinet touch-up project with confidence and precision. The time invested in preparation will pay dividends in a flawless, professional-looking finish that rejuvenates your kitchen’s appearance.
To help you gather all the necessary items, here is a table summarizing the essential tools and materials required for successful cabinet touch-up work.
Tool/Material | Purpose | Notes |
Matching paint | Restores original color and finish | Obtain through professional color matching |
Fine-tipped artist brushes | Precise application on small areas | Use synthetic bristles for control |
Fine-grit sandpaper (220+) | Smooths scratches and rough patches | Sand gently in direction of wood grain |
Painter’s tape | Protects surrounding surfaces | Useful for sharp, clean edges |
Microfiber cloths | Dust and residue removal | Prevents lint and streaks |
Rubbing alcohol | Final cleaning before paint application | Ensures surface is oil- and residue-free |
Primer (type-specific) | Enhances adhesion and coverage | Match to original paint (shellac, latex, or oil-based) |
Wood filler (optional) | Repairs deeper scratches/dents | Sand smooth once dry |
Disposable gloves | Keeps hands clean and avoids contamination | Use throughout the process |
Drop cloths/plastic sheeting | Protects nearby areas from drips/splatter | Line work area before starting |
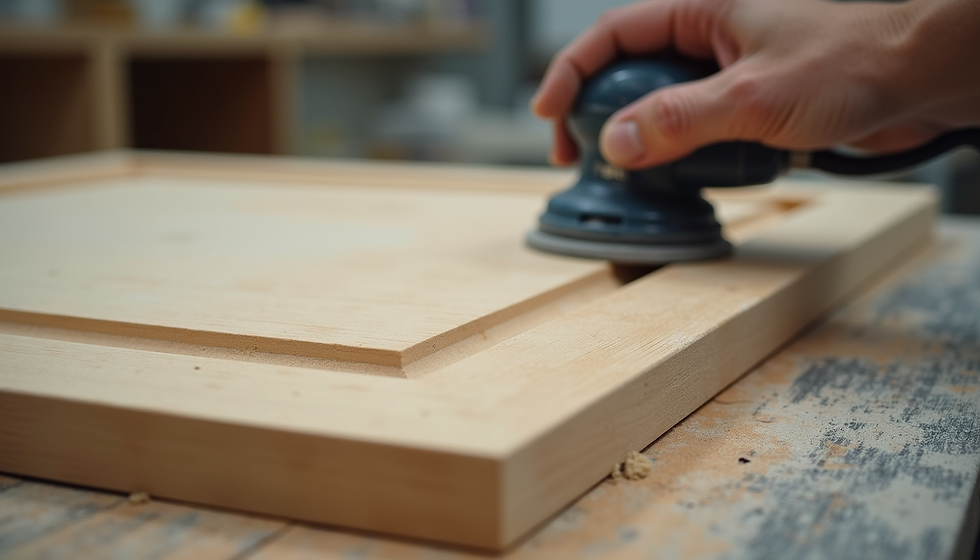
Step 2: Clean and Prepare Cabinet Surfaces
Preparing your cabinet surfaces is a critical step that determines the success of your touch-up project. Surface preparation transforms your existing paint job from ordinary to extraordinary, ensuring that your touch-up work blends seamlessly with the original finish. The goal is to create a clean, smooth canvas that allows paint to adhere perfectly and look professional.
Thorough cleaning is the foundation of excellent paint touch-ups. Start by removing all surface contaminants that could interfere with paint adhesion. Use a degreasing solution or a mixture of warm water and mild dish soap to cut through accumulated kitchen grime, cooking oils, and dust. Work systematically, cleaning each cabinet surface with a soft microfiber cloth, paying extra attention to areas around handles and edges where grease tends to accumulate. After initial cleaning, follow up with rubbing alcohol on a clean cloth to remove any remaining residue and ensure a completely clean surface.
Read our detailed guide on prepping cabinets for additional professional insights. Once cleaned, carefully inspect the surfaces for imperfections. Light sanding with fine-grit sandpaper (220-grit) will help smooth out minor scratches, dings, or uneven paint areas. Sand gently and uniformly, moving in the direction of the wood grain to avoid creating visible scratches. The objective is to create a slightly rough surface that allows new paint to grip effectively without damaging the existing finish.
After sanding, remove all dust using a tack cloth or a vacuum with a soft brush attachment. This step is crucial because any remaining dust particles can create an uneven touch-up appearance. Wipe the surfaces with a lint-free cloth slightly dampened with rubbing alcohol for a final, pristine cleaning. If you notice any significant damages or deep scratches, consider using wood filler to create a smooth surface before painting. Apply wood filler sparingly, allow it to dry completely, and sand it smooth to match the surrounding area.
Careful surface preparation might seem time-consuming, but it is the most important factor in achieving a professional-looking touch-up. Rushing this step or skipping critical cleaning and smoothing processes will result in a visibly flawed finish that draws attention to the imperfections you’re trying to conceal. Take your time, be methodical, and your cabinets will reward you with a refreshed, uniform appearance that looks like new.
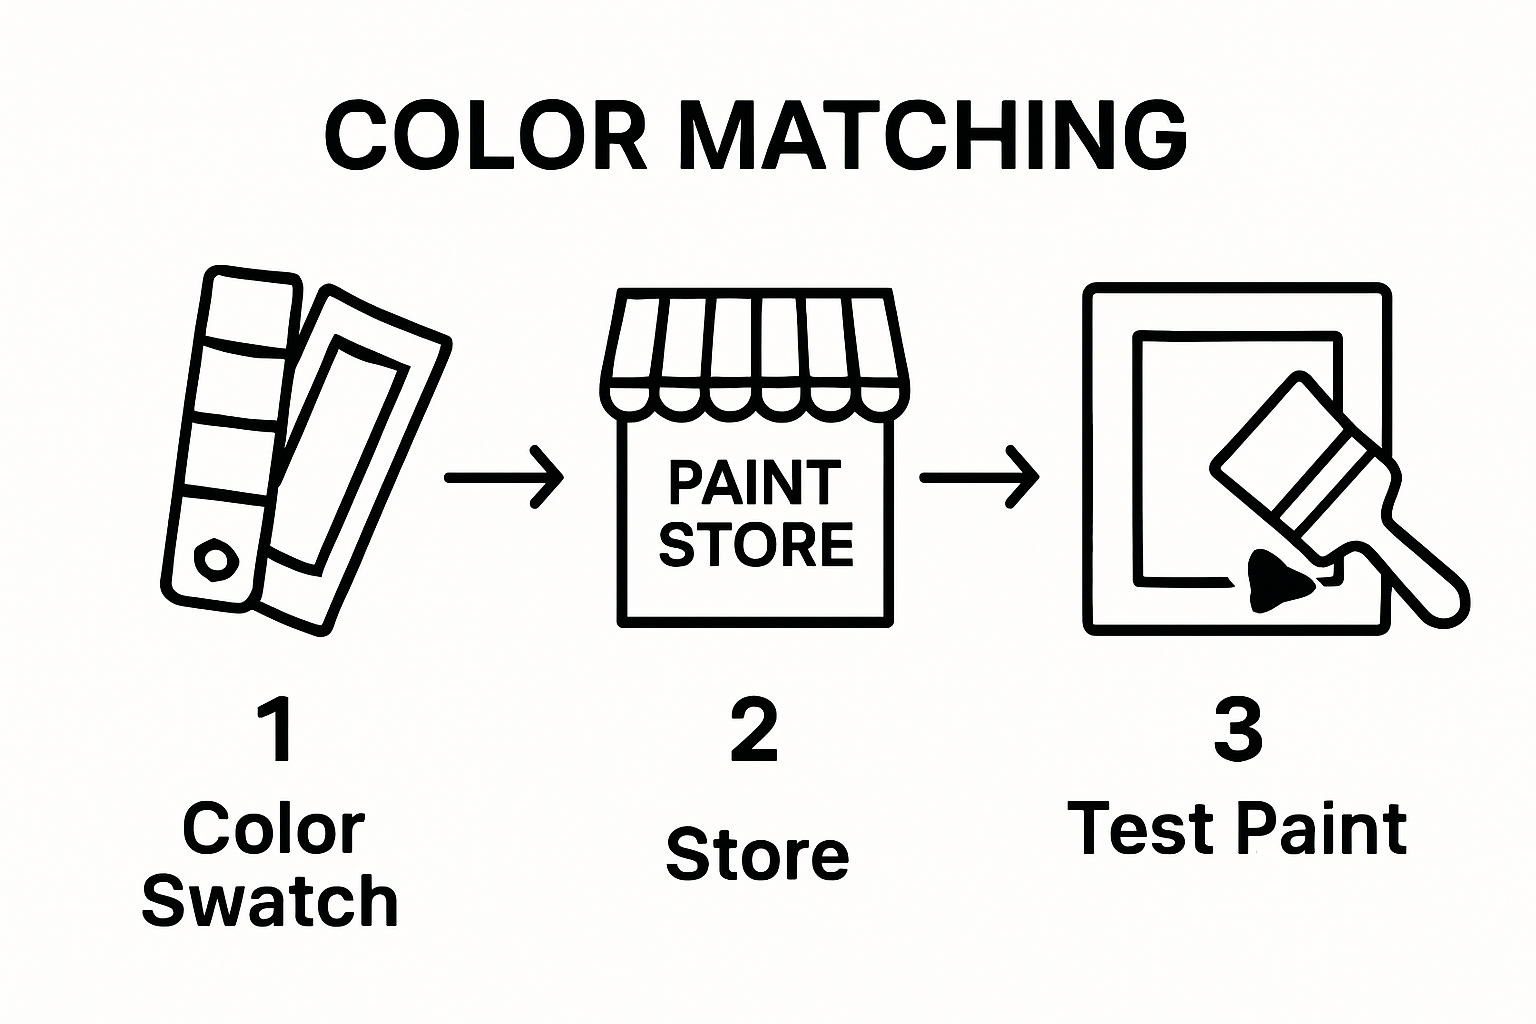
Step 3: Match Paint Color and Prepare Mixed Paint
Color matching is the most nuanced and critical aspect of successful cabinet touch-ups. A perfect color match can make repaired areas invisible, while a slight variation can create unsightly patches that draw unwanted attention. Professional painters understand that color matching requires both scientific precision and artistic judgment.
To achieve an impeccable match, bring a small, undamaged section of your cabinet door to a professional paint store with advanced color matching technology. Digital spectrophotometers can analyze the exact pigment composition, accounting for slight color variations caused by age, sunlight exposure, and previous cleaning. Some stores offer computerized color scanning that can reproduce your original paint shade with remarkable accuracy. If bringing a cabinet sample is impossible, take a high-resolution, well-lit photograph that captures the true color under natural light.
Explore our comprehensive guide to painting cabinets for additional professional insights into paint selection. When mixing your touch-up paint, select a paint type identical to the original finish. Water-based latex, oil-based, or enamel paints behave differently, and mixing incompatible types can result in poor adhesion or uneven texture. Professional paint specialists can help you determine the original paint type by examining your sample or discussing your cabinet’s age and finish.
Prepare your mixed paint with meticulous attention to detail. Strain the paint through a fine mesh screen to remove any potential contaminants that could create lumps or uneven application. Use a clean, disposable container and mix thoroughly but gently to avoid introducing air bubbles. Test the color match on a hidden cabinet area or inconspicuous piece of scrap wood that matches your cabinet material.
Natural and artificial lighting can reveal subtle color differences, so examine your test area under multiple light sources to ensure a true match.
Remember that paint can appear different when applied in thin touch-up layers versus larger areas. Professional painters recommend applying multiple ultra-thin layers rather than one thick coat. This technique allows for gradual blending and helps prevent noticeable variations in sheen or color depth. Patience during this stage will dramatically improve your final result, transforming potential imperfections into a seamless, professional-looking finish.
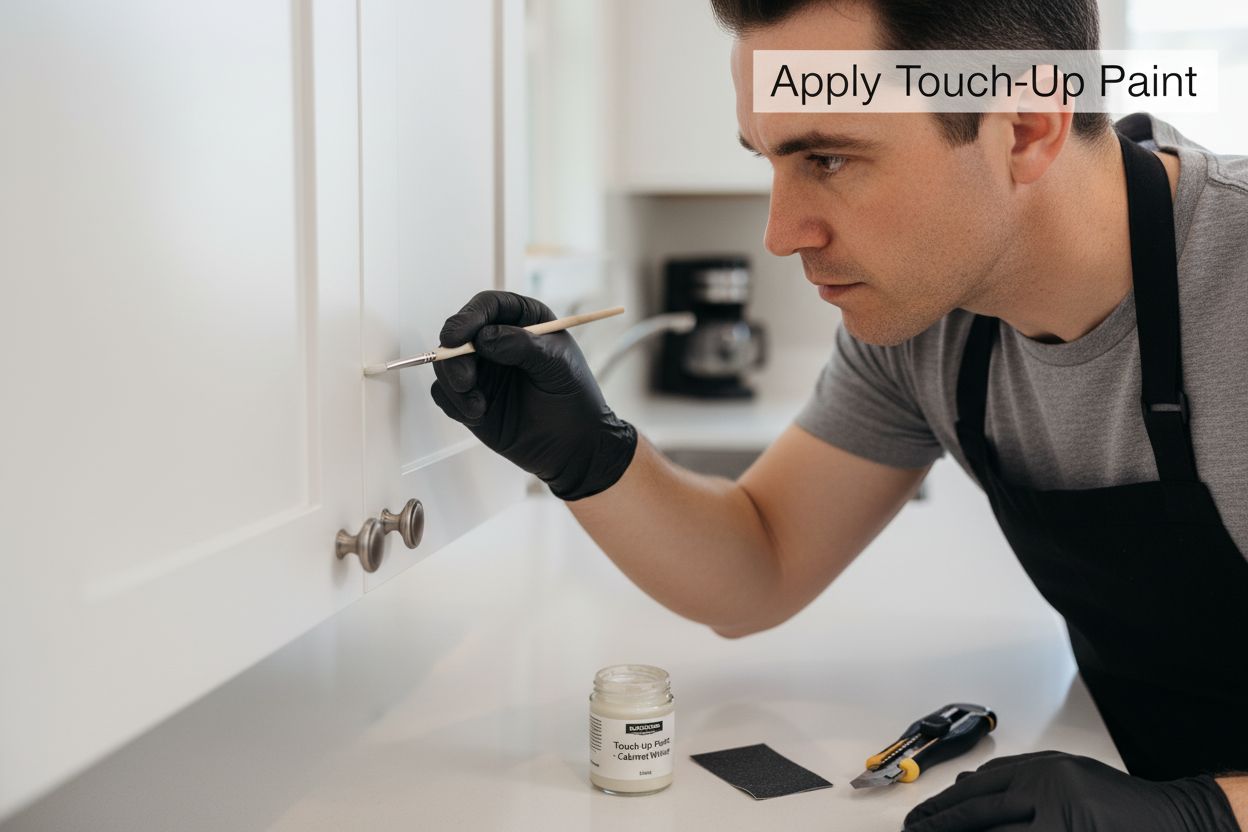
Step 4: Apply Touch-Up Paint on Damaged Areas
Applying touch-up paint requires a steady hand, patience, and a systematic approach. The goal is to create invisible repairs that seamlessly blend with your existing cabinet surface. Professional painters understand that technique matters as much as the paint itself when addressing minor imperfections and wear areas.
Begin by selecting the most appropriate brush for your touch-up work. Fine-tipped artist brushes with synthetic bristles provide the most precise application for small areas. Hold the brush like a pencil, using gentle, controlled strokes that mimic the original paint application direction. For very small nicks or scratches, consider using a toothpick or the tip of a fine artist brush to apply microscopic amounts of paint with surgical precision.
Learn more about avoiding common painting mistakes to ensure a professional finish. Apply paint in extremely thin, multiple layers rather than one thick coat. This technique prevents drips, allows for better blending, and ensures a smooth transition between the original surface and the touch-up area. Wait approximately 15-20 minutes between each layer, allowing sufficient drying time. Use a bright, direct light source to help you identify any uneven areas or slight color variations during application.
Pay special attention to the paint’s consistency and application technique. If the touch-up area is larger than a pinhead, feather the edges by using progressively lighter brush strokes that gradually blend into the surrounding paint. This method creates an almost invisible repair that prevents harsh lines or noticeable patches. For areas with significant wear or multiple scratches, consider using a small foam applicator that can distribute paint more evenly across textured surfaces.
Verify your touch-up work by examining the repaired areas from multiple angles and under different lighting conditions. Natural daylight and overhead kitchen lighting will reveal any subtle discrepancies. If you notice any imperfections, allow the paint to dry completely, then lightly sand the area with ultra-fine sandpaper and reapply thin layers of paint. Patience and attention to detail are the hallmarks of a professional-looking cabinet touch-up that restores your kitchen’s beautiful appearance.
Step 5: Blend and Smooth the Touch-Up Work
Blending and smoothing touch-up work transforms isolated repairs into a seamless, professional-looking finish. This critical stage requires a delicate balance of technique, patience, and precision to ensure that repaired areas become virtually invisible. Professional painters understand that the finishing process is where true craftsmanship emerges.
After your touch-up paint has completely dried, begin the blending process using ultra-fine grit sandpaper (400-600 grit). Wrap the sandpaper around a small wooden block to maintain a flat, even surface that prevents accidental gouging or uneven sanding. Use extremely light, circular motions with minimal pressure, focusing on gradually feathering the edges of your touch-up area. The goal is to create an imperceptible transition between the original paint and the newly applied area.
Explore our detailed guide for cabinet painting techniques to refine your approach. Lighting is crucial during this stage. Work near a bright, natural light source that reveals subtle variations in texture and color. Rotate your work area frequently, examining the surface from multiple angles to ensure a completely smooth finish. If you notice any slight ridges or uneven areas, continue sanding with the lightest possible touch, periodically wiping away dust with a clean, lint-free microfiber cloth.
For areas with more significant repairs, consider using a paint leveling solution designed specifically for touch-up work. These specialized products help blend paint layers, reducing visible lines and creating a more uniform appearance. Apply the leveling solution sparingly using a clean, soft brush, working in the same direction as the original paint application. Allow the solution to settle naturally, which helps smooth out microscopic imperfections that sanding alone might not address.
Verify your blending work by running your fingertip lightly across the repaired area. A perfectly blended touch-up should feel smooth, with no discernible difference in texture between the original surface and the repaired section. Examine the area under different lighting conditions - natural daylight, overhead kitchen lights, and ambient evening lighting will reveal the true quality of your touch-up work. If any imperfections remain, repeat the sanding and blending process with even more delicate, controlled movements.
Step 6: Allow to Dry and Inspect for Quality
The drying and inspection phase is where your meticulous touch-up work is ultimately validated. Patience is not just a virtue, but a critical requirement in achieving a flawless cabinet finish. Professional painters understand that rushing this final stage can undo all the careful preparation and application work completed in previous steps.
Create an ideal drying environment by maintaining a consistent room temperature between 70-75 degrees Fahrenheit with minimal humidity. Avoid direct sunlight or drafty areas that could impact paint curing, as these conditions can cause uneven drying or introduce dust particles into your freshly applied paint. Ensure good air circulation by opening nearby windows slightly or using a fan positioned at a distance to promote gentle air movement without directly blowing on the painted surfaces.
Explore our comprehensive guide to cabinet painting techniques for additional professional insights. Allow a minimum of 24-48 hours for complete paint curing, understanding that different paint types have varying drying times. Oil-based paints typically require longer curing periods compared to latex paints. During this waiting period, resist the temptation to touch or test the surface, as even gentle contact can mar the delicate new paint layer.
Inspection requires methodical and thorough examination under multiple lighting conditions. Natural daylight provides the most revealing assessment, exposing subtle color variations or texture inconsistencies. Move around the cabinets, viewing repaired areas from different angles and distances. Look for telltale signs of imperfect touch-ups: slight color mismatches, visible paint edges, texture variations, or uneven sheen. Use a bright, handheld light to cast shadows that can reveal minute surface irregularities invisible to the naked eye.
If minor imperfections are discovered during your quality check, do not panic. Small issues can often be gently corrected by lightly re-sanding the area and applying an additional ultra-thin paint layer. However, significant discrepancies might require complete reapplication of the touch-up process. Remember that professional-quality results demand patience, precision, and a willingness to revisit and refine your work until achieving a truly seamless finish that restores your cabinets to their original beauty.
Here’s a step overview table summarizing the core steps of touching up painted cabinets, with each phase’s difficulty level, estimated time, and key outcomes for quick reference.
Step | Difficulty | Estimated Time | Key Outcome |
Gather Touch-Up Supplies | Easy | 30-45 minutes | All tools and materials organized |
Clean and Prepare Cabinet Surfaces | Moderate | 45-60 minutes | Surfaces degreased, dust-free, and smooth |
Match Paint Color and Prepare Mixed Paint | Hard | 30-60 minutes | Perfect or near-perfect color match |
Apply Touch-Up Paint on Damaged Areas | Moderate | 30-90 minutes | Paint applied precisely; repairs blended |
Blend and Smooth the Touch-Up Work | Challenging | 30-60 minutes | Transitions are seamless and invisible |
Allow to Dry and Inspect for Quality | Easy | 24-48 hours | Finish hardened, flaws corrected |
Give Your Cabinets the Professional Finish They Deserve
Struggling to make those cabinet touch-ups look seamless? Many homeowners find that matching paint color and blending touch-ups can feel overwhelming. Even after following every step for surface prep and color matching, small imperfections often remain, leaving your kitchen looking less than its best. You deserve a solution that brings lasting beauty, not just a temporary fix.
Why settle for touch-ups that don’t truly erase the signs of wear? At Ottawa Cabinet Painting, our team combines expert prep work, premium paints, and proven techniques to deliver that flawless, silky finish you crave. Let us handle the details so you can enjoy a revitalized kitchen that feels like new—without the stress, disruption, or high cost of a full remodel. If you’re ready to discover how easy and affordable professional cabinet refinishing can be, visit our Ottawa Cabinet Painting home page today and take the first step toward a kitchen you love. Spots fill fast, so reach out now for your personalized quote and let your cabinets shine for years to come.
Frequently Asked Questions
How do I match paint color for touch-ups?
To match paint color for touch-ups, bring a small undamaged sample of your cabinet door to a professional paint store that utilizes color matching technology, such as a digital spectrophotometer, for precise color replication. If a sample is not available, a high-resolution photo in natural light may help.
What supplies do I need for touching up painted cabinets?
Essential supplies for touching up painted cabinets include matching paint, fine-tipped artist brushes, fine-grit sandpaper, painter’s tape, microfiber cloths, rubbing alcohol for surface cleaning, and an appropriate primer. Ensure the primer is compatible with your original paint type for optimal results.
How do I prepare the cabinet surfaces before touch-up painting?
Start by thoroughly cleaning the cabinet surfaces with a degreasing solution or soapy water to remove grease and dust. After that, lightly sand the areas with fine-grit sandpaper to smooth any imperfections. Lastly, eliminate any dust with a tack cloth or vacuum before applying paint.
What technique should I use for applying touch-up paint?
Use fine-tipped artist brushes for precise application, and apply the paint in multiple ultra-thin layers instead of one thick coat. Feather the edges to blend the repair with the original finish, and allow sufficient drying time between applications to avoid drips and ensure a smooth finish.
Recommended
Comments