How to Remove Finish from Cabinets: A Step-by-Step Guide
- demoore5506
- Oct 3, 2025
- 11 min read
Cabinet refinishing might seem like a major hassle, and plenty of people skip important prep just to save time. But here’s the surprise. Missing out on even a single cleaning or testing step can lead to costly damage or a ruined finish—leaving many DIYers with regrets and repairs. Most don’t realize that a well-organized workspace and a simple finish test can make the difference between a flawless upgrade and a kitchen disaster. Ready to see what you can do differently?
Table of Contents
Quick Summary
Key Point | Explanation |
1. Gather all necessary materials first | Collect protective gear, scrapers, and chemical strippers before starting to ensure an organized workflow and safety. |
2. Prepare a well-ventilated workspace | Set up in a spacious area with ventilation to safely handle chemicals and provide a clean working environment for refinishing. |
3. Test the chosen finish removal method | Test your technique on a hidden area to understand its effectiveness and avoid damaging visible surfaces during the full application. |
4. Apply stripper in manageable sections | Work systematically on one section at a time, ensuring even application and preventing the stripper from drying out prematurely. |
5. Clean thoroughly after removing finish | Wash surfaces with a recommended solvent to eliminate residues, which is essential for a smooth new finish application. |
Step 1: Gather Necessary Materials and Tools
Preparing to remove the finish from your cabinets requires careful planning and the right equipment. Before diving into the project, gathering all necessary materials will save you time and prevent unnecessary interruptions.

A well-organized workspace translates into a smoother refinishing experience.
For this initial step, you will need a comprehensive set of protective gear and specialized tools. Your safety equipment is paramount, so start by acquiring high-quality chemical-resistant gloves that extend past your wrists. Thick rubber or nitrile gloves provide the best protection against harsh stripping chemicals. Next, invest in safety goggles that create a complete seal around your eyes, preventing any accidental chemical splashes. A reliable respirator mask rated for chemical vapors is crucial to protect your lungs from potentially toxic fumes.
Your tool collection should include several key items for an effective finish removal process. Check out our guide on essential painting tools to ensure you have everything needed. You will want multiple scrapers of varying widths - plastic scrapers for delicate surfaces and metal scrapers for more stubborn finishes. A set of clean, lint-free rags will be essential for wiping away residue and cleaning surfaces between applications.
Chemical strippers are the cornerstone of this project, so select a product specifically designed for your cabinet’s existing finish. Different finishes like varnish, shellac, or lacquer require different stripping agents. Read product labels carefully and choose a stripper compatible with your specific cabinet material. Supplemental materials like steel wool, sandpaper (ranging from 120 to 220 grit), drop cloths to protect surrounding areas, and painter’s tape for masking will complete your toolkit.
Before beginning, create a dedicated workspace with excellent ventilation. A well-lit, open area like a garage or outdoor workspace with protection from direct sunlight will provide the ideal environment for your refinishing project. Lay down drop cloths, arrange your tools within easy reach, and double-check that you have everything needed to complete the job efficiently and safely.
Below is a summary table of essential tools and materials for cabinet finish removal, including their specific uses and any relevant safety guidance.
Tool/Material | Purpose/Use | Safety Guidance |
Chemical-resistant gloves | Protect hands from harsh stripping chemicals | Must extend past wrists for best protection |
Safety goggles | Shield eyes from splashes | Should form a complete seal around eyes |
Respirator mask | Protect lungs from fumes | Use one rated for chemical vapors |
Scrapers (plastic/metal) | Remove softened cabinet finish | Use plastic for delicate areas, metal for stubborn |
Chemical stripper | Breaks down existing cabinet finish | Choose type compatible with cabinet material |
Lint-free rags | Wipe residue and clean surfaces | Use only clean, residue-free cloths |
Steel wool/sandpaper | Remove residue and smooth surfaces | Use 120-220 grit; wear a mask when sanding |
Drop cloths | Protect surrounding areas from spills | Ensure full floor and counter coverage |
Painter’s tape | Mask edges and hardware for clean application | Prevents chemical splashes on non-targeted surfaces |
Step 2: Prepare the Work Area for Refinishing
Transforming your cabinets requires more than just technical skill it demands a strategic and meticulously prepared workspace. Proper area preparation prevents potential damage and ensures a smooth, professional refinishing process. Think of this stage as creating a controlled environment where precision and protection are paramount.
Begin by completely emptying the cabinets and removing all items from surrounding countertops. This step eliminates potential contamination and provides a clear workspace. Learn more about cabinet preparation techniques to understand the comprehensive approach needed. Carefully remove cabinet doors, drawers, and hardware using appropriate screwdrivers. Store these components in labeled plastic bags to ensure easy reassembly later. Place hardware in a secure container to prevent loss and maintain organization.
Protecting your workspace is crucial during the refinishing process. Cover all adjacent surfaces with high-quality drop cloths or plastic sheeting, extending coverage beyond the immediate cabinet area. Seal edges with painter’s tape to prevent chemical splashes or accidental paint drift. If working in a kitchen, consider removing small appliances and covering larger items like refrigerators or stoves with protective materials. Ensure adequate ventilation by opening windows or setting up fans to help disperse chemical fumes and maintain air circulation.
Create a dedicated staging area for your materials and tools. This space should be clean, well-lit, and positioned away from direct sunlight or extreme temperatures. Arrange your chemical strippers, scrapers, protective gear, and cleaning materials within easy reach. A strategically organized workspace minimizes unnecessary movement and reduces the risk of accidental spills or contamination.
Before proceeding, perform a final workspace assessment. Confirm that all surfaces are protected, tools are accessible, and you have sufficient workspace to maneuver. Remove any potential tripping hazards, ensure proper lighting, and double-check your safety equipment. A well-prepared area sets the foundation for a successful cabinet refinishing project, transforming what could be a challenging task into a manageable and rewarding home improvement experience.
This table offers a concise overview of each main step involved in cabinet finish removal, summarizing primary tasks, estimated effort, and the expected key outcomes.
Step | Primary Task | Estimated Effort | Key Outcome |
Gather Materials and Tools | Collect gear, strippers, and tools | 20-30 minutes | Ready, safe, organized workspace |
Prepare Work Area | Clear cabinets, mask surfaces, ventilate | 30-45 minutes | Protected, accessible, safe environment |
Test Finish Removal Method | Apply stripper on a hidden spot | 15-30 minutes | Confirmed safe/effective removal process |
Apply Removal Technique | Systematically strip finish in sections | 1-3 hours | Old finish removed without damage |
Clean and Inspect | Wipe surfaces, inspect for imperfections | 30-60 minutes | Surfaces fully clean, ready for refinishing |
Finish and Protect | Apply new finish/protective coating | 1-2 hours (+ cure) | Durable, attractive protected cabinet finish |
Step 3: Test the Finish Removal Method
Before committing to a full cabinet refinishing project, testing your chosen finish removal method is a critical step that can save you from potentially costly mistakes. Selecting the right technique requires precision and careful evaluation. This preliminary assessment allows you to understand how different chemical strippers interact with your specific cabinet surfaces and determine the most effective approach.
Our comprehensive guide on cabinet preparation recommends selecting an inconspicuous area for initial testing. Choose a small, hidden section of cabinetry typically concealed by hinges or located in a less visible corner. This strategic location provides a realistic test surface without risking prominent damage. Wear your protective gear exactly as you would for the full project - safety goggles, chemical-resistant gloves, and a respirator mask are non-negotiable during this exploratory phase.
Apply a small amount of chemical stripper to the test area using a disposable brush, following the manufacturer’s instructions precisely. Different finish types - whether lacquer, varnish, or polyurethane - react distinctly to chemical strippers. Observe how quickly the existing finish begins to soften or bubble. Note the time required for the chemical to effectively break down the surface coating. Pay close attention to the stripper’s performance: Does it remove the finish cleanly? Are multiple applications necessary?
Carefully scrape the softened finish using your plastic or metal scraper, watching how easily the material lifts from the wood surface. Assess the residue left behind and the potential for wood damage. Some chemical strippers can be more aggressive than others, potentially etching or discoloring the underlying wood if left too long. The goal is finding a method that removes the finish efficiently without compromising the cabinet’s structural integrity.
After completing your test, thoroughly clean the area with mineral spirits or the recommended neutralizing solution. Allow the surface to dry completely and inspect the results. Look for signs of wood damage, uneven stripping, or areas requiring additional attention. This methodical approach transforms a potentially risky project into a controlled, predictable refinishing process. A successful test area provides the confidence and insights needed to proceed with your entire cabinet refinishing endeavor.
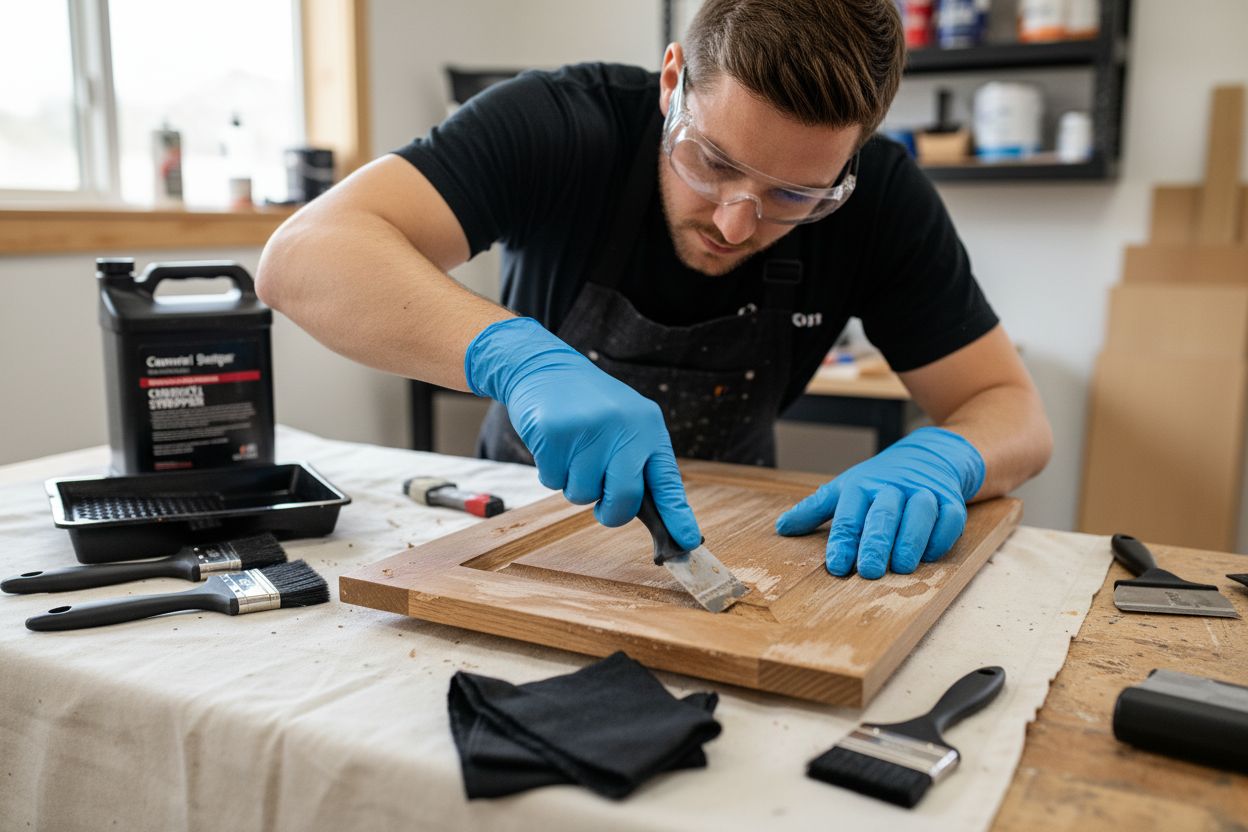
Step 4: Apply the Chosen Finish Removal Technique
With your initial test complete, you are now ready to systematically apply the finish removal technique across your entire cabinet surface. Precision and patience are your most valuable tools during this critical phase. The method you selected during testing will now be implemented with meticulous care and consistent technique.
Discover more about professional cabinet refinishing techniques to complement your approach. Begin by working in manageable sections, typically focusing on one cabinet door or surface area at a time. This segmented strategy prevents the chemical stripper from drying out and ensures uniform coverage. Apply the stripper using a disposable brush, working in smooth, even strokes and maintaining a consistent thickness across the surface. Critical tip: Always apply the stripper in the direction of the wood grain to minimize potential surface damage.
Once applied, allow the chemical stripper to sit for the precise duration recommended by the manufacturer. This waiting period is crucial - too short, and the finish will not adequately soften; too long, and you risk damaging the underlying wood surface. Watch for visual cues like bubbling or wrinkling, which indicate the finish is breaking down. These signals suggest the stripper is working effectively and preparing the surface for removal.
Using your plastic or metal scraper, begin gently removing the softened finish. Start at an edge or corner, carefully lifting the softened material without gouging or scraping too aggressively. Work methodically, cleaning your scraper frequently to prevent buildup and ensure clean, consistent removal. For stubborn areas, you might need to reapply the chemical stripper and allow additional time for penetration. Some wood surfaces or multiple layers of finish might require several applications to achieve complete removal.
After scraping, use steel wool or fine-grit sandpaper to remove any remaining finish residue. Clean the surface thoroughly with mineral spirits or the recommended neutralizing solution, ensuring all chemical stripper and finish particles are completely removed. Allow the surface to dry completely before proceeding to the next stage of your cabinet refinishing project. A clean, smooth surface free of old finish sets the foundation for a flawless new finish.
Step 5: Clean the Cabinets and Inspect Results
After the intensive finish removal process, thoroughly cleaning and meticulously inspecting your cabinets becomes crucial. This step transforms your raw, stripped surfaces into a pristine canvas ready for refinishing. Careful cleaning removes all chemical residues, wood particles, and potential contaminants that could compromise your future finish.
Learn more about maintaining kitchen surfaces during renovation to complement your refinishing process. Begin by preparing a cleaning solution of mineral spirits or the manufacturer-recommended solvent. Using lint-free rags, systematically wipe down every surface where finish removal occurred. Work in consistent, overlapping strokes to ensure complete coverage. Pay extra attention to corners, edges, and recessed areas where chemical residue might accumulate. The goal is creating an immaculately clean surface that allows your next coating to adhere perfectly.
Inspection requires both visual assessment and tactile examination. Illuminate your workspace brightly to reveal subtle imperfections that might otherwise go unnoticed. Run your gloved hand carefully across each surface, feeling for any rough patches, remaining finish fragments, or uneven areas. Look for signs of wood damage, such as deep scratches, gouges, or areas where the chemical stripper might have been overly aggressive. These imperfections will need additional attention before proceeding with refinishing.
If you discover minor surface irregularities, gentle sanding with fine-grit sandpaper can help smooth these areas. Work slowly and consistently, always moving in the direction of the wood grain. For deeper scratches or more significant damage, you might need wood filler or more extensive repair techniques. Take your time during this inspection phase - rushing could result in a subpar final finish that highlights every imperfection.
After cleaning and initial inspection, allow the cabinets to dry completely in a well-ventilated area. The surface should feel smooth, uniform, and free of any sticky or tacky residue. A successful cleaning and inspection stage sets the foundation for a professional-quality refinishing project, ensuring your cabinets will look stunning and maintain their beauty for years to come.
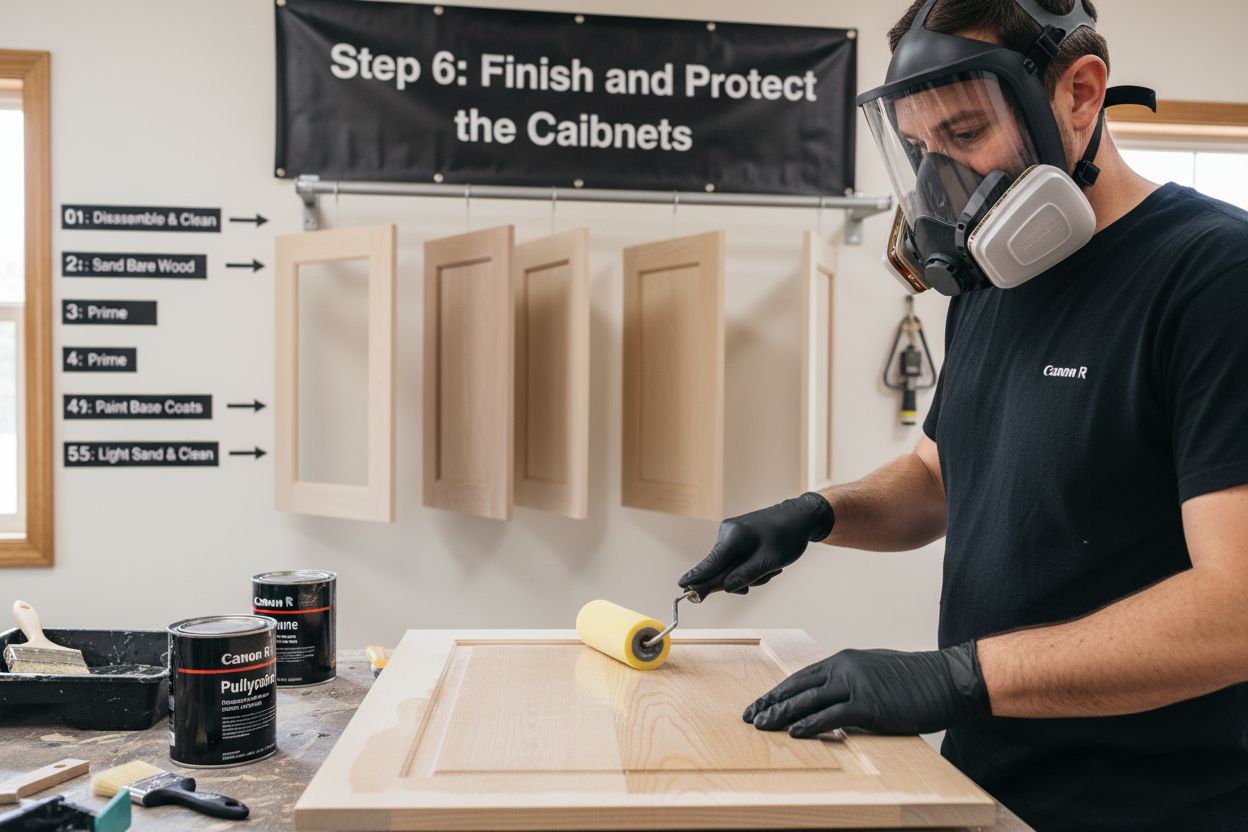
Step 6: Finish and Protect the Cabinets
The final stage of your cabinet refinishing journey involves selecting and applying a protective finish that will not only enhance the wood’s appearance but also shield it from daily wear and tear. This critical step transforms your stripped cabinets from vulnerable surfaces into resilient, beautiful features of your kitchen. Choosing the right finish requires careful consideration of durability, aesthetic preferences, and the specific wood type you are working with.
Explore professional techniques for cabinet painting and finishing to ensure optimal results. Begin by selecting a high-quality polyurethane, lacquer, or water-based finish compatible with your wood surface. Oil-based finishes provide exceptional durability and a rich, deep appearance, while water-based alternatives offer faster drying times and lower volatile organic compound emissions. Apply a thin, even primer first to ensure optimal adhesion and create a uniform base for your final finish.
Technique is paramount when applying your protective coating. Use a high-quality, lint-free foam roller or professional-grade sprayer to achieve a smooth, consistent application. Work in a well-ventilated area with minimal dust, ideally using a dedicated workspace like a clean garage or workshop. Apply multiple thin coats rather than a single thick layer, allowing adequate drying time between each application. This approach prevents drips, ensures even coverage, and promotes a more durable final finish. Sand lightly with ultra-fine grit sandpaper between coats to remove any microscopic imperfections and promote better layer adhesion.
Pay special attention to frequently used areas like cabinet handles, edges, and corners. These high-traffic zones require extra protection and careful application. Consider applying an additional protective layer in these regions to enhance wear resistance. After your final coat, allow the cabinets to cure completely - this might take several days to a week depending on the specific product used. Resist the temptation to replace hardware or use the cabinets immediately; proper curing ensures maximum durability and a professional-quality finish.
Once fully cured, your cabinets will showcase a stunning, protected surface that resists moisture, scratches, and daily kitchen challenges. Regular maintenance, such as gentle cleaning and avoiding harsh chemicals, will help preserve the beautiful finish you’ve meticulously created.
Skip the Stress and Let Experts Transform Your Cabinets
Tackling cabinet finish removal on your own can be daunting. Between harsh chemicals, endless scraping, and the risk of damage, it is easy to feel overwhelmed or worried about achieving a smooth, flawless foundation for your dream kitchen. Every step, from prepping your space to carefully inspecting for imperfections, demands time and unwavering focus. If you crave a beautiful and durable result but want to avoid the frustration of DIY hiccups, there is a solution designed just for you.

Let Ottawa Cabinet Painting take care of everything. Our team follows a meticulous prep process that addresses every pain point covered in the article. We use premium materials and proven techniques to deliver silky, resilient finishes that last. Start with a simple quote request and see how you can save money, safeguard your cabinet layout, and enjoy a renewed kitchen look without any of the chaos. Visit our main website now to discover real transformations, explore our 6-year warranty, or contact us for a fast consultation. Let us make your cabinet refinishing project stress-free and spectacular.
Frequently Asked Questions
What materials are necessary for removing finish from cabinets?
You will need protective gear such as chemical-resistant gloves, safety goggles, and a respirator mask. Essential tools include plastic and metal scrapers, lint-free rags, chemical strippers, steel wool, sandpaper, drop cloths, and painter’s tape.
How do I choose the right chemical stripper for my cabinets?
Select a chemical stripper specifically designed for the existing finish on your cabinets, such as varnish, shellac, or lacquer. Always read product labels carefully to ensure compatibility with your cabinet material.
Why is testing a small area important before removing the finish?
Testing in a small, inconspicuous area allows you to assess how the chemical stripper reacts with your cabinet surface, ensuring that it effectively softens the finish without causing damage to the wood.
How do I ensure a successful cleaning and inspection after removing the finish?
Thoroughly clean the surface with mineral spirits or the recommended solvent using lint-free rags. Inspect for any remaining residue or surface imperfections and sand lightly if necessary to ensure a smooth surface for refinishing.
Recommended
Comments