How to Pick Kitchen Backsplash for a Stress-Free Upgrade
- demoore5506
- Nov 17, 2025
- 7 min read

Over 60 percent of homeowners report feeling overwhelmed by the endless choices when trying to update their kitchen’s look. A well-chosen backsplash can completely refresh your space and add lasting value, but picking the right one involves more than simply browsing pretty tiles. Understanding your kitchen’s style, your needs, and how different materials perform will make the process smoother and the results more satisfying.
Table of Contents
Quick Summary
Key Point | Explanation |
1. Assess kitchen style and needs | Evaluate your kitchen’s existing elements to guide backsplash selection and ensure cohesive design. |
2. Coordinate with cabinet colors | Use complementary tones instead of matching exactly, applying the 60-30-10 color rule for balance. |
3. Select durable, easy-to-clean materials | Opt for materials like ceramic and glass for durability, minimal maintenance, and aesthetic appeal. |
4. Match size and layout to space | Choose backsplash dimensions and patterns that complement your kitchen’s features and enhance visual appeal. |
5. Visualize final options clearly | Utilize design tools and mood boards to confidently evaluate color, texture, and harmony in your selections. |
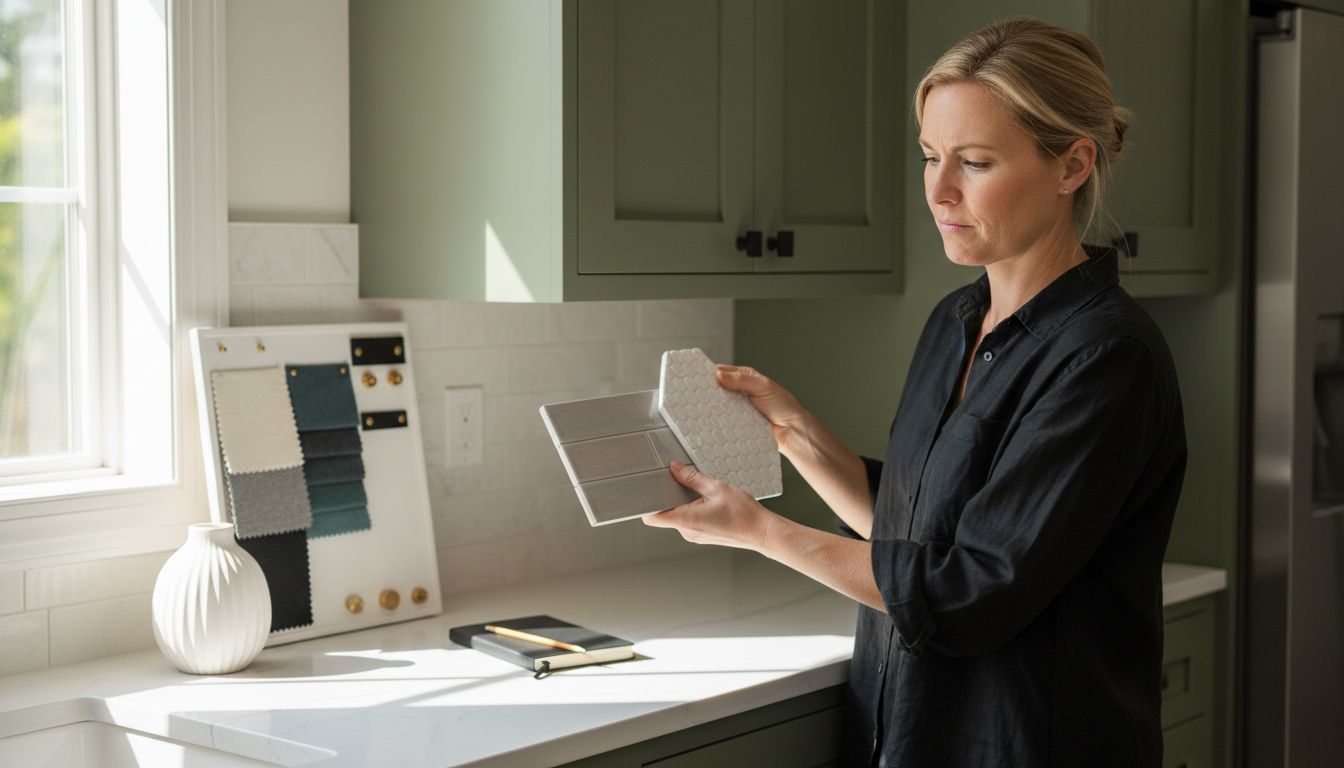
Step 1: Assess Your Kitchen’s Style and Needs
Choosing the perfect kitchen backsplash starts with understanding your kitchen’s unique personality and functional requirements. This initial assessment will help you narrow down design options and select a backsplash that transforms your space without overwhelming your existing aesthetic.
Begin by taking a comprehensive visual inventory of your kitchen. Look closely at your cabinet colors, countertop materials, flooring, and overall color scheme. Are your kitchen elements more traditional with warm wood tones and classic lines? Or do you lean towards a modern minimalist approach with sleek surfaces and neutral palettes? Understanding your kitchen’s existing style will guide your backsplash selection process and ensure a harmonious design.
Consider both visual appeal and practical functionality when evaluating backsplash options. High traffic areas or spaces near cooking zones might require more durable materials like ceramic or porcelain tiles that can withstand splashes, heat, and frequent cleaning. Kitchen upgrade ideas for budget friendly families often recommend selecting materials that balance aesthetic preferences with long term performance.
Pro tip: Take digital photographs of your kitchen from multiple angles. These images will help you visualize potential backsplash designs and compare different options side by side. By methodically assessing your kitchen’s style and needs upfront, you will set the foundation for a stress free and successful backsplash upgrade.
Step 2: Coordinate Backsplash with Cabinet Colors
Coordinating your backsplash with cabinet colors is a critical design decision that can dramatically impact your kitchen’s overall aesthetic. Your goal is to create a harmonious visual flow that enhances both elements without creating visual tension or overwhelming the space.
According to Deslaurier Custom Cabinets, you should avoid trying to match cabinet and backsplash colors exactly. Instead, focus on complementary tones and textures that create intentional contrast. Composite Carpentry recommends following the 60-30-10 color rule: use 60% for your dominant color (typically cabinets), 30% for a secondary color like countertops or backsplash, and 10% for accent elements such as hardware or decor.
When selecting your backsplash, consider materials and finishes that interact interestingly with your cabinet colors. A glossy ceramic tile can add depth to matte cabinet surfaces, while a textured stone backsplash can soften sleek modern cabinet designs. Understanding Choosing Cabinet Colors for Your Home suggests experimenting with samples and viewing them in your kitchen’s lighting to ensure the perfect visual balance.
Pro tip: Create a mood board with samples of your cabinet color, potential backsplash materials, and countertop swatches. This visual reference will help you confidently choose a combination that looks cohesive and intentional.
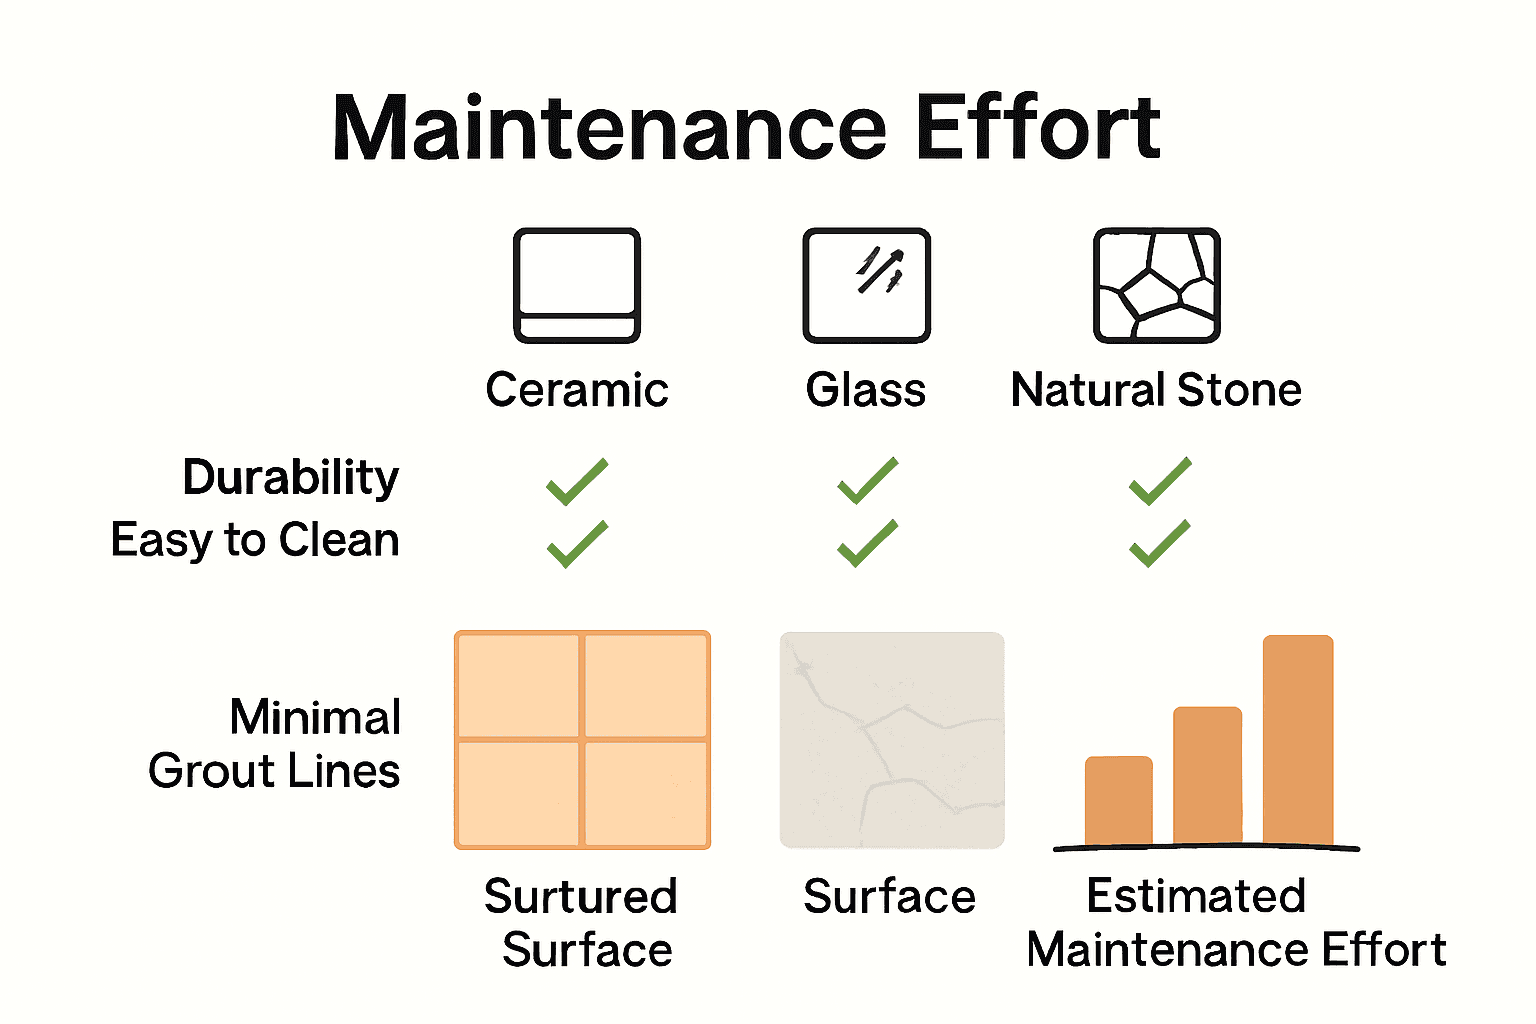
Step 3: Select Durable and Easy-to-Clean Materials
Selecting the right backsplash material is crucial for creating a functional and long lasting kitchen surface that can withstand daily wear and tear. Your goal is to find a material that not only looks beautiful but also provides practical protection and requires minimal maintenance.
Ceramic and porcelain tiles remain top choices for kitchen backsplashes due to their exceptional durability and cleaning ease. These materials resist moisture, stains, and heat while offering a wide range of design possibilities. Glass tiles provide another excellent option with their non porous surface that prevents grime buildup and allows for quick wipe downs. Understanding Durable Cabinet Paint suggests that selecting materials with smooth surfaces can significantly reduce cleaning time and maintenance efforts.
When evaluating materials, consider factors like texture, grout lines, and surface finish. Smooth tiles with minimal grout spacing will be easier to clean compared to highly textured surfaces that can trap dirt and grease. Natural stone options like marble or granite look stunning but typically require more maintenance and periodic sealing to preserve their appearance.
Pro tip: Always request material samples and test them against common kitchen substances like oil, wine, and tomato sauce to understand their real world performance. This practical approach will help you choose a backsplash that looks great and stands up to your kitchen lifestyle.
Step 4: Match Backsplash Size and Layout to Space
Selecting the right backsplash size and layout is critical for creating a visually balanced and functional kitchen design. Your goal is to choose a configuration that complements your kitchen’s dimensions while maximizing aesthetic appeal and practical utility.
Macucina recommends typically covering 18 inches above the countertops as a standard backsplash height. However, they also suggest extending the backsplash to the ceiling for a more dramatic visual impact. Consider your kitchen’s specific dimensions when deciding between standard and full height installations. Caesarstone Canada offers additional insight for smaller kitchens recommending white subway or honeycomb tiles to create an illusion of more space.
When planning your backsplash layout, explore different tile installation patterns like straight or staggered arrangements. Straight layouts provide a clean modern look perfect for minimalist designs, while staggered patterns add visual interest and can make smaller kitchens feel more dynamic. Pay special attention to areas around sinks and stoves where intricate tile work can create focal points.
Pro tip: Create paper or digital mockups of your potential backsplash layout before purchasing materials. This visualization technique helps you understand how different patterns and sizes will interact with your kitchen’s existing design elements and prevent costly installation mistakes.
Step 5: Review Options and Visualize the Finish
Reviewing and visualizing your backsplash finish is the final crucial step in creating a kitchen upgrade that truly reflects your personal style and functional needs. Your goal is to transform abstract design ideas into a concrete visual representation that helps you confidently make your selection.
HGTV highlights innovative eco friendly options like cork mosaic tiles, bamboo tiles, and recycled glass tiles that offer both sustainability and unique aesthetic possibilities. Wayfair Canada suggests exploring color combinations such as blue cabinets with white backsplashes or light brown and black with marble backsplashes to understand how different design elements interact.
To effectively visualize your backsplash, leverage multiple resources like digital design tools, physical sample boards, and augmented reality apps that allow you to preview materials in your actual kitchen space. How to Choose Paint Finish recommends comparing samples under different lighting conditions to ensure your selection looks perfect throughout the day.
Pro tip: Create a physical mood board by collecting tile samples, paint swatches, and kitchen hardware to see how all elements work together. This tangible approach will help you make a more informed and confident design decision.
Transform Your Kitchen Backsplash Upgrade with Expert Cabinet Refinishing
Picking the right kitchen backsplash can feel overwhelming with so many styles, materials, and layouts to consider. The article highlights common challenges like coordinating backsplash colors with cabinets, selecting durable materials that are easy to clean, and visualizing the final look to avoid costly mistakes. If you are stressed about balancing aesthetics and functionality while wanting to avoid a full kitchen renovation, there is a better way to achieve a stunning upgrade.
Ottawa Cabinet Painting specializes in professional cabinet painting and refinishing that perfectly complements your backsplash choice. By transforming your existing cabinets with a high-end, modern finish, you can create a cohesive kitchen style without the expense and disruption of a full replacement. Their meticulous process ensures a silky smooth, durable finish that increases the beauty and value of your kitchen. Ready to combine your ideal backsplash with refreshed cabinet surfaces for a cohesive makeover? Visit Ottawa Cabinet Painting today to explore your options and request a quote. Don’t wait to create the warm, functional kitchen you deserve with expert care right in your neighborhood.
Frequently Asked Questions
How do I assess my kitchen’s style before picking a backsplash?
Begin by evaluating your existing kitchen elements, such as cabinet colors, countertops, and overall color schemes. Take visual inventory and consider whether your kitchen leans more traditional or modern, which will help narrow down your backsplash options.
What materials should I consider for a durable and easy-to-clean backsplash?
For durability and ease of maintenance, ceramic and porcelain tiles are excellent choices due to their resistance to moisture and stains. Opt for smooth surfaces to minimize cleaning time, which can help reduce maintenance efforts by around 30%.
How can I effectively coordinate my backsplash with cabinet colors?
Focus on complementary tones and textures rather than exact matches to create visual harmony. Utilize the 60-30-10 color rule: 60% dominant color (cabinet), 30% secondary (backsplash), and 10% accents to achieve balance in your kitchen design.
What size and layout should I choose for my kitchen backsplash?
A standard backsplash height is about 18 inches above countertops, but extending it to the ceiling can enhance visual impact. Experiment with different tile patterns, like straight or staggered, to find a layout that complements your kitchen’s dimensions and maximizes aesthetic appeal.
How can I visualize my backsplash options before making a final decision?
To effectively visualize your backsplash selections, create a physical mood board with tile samples, paint swatches, and decor elements. Use digital design apps to preview how materials will look in your actual kitchen space to ensure a cohesive choice.
What is the best way to finalize my backsplash choices?
Review all options by comparing materials and finishes under different lighting conditions. Conduct side-by-side comparisons of samples to help make an informed decision that reflects your personal style while meeting functional needs.
Recommended

Comments