Paint Kitchen Cabinets in Ottawa This Weekend: No Sanding, 2–4 Years

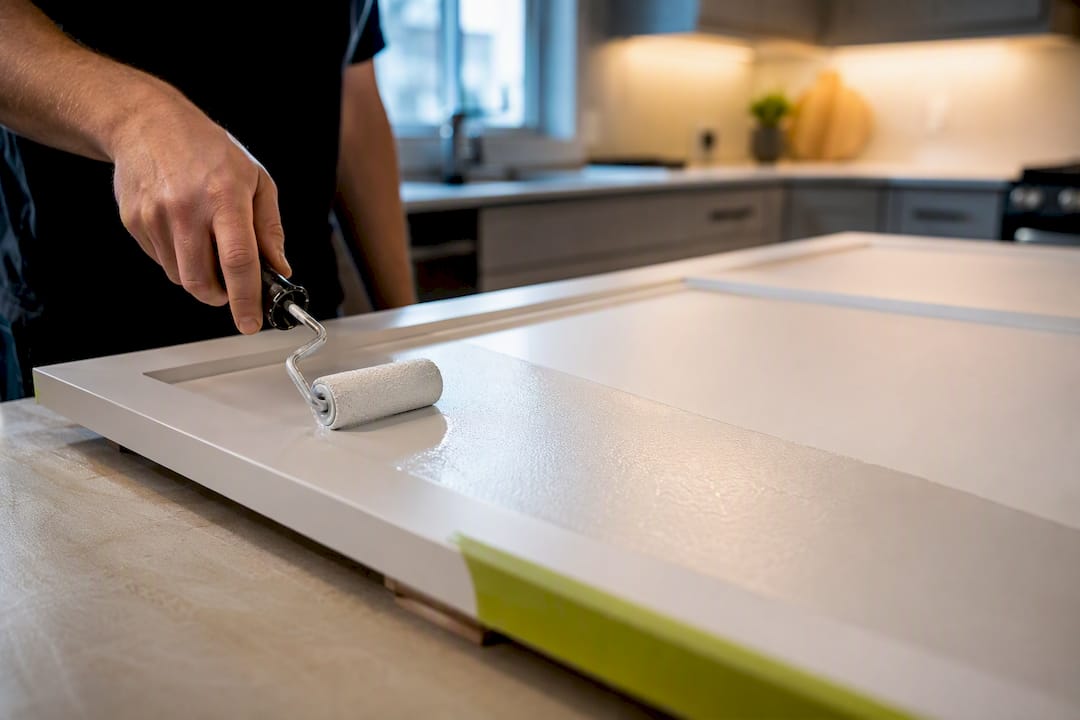
The easiest reliable way to paint kitchen cabinets is to clean them thoroughly, use a liquid deglosser instead of sanding on lightly worn factory finishes, apply a bonding primer matched to the material, then brush and roll on two thin coats of cabinet-grade paint. Remove the doors when you can. This shortcut holds up well for a few years on the right surfaces. If you want a finish that lasts a decade without touch-ups, that’s a job for a professional refinisher.
TL;DR:
Using a liquid deglosser and bonding primer can extend cabinet paint life to around 2 to 4 years without sanding, but durability declines over time.
Removing doors allows for a smoother finish and reduces drips, but requires careful labeling and can add 3 to 4 days including dry and cure time.
Appropriate primer and paint choices depend on cabinet materials, with urethane acrylic primers for laminate and shellac-based primers for wood and varnished surfaces.
Skipping sanding is suitable only when existing finishes are intact, glossy, and stable, otherwise full mechanical sanding offers significantly longer-lasting results.
Professional refinishing with full prep, longer process, and longer warranty provides a cleaner, more durable finish that can last ten years or more.
Table of Contents
What’s the Easiest Way to Paint Kitchen Cabinets This Weekend?
You don’t need a garage full of tools to get a decent result. You need the right handful of products and a sequence that doesn’t skip steps that actually matter.
Here’s what to buy before you touch a single door:
Degreasing cleaner (or a diluted vinegar solution) to strip cooking oil residue that paint won’t stick to
Liquid deglosser to chemically dull glossy factory finishes so primer can bite
Bonding primer matched to your cabinet material (more on this below)
Cabinet-grade paint in satin or semi-gloss, not standard wall paint
Foam mini roller for flat door faces
2.5 inch angled brush for edges, corners, and profiled details
Tack cloths to pull dust and lint off surfaces before priming and between coats
The shortest sequence looks like this: label every door and drawer front with painter’s tape and a number, remove hardware and hinges, clean everything, degloss, prime, apply two thin topcoats, then reassemble. That order rarely changes across major how-to guides from paint retailers and manufacturers, because skipping a step is where most DIY jobs go sideways.
Pro Tip: Number the back of every door and its matching cabinet opening with painter’s tape before you remove a single hinge. It sounds obvious until you’re staring at 14 identical white doors on Sunday night with no idea which one goes where.
Budget your time honestly. Active work, the cleaning, degloss, prime, and paint, usually adds up to 12 to 16 hours spread across a weekend. But the calendar timeline runs longer: 3 to 4 days minimum once you count dry time between coats and a proper cure before you hang doors back on hinges. Try to compress that and you’ll dent a soft finish with the first oven-mitt swipe.
A few red flags mean DIY probably isn’t the move. If your cabinets are pre-1978, lead paint is a real possibility, and the EPA’s lead-safe work practices call for containment and specific handling before you sand or scrape anything. If the boxes are swollen from water damage, or previous paint is already peeling in sheets, priming over the problem won’t fix it. And if you’re in a condo with restrictions on spraying or strong odors, factor that into your method before you buy a sprayer you can’t legally use in-suite.
Step-by-Step: The Easiest Full Process That Actually Holds Up
This is the sequence that gets you a smooth, durable result without a mechanical sander running for two days straight.
1. Decide: doors off or painted in place?
Removing doors and drawer fronts takes more time up front, but it’s worth it. You get flat horizontal surfaces to paint, which means no drips, no sagging, and a smoother finish overall. Painting in place saves an hour of hardware removal but almost guarantees visible brush marks on vertical surfaces and drip lines under hinges. For anything beyond a quick refresh, take the doors off.
2. Clean and degrease everything
Kitchen cabinets accumulate a thin film of cooking grease you can’t always see, and paint will not bond to it. A degreasing cleaner or a diluted vinegar solution applied with a scrub sponge, followed by a clean water rinse, handles most kitchens. Behr’s application guidance recommends multiple passes on the areas around the stove and range hood, where grease builds up thickest. Let everything dry completely, ideally overnight, before moving to the next step.
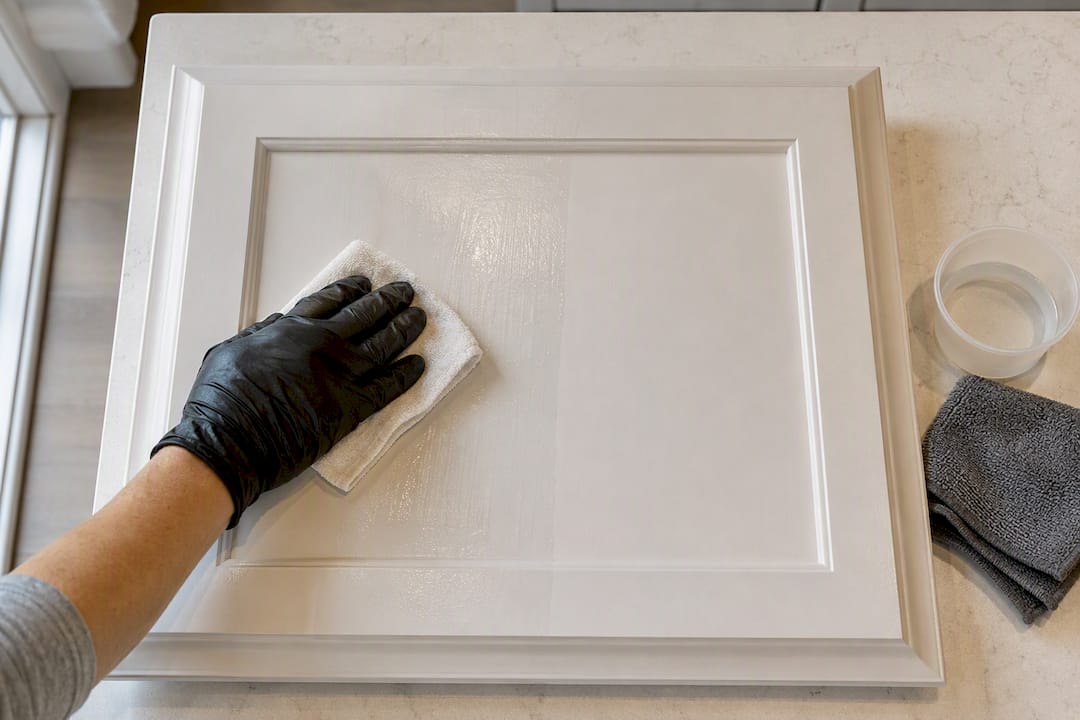
3. Apply liquid deglosser (skip sanding where it applies)
If your existing finish is intact, not peeling, not chipped down to bare wood, a liquid deglosser wiped on with a rag chemically etches the surface so a bonding primer can grip it. This step is what makes the whole no-sanding approach work, but it only works within limits covered in the next section. Ventilate the room. Deglossers are solvent-based and fumes can be strong in a closed kitchen.
4. Prime with a bonding primer suited to the surface
This is the step people rush, and it’s the one that determines whether your paint job lasts two years or two months. Apply the primer in thin, even coats with your foam roller on flats and angled brush on edges. Don’t load the roller heavily. Thin coats level out and dry faster; thick coats sag, pool in corners, and take days to cure properly.
5. Paint: brush the edges, roll the flats
Cut in the edges, panel grooves, and any raised profile with your angled brush first. Then roll the flat center panels with the foam mini roller, working in one direction and “laying off” each section with a light final pass to smooth out roller texture. Benjamin Moore’s application guidance recommends planning for at least two thin finish coats rather than chasing a single heavy coat, since thin layers dry harder and level more evenly.
6. Respect dry time and cure time, they are not the same thing
Dry time is how long before you can apply the next coat, usually a few hours. Cure time is how long the paint needs to reach full hardness, which can run several days to a couple of weeks depending on the product. A door that feels dry to the touch on Tuesday can still be soft enough to scuff or stick on Thursday. Wait the full cure window before hanging doors and using the kitchen normally.
7. Reassemble carefully
Rehang doors using your labeling system, and don’t overtighten hinge screws into fresh paint, it can crack the finish around the screw head. If a door sticks slightly against the frame, wait a few more days before adjusting anything. Cured paint settles into its final texture over time, and what feels sticky at day 3 is often fine by day 10.
When Skipping Sanding Is Okay, and When You Must Sand
Not every kitchen is a good candidate for the no-sanding shortcut, and pretending otherwise is how good weekend projects turn into peeling messes by spring.
Skipping sanding is reasonable when all of the following are true:
The existing finish is intact, with no peeling, bubbling, or chips down to bare wood
The cabinets have a factory finish, not multiple layers of old repaint
You’re using a liquid deglosser correctly, followed by a bonding primer designed for glossy surfaces
The material is solid wood or a stable engineered substrate, not deteriorating MDF
You accept a shorter lifespan in exchange for the time saved
That last point matters more than most guides admit. A deglosser-and-bonding-primer approach typically holds up for roughly 2 to 4 years under ideal conditions, compared with 10 or more years when the surface gets full mechanical sanding first. Sanding physically roughs up the surface, giving primer more to grip onto. Chemical deglossing does something similar but shallower, which is why it’s faster and less durable.
You should sand, not skip it, in a few specific scenarios: cabinets that have already been repainted once (multiple coats create adhesion problems deglosser alone can’t solve), thick lacquer finishes that resist chemical breakdown, and thermofoil or MDF panels where the base material itself needs mechanical prep to hold primer. In those cases, a light sanding, even just enough to knock down the sheen, dramatically improves your odds.
There’s a middle ground worth knowing about: sanding just the high-touch edges (around handles, hinge areas, door bottoms) while deglossing the flat center panels. That hybrid approach is exactly what professional refinishers tend to do, because it targets the areas that take the most physical abuse without doubling your total prep time.
Which Primers, Paints, and Tools Give the Best Low-Effort Results?
Picking the wrong primer is the single most common reason a “quick” cabinet paint job fails within months, so this is worth getting right before anything else.
Primer choice depends on your cabinet material:
Thermofoil, melamine, and laminate surfaces need a urethane acrylic bonding primer like INSL-X STIX, which is formulated specifically to grip non-porous, slick surfaces. Standard primers, including some shellac-based ones, can peel off these substrates within months.
Solid wood with a stained or varnished finish often works well with a shellac-based primer like Zinsser BIN, which blocks tannin bleed-through and adheres to glossy wood surfaces.
Never reach for a generic interior wall primer on glossy cabinet doors. Wall primers are built for porous drywall, not slick, oil-contaminated cabinet surfaces, and they will let go within a season.
Topcoat and sheen guidance:
Cabinet-grade paints, waterborne alkyds and dedicated cabinet enamels, are formulated to level smoothly and cure to a harder, more washable film than regular trim paint. Stick with satin or semi-gloss sheen. Higher sheens resist grease and fingerprints better and make cleanup easier, which matters a lot on cabinets that get touched dozens of times a day.
Tools that actually speed the work up:
A foam mini roller lays down a smooth, nearly brush-mark-free finish on flat door panels
A 2.5 inch angled brush handles edges, panel grooves, and profiled details a roller can’t reach
Microfiber rollers work well for larger flat surfaces like cabinet frames still mounted on the wall
A pair of painter’s tripods or simple sawhorses keep doors elevated and flat while you work, instead of leaning them against a wall where they pick up dust and drips
Spraying produces the smoothest possible finish, but it comes with real trade-offs for a DIYer: overspray control, ventilation, and masking off an entire kitchen. In condos and shared buildings, in-suite spraying is often restricted by strata or building rules around VOCs and odor complaints, which is why many professional refinishers spray doors offsite in a controlled space and brush-and-roll the frames that stay mounted in the kitchen. If you’re set on spraying, doing the doors in a garage or basement, away from the finished kitchen, solves most of that problem.
Time-Saving Hacks That Don’t Ruin Durability
A few workflow tweaks shave real hours off the project without cutting a corner that matters.
Batch everything. Remove all doors and hardware in one pass, clean all of them in one pass, degloss all of them in one pass. Switching tasks constantly is what eats a weekend.
Paint doors flat, in a single staging area. Laying doors flat on sawhorses lets you prime and paint several at once while earlier ones dry, instead of babysitting one door at a time.
Sand only the edges that take abuse. Combine deglossing on flat panels with quick hand-sanding around handles and door bottoms, the spots most likely to chip first.
Use a fast-drying bonding primer. Some bonding primers are ready for a topcoat in as little as an hour, which compresses your total timeline without skipping the step.
Label as you disassemble, not after. A simple numbered tape system on doors and matching cabinet openings turns reassembly into a 20-minute task instead of a frustrating puzzle.
Pro Tip: Set up two staging zones, one for pieces waiting to dry, one for pieces ready for the next coat. Doors get moved between zones as they progress, so you always know at a glance what’s done and what’s not.
Fixing Peeling, Brush Marks, and Sticky Doors
Even a careful job can throw a curveball. Most common problems have a fast, targeted fix that doesn’t mean redoing the entire cabinet.
Edge lift or peeling near hinges and the sink: this usually means the primer never bonded to the substrate in that spot. Sand back to sound material and re-prime with a bonding primer before repainting, since a cosmetic touch-up over lifting paint rarely holds.
Visible brush marks or orange peel texture: let the coat cure fully, then knock it down with fine sandpaper and apply one thin, well-laid-off touch-up coat with a foam roller.
Doors sticking against the frame after reassembly: give the paint more cure time before forcing anything. If it persists, a small hinge adjustment usually solves it without touching the paint at all.
Repeated peeling across multiple doors: that’s a sign the underlying prep, cleaning, deglossing, or primer choice, wasn’t matched to your cabinet material, and it may be time to call a professional refinisher rather than repeat the same steps.
DIY vs Professional Cabinet Painting: Ottawa Cabinet Painting’s Practical Perspective
A weekend refresh is genuinely the right call for some kitchens. If your cabinets are in good shape, you’re not chasing a flawless factory look, and you’re comfortable with a finish that might need attention again in a few years, the process above will serve you well.
Where it stops making sense is when the goal is a finish that looks and performs like a brand-new kitchen for a decade or more. That’s a different standard of prep, and it’s where Ottawacabinetpainting’s approach differs from the weekend method:
Full mechanical sanding and prep, not chemical shortcuts, on every surface that touches paint
A roughly 10-day timeline, built around proper dry and cure times at every stage rather than compressing the schedule
A 6-year warranty backing the finish, which reflects the durability gap between a full professional prep and a deglossed shortcut
Doors sprayed offsite where appropriate, keeping dust and fumes out of the occupied kitchen
That longer timeline isn’t padding. It’s the same principle covered above, thin coats and full cure times, just applied without any shortcuts, which is exactly why professionally refinished cabinets tend to outlast a DIY deglossing job by years, not months.
There’s also a household disruption angle worth naming. Full cabinet replacement means weeks without a working kitchen, contractors in and out, and a layout you didn’t necessarily ask for. Refinishing, done properly, keeps your existing layout and cabinet boxes intact while delivering a finish that looks new. If you’re weighing that trade-off for your own kitchen, local cost and style guidance for Ottawa-area homeowners walks through what that looks like in practice.
A Note on Balancing Speed and Durability
Every homeowner asking about the easiest way to paint cabinets is really asking a durability question in disguise. A weekend refresh with a deglosser and bonding primer can look fantastic on day one, but the honest comparison is a couple of years of good service against a decade or more from full professional prep.
Professional refinishers don’t treat degloss and sanding as an either/or choice. Combining chemical deglossing on flat panels with targeted sanding at hinges and edges, the spots that take the most daily wear, gets you most of the speed of the shortcut with meaningfully better edge adhesion.
If you’re not sure which approach fits your kitchen, or you want a second opinion before you buy a gallon of the wrong primer, our team is happy to talk through the specifics of your cabinets and give you a straight answer.
— Ottawa
How Ottawa Cabinet Painting Can Help With Your Kitchen
If you’ve read through the steps above and realized your kitchen needs more than a weekend deglossing job, that’s exactly the gap Ottawacabinetpainting fills. We handle professional cabinet painting, full refinishing, and hardware refits for kitchens and bathrooms across Ottawa, with a prep process built around full sanding and proper cure times rather than chemical shortcuts. Projects run around ten days from start to finish and include warranty protection on the finish.
If your cabinets have already been repainted once, are thermofoil or laminate, or you just want a finish that outlasts a couple of paint seasons, a professional result is worth the conversation. Request a free quote for your cabinet painting project and we’ll walk you through timeline, cost, and what your specific cabinets need before you commit to anything.
Sources
Recommended
Comments