Cabinet Stripping and Refinishing: Your Ottawa DIY Guide

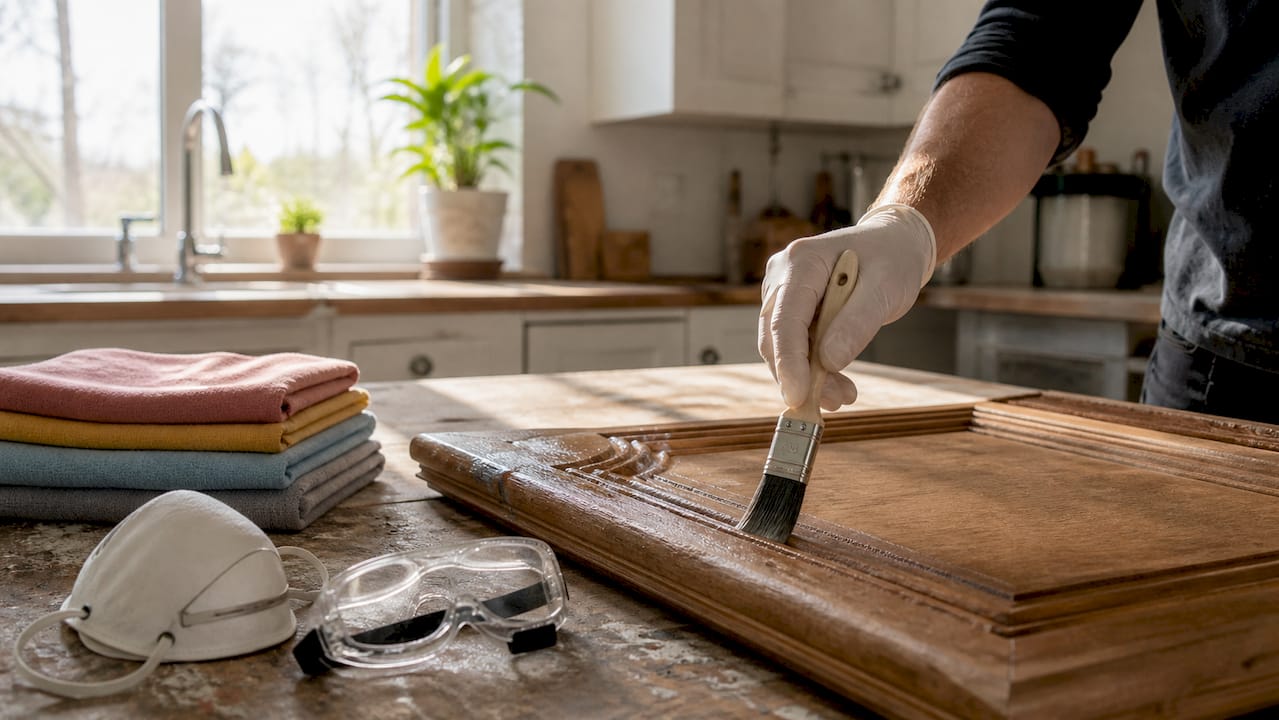
Cabinet stripping and refinishing is the right call when your existing finish is peeling, alligatoring, or built up in so many layers that paint-over would only add to the problem. For most Ottawa homeowners, the decision breaks down cleanly: strip when the finish is failing or multi-layered; scuff-sand when the film is solid and bonded; clean and prime with a bonding primer when the finish is intact but dated. Before you touch a scraper or open a can of stripper, put on your respirator with organic-vapor cartridges, chemical-resistant gloves, and eye protection, and make sure the workspace has real cross-ventilation, not just a cracked window.
Three quick decision rules:
Peeling, bubbling, or thick multi-coat finish? Strip chemically. Painting over a failing film is a recipe for disaster within a year.
Solid, bonded single-layer factory finish or MDF/veneer? Scuff-sand to 220 grit, refine to 320 on show faces, apply a bonding primer, and topcoat.
Intact but dated finish with no adhesion failure? Clean thoroughly, degrease, apply a shellac-based or bonding primer, and topcoat. No stripping needed.
Pro Tip: Label every door and drawer with a numbered piece of painter’s tape before removal. Photograph each cabinet bay with your phone. Reassembly takes minutes when you know exactly where everything came from.
Key Takeaways
Cabinet stripping and refinishing done right starts with an honest inspection: choose your prep method based on what the finish is actually doing, not what is easiest.
Point | Details |
Match prep to finish condition | Strip failing or multi-layer finishes; scuff-sand solid bonded films; prime over intact finishes. |
Test patch before full commitment | Apply stripper to one inconspicuous door first to confirm product strength and substrate compatibility. |
Neutralize after stripping | Skipping the after-wash step leaves residue that prevents primer and topcoat from bonding. |
Canadian pro cost range | Professional refinishing in Canada runs roughly $938 to $7,106, with a median near $3,268. |
Ottawacabinetpainting for Ottawa kitchens | Offers off-site spray, a 6-year warranty, and a 7–10 business day timeline as a professional alternative to DIY. |
Table of Contents
What supplies and tools do you need for cabinet stripping and refinishing in Ottawa?
How do you decide whether to strip, sand, or paint over your cabinets?
Step-by-step Ottawa cabinet stripping and refinishing workflow
Safety, ventilation, PPE, and legal disposal of stripper residues in Ottawa
What does cabinet refinishing cost in Ottawa, and how long does it take?
Common problems with refinishing old cabinets and how to fix them
What does a professional Ottawa cabinet refinisher do differently?
Ottawacabinetpainting offers Ottawa homeowners a professional alternative to DIY refinishing
What supplies and tools do you need for cabinet stripping and refinishing in Ottawa?
Getting the right materials before you start saves two extra hardware-store runs. Here is a consolidated checklist organized by category, with notes on what to look for at Canadian retailers like Home Depot, Lowe’s Canada, or Princess Auto.
Chemical strippers
Choose a gel-formulated stripper for ornate doors and raised-panel profiles. Gel clings to vertical surfaces and gives the product time to penetrate without running off. For flat slab doors, a liquid stripper works fine. Look for labels that say “multi-layer” or “heavy-duty” and check the VOC content. Low-VOC or citrus-based options (such as Citristrip) are widely available in Canada and are a good choice for indoor work with limited ventilation. Methylene-chloride-free formulas are safer for enclosed spaces, though they require longer dwell times.
Sanding tools and abrasives
Tool/Supply | Recommended Spec | Use |
Random-orbit sander | 5-inch, variable speed | Flat door faces and frame rails |
Sanding discs | 120, 150, 220, 320 grit | Grit ladder from strip to finish |
Sanding sponges | Medium and fine | Profiles, coves, and routed edges |
Detail sander or oscillating tool | Triangular pad | Tight corners and inside frames |
Tack cloths | Lint-free, low-tack | Between every coat |
PPE and safety supplies
Half-face respirator with OV/P100 cartridges (organic vapor plus particulate)
Chemical-resistant nitrile or neoprene gloves (not latex)
Safety glasses or chemical splash goggles
Disposable Tyvek coveralls
Drop cloths (canvas for floors, plastic sheeting for countertops and appliances)
Shop vac with a HEPA or fine-filter bag for sanding dust
Finishing supplies
Wood filler or grain filler, chip brushes for applying stripper, plastic scrapers (never metal on veneer), steel wool (0000 grade for profiles after stripping), shellac-based primer (Zinsser BIN is widely available at Canadian hardware stores), waterborne alkyd topcoat or conversion varnish, foam rollers (4-inch for flat panels), and a quality synthetic brush for profiles.
Pro Tip: Pick up a box of small zip-lock bags and a permanent marker. Drop each door’s hinges, screws, and hardware into a labeled bag and tape it to the back of that door. You will never spend 20 minutes hunting for the right screw on reassembly day.
How do you decide whether to strip, sand, or paint over your cabinets?
The wrong prep choice costs you the whole project. A few simple tests done before you buy a drop of stripper will tell you exactly what you are dealing with.
The inspection checklist
Run through these before anything else:
Peeling or alligatoring: Any lifting at edges or a cracked, reptile-skin texture means the film has lost adhesion. Strip.
Soft or gummy film: Press a fingernail lightly into an inconspicuous spot. If the finish dents or feels tacky, it has never fully cured or has degraded. Strip.
Brush ridges and heavy buildup: Hold a raking light (a flashlight held nearly parallel to the surface) across the door face. Visible ridges from previous brush strokes indicate multiple coats. Strip.
Veneer, MDF, or thermofoil: These substrates are sensitive to moisture and heat. Chemical strippers can swell MDF edges and lift veneer. Sand only, and use the gentlest method possible.
Previous lacquer or conversion varnish: These finishes are hard and brittle. Latex paint applied over them without proper prep will peel within months. Strip or scuff aggressively.
Quick diagnostic tests
Tape pull test: Press a strip of blue painter’s tape firmly onto the finish, then pull it off sharply at 90 degrees. If finish comes with it, adhesion has failed. Strip.
Solvent rub test: Dampen a rag with denatured alcohol and rub a small area. If the finish softens or dissolves, it is likely shellac or lacquer. If it stays hard, it is probably a conversion varnish or catalyzed finish. Catalyzed finishes need aggressive scuffing or stripping.
Profile sensitivity test: Look at the routed edges and raised-panel details. If they are already rounded from previous sanding, more sanding will lose the crispness entirely. Switch to chemical stripping for those areas.
When to strip, sand, or paint over
Scenario | Best Method |
Peeling, bubbling, or alligatoring finish | Chemical strip |
Latex paint over old varnish or lacquer | Chemical strip |
Ornate profiles with thick multi-layer buildup | Chemical strip (gel) |
Solid bonded single-layer factory finish | Scuff-sand 220–320 grit + bonding primer |
MDF or veneer substrate | Sand only (120–220), no chemical stripper |
Intact but dated finish, good adhesion | Clean + bonding primer, no strip or sand |
The hybrid approach is what most experienced refinishers use: chemical gel on the profiles and recessed panels, random-orbit sanding on the flat faces. It preserves the crispness of routed details while keeping the flat areas smooth and consistent.
Step-by-step Ottawa cabinet stripping and refinishing workflow
Work through these steps in order. Skipping or rushing any one of them is where most DIY projects go wrong.
Step 1: Plan, label, and remove (1–2 hours)
Number every door and drawer front with painter’s tape before removing a single hinge. Photograph each cabinet bay. Remove all hardware and store it in labeled bags. Take doors to a well-ventilated workspace, ideally a garage with the door open, or outdoors on a calm day.
Step 2: Set up your workspace and ventilation (30 minutes)
Lay canvas drop cloths on the floor. Cover any nearby surfaces with plastic sheeting. Position a box fan to exhaust air outward, not just circulate it. If working indoors, open windows on the opposite side of the room to create cross-flow. Put on your respirator, gloves, goggles, and coveralls before opening any stripper.
Step 3: Test patch on an inconspicuous door (30–60 minutes)
Always test your stripping product on an out-of-sight area first before committing to the full project. Apply a small amount of stripper to the back of one door, wait the full dwell time listed on the label, and check how the finish responds. This tells you whether the product is strong enough and whether the substrate can handle it.
Step 4: Apply stripper and let it work (20–40 minutes dwell time)
Brush a generous, even coat of gel stripper onto the door face. Do not spread it thin. On ornate profiles, work the gel into the recesses with a chip brush. Cover the coated surface with plastic wrap to slow evaporation and extend the dwell time. Let the stripper do the work. Do not scrape prematurely.
Step 5: Scrape and reapply as needed (30–60 minutes per door)
Use a plastic scraper on flat areas and a wooden dowel, brass brush, or 0000 steel wool on profiles. Work with the grain. If the finish has not fully released, apply a second coat and wait again. Aggressive scraping on a partially softened finish tears the wood fiber and creates more work later.
Step 6: Neutralize and wash (20–30 minutes, then dry overnight)
Follow the manufacturer’s directions for the after-wash step. Most gel strippers require a rinse with mineral spirits or a specific neutralizer. Some water-based strippers rinse with water. Skipping neutralization leaves a residue that prevents primer and stain from bonding. After washing, let the wood dry completely, at minimum overnight, before sanding.
Chemical stripping raises the wood grain, so a light sanding pass is always required after stripping. This is not optional. Stripping reduces sanding effort for heavy buildup, but is always followed by sanding to smooth raised fibers and remove residue.
Step 7: Sand after stripping (1–2 hours per set of doors)
Start at 120 grit to knock down raised grain, move to 150, then 180, then 220 on flat faces. For show faces, refine to 320. Wipe with a tack cloth between grits. On profiles, use a sanding sponge at 150 and 220. Vacuum all dust before moving on.
Step 8: Fill and repair (30–60 minutes, plus dry time)
Fill any dents, nail holes, or veneer chips with a compatible wood filler. Let it cure fully per the label, then sand flush. This is also the time to address any MDF edge swelling from moisture exposure during stripping.
Step 9: Apply stain (if desired) (1–2 hours, dry overnight)
If you are restaining rather than painting, apply stain with a lint-free rag or foam brush, working with the grain. Wipe off excess within the time window the manufacturer specifies. Uneven wipe-off is the most common cause of blotchy stain. Let dry fully before priming.
Step 10: Prime (1–2 hours application, dry 2–4 hours minimum)
For bare wood going to paint, a shellac-based primer like Zinsser BIN blocks tannin bleed and sticks to almost any surface. For scuff-sanded intact finishes, a waterborne bonding primer works well. Apply one coat, let it dry, then lightly sand with 320 grit and wipe with a tack cloth.
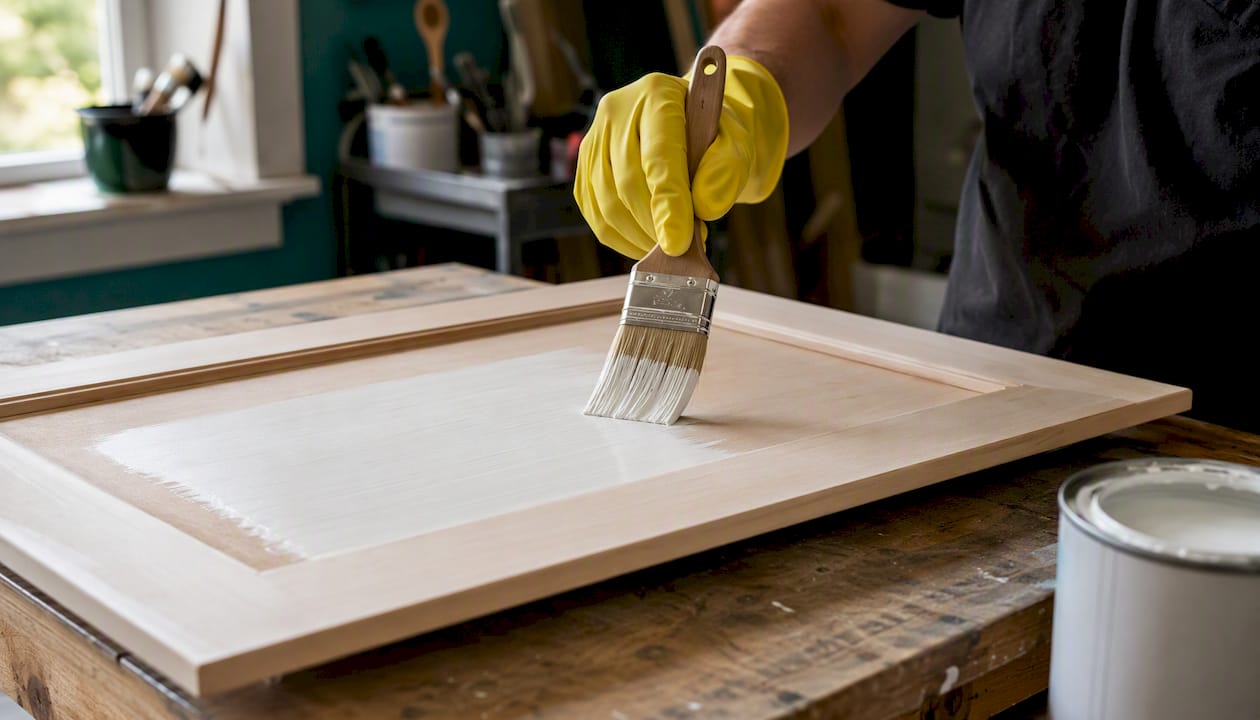
Step 11: Topcoat (2 coats, 4–6 hours between coats, full cure 7–30 days)
Waterborne alkyd topcoats (Benjamin Moore Advance, Sherwin-Williams Emerald Urethane) level well and cure hard. Conversion varnish, applied by spray, gives the most durable factory-like finish but requires an HVLP sprayer and proper mixing ratios. Apply two coats, sanding lightly with 400 grit between coats and wiping with a tack cloth. Full cure takes 7–30 days depending on the product and ambient temperature.
Pro Tip: Strip the profiles with gel, sand the flat faces with a random-orbit sander. Use a grit ladder of 120 → 150 → 220 after stripping, refine show faces to 320, and de-nib between topcoats with 400. That sequence is what separates a smooth finish from a textured one.
Safety, ventilation, PPE, and legal disposal of stripper residues in Ottawa
Chemical strippers are hazardous materials. Treating them casually is how people end up with chemical burns, solvent headaches, or a fine from improper disposal.
PPE requirements
Respirator: Half-face respirator with OV/P100 combination cartridges. A dust mask does not protect against solvent vapors.
Gloves: Nitrile (at least 8 mil thickness) or neoprene. Latex gloves offer no meaningful protection against most stripping solvents.
Eye protection: Chemical splash goggles, not safety glasses with open sides.
Skin: Disposable Tyvek coveralls or old clothes you will not wear again. Wash any skin contact immediately with soap and water.
Ventilation indoors
Position a box fan to exhaust air out of the workspace, not recirculate it. Open a window or door on the opposite side of the room to draw fresh air in. For enclosed garages, prop the main door open fully. Never use propane or open-flame heat guns in an enclosed space with solvent-based strippers. The combination is a fire hazard.
Neutralizing and cleaning stripper residue
Follow the manufacturer’s after-wash directions exactly. Most solvent-based gel strippers require a mineral spirits wipe-down. Water-based strippers typically rinse with clean water. Do not substitute or skip this step. Residue left on the wood surface will prevent primer adhesion and cause finish failure within weeks.
Hazardous waste disposal in Ottawa
Do not pour stripper residue, contaminated mineral spirits, or used rags down the drain or into household garbage. In Ottawa, the City operates Household Hazardous Waste (HHW) depots where residents can drop off paint, solvents, strippers, and contaminated materials at no charge. Store waste in the original sealed container or a clearly labeled sealed container until drop-off. Check the City of Ottawa’s waste disposal schedule for current depot locations and hours, as seasonal availability applies. Contaminated rags soaked in flammable solvents must be stored in a metal container with a tight-fitting lid or spread flat outdoors to dry before disposal, as wet solvent rags can self-ignite.
Safety note: Flammable strippers must be kept away from open flames, pilot lights, and heat sources. Store them in a cool, ventilated area in their original containers.
What does cabinet refinishing cost in Ottawa, and how long does it take?
Budget and timeline are usually the two questions that decide whether a homeowner picks up a scraper or picks up the phone.
Canadian cost benchmarks
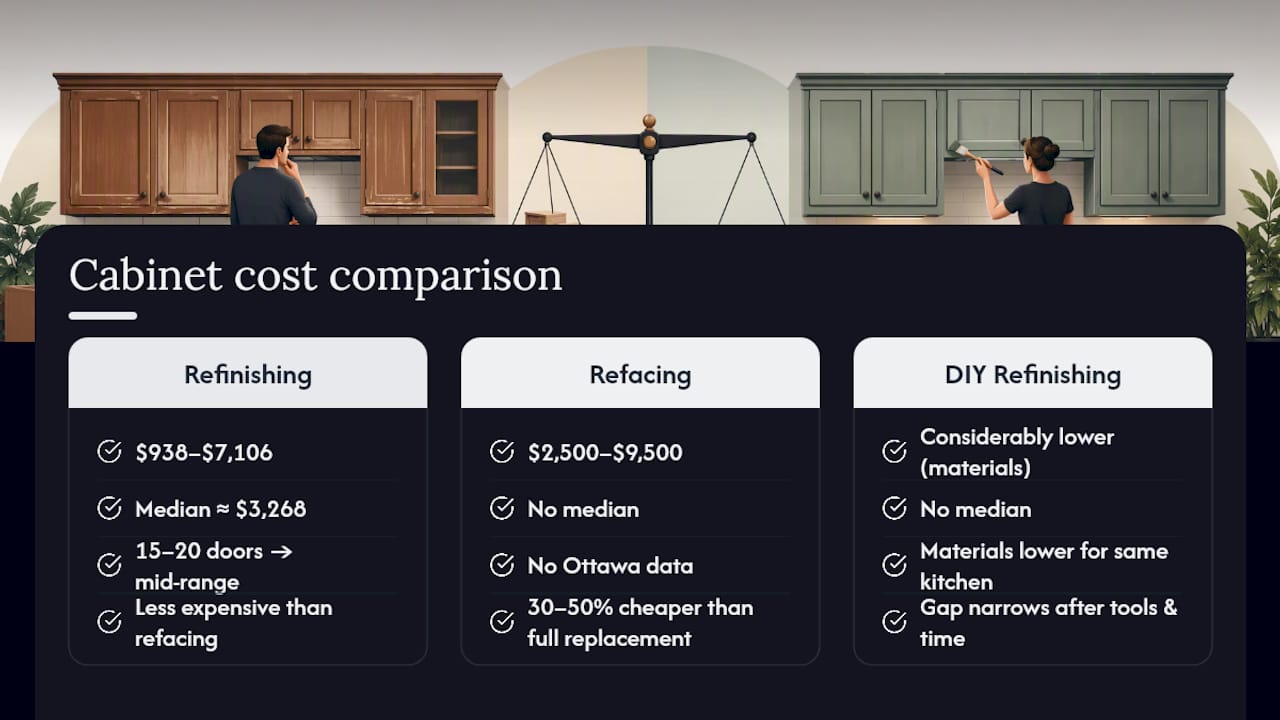
Professional cabinet refinishing in Canada ranges from roughly $938 to $7,106, with a median near $3,268, depending on the number of cabinets, door complexity, and the extent of prep work required. For Ottawa specifically, a local cost breakdown shows that a typical kitchen with 15–20 doors falls in the mid-range of those figures. DIY material costs for the same kitchen run considerably lower, but the gap narrows when you factor in tool purchases and the time investment.
Cabinet refacing, a different option that replaces door fronts and applies new veneers without touching the cabinet boxes, typically costs $2,500–$9,500 in Canada and is commonly 30–50% cheaper than full replacement. Refinishing is generally less expensive than refacing, which makes it the first option worth evaluating when the cabinet boxes are structurally sound.
For homeowners weighing whether to replace interior doors or refinish existing ones, the same cost logic applies: restoration almost always costs less than replacement when the underlying structure is intact.
DIY vs. professional timeline
Phase | DIY Estimate | Professional Estimate |
Removal and labeling | 2–3 hours | 2–3 hours |
Stripping and neutralizing | 2–4 days (multiple sessions) | 1–2 days (off-site) |
Sanding and repair | 1–2 days | 1 day |
Priming and topcoating | 2–3 days (dry time between coats) | 1–2 days (spray booth) |
Cure before reinstall | 24 hours minimum | 24 hours minimum |
Reassembly | 2–3 hours | 2–3 hours |
Total elapsed time | 2–3 weekends | 5–7 business days |
When hiring a pro makes financial sense
Your cabinets have ornate profiles or extensive veneer that are easy to damage.
You are preparing for resale and need a factory-like finish that photographs well.
Your time has a real dollar value and two lost weekends cost more than the labor savings.
You want a warranty. A professional finish with documented prep and premium materials can carry a multi-year guarantee that a DIY project cannot.
The long-term value of refinishing versus replacement is significant regardless of who does the work. The cabinet boxes in most Ottawa kitchens are structurally sound for decades. The finish is what ages.
Common problems with refinishing old cabinets and how to fix them
Even careful DIYers run into these. Knowing the fix before it happens saves a full restart.
Tannin bleed-through
Oak, cherry, and walnut release tannins that bleed through water-based primers and topcoats as yellow or brown stains. The fix is a shellac-based primer (Zinsser BIN) applied over the affected area after the water-based coat dries. Shellac blocks tannins completely. If you are working with any of these species, use shellac primer as your first coat, not a water-based bonding primer.
Raised grain after stripping
Chemical strippers raise wood fibers. If you prime over raised grain without sanding, the texture telegraphs through every topcoat. Sand with 150 grit after the wood dries, wipe with a tack cloth, and re-prime. Do not skip the dry time. Wet wood sands unevenly and clogs the paper.
Finish not bonding (adhesion failure)
Adhesion failure after topcoating almost always traces back to one of three causes: stripper residue not fully neutralized, a greasy surface from cooking oils, or a primer that was not compatible with the topcoat. If you catch it within 24 hours, you can sometimes scuff with 220 and re-prime. If the finish has cured, you need to strip back to bare wood or to the last stable layer and start the prep sequence again.
Ghost stains (old stain showing through new finish)
Old stain that was not fully stripped will bleed through light-colored topcoats. Apply a stain-blocking primer (shellac-based or oil-based) over the affected area, let it dry fully, sand lightly with 320, and topcoat again. Going lighter in color always requires more blocking coats than going darker.
Sanding through veneer
This is the hardest mistake to recover from. If you sand through the veneer face, you expose the substrate below, which absorbs stain and finish differently. For small areas, a tinted wood filler matched to the species can minimize the appearance. For larger areas, the door may need replacement. Prevention: use a random-orbit sander at low speed on veneer, check frequently, and never use coarse grits (below 120) on veneer faces.
Pro Tip: If you are refinishing old kitchen cabinets and discover the veneer is lifting at the edges, press it back with wood glue and a clamp before stripping. Trying to strip over a loose veneer edge will peel it further. Glue first, strip second.
What does a professional Ottawa cabinet refinisher do differently?
When the project is complex, the profiles are ornate, or the finish needs to last a decade, the professional process is meaningfully different from what a DIYer can replicate at home.
A professional refinisher working in Ottawa typically:
Removes and labels every door and drawer with a documented numbering system, so reinstallation is precise.
Works off-site in a controlled environment. Spray booths eliminate dust contamination, the single biggest cause of texture in a brushed or rolled finish.
Controls humidity and temperature during application and curing. Ottawa’s climate swings from humid summers to dry winters, and both extremes affect how a finish levels and cures. A shop environment removes that variable.
Uses professional-grade conversion varnish or catalyzed topcoats that cure harder and faster than consumer waterborne products, and that are not available in retail quantities.
Applies a documented prep sequence including degreasing, sanding, filling, priming, and topcoating, with dry-time verification between steps.
Backs the work with a warranty. Ottawacabinetpainting offers a 6-year warranty on finished work, which reflects confidence in the prep and materials used.
The before-and-after results from professional refinishing projects in Ottawa show the difference that controlled spray application and proper prep make compared to brush-and-roll DIY work. For homeowners considering resale, that visual difference matters.
When does hiring a pro clearly win over DIY? Complex profiles, extensive veneer, time constraints, or any situation where the finish needs to look factory-perfect. For a straightforward slab-door kitchen with solid wood boxes and an intact but dated finish, a competent DIYer can get excellent results following the steps above.
A note from Ottawa on one trick that saves hours
One thing we see consistently on DIY projects that come to us for rescue: the homeowner skipped the test patch. They applied stripper to all 20 doors at once, discovered the product was too aggressive for their veneer, and ended up with swollen edges on half the kitchen. The test patch is not a formality. It is 30 minutes that tells you whether your plan is going to work before you are committed to it.
The other time-saver we use on every project is a color-match test panel. Before spraying the final topcoat color on the doors, we spray a small test panel and hold it against the cabinet boxes in the actual kitchen light. Colors shift between a spray booth and a north-facing Ottawa kitchen in February. That five-minute check prevents a color mismatch that would require a full re-spray.
One caution for DIYers: avoid high-temperature heat guns near veneer or MDF. The heat delaminates veneer edges and can cause MDF to swell and crack. A chemical stripper, even a slow-acting citrus-based one, is always the safer choice on those substrates.
Ottawacabinetpainting offers Ottawa homeowners a professional alternative to DIY refinishing
If the steps above feel like more than you want to take on, or if your cabinets have the kind of ornate profiles and veneer that make DIY stripping genuinely risky, Ottawacabinetpainting handles the full process for Ottawa homeowners. The service includes off-site door spraying in a controlled environment, a documented prep sequence, premium topcoats, and a 6-year warranty on the finished work. Most Ottawa kitchen projects are completed within 7–10 business days, with minimal disruption to your household. The cost is a fraction of full cabinet replacement, and the finish holds up to daily kitchen use for years. Get a free quote and see what a professional refinish would cost for your kitchen before committing to a DIY weekend.
Sources
Recommended
Comments